| Message |
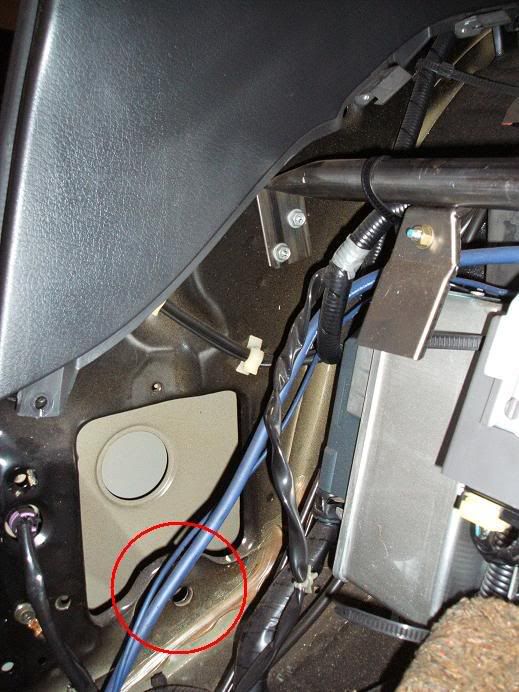
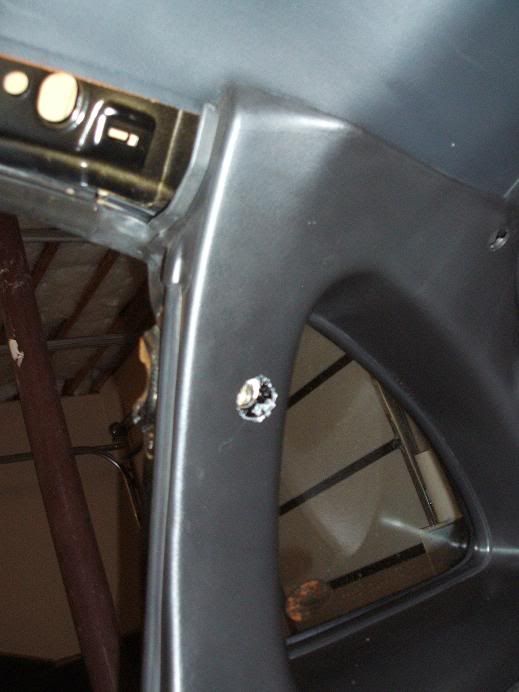
As I have posted the 94+ seatbelt assemblies for sale, I have had numerous requests asking how to install them. I have decided to post step-by-step install instructions with pics. First, go through the steps to remove the rear panels. Remove the rear hatch bucket, then the center trim piece that comes between the seats from the back, then the piece behind the seat. Then, take out all of the visible screws from the rear quarter window trim. I believe there are about 4 of them, one is on top with a small plastic circle that covers it. Once this is done, you will see this open hole. The piece I have circled needs to be bent down a small bit to fit the assembly, and a new hole needs to be drilled for the large bolt.
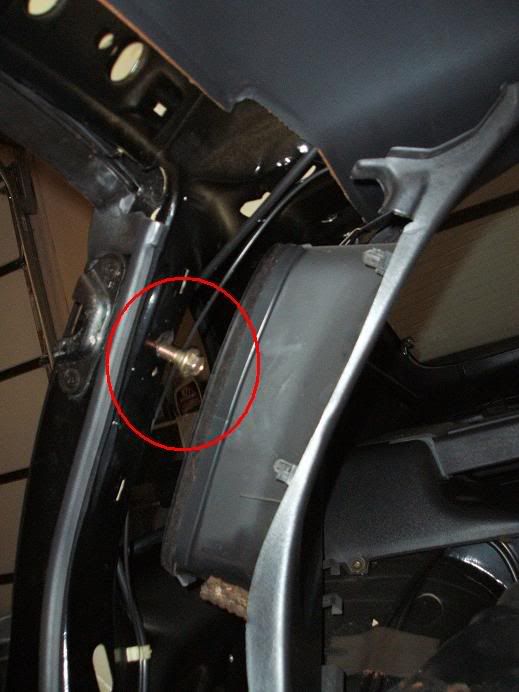
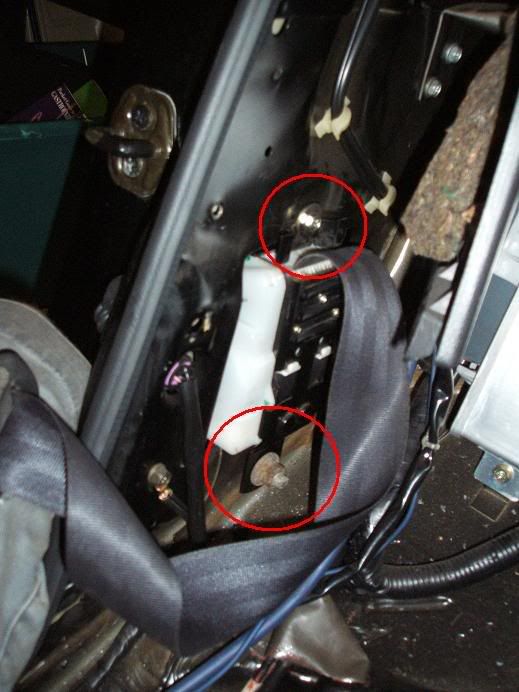
You will see this hole up top. You will need to feed the nut with a magnetic extension up from the large opening for the assembly.
Once you can see the nut, grab it with the bolt so you can remove the extension. Hold it in place, and use some JBQwik weld on the nut between the nut and the sheet metal. You can leave the bolt in it until it dries. The JBWeld is not load bearing, it is simply to hold the nut in place while you tighten the bolt.
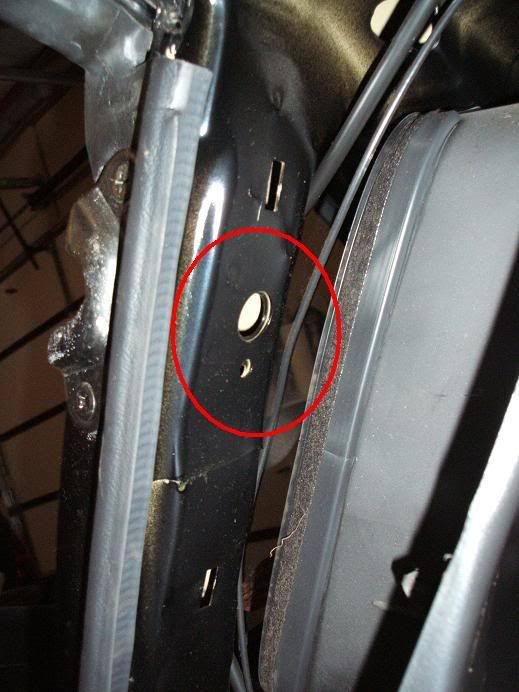
Circled is the area that is cut out of the newer models for the seatbelt mounting point.
You will need to cut it, drill it or dremel it so it is large enough to allow the washer from the bolt to go through. Re-attatch the window moulding piece, then slip the bolt in and tighten it. Please make sure you use enough JBWeld to hold the nut, because fitting a long enough wrench up there to tighten it would be a serious pain.
I attatched the bottom large bolt backwards. This allowed me to hold the tip of the bolt with vice grips and tighten the nut onto it. Then I tightened the screw on top, which screws right into the sheet metal.
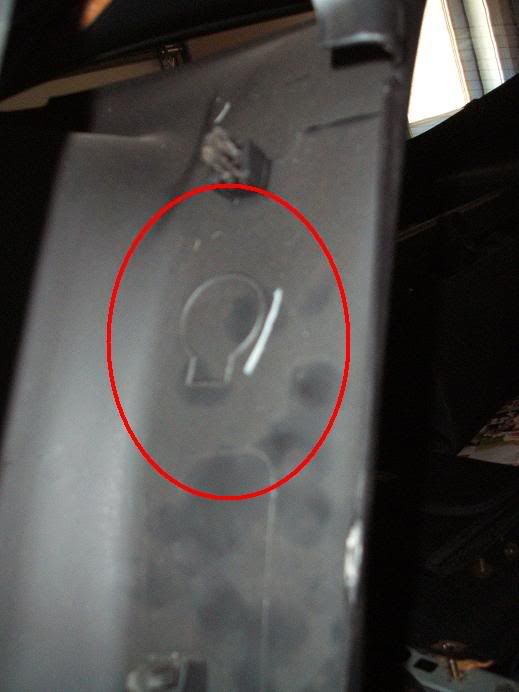
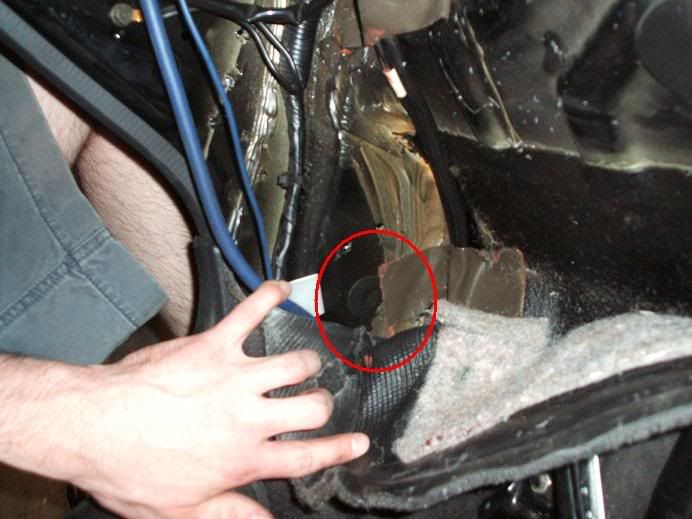
Lift up the carpet, and you will see a small plastic sticker. Remove it, and you will see a nut hole for a bolt. The bolt with the assembly screws right into it. Tighten it down.
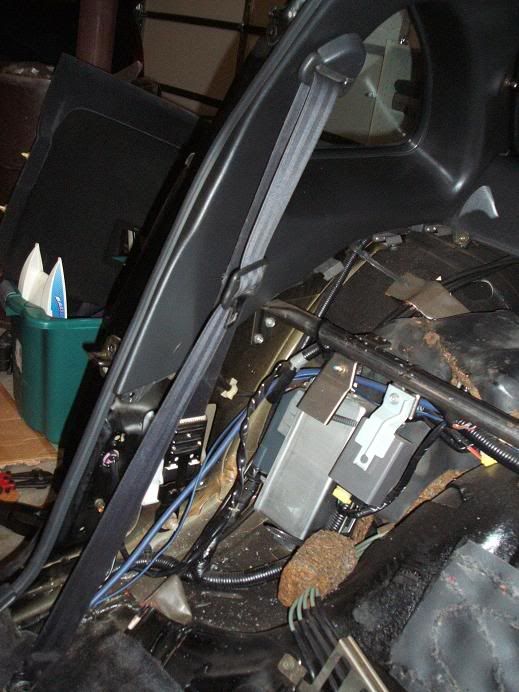
Once it's tightened, it should look like this.

This is what it should look like when you're done.
 This is the passenger side, and the driver side is identical. The pictures were taken of a '93 slicktop z. I have not looked very deeply into the weight-bearing specifications of these mounting points on the 90-93 chassis, and I have been told the 94+ body style has been better reinforced for this seatbelt setup. I have done this on multiple cars, and I have not had any problems. However, please be sure you do your research before you do this install, as tampering with the restraining system of a vehicle can be very dangerous. If you have any questions about it, ask YugoBernie or one of the other reputable tt.net members. Enjoy! Jonnie
|
 |


 94+ style seatbelt install guide -