| Ok, so I made this write up because my A/C control pod started giving me trouble a few months ago and I got tired of it working only sometimes. Also I don't think i ever remember speed #2 on the blower motor ever working. so this is what I did to fix it. NOTE: This is for the 1990-early '91 Z32's with the manual climate control. NOT FOR THE AUTO CLIMATE CONTROL EQUIPPED Zs!! What you will need: -10mm socket wrench
-Phillips head screw driver
-Flat head screw driver or pick
-1000 grit sand paper
(anything higher than 1000 should work)
-Dielectric grease
-Paper towels or a shop rag Estimated time: 20 mins. Steps: 1. Disconnect the negative terminal of you battery (just to be safe) using the 10 mm socket wrench. 2. Locate A/C control pod (to the right of your Gauge cluster) and remove the two phillips head screws that are screwed directly below the A/C controls (looking up). 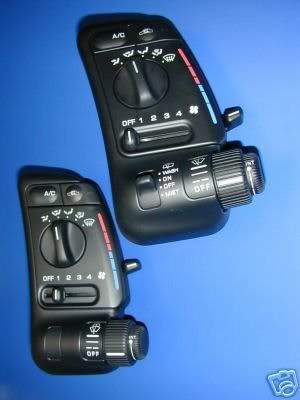
3. Next, pull the control pod out and unplug the wiring harnesses from the rear of the controls. 4. Now that the control pod is free and in your hand, pop the "A/C" and "recirculate" buttons off using the flat head screw driver or pick. (you might even be able to pull them off without a tool) 5. After that, turn over the control pod and remove the three phillips head screws holding on the black cover. 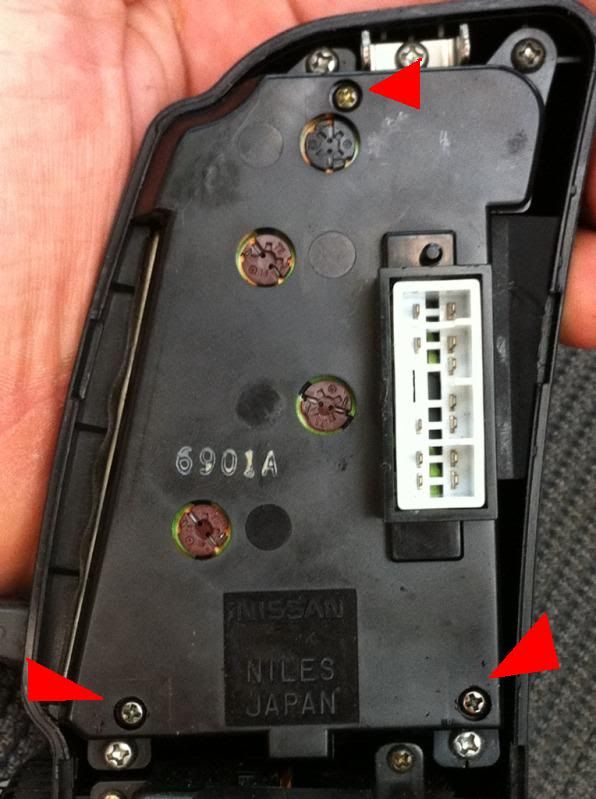
6. Once the cover is removed, remove the 6 phillips head screws holding the circuit board to the control pod.
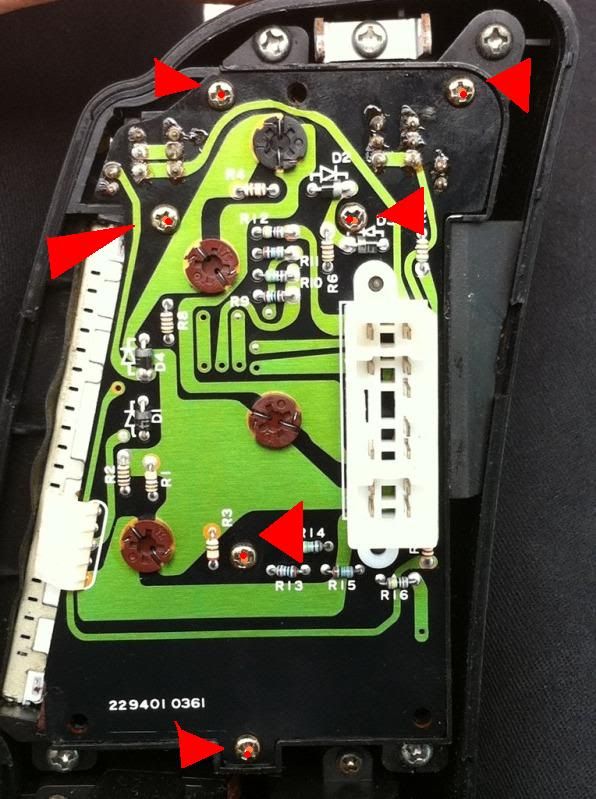
7. CAREFULLY pull the circuit board away from the control pod while paying close attention to the wire ribbon to the side and UN-bending it as you go. (arrow in the center of the picture below) 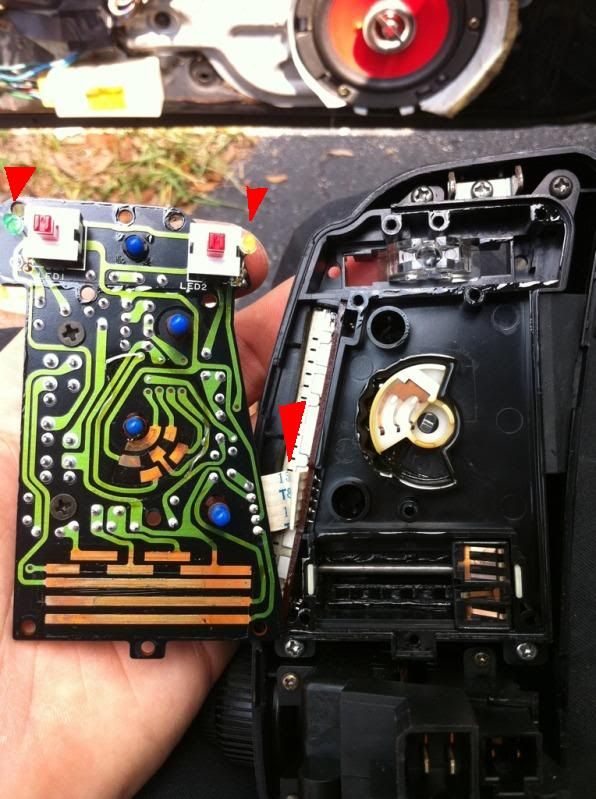
In the photo above you can see the copper contact strips on the board to the left of the photo and the control prongs on the right still on the pod itself.
ALSO, please note the two small LEDS with the arrows at the top. 8.Now, take a clean paper towel or shop rag and carefully remove the 20+ years old dielectric grease from the contact strips. (note how dark and corroded mine were) 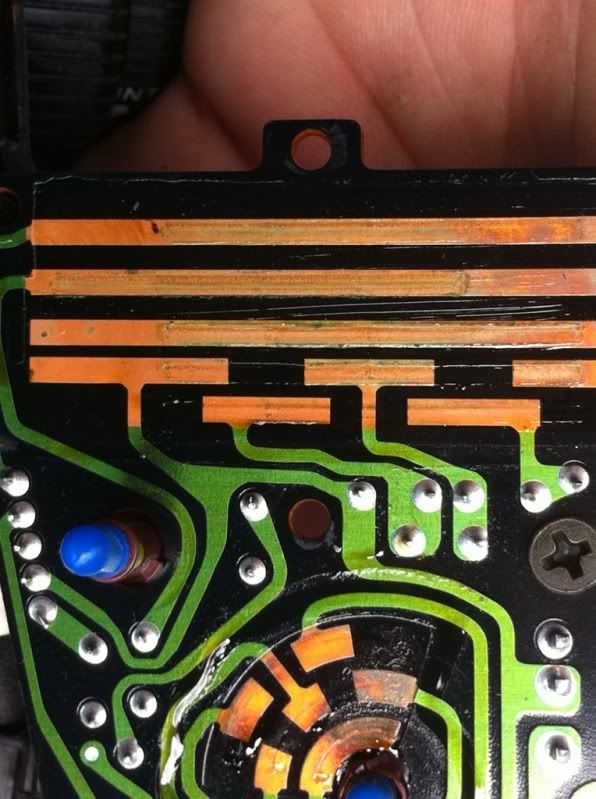
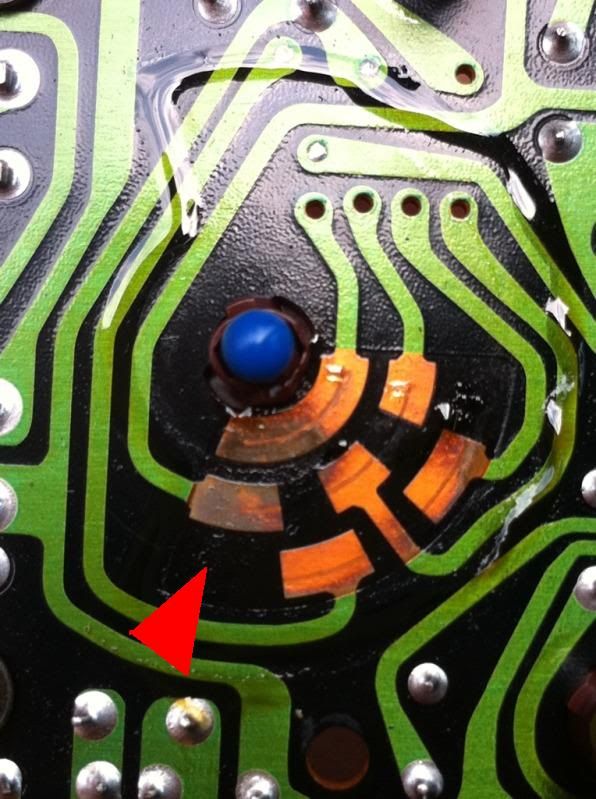
9. Now take a small piece of sand paper and sand the contact strips until they are nice and shiny. 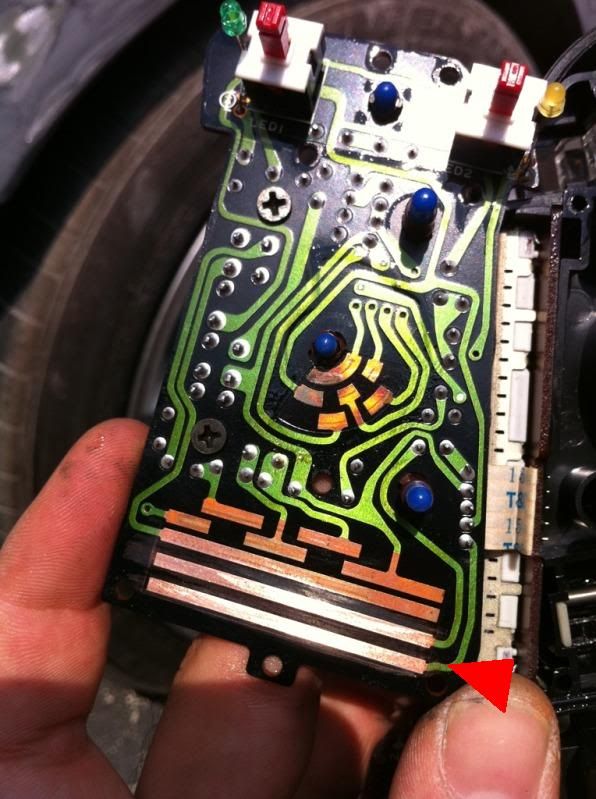
the above picture is after i sanded the bottom two strips just for comparison. 10. Now comes the part you need to be REALLY gentle. Notice the prongs on the pod that are connected to the switches are a VERY thin metal and over the years have lost their "spring" and are now sagging. 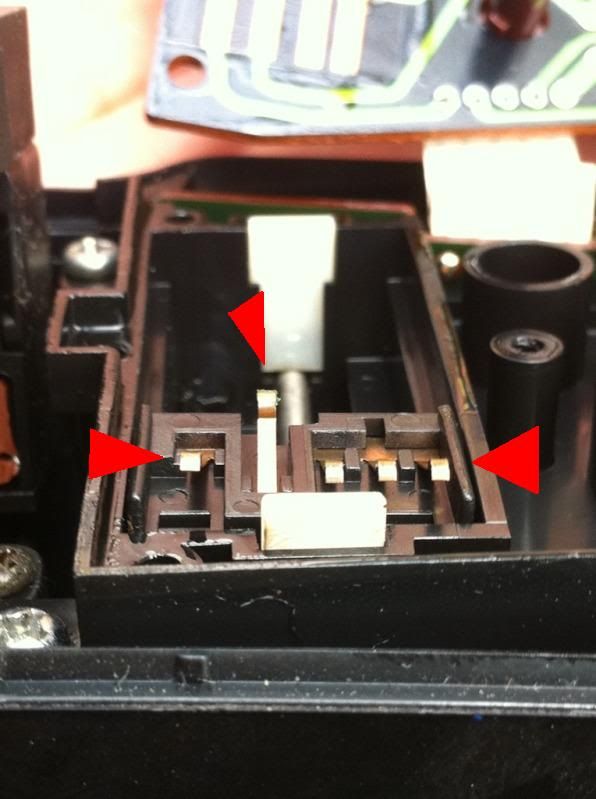
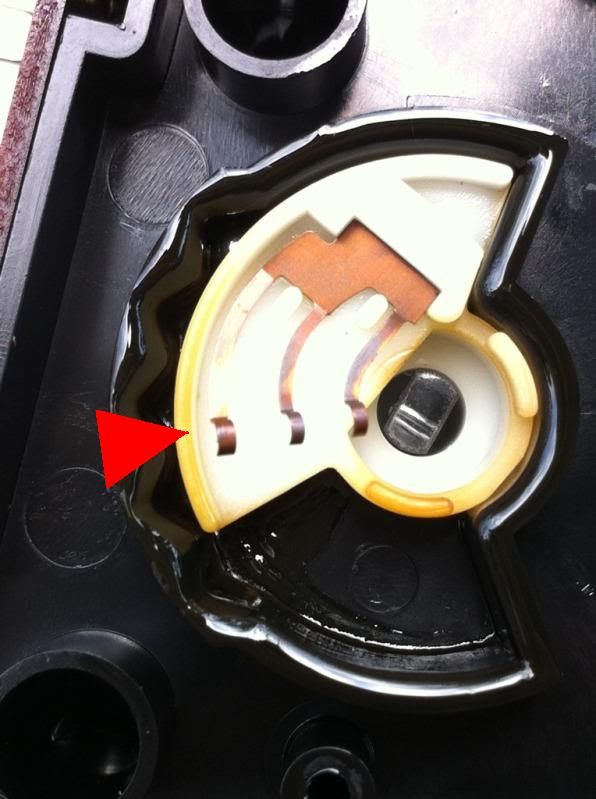
Sand the tips of the prongs VERY VERY gently and after your done, VERY SLGIHTLY bend them up a little to give them that extra bit of contact. 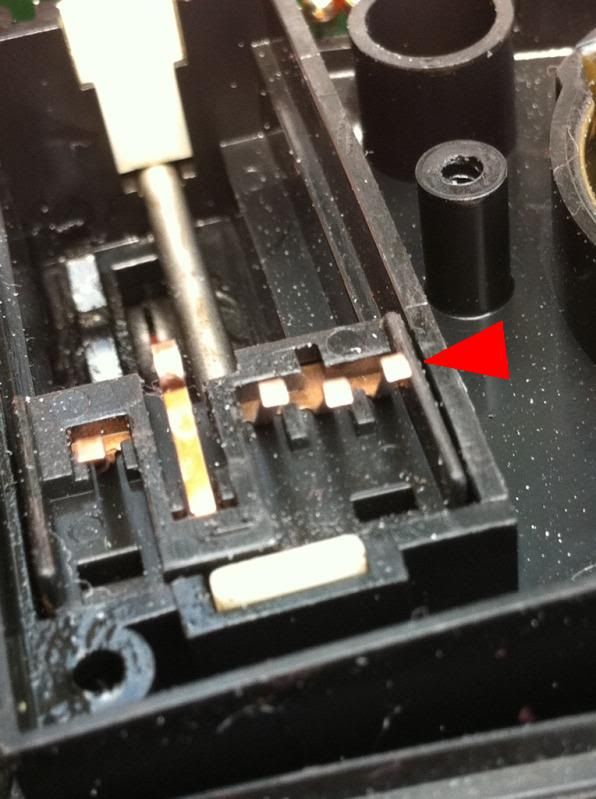
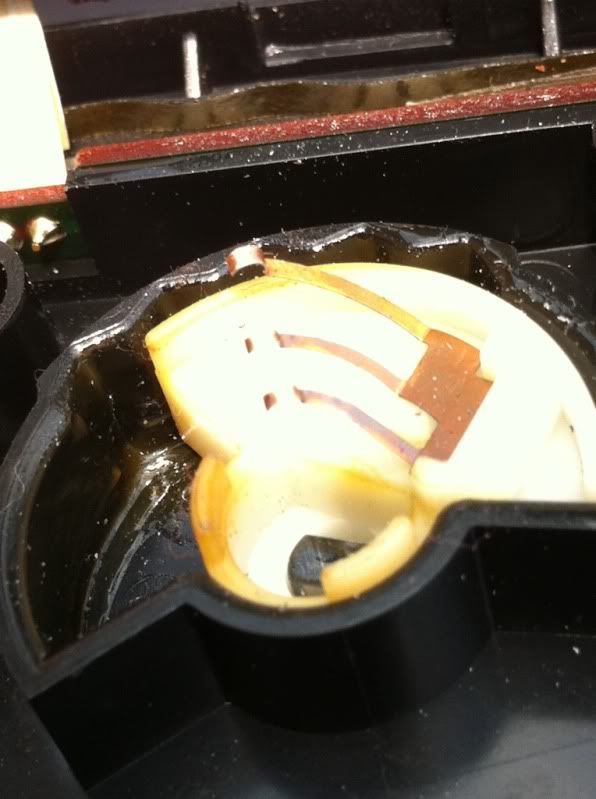
11.Take your new dielectric grease and put a thin layer over your newly cleaned contact strips (not necessary to coat the prongs). 12. This is what the final product should look like: 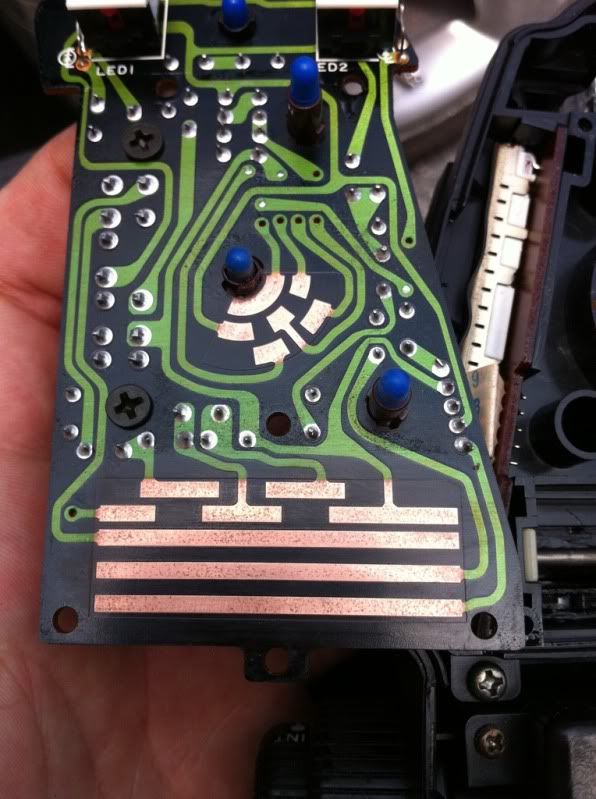
13. Now just put the board back on the control pod and pay careful attention to the two small LEDS i told you to take note of when placing the board back into the pod.(the top two arrows in this pic) 
14. Replace all screws and covers, plug back in, screw back into cluster pod, and reconnect battery. Your DONE! Congrats and enjoy your like-new A/C controls!
-----------------------Signature---------------------------- 
---------------All Time Favorite Quotes---------------------
Looks like a quality movie. (n/m) - Brian Spilner 02/07/07
LOL, sweet sig name. (n/m) - jmw23712 02/07/07 22:53:10
yeah, typical white-boy name - ZEngineer 02/08/07 08:52:09
in other news. thousands of people did not receive their holiday mail....
sources close the USPS said that they believe an interweb site page is
responsible for the sabotage that has left its tell tale calling cards
jamming their machines...
a spokes person for the interpage in question is quoted as replying to the
aleagtions with the following responese.
"false"
- dvlhntr 12/12/06 22:35:35
|

