| Feel free to delete this because of NZR but I wanted to show everyone these cars are not that difficult to work on and share a lot of commonality among other nissan/infinity models. This is also a reminder that it doesn't take a big name shop to get some serious shit done - blue/white collar guys like you and me can do it! I have owned my 09' GTR since August of last year and bought it with just a few things done to it. I had some downtime between thanksgiving and christmas of last year so I decided I wanted to do a quality build on the GTR. Here we are pulling it in 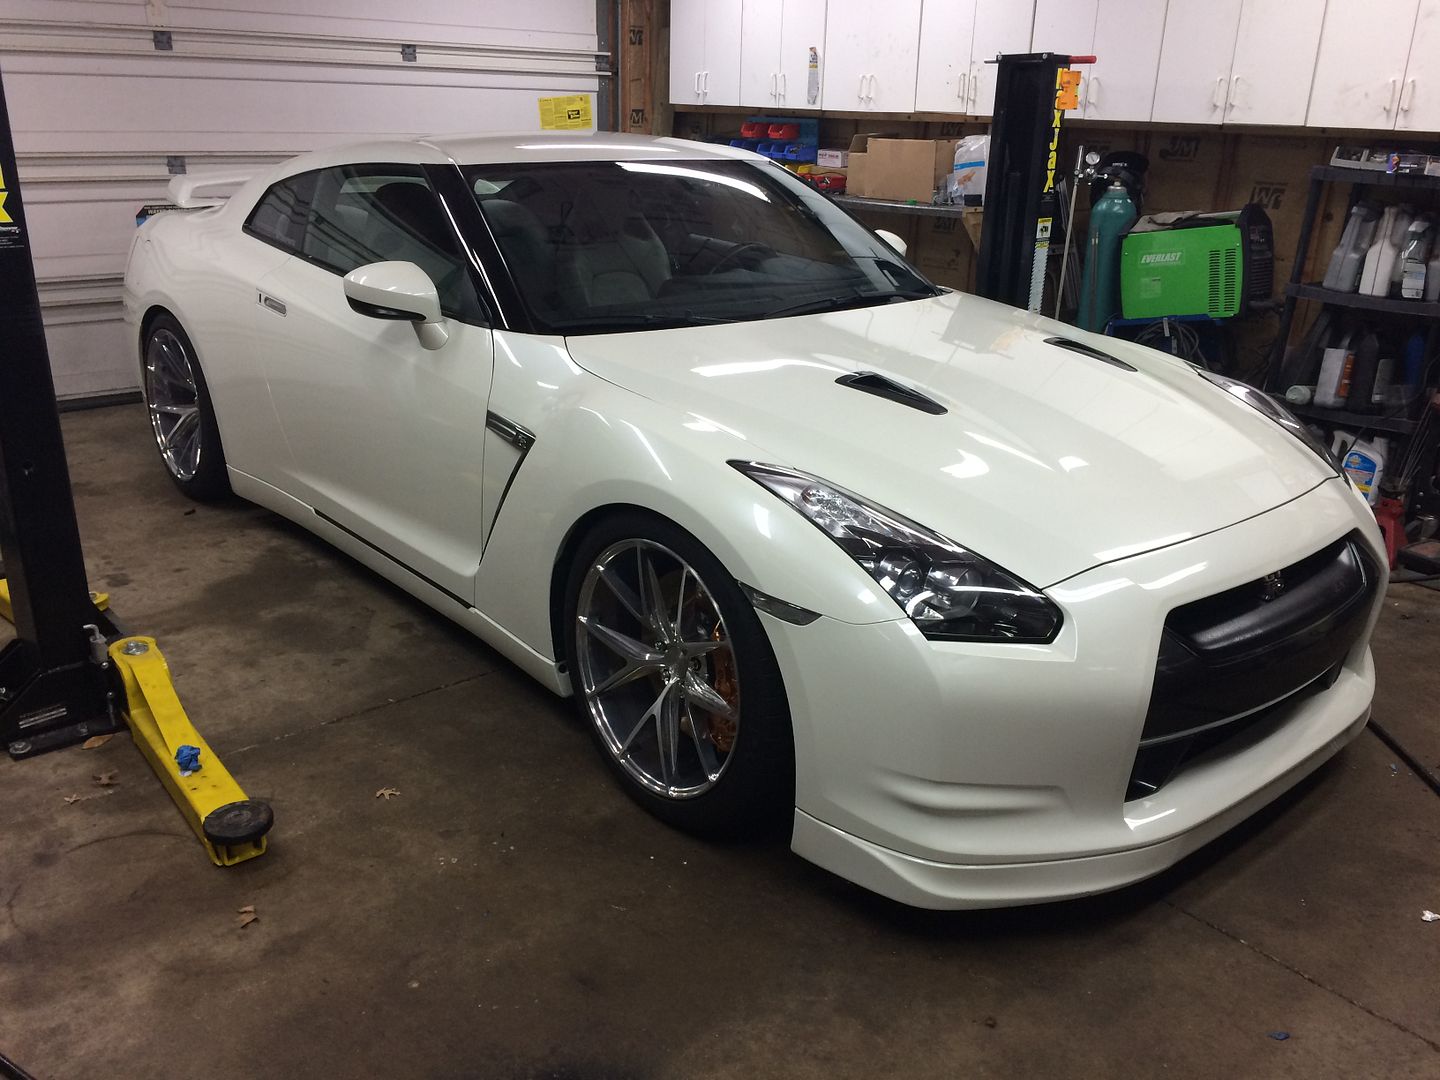
I adore my MaxJax with all my heart. I do not know how I would function without it 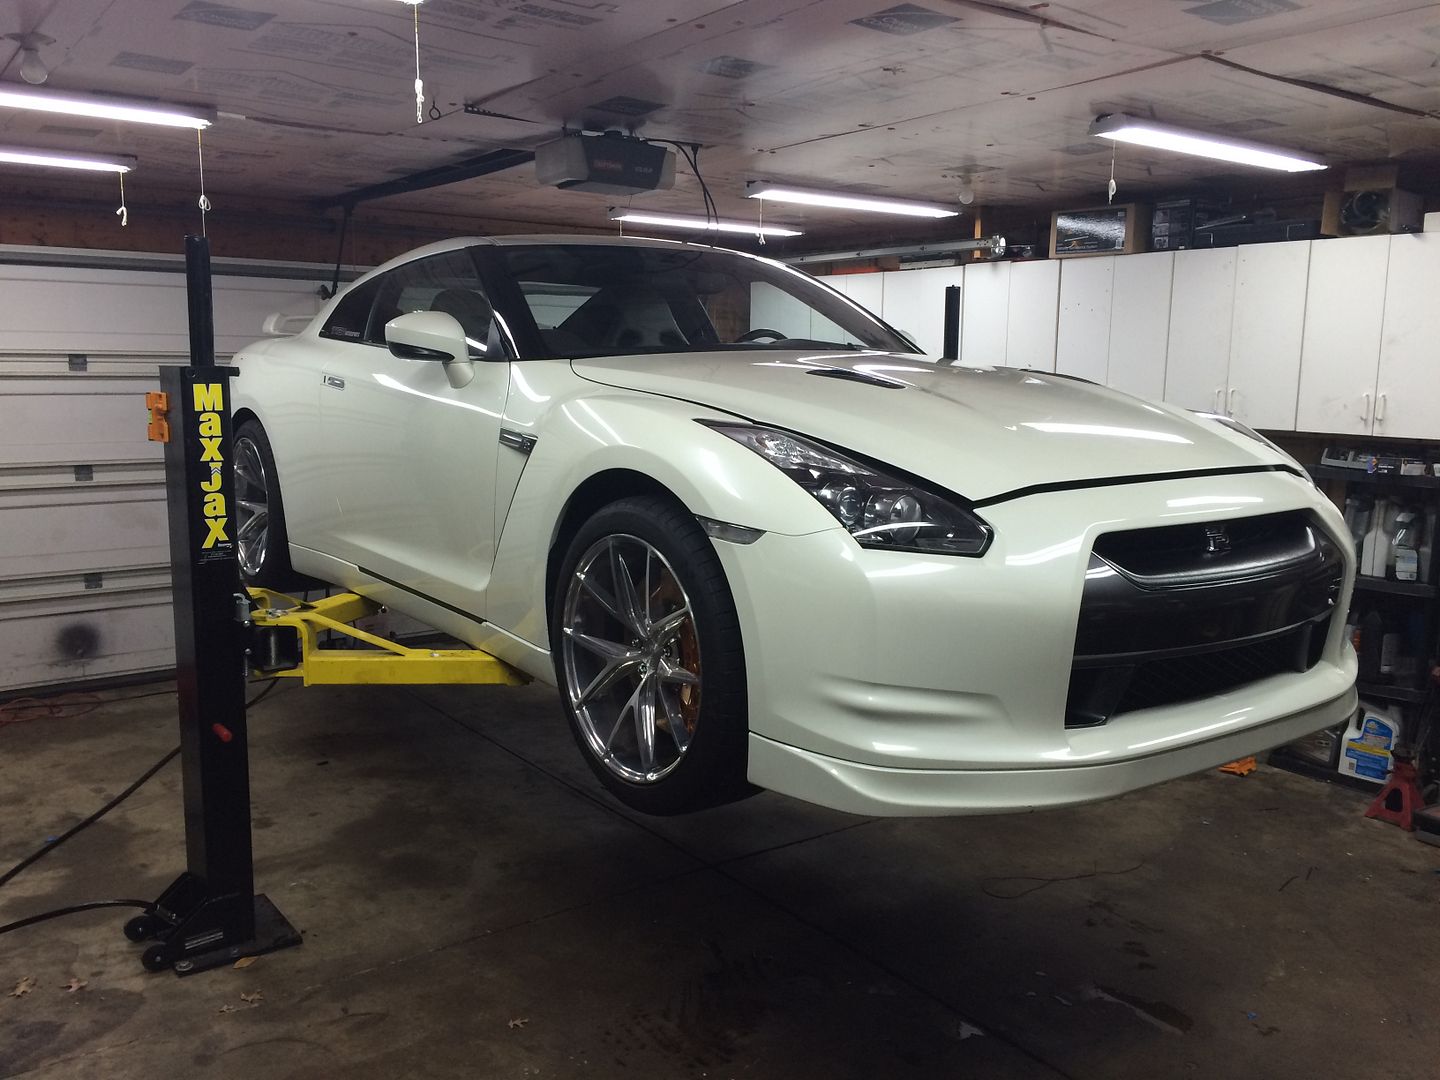
I began by pulling the splash shields and the front bumper 
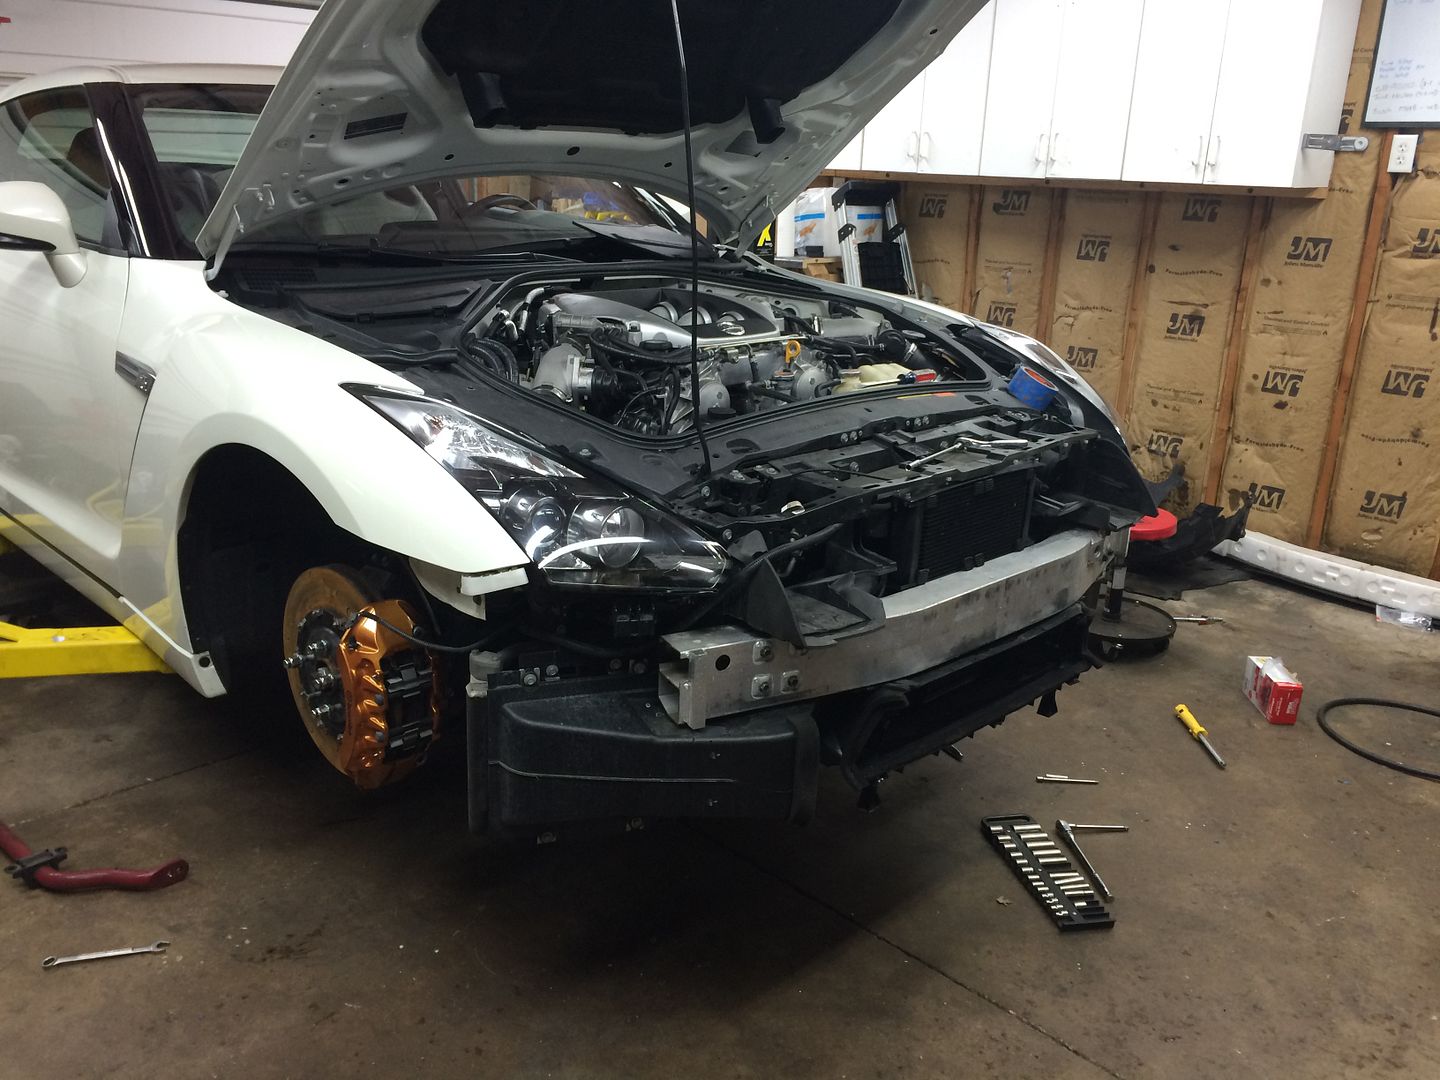
Charge pipes coming off 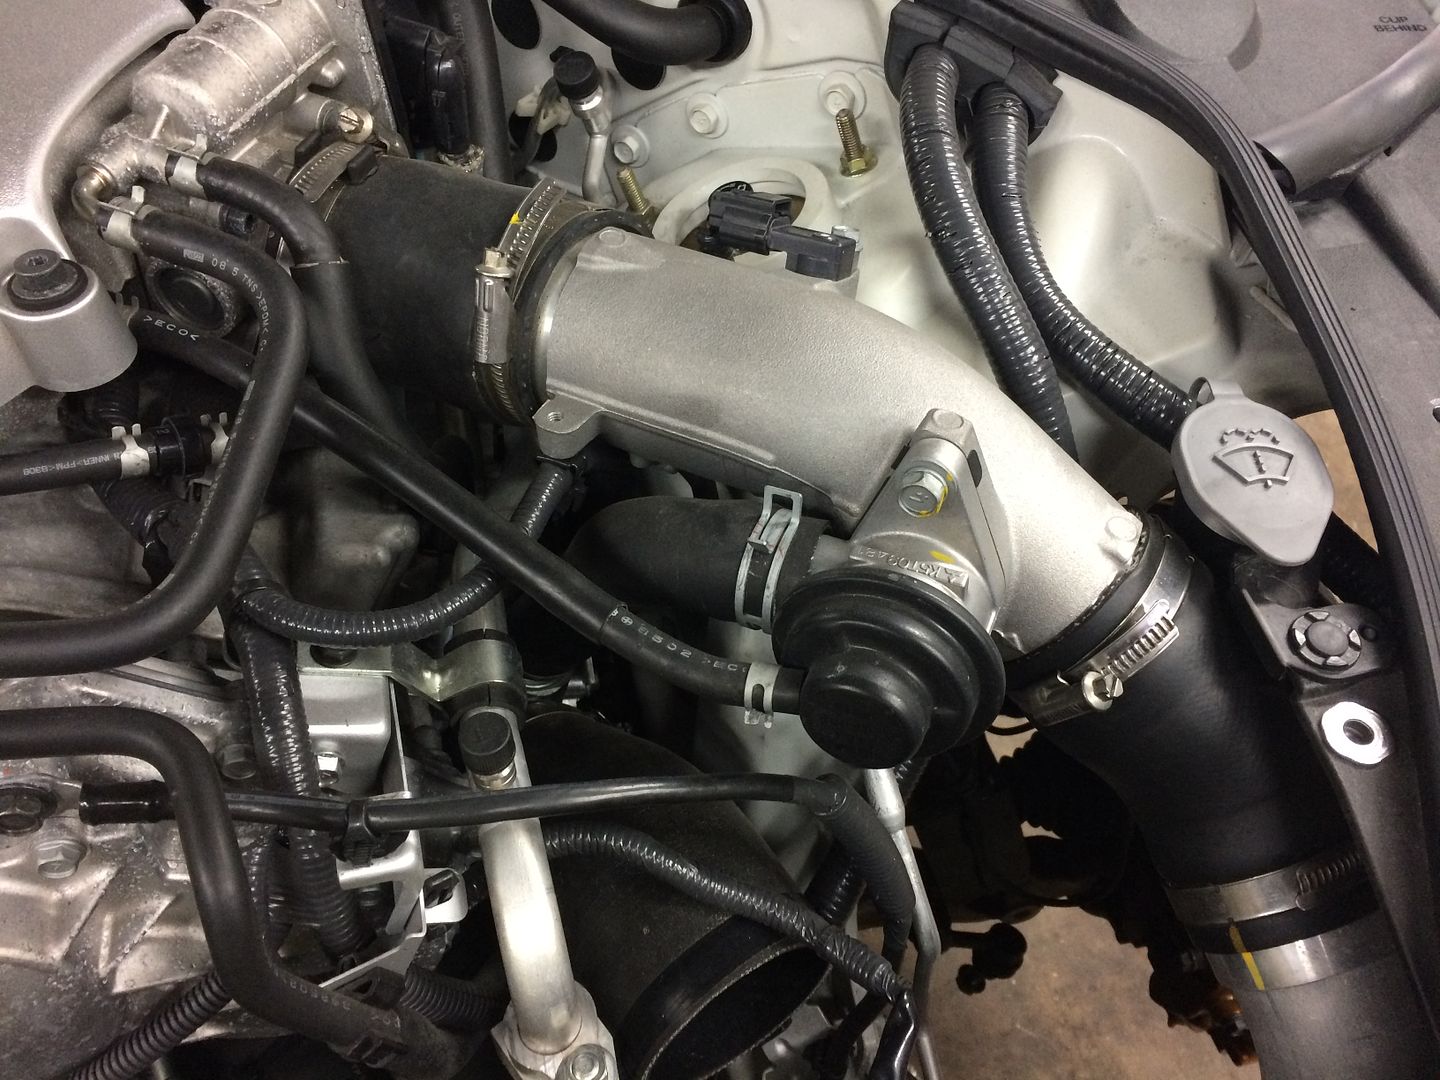
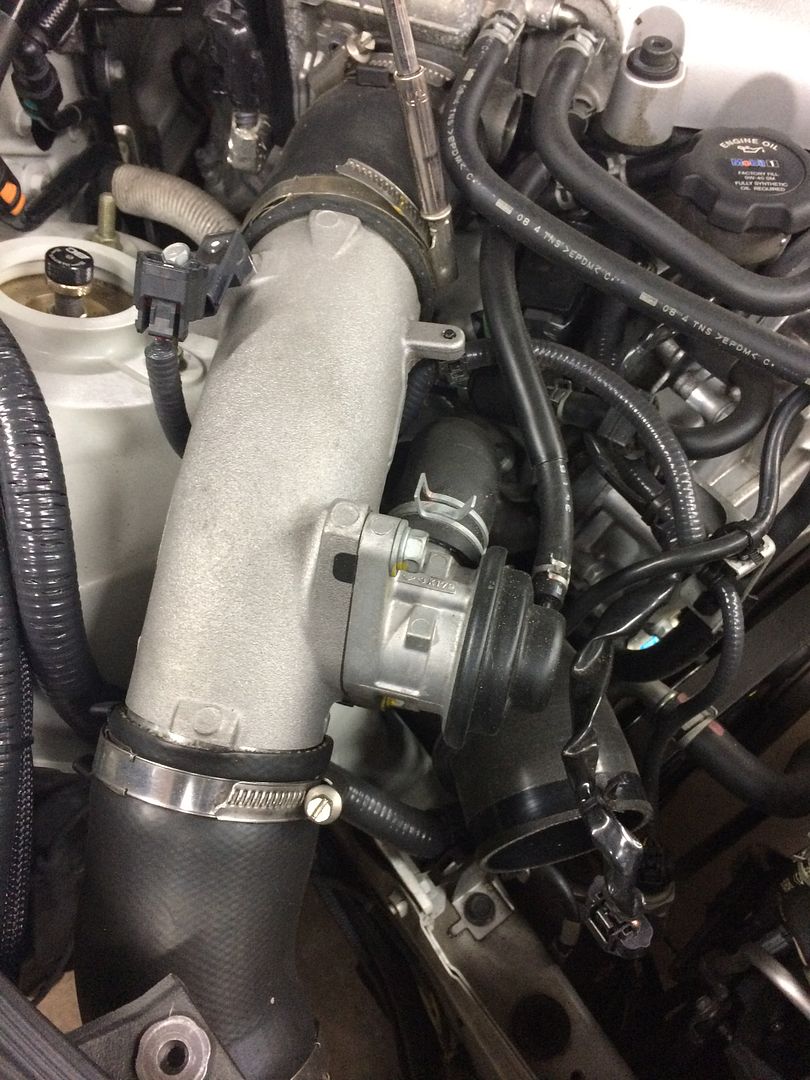
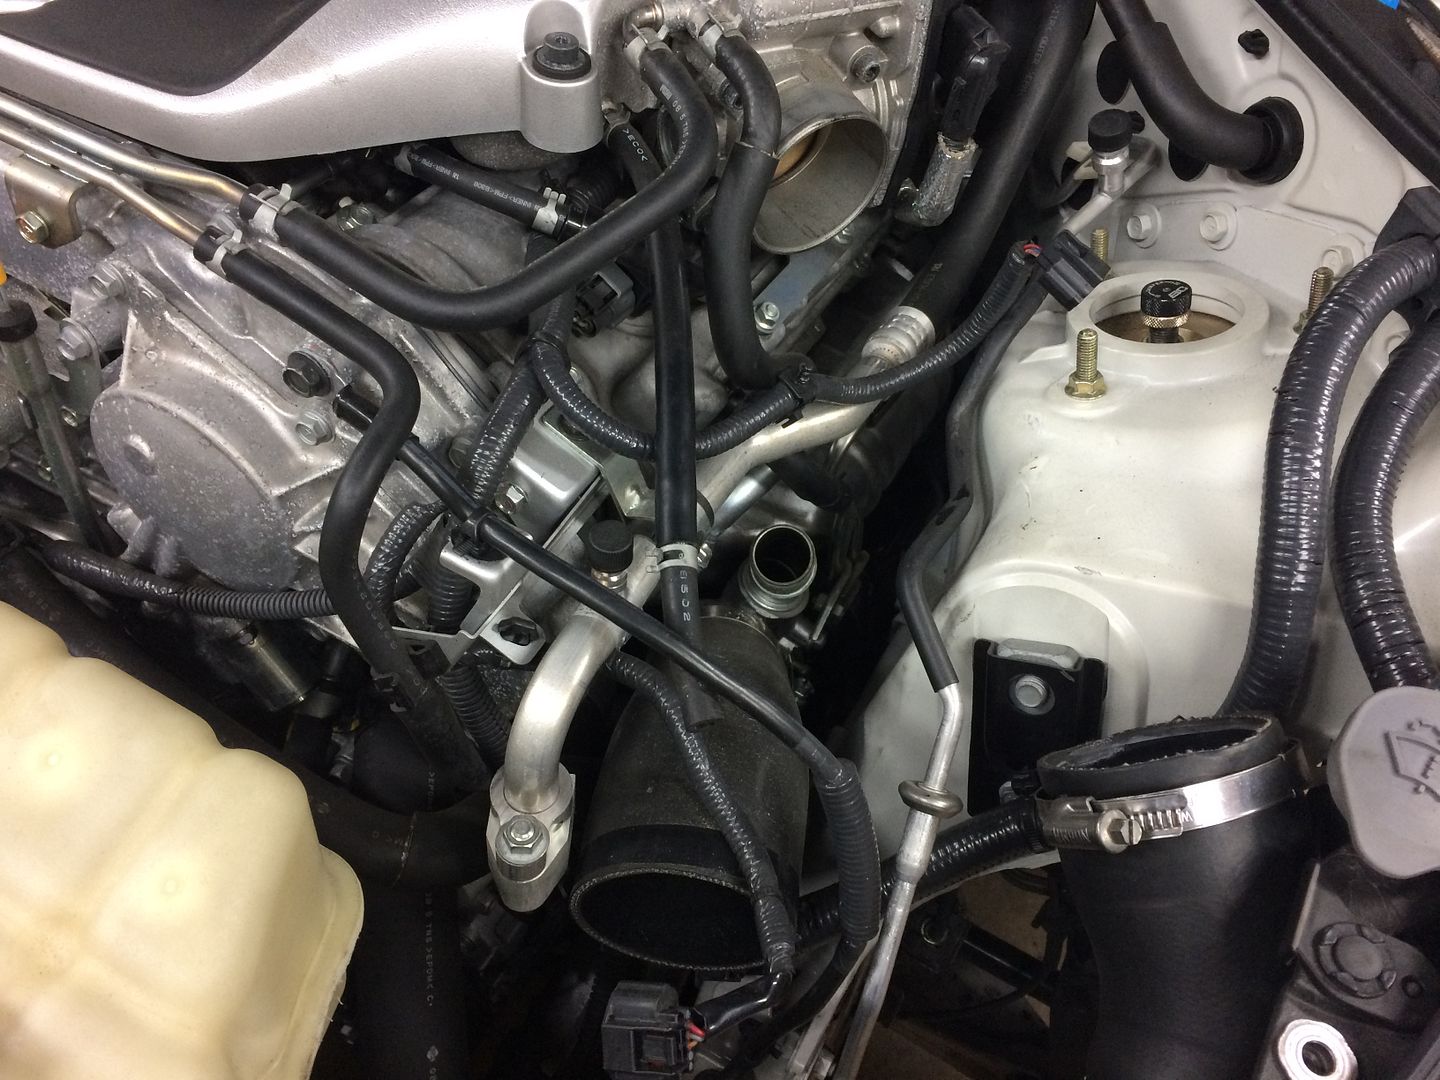
The radiator stays in the car this entire process. You'll just remove the expansion tank, and the radiator hoses 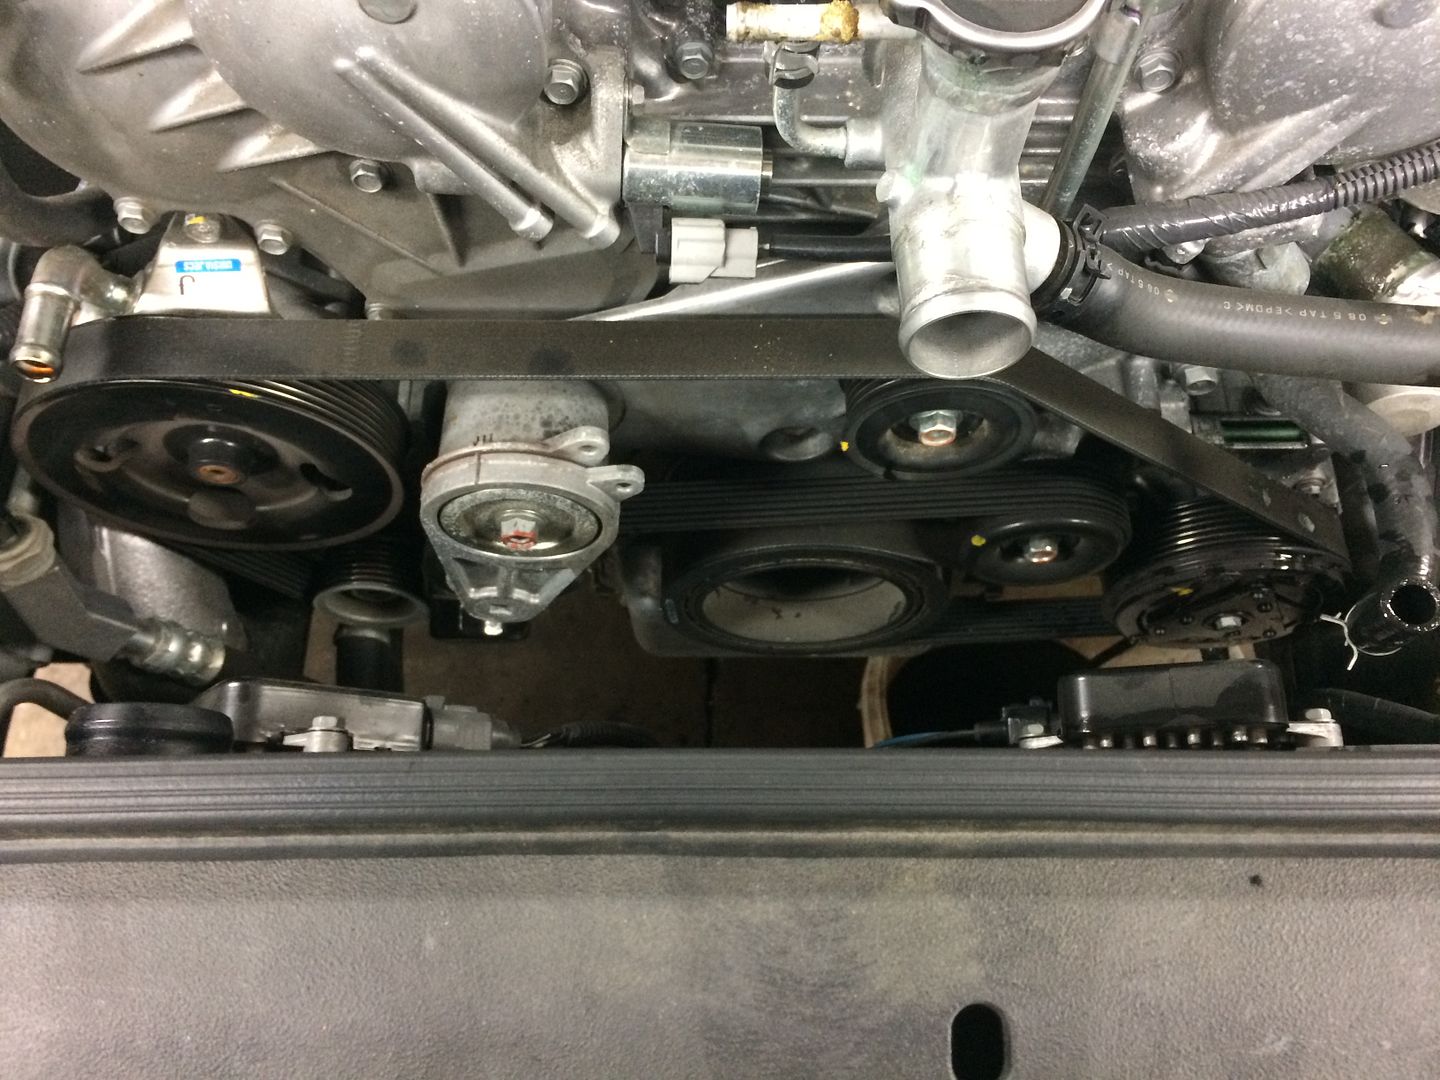
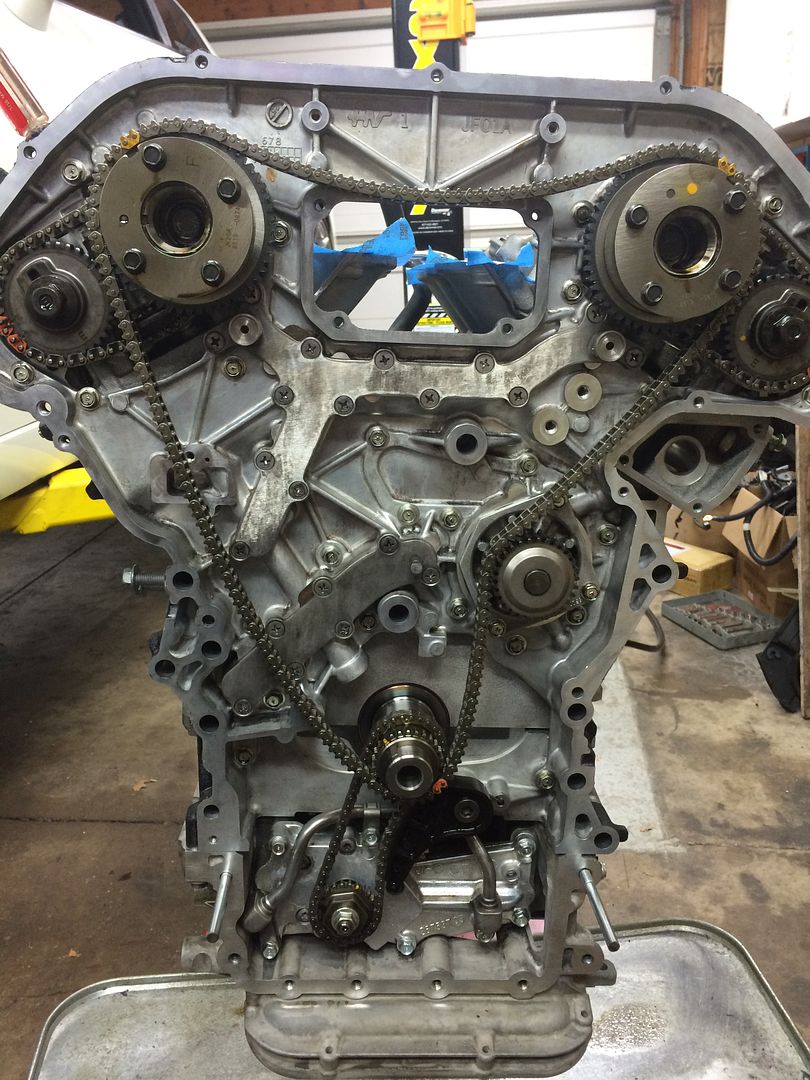
Time to start digging into godzilla 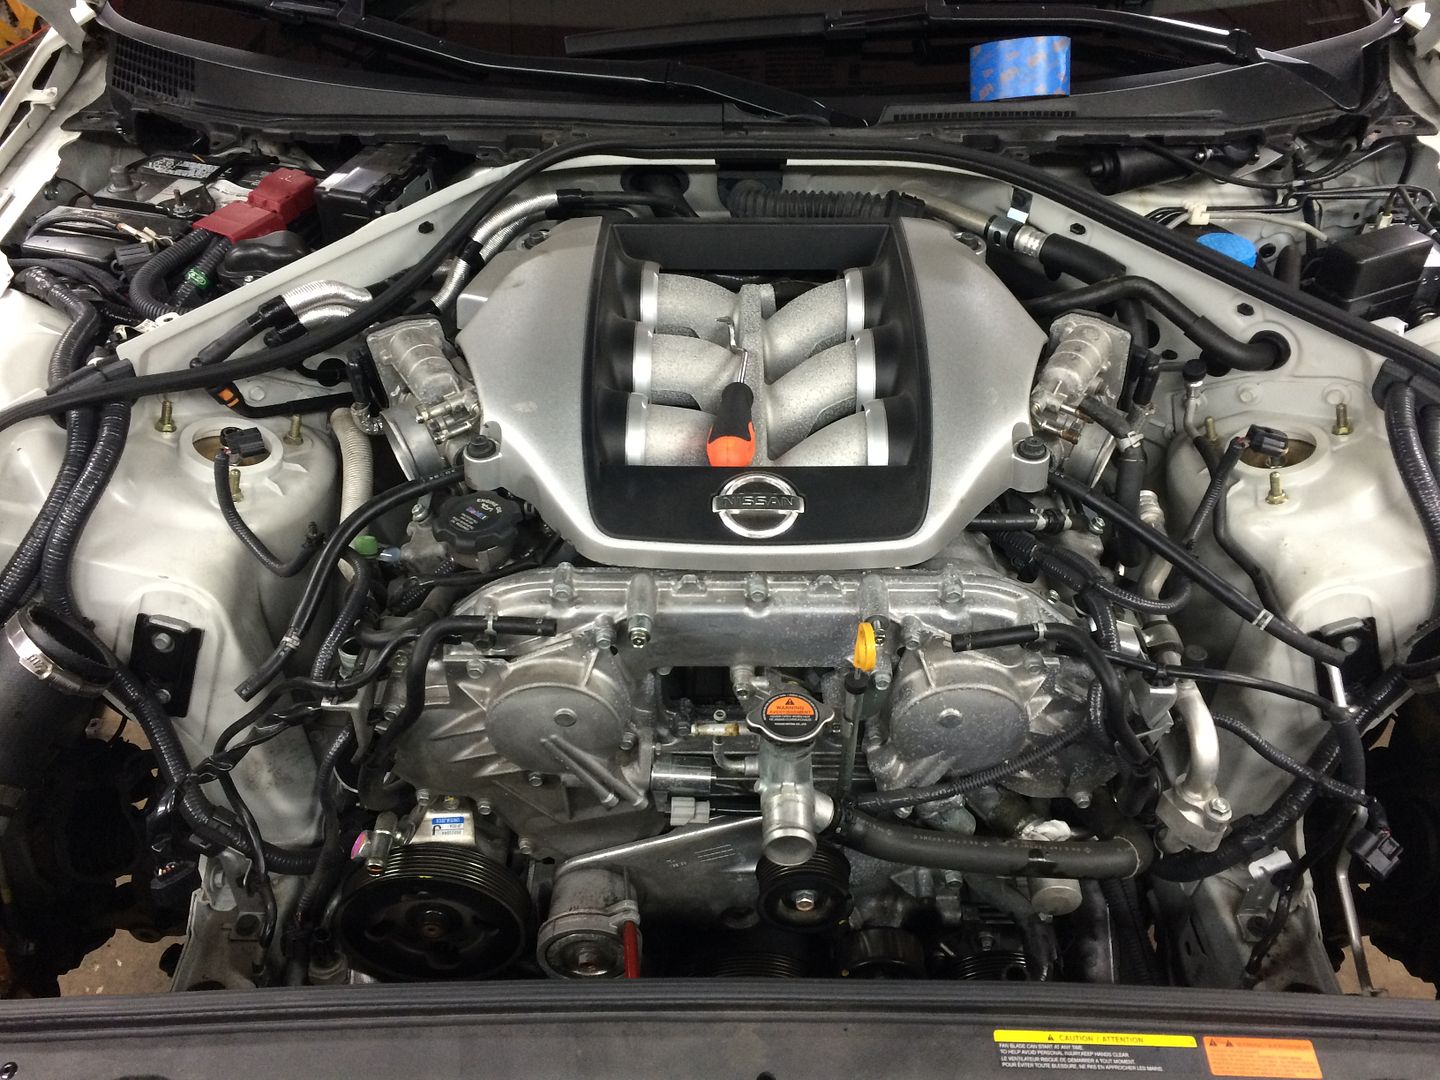
I removed the intake manifold because I was unsure I would have the proper ground clearance to get the engine out with the car as high as it would go. On the GTR, the engine MUST come out of the bottom! 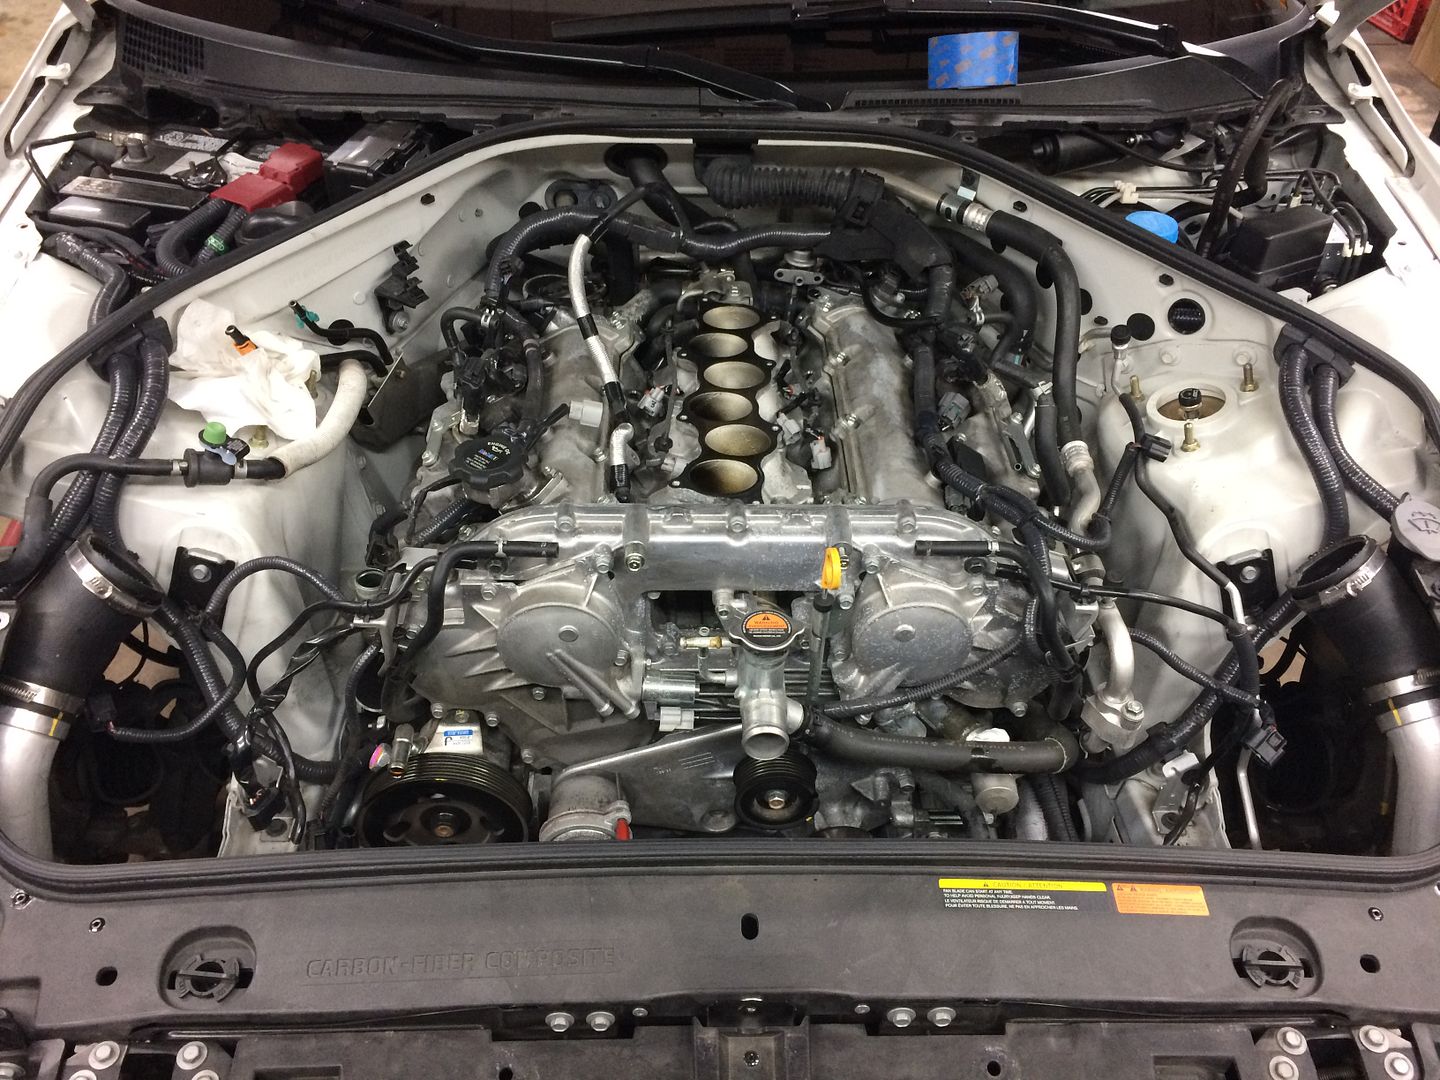
Next, different from the Z32 - the engine harness actuallys stays with the engine when you're pulling it. The ECU is located in the same area in the footwell and by pulling some of the shields, you can undo the connectors and pull them through the firewall and rest them on the engine 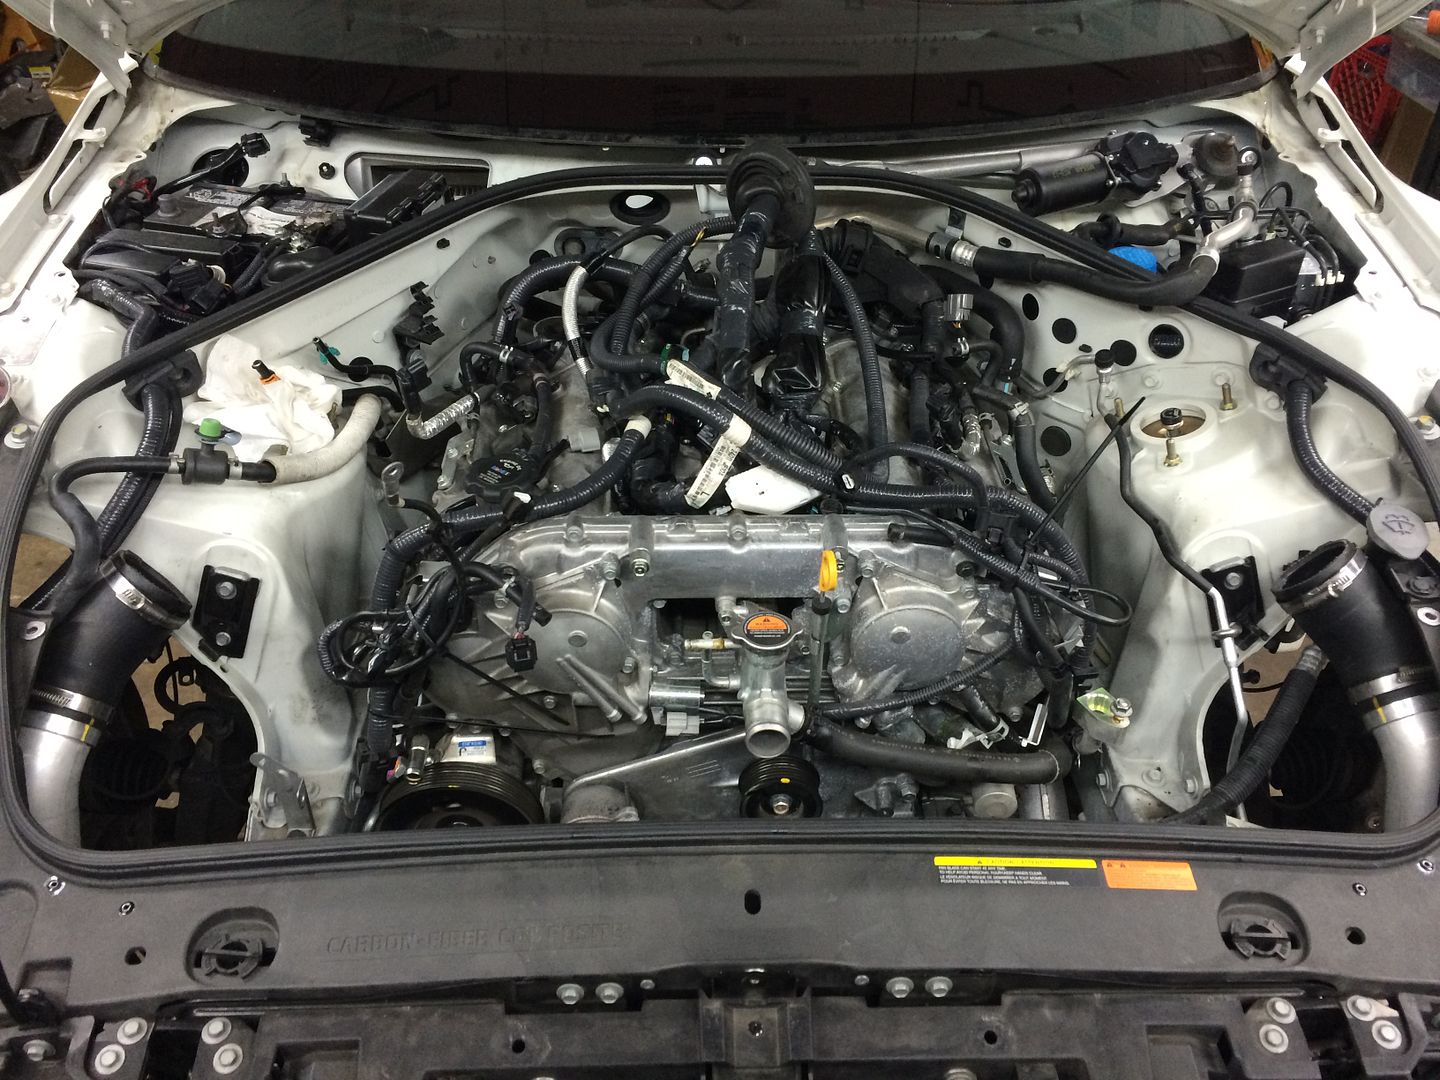
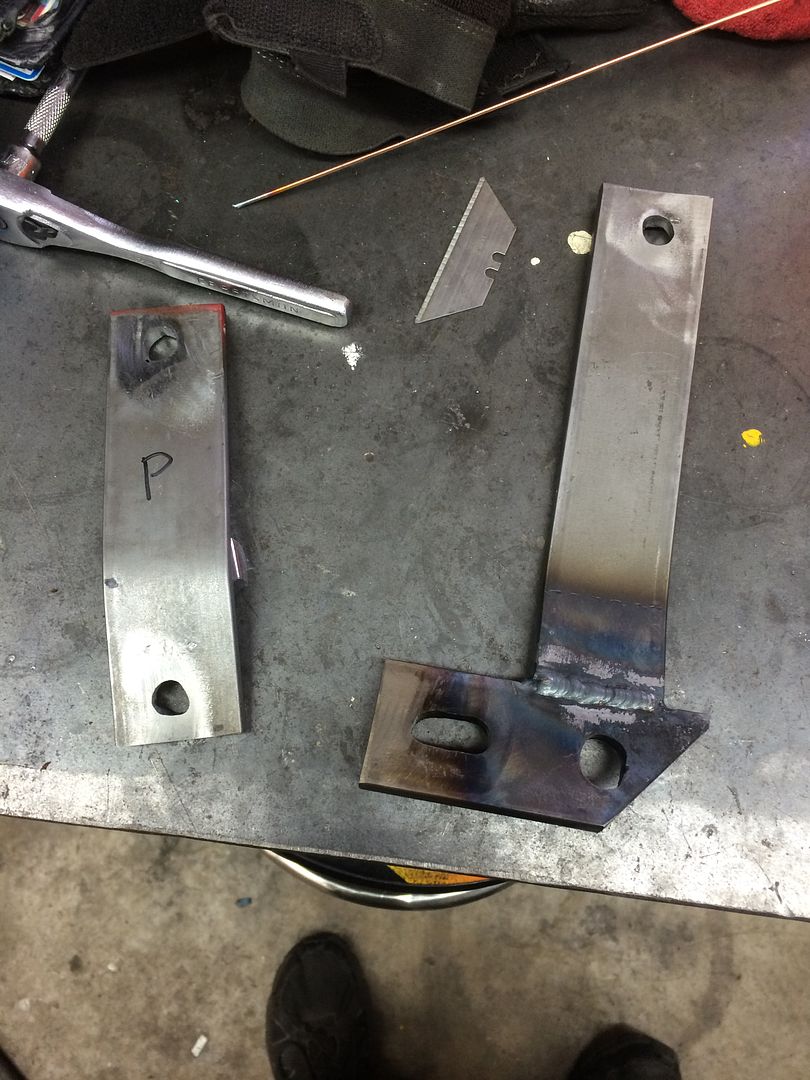
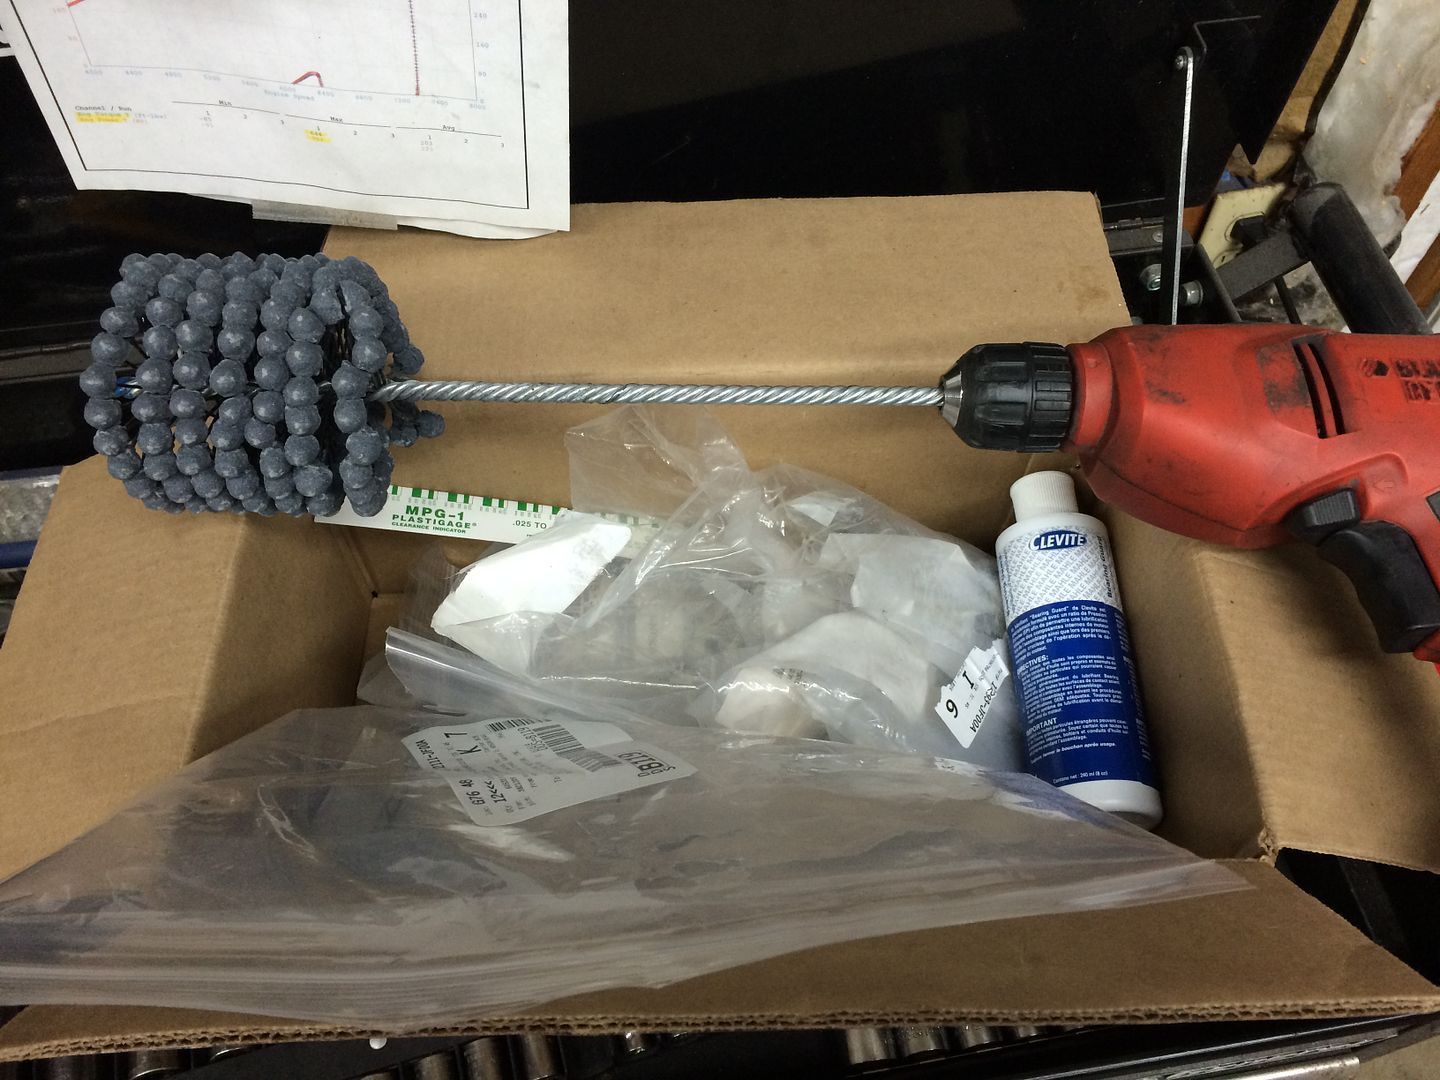
Next, I decided to make some factory engine slingers with some elbow grease.........and plasma 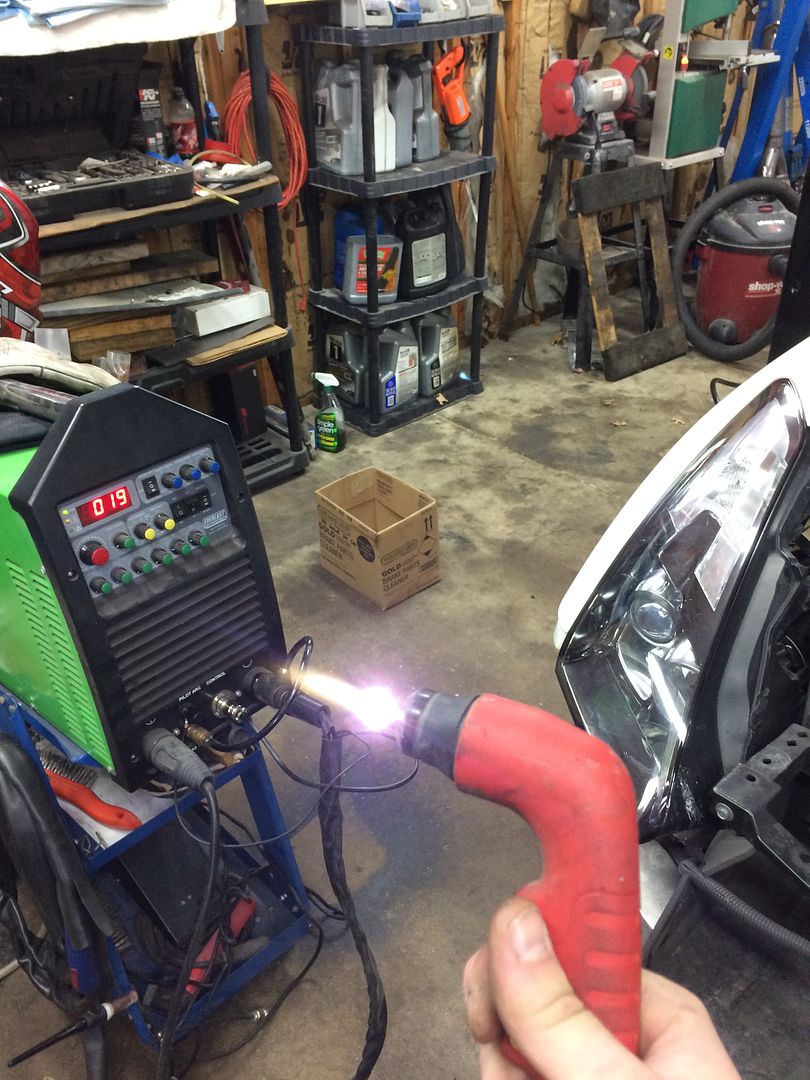
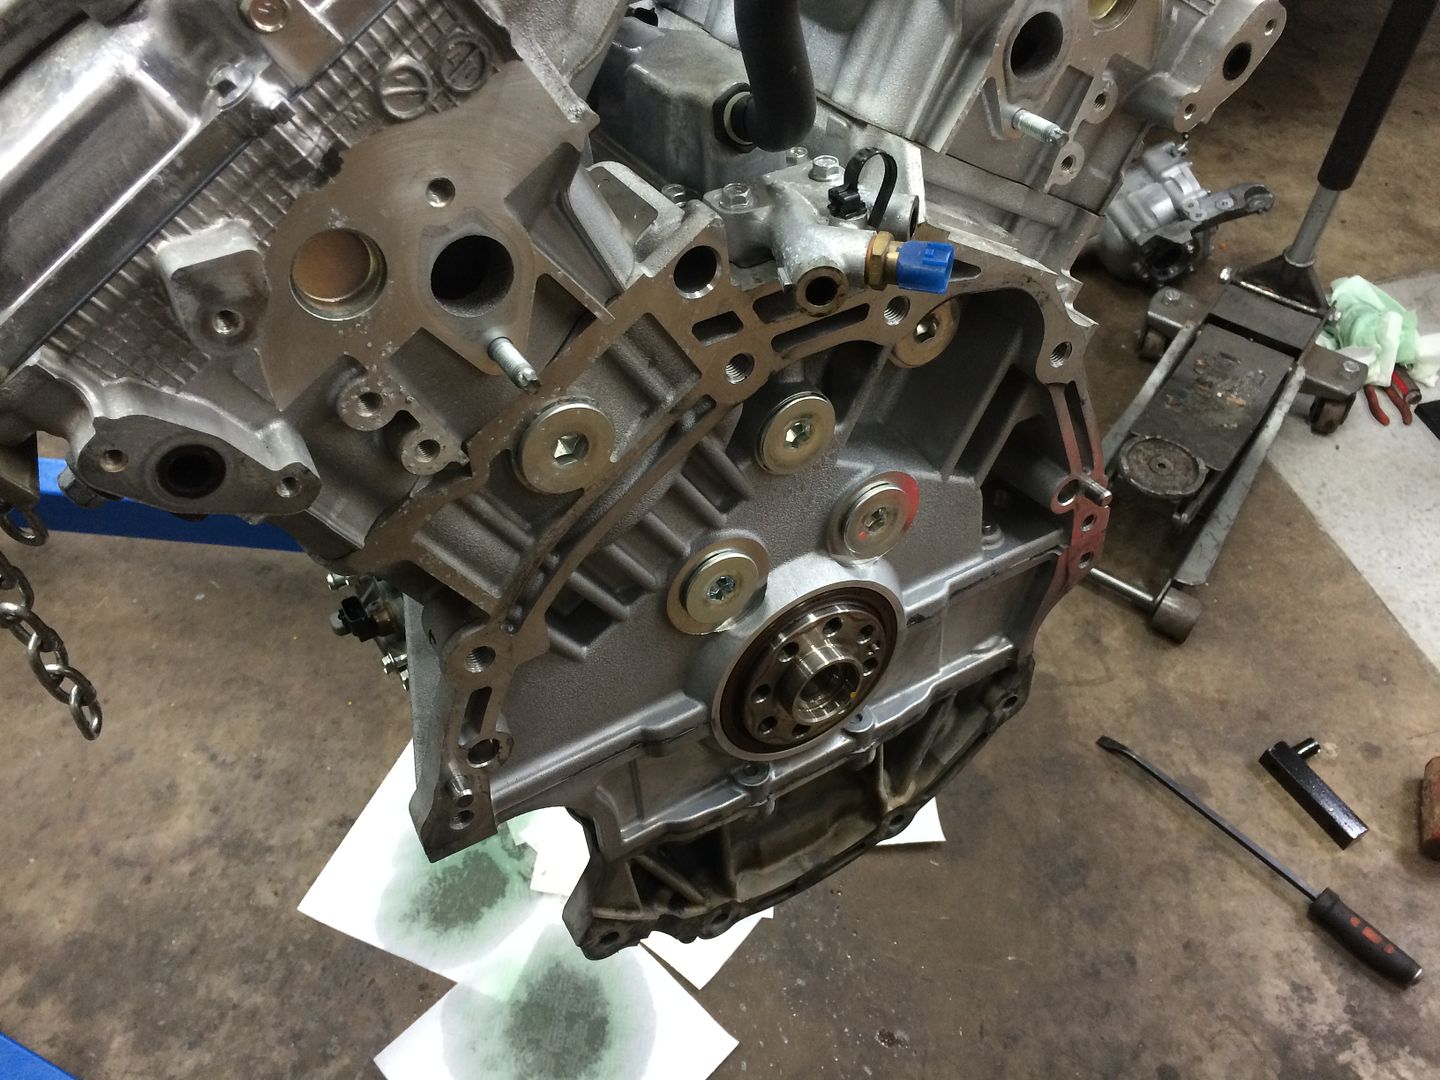
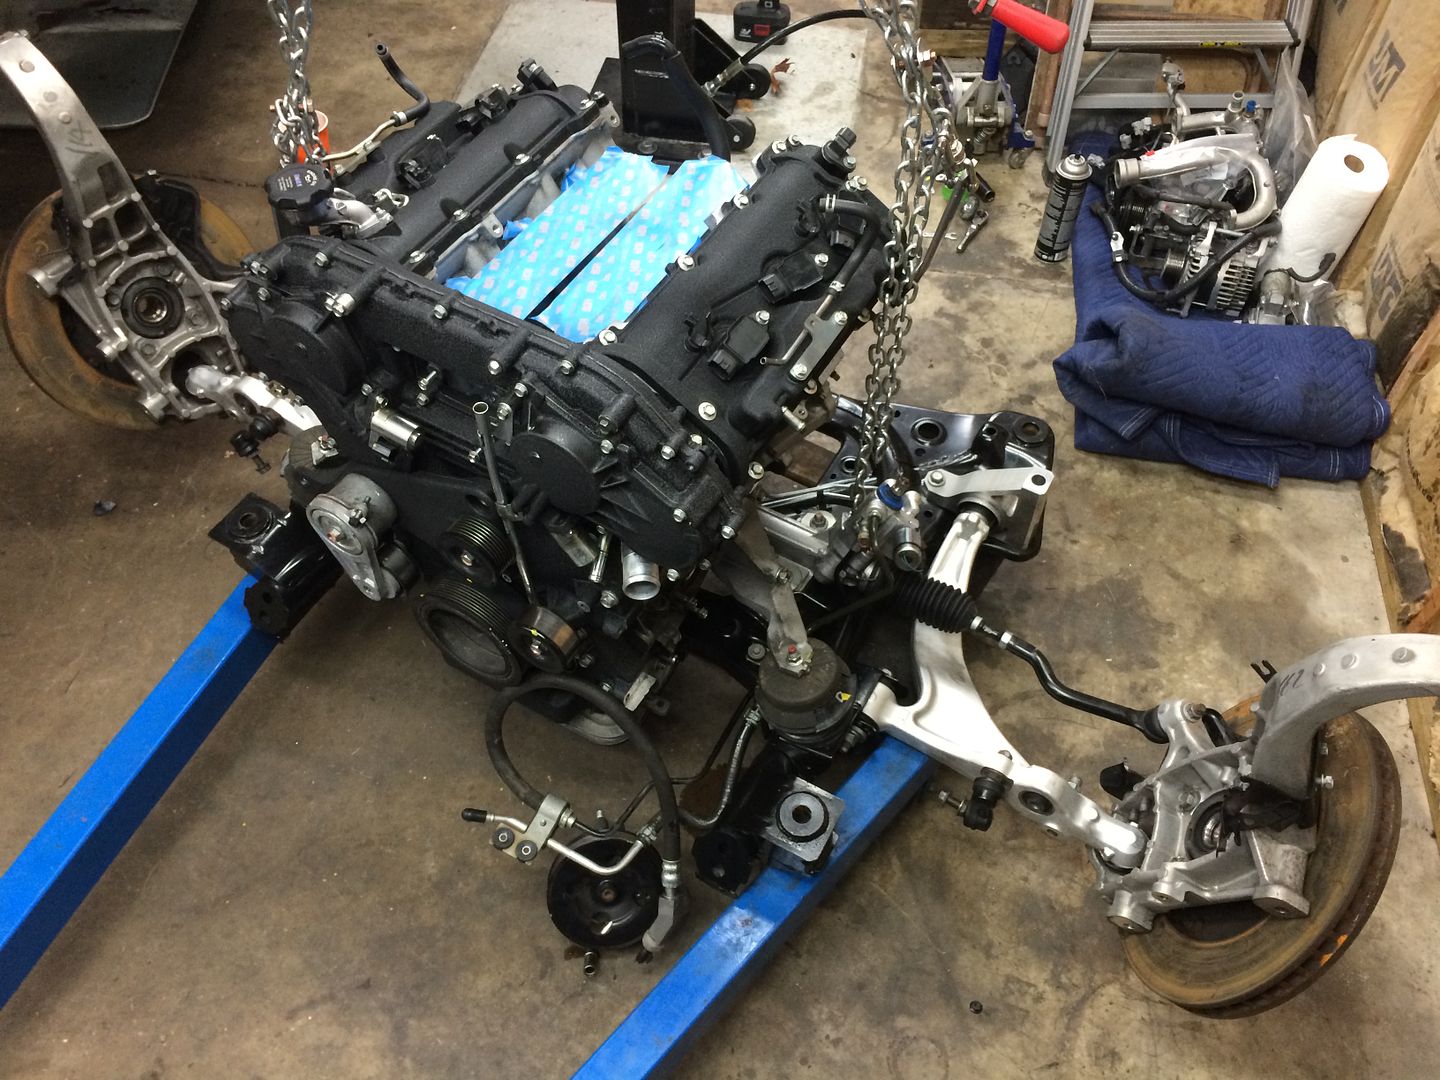
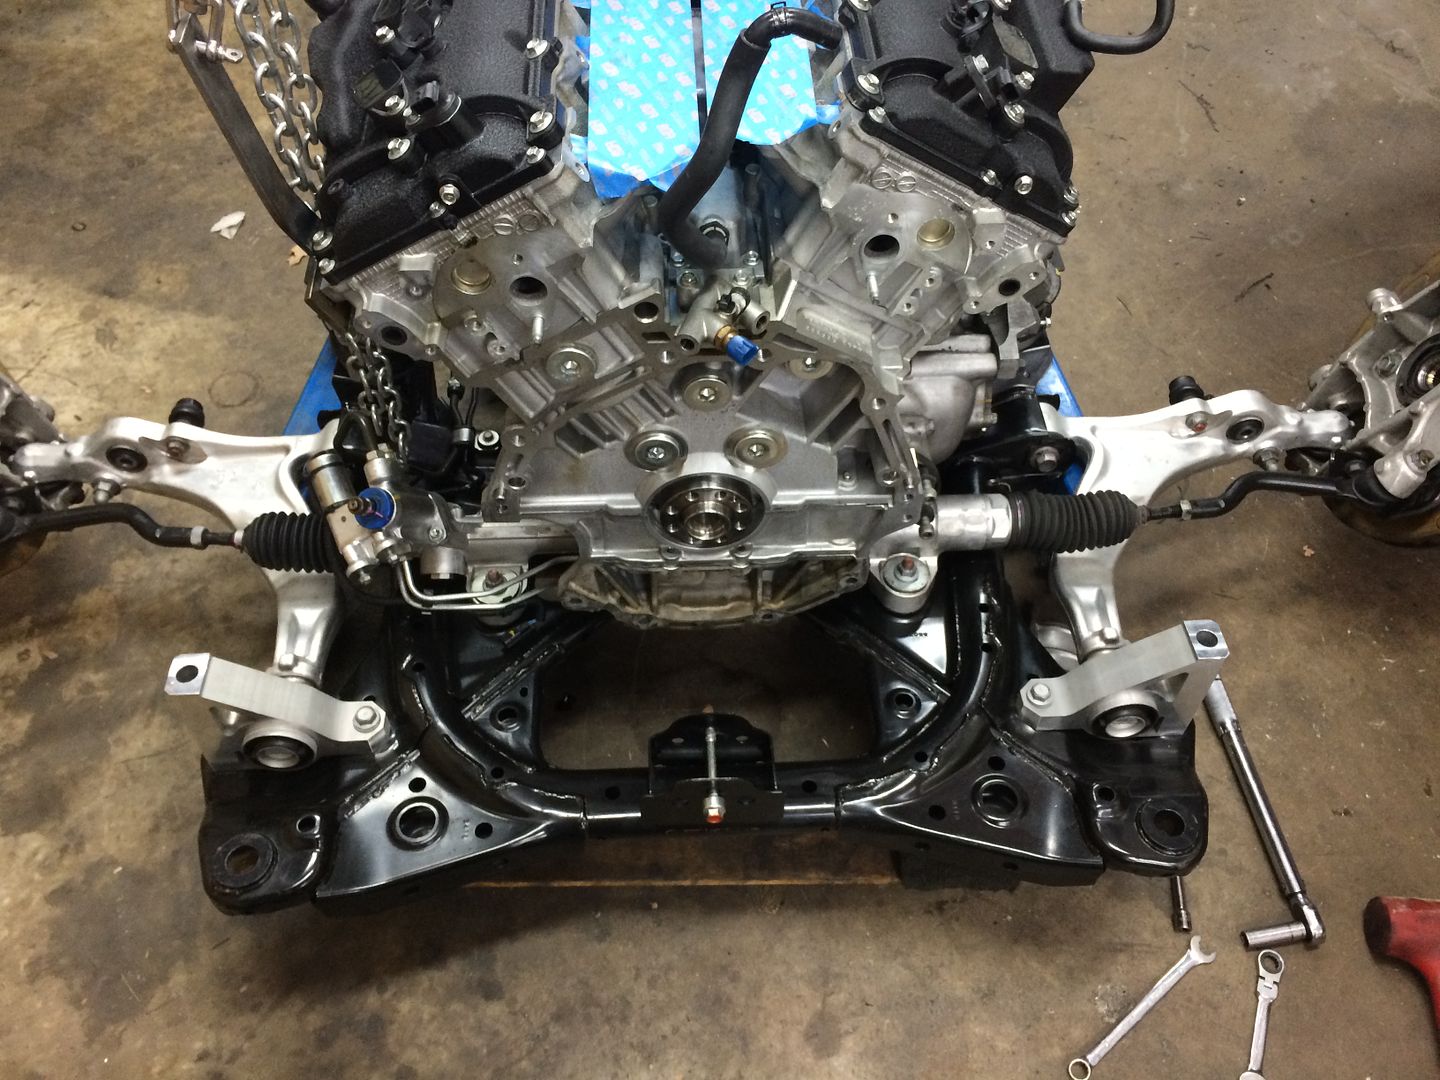
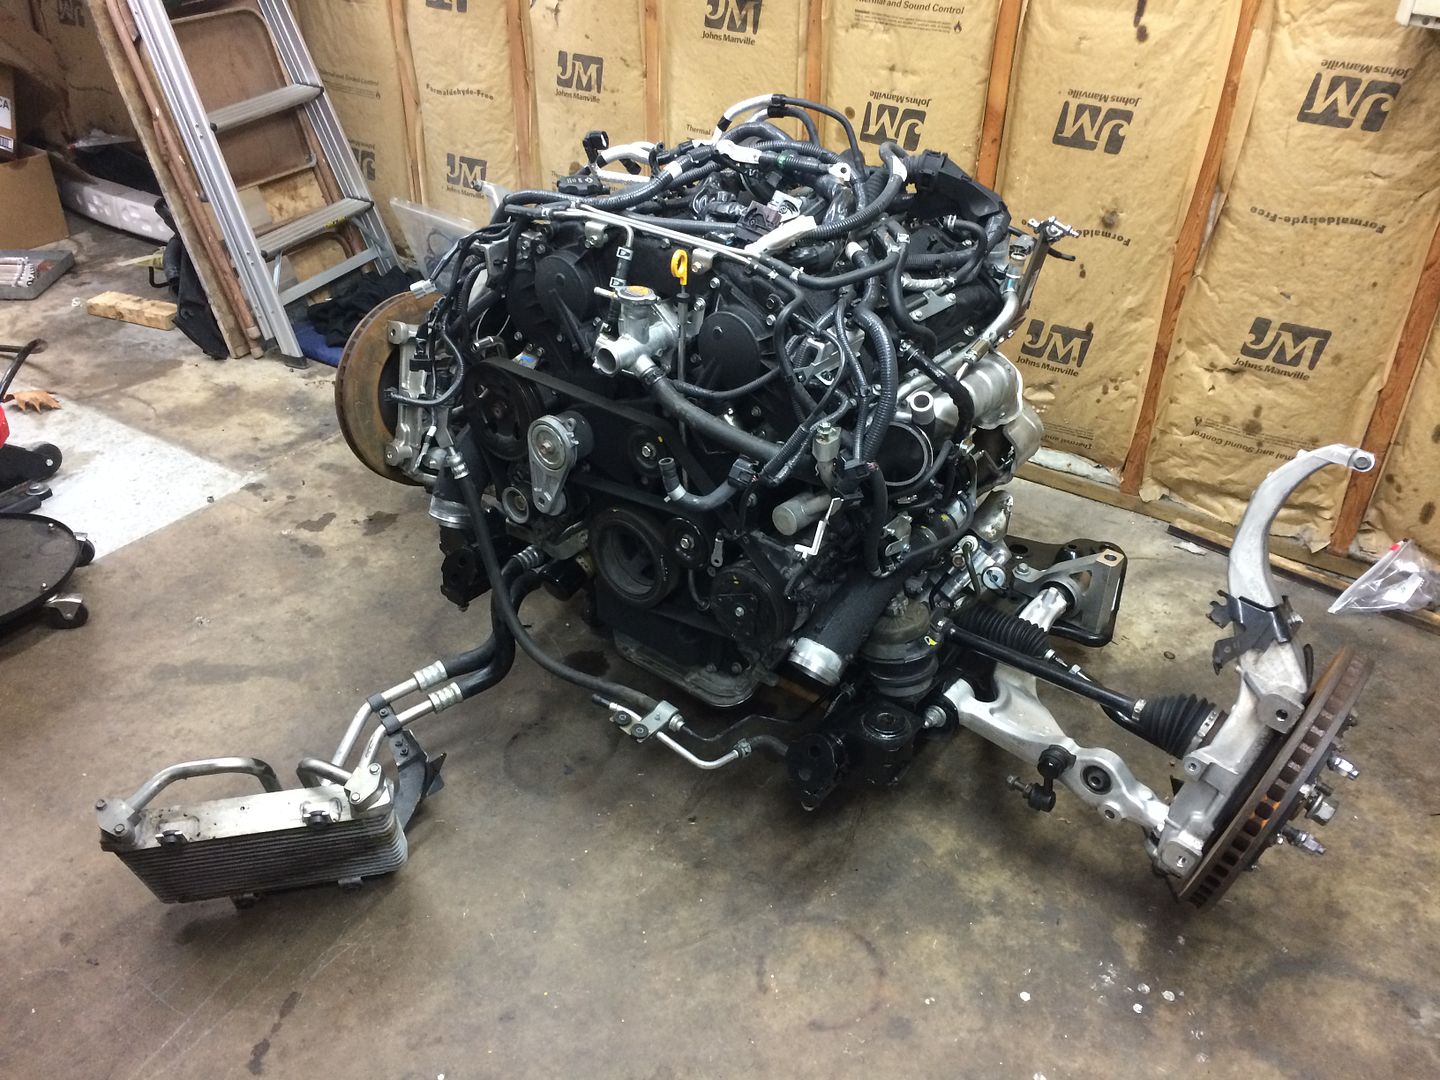
Here's where it gets a little tricky. I used the engine spanner bar to support the engine while I worked underneath. The engine comes out still attached to the subframe so I used the spanner bar to help lower the engine onto a movable dolley 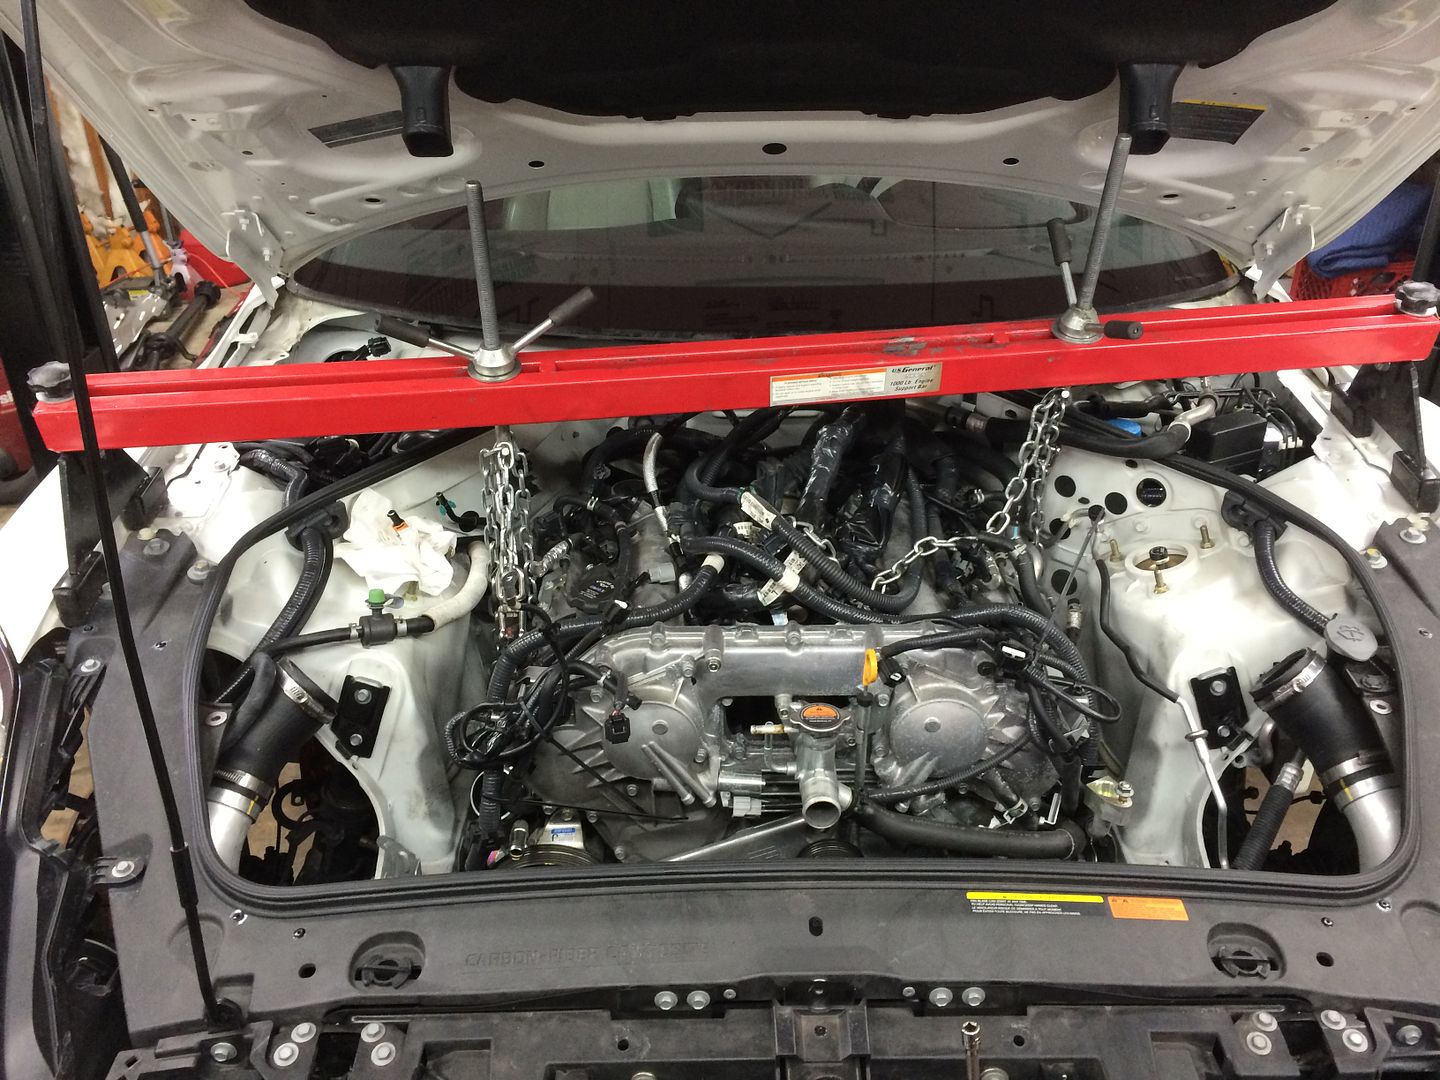
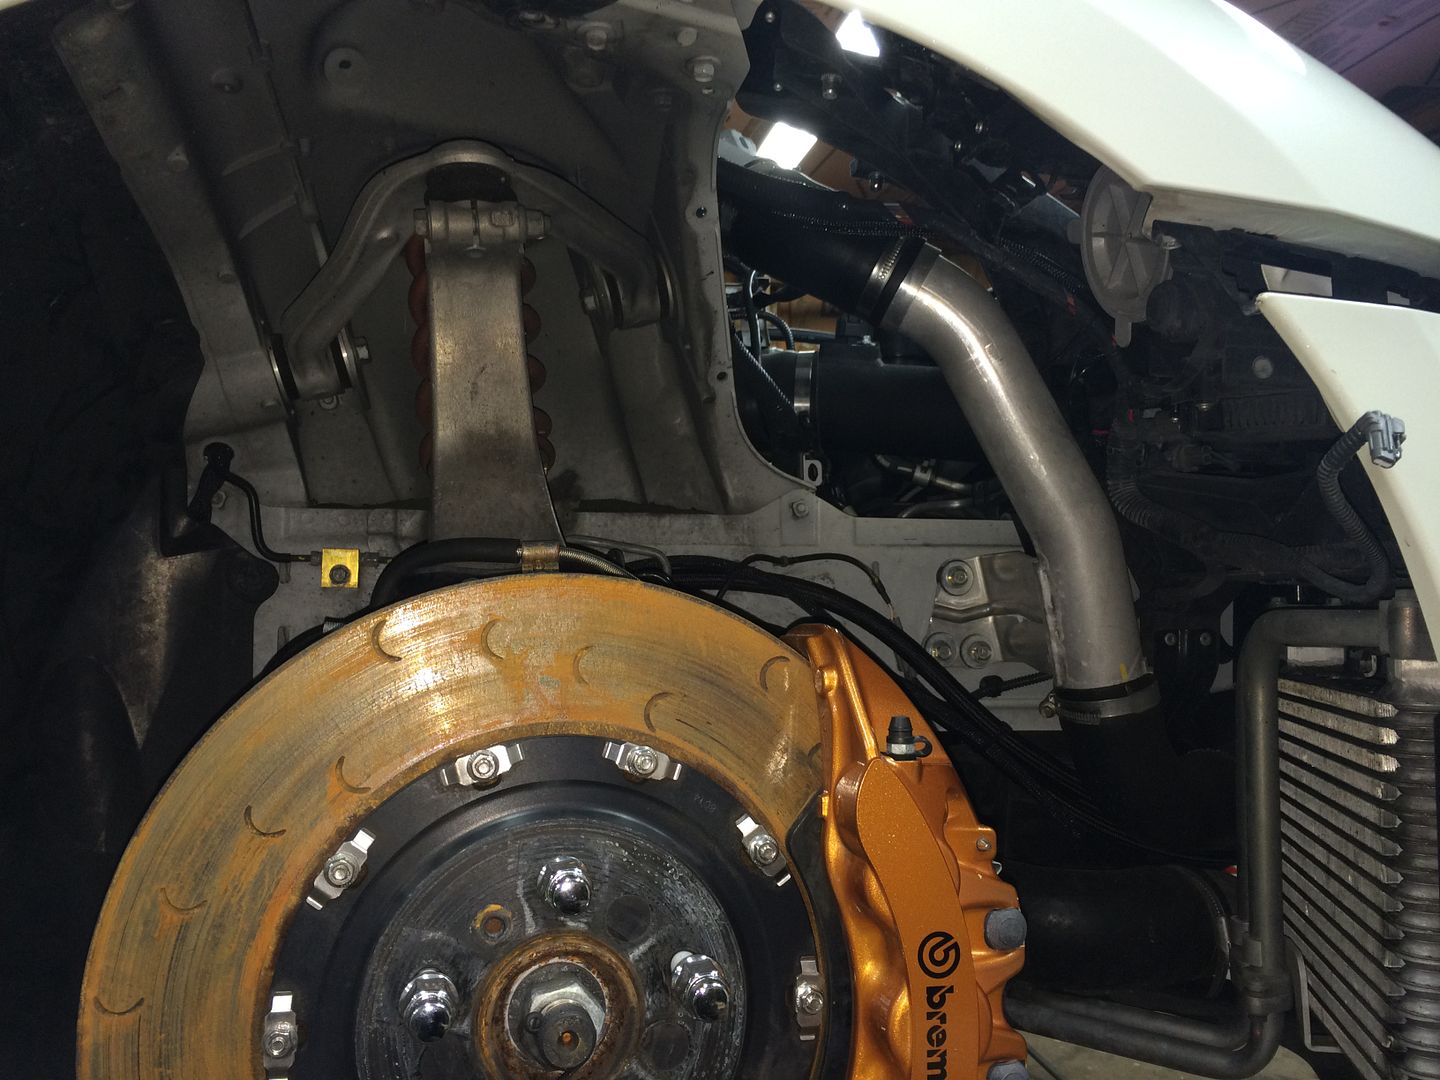
I didnt take any pictures but for the suspension you just undo the lower shock mounts, unbolt the calipers and hang them with a bunjee cord. Also not pictured I dropped the exhaust, and both driveshafts. The GTR is a transaxle style car meaning the trans sits in the rear end. It does however, have a bell housing - similar to a corvette setup. I lowered the engine onto the dolley and then raised the car up on the lift 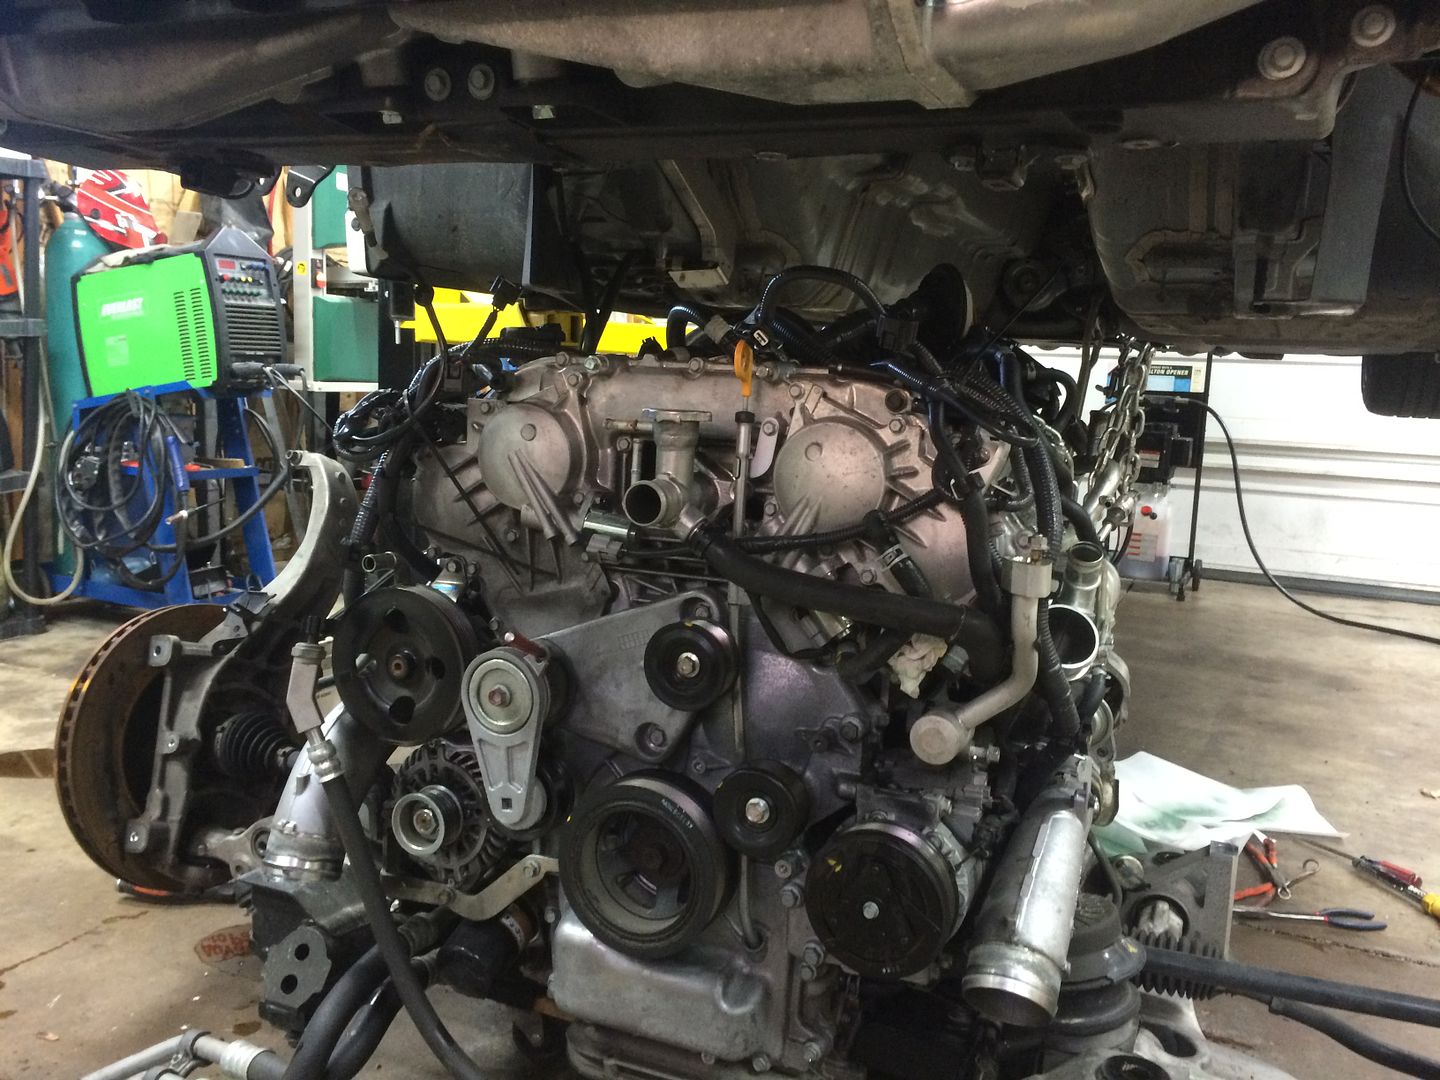
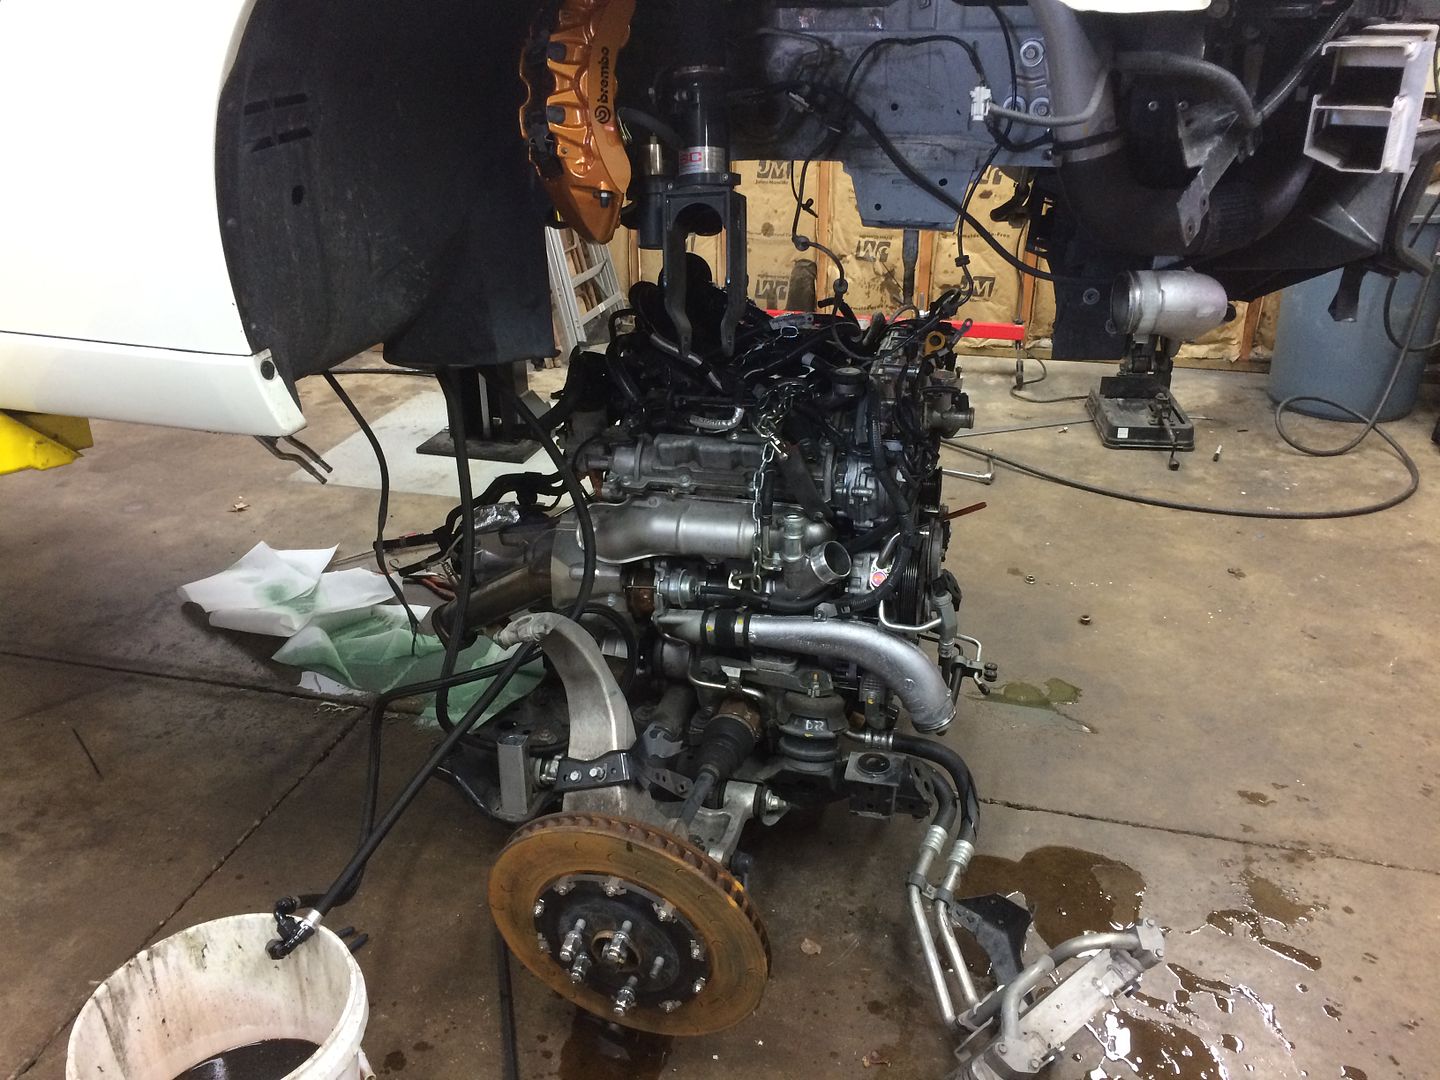
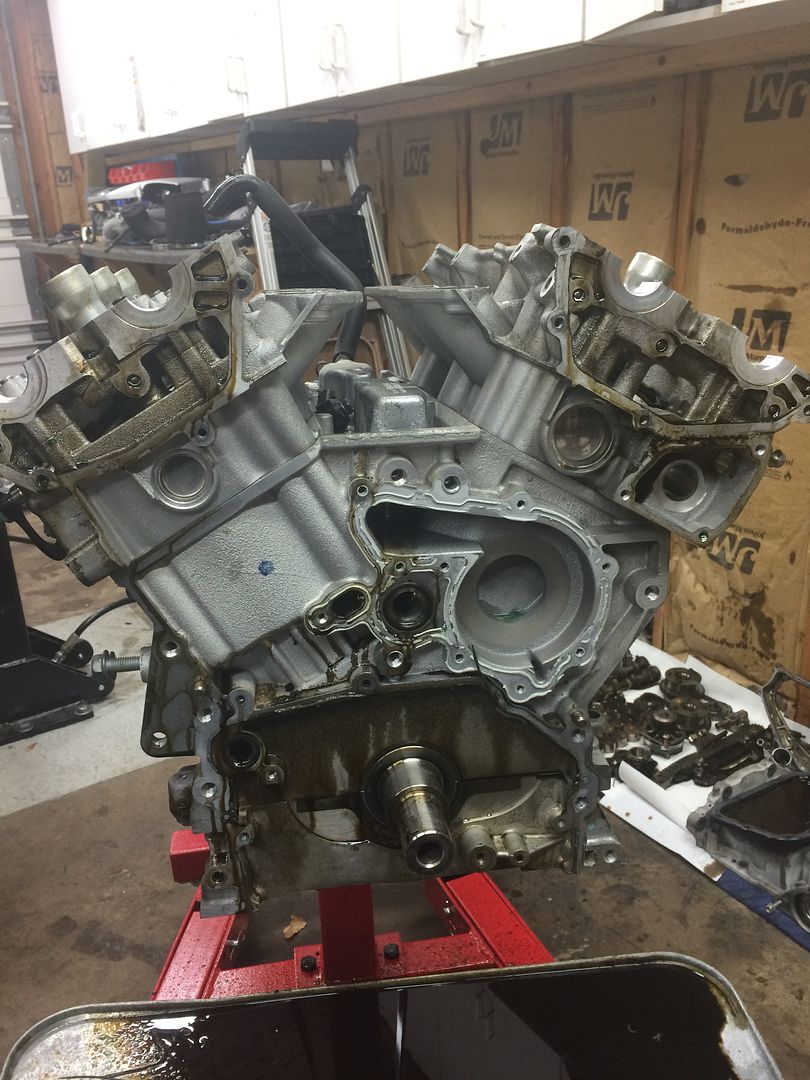
The VR38 in all its glory 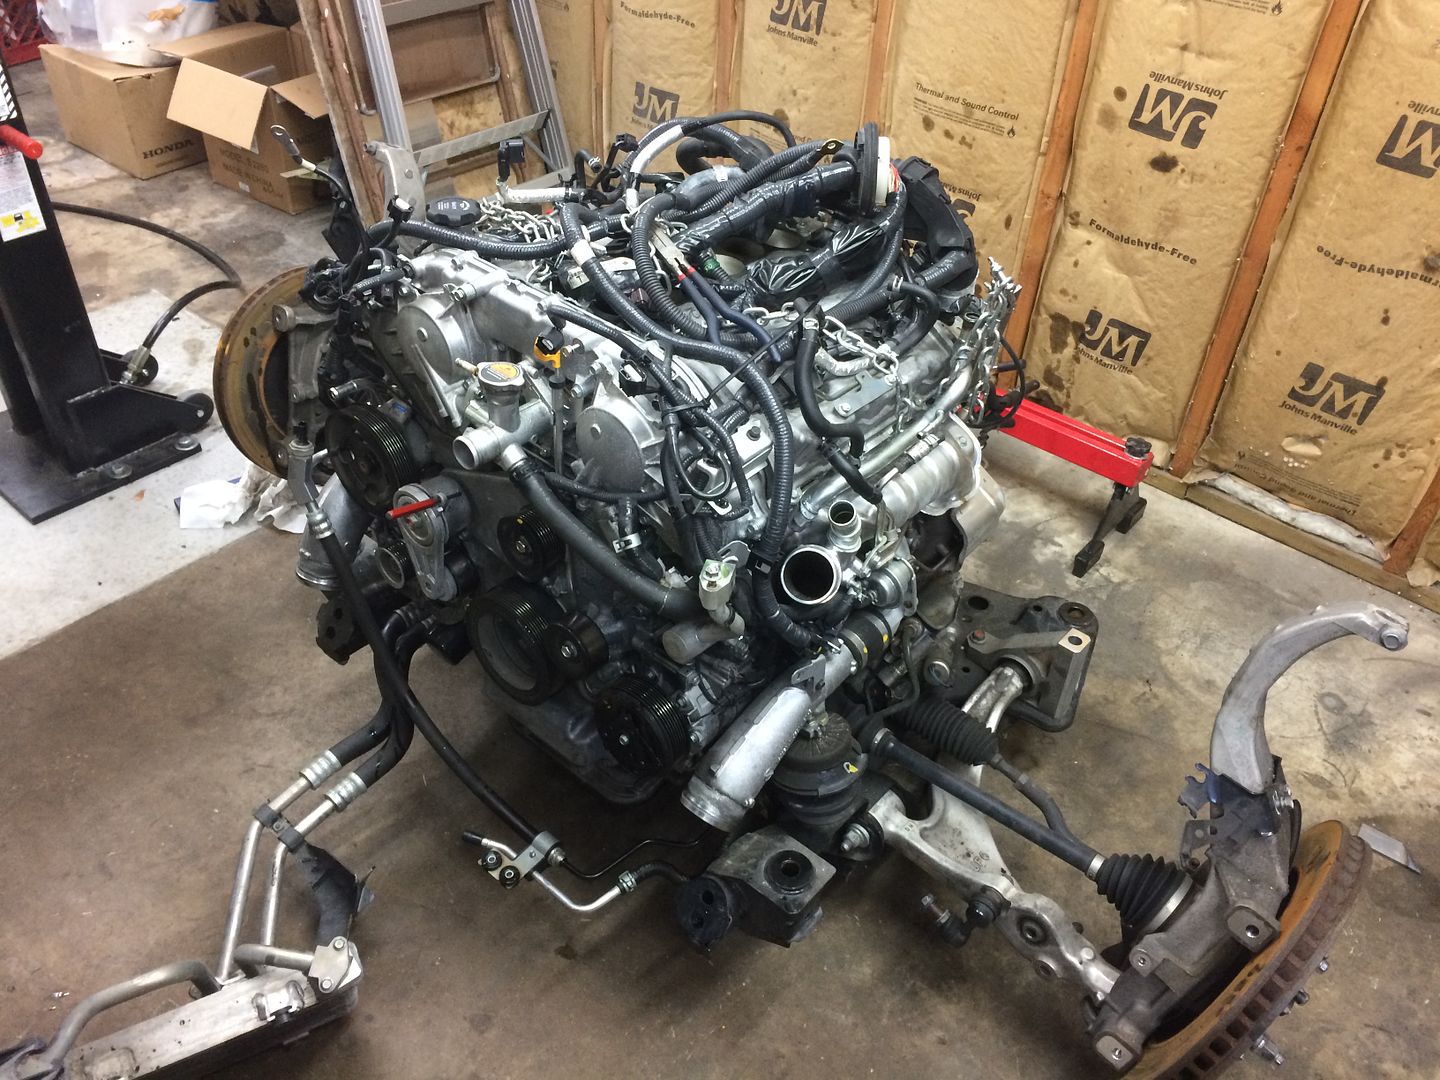
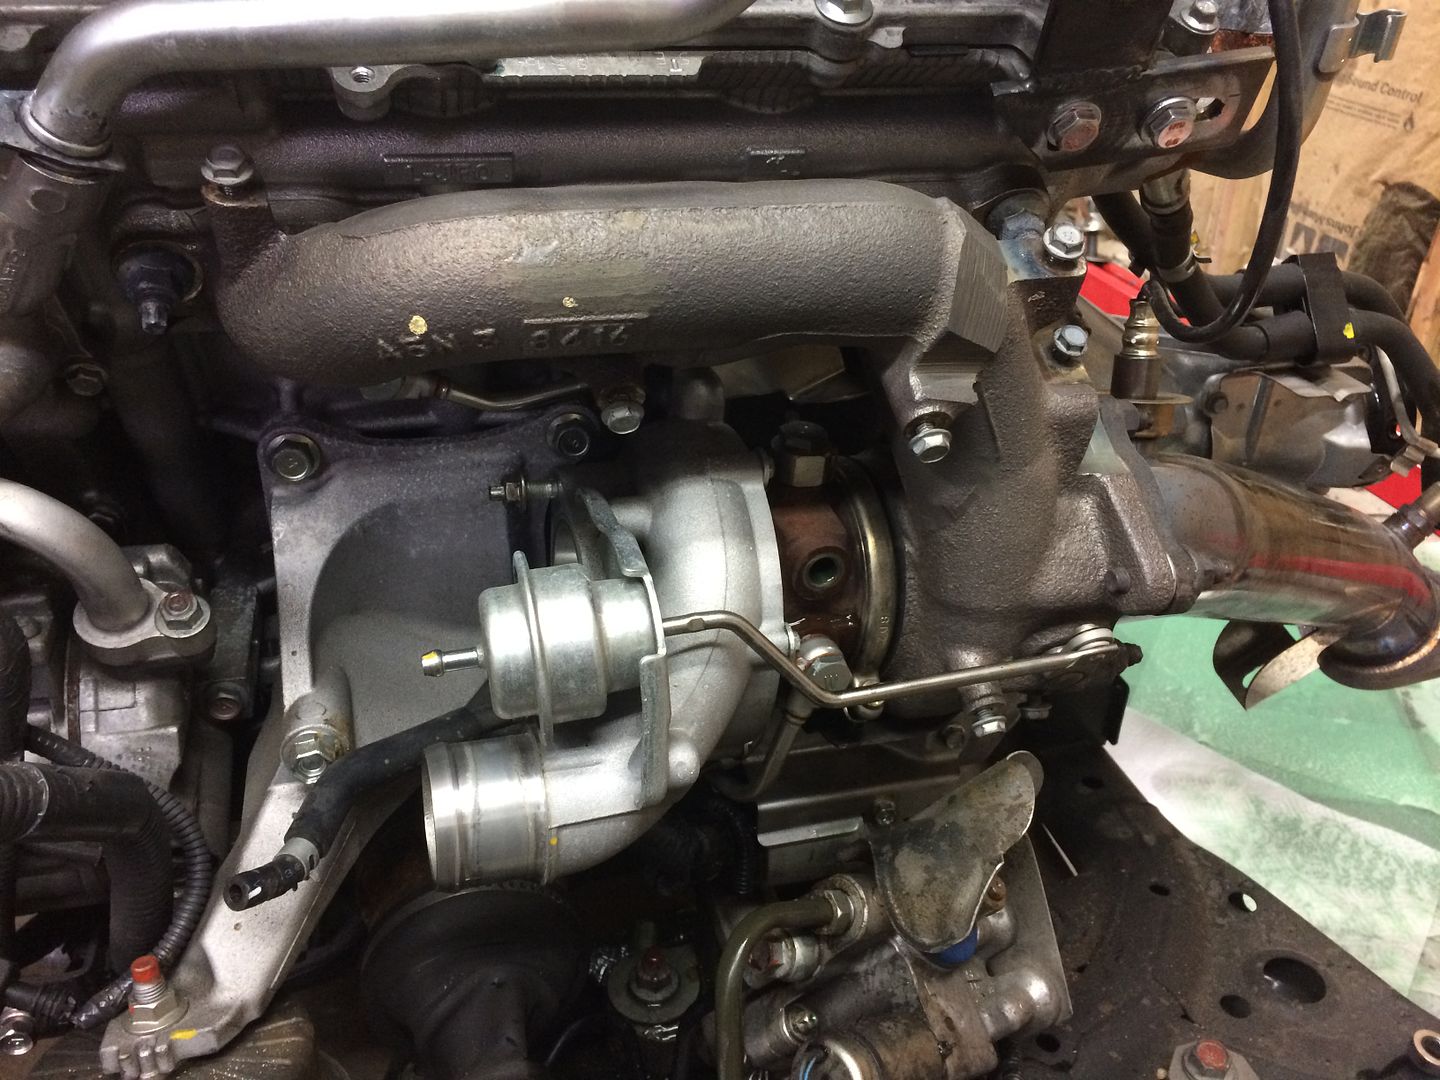
Here's the dinky turbo system on the driver's side 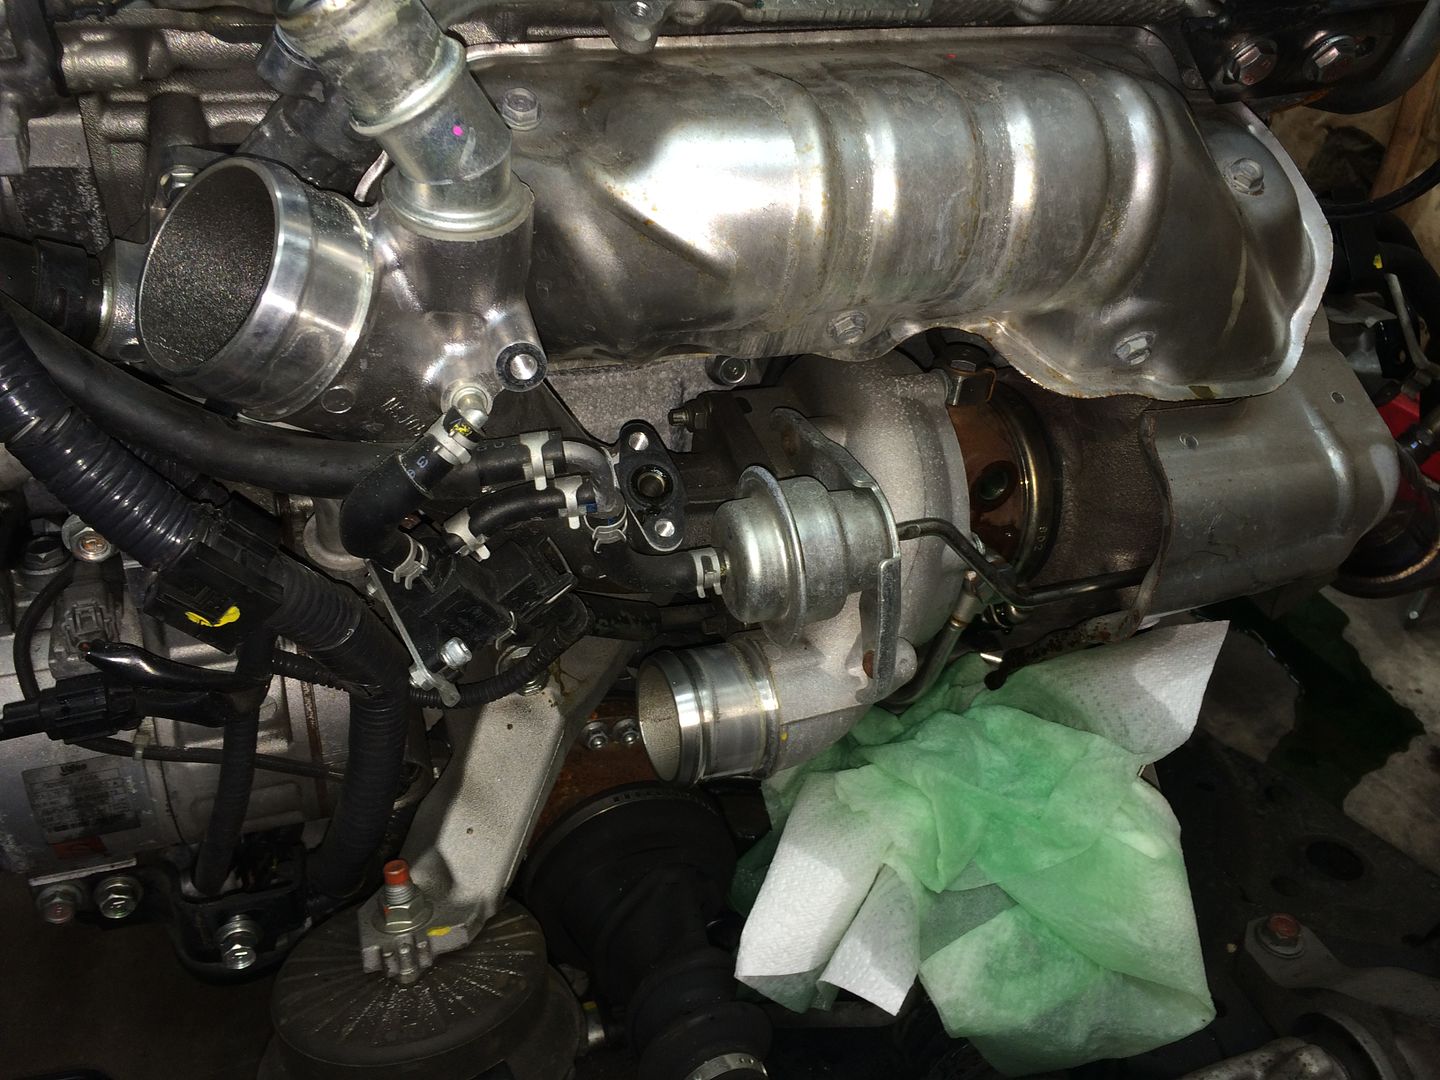
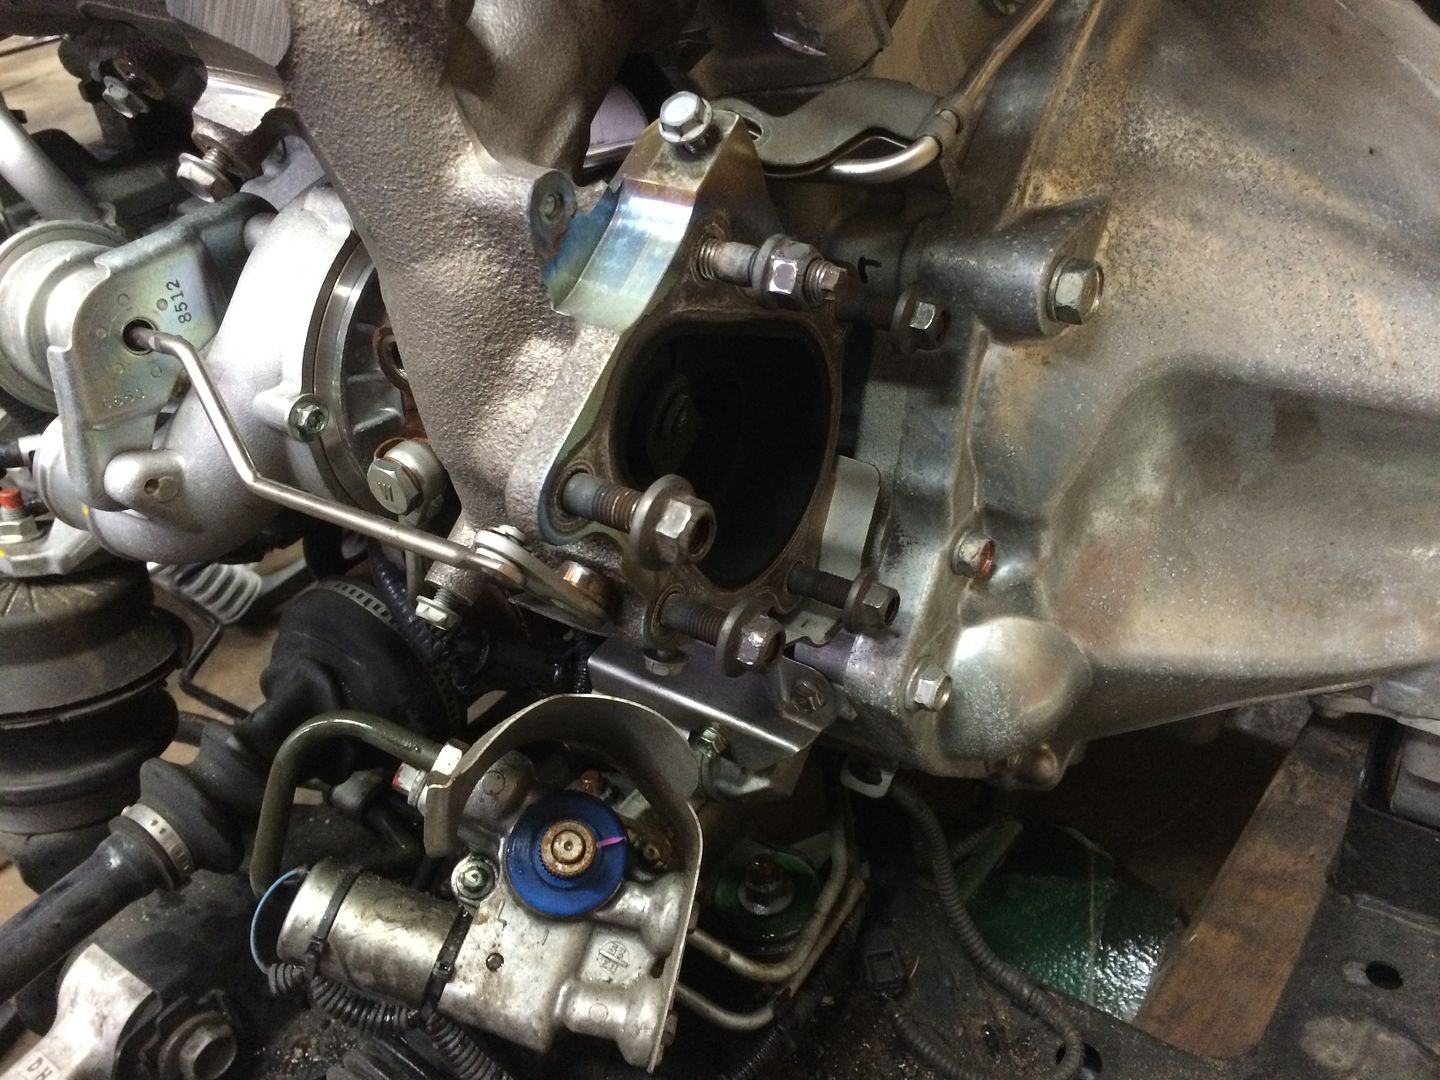
Here's the bell housing setup I mentioned 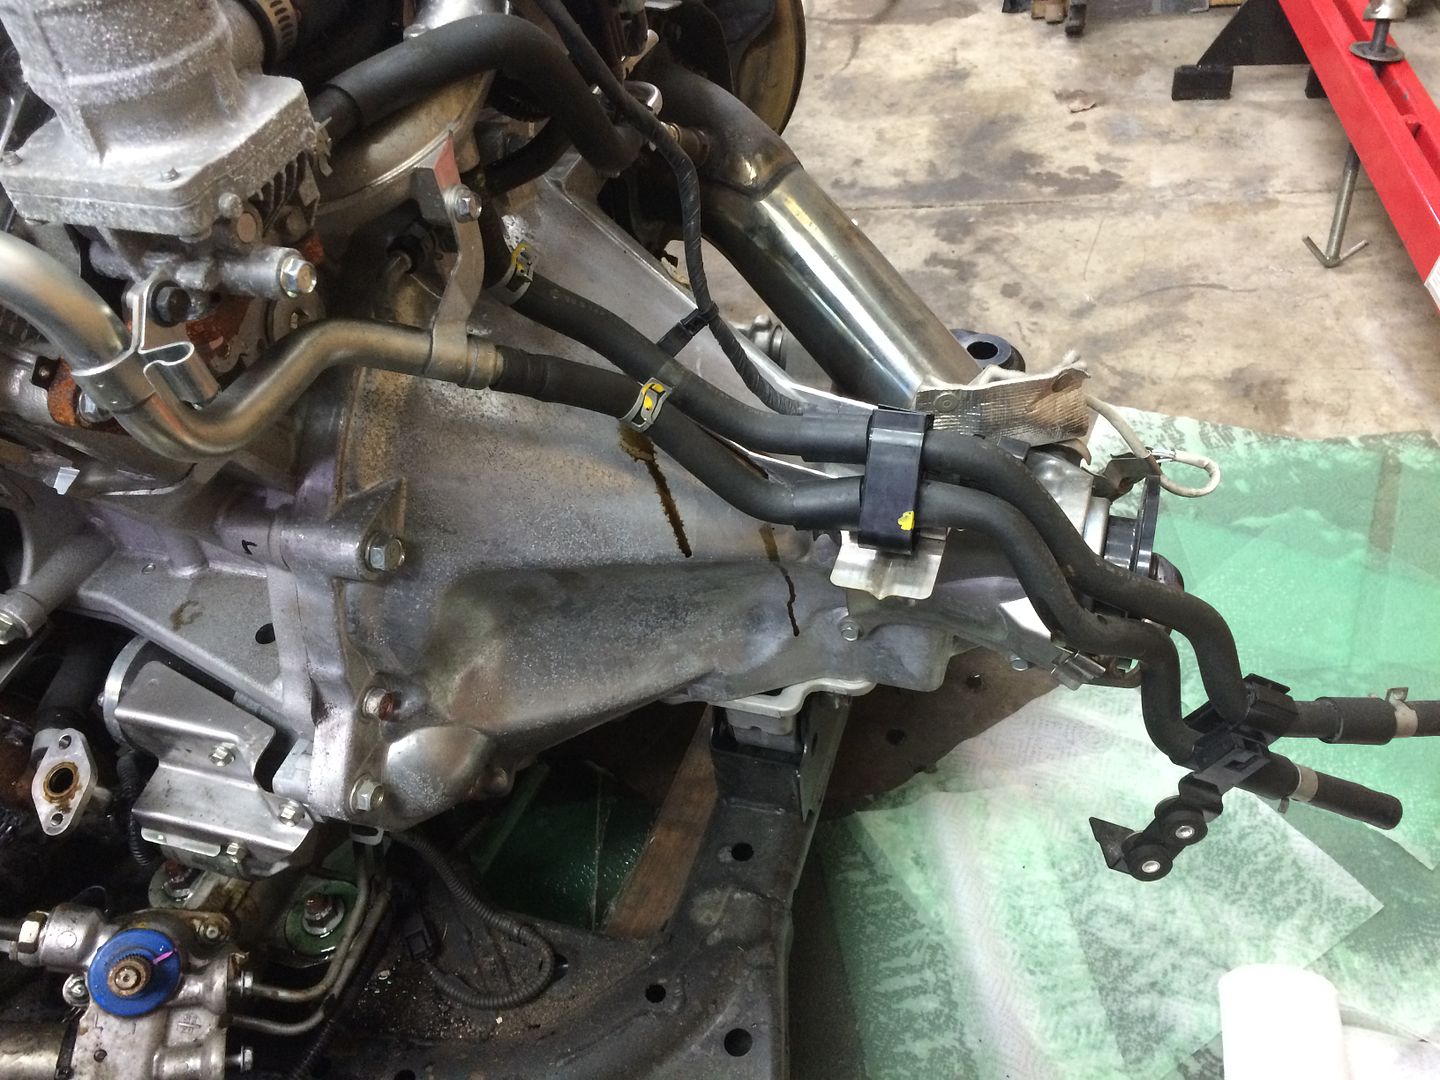
Passenger side turbo system 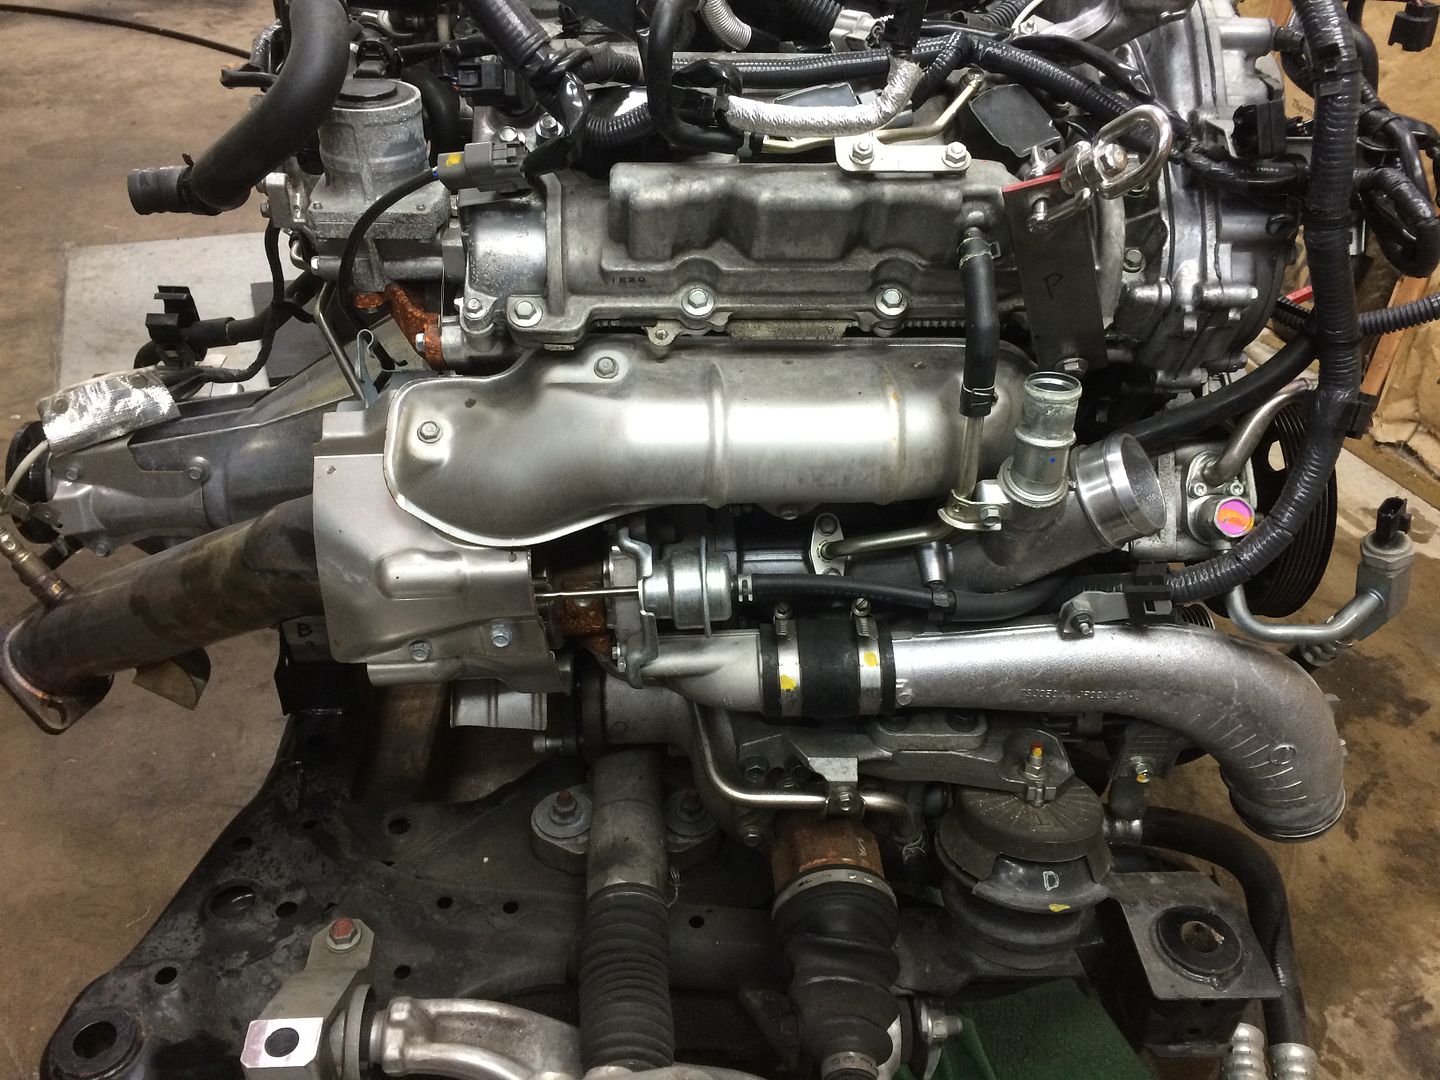
Similar EGR system and coolant routing 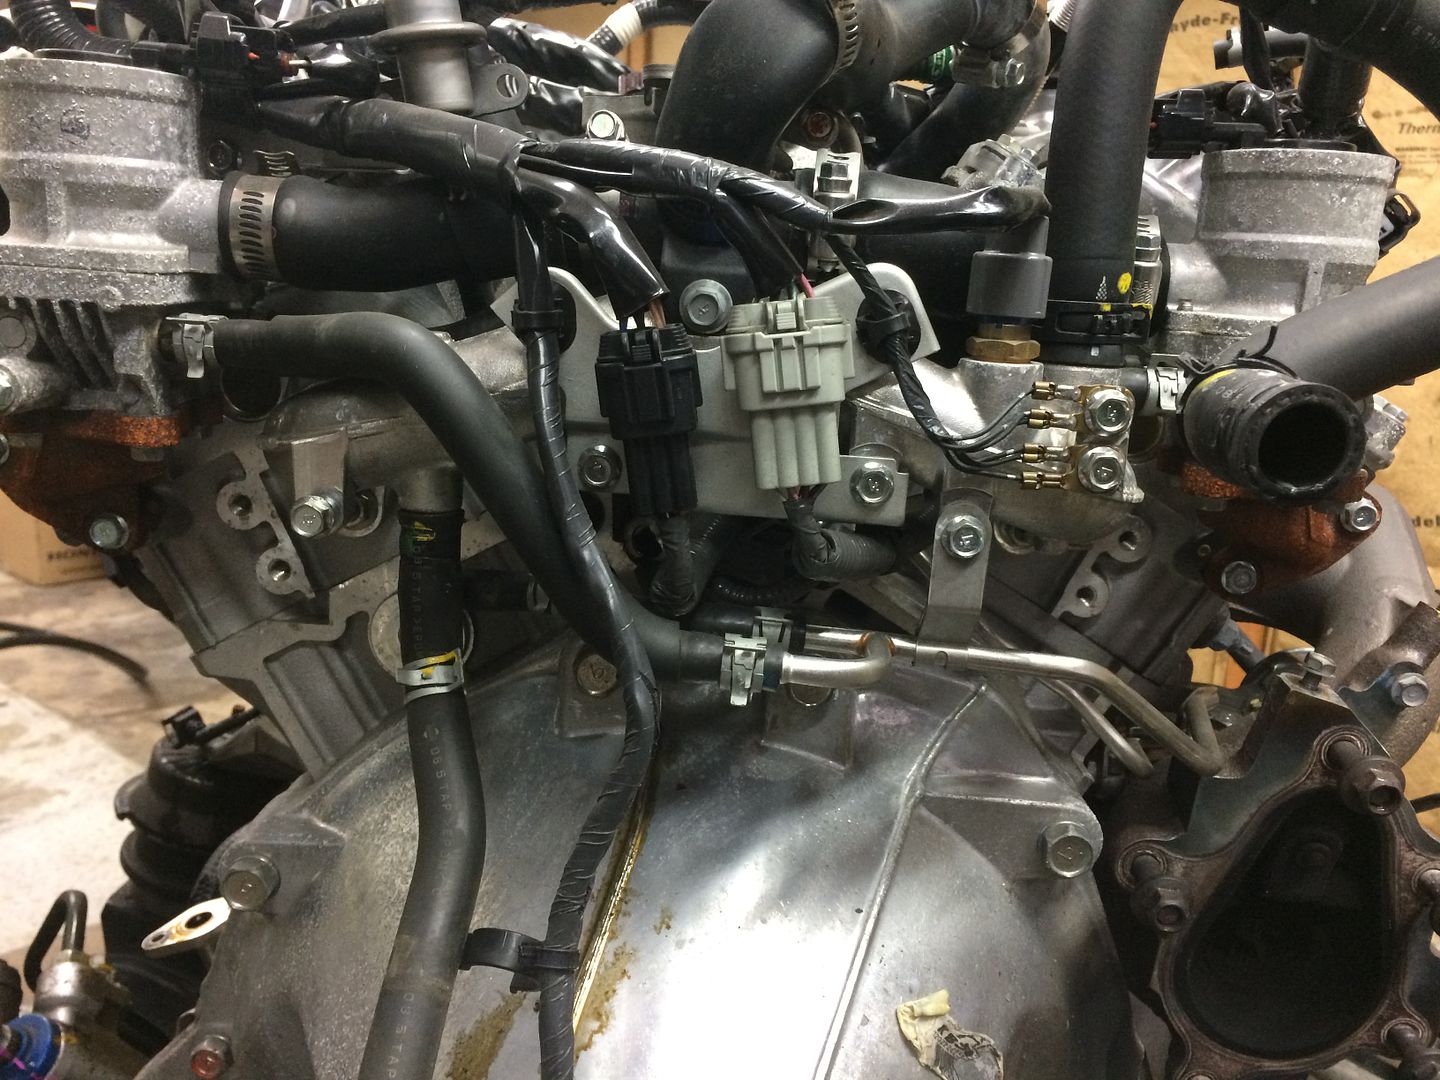
Turbo off 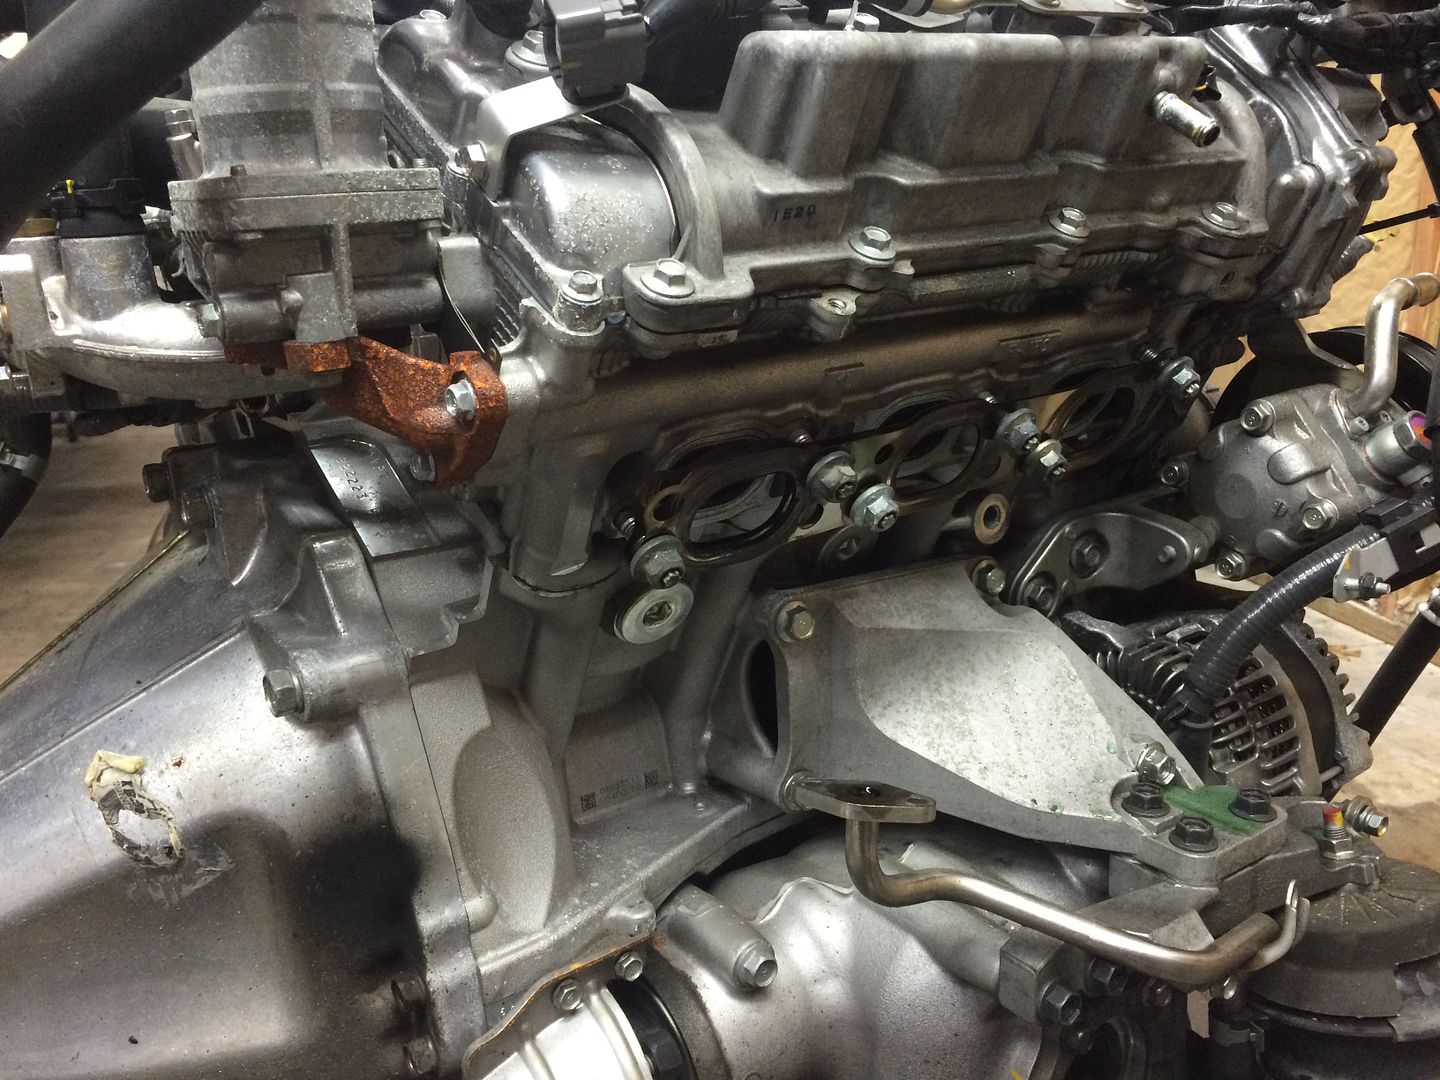
Lower intake manifold removed 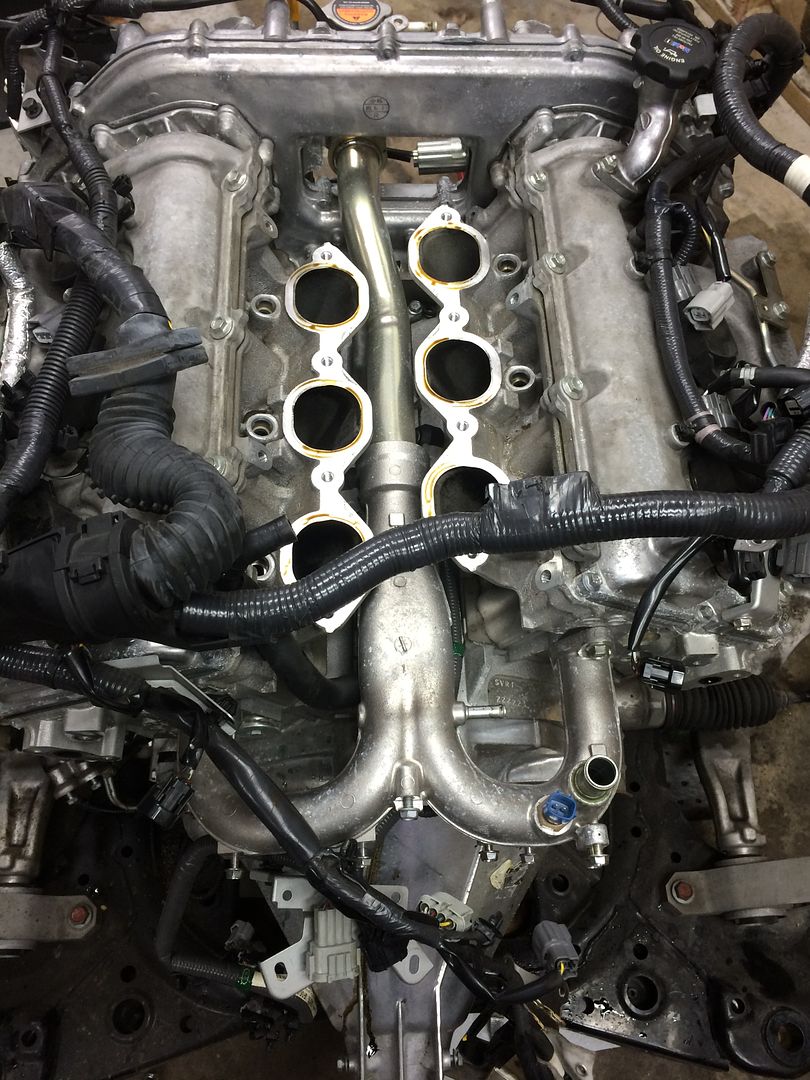
The front coolant pipe passes through the front timing system here 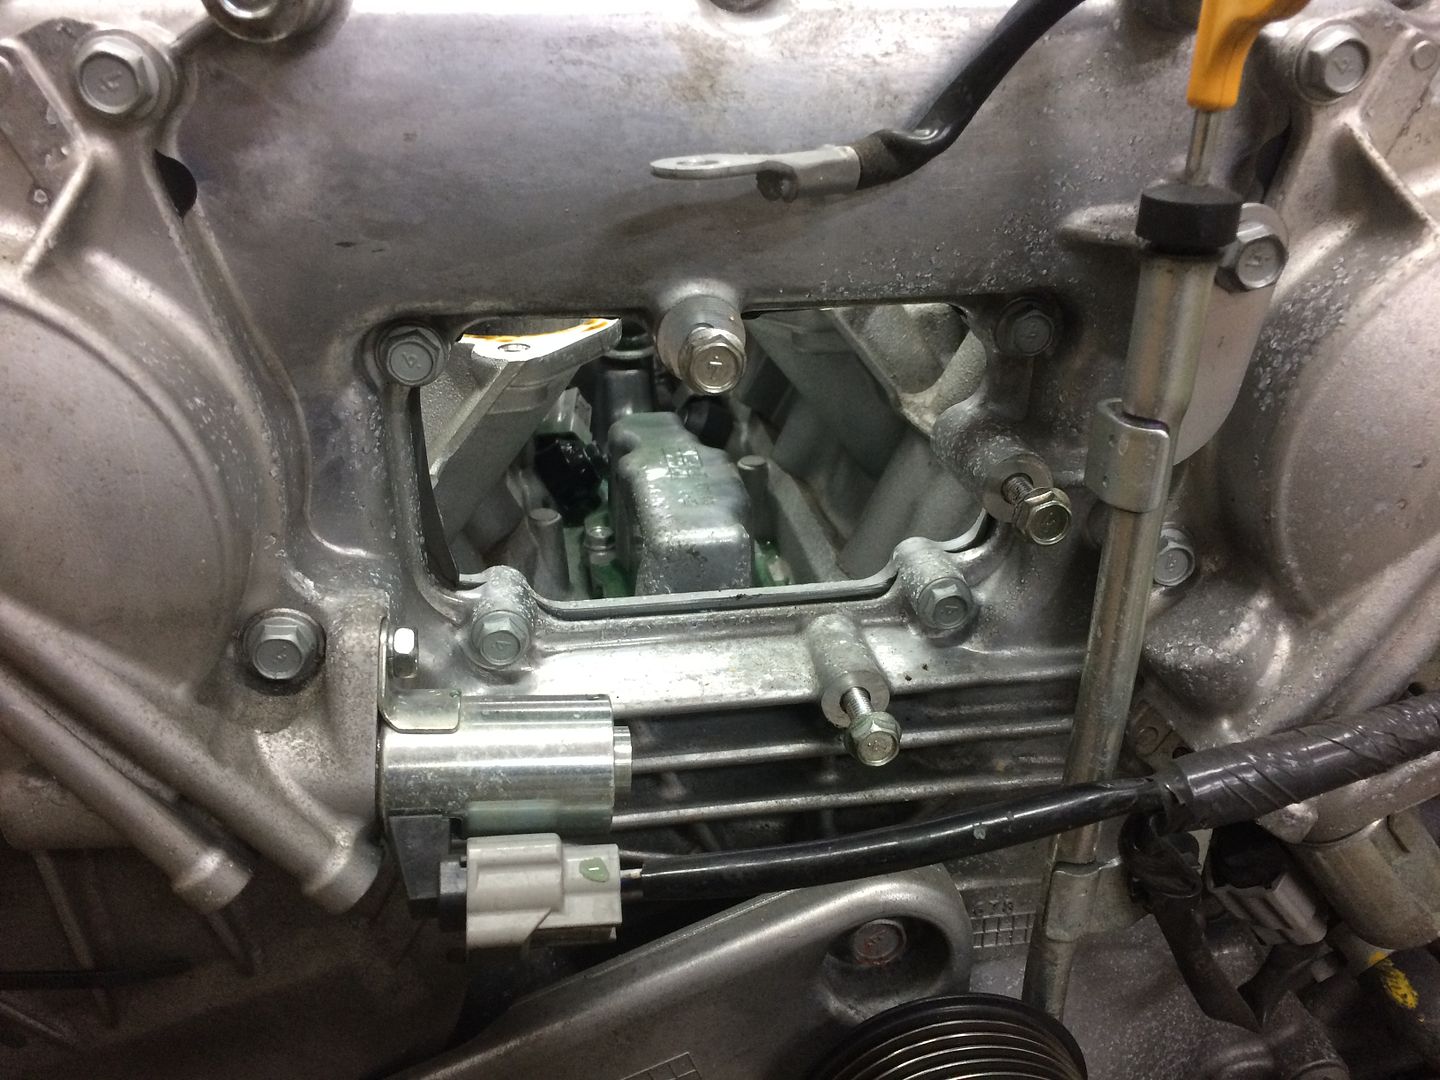
The coolant pipe travels back and "Y's" apart 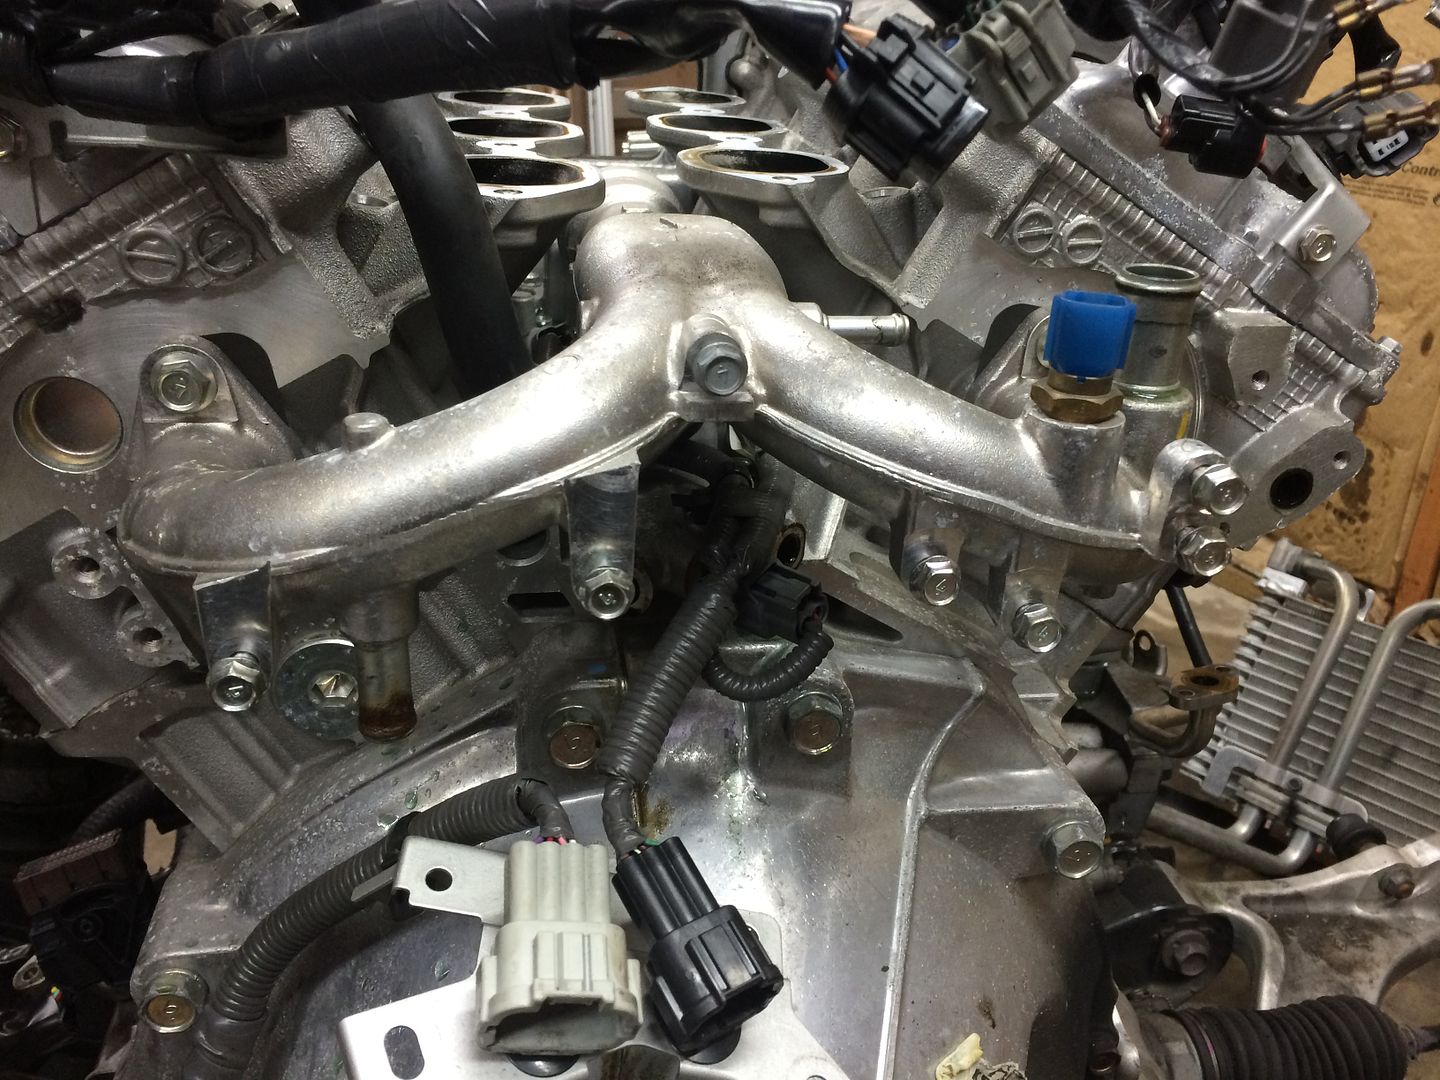
This is the oil pressure sensor and the feed connections for both the turbos 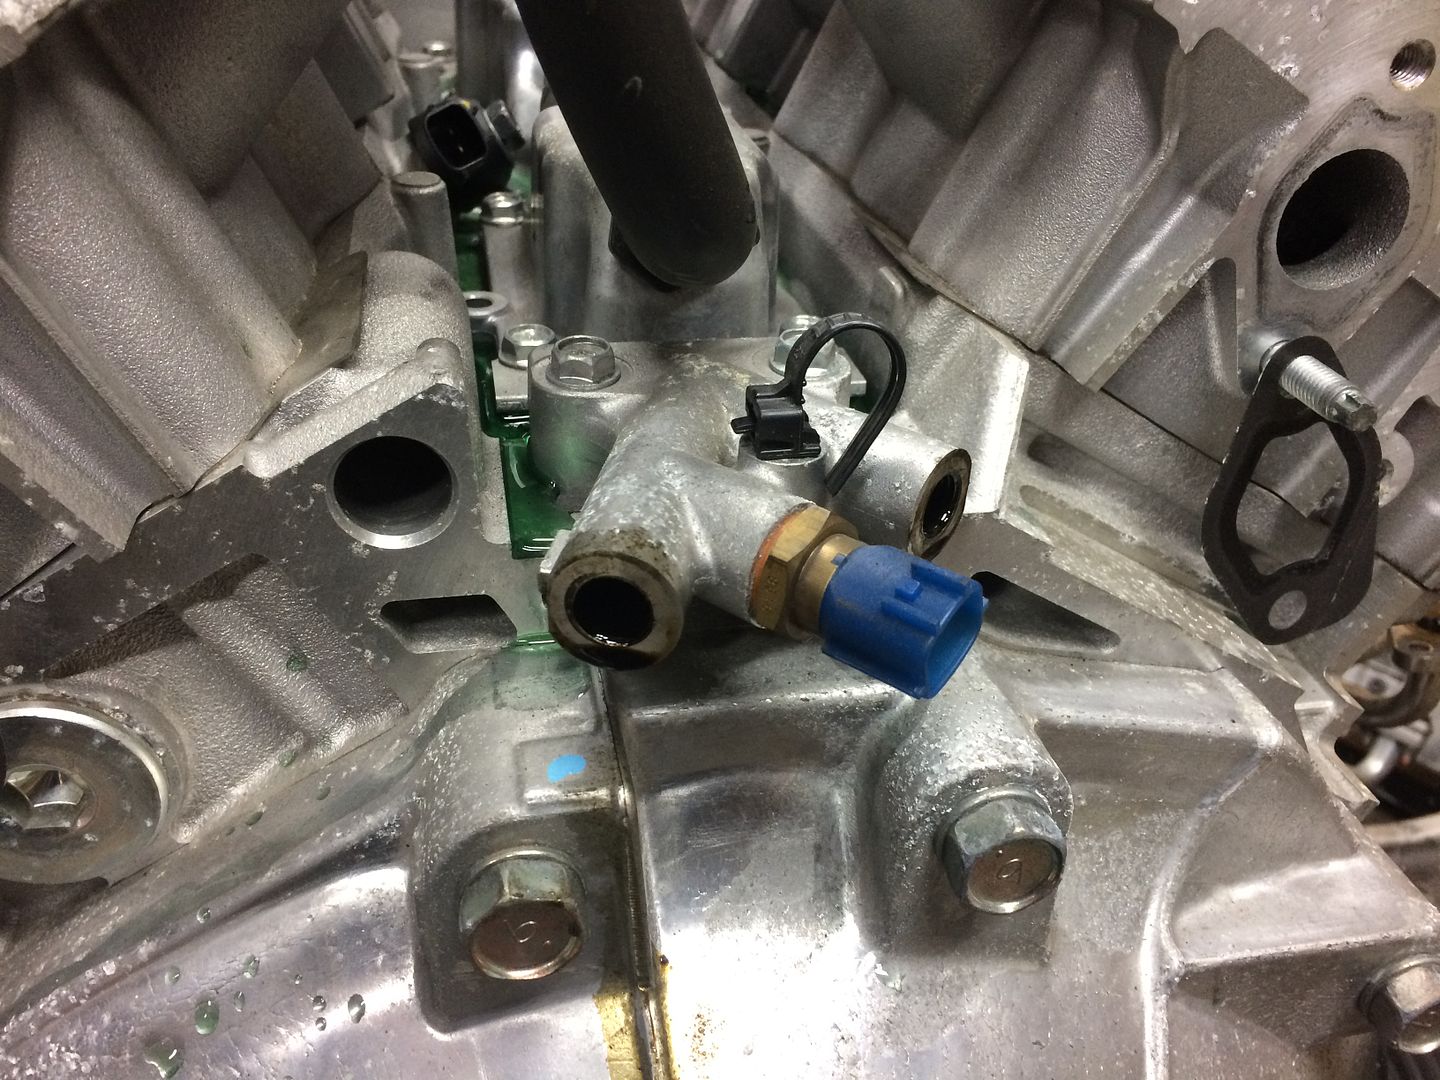
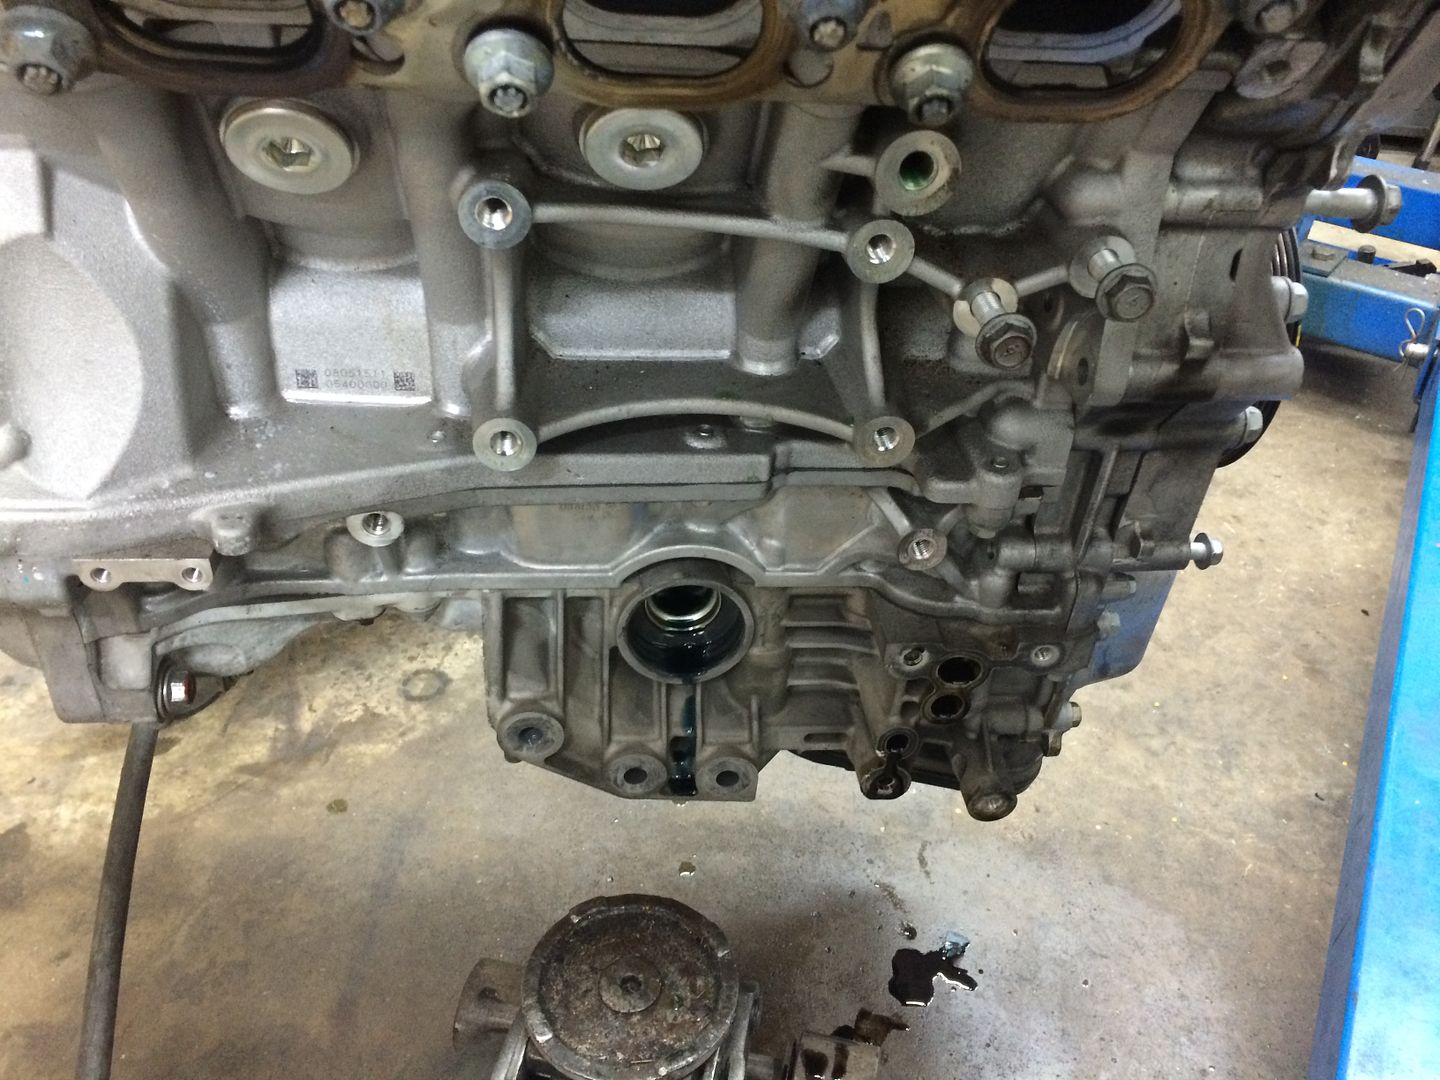
Here's the lower front of the engine 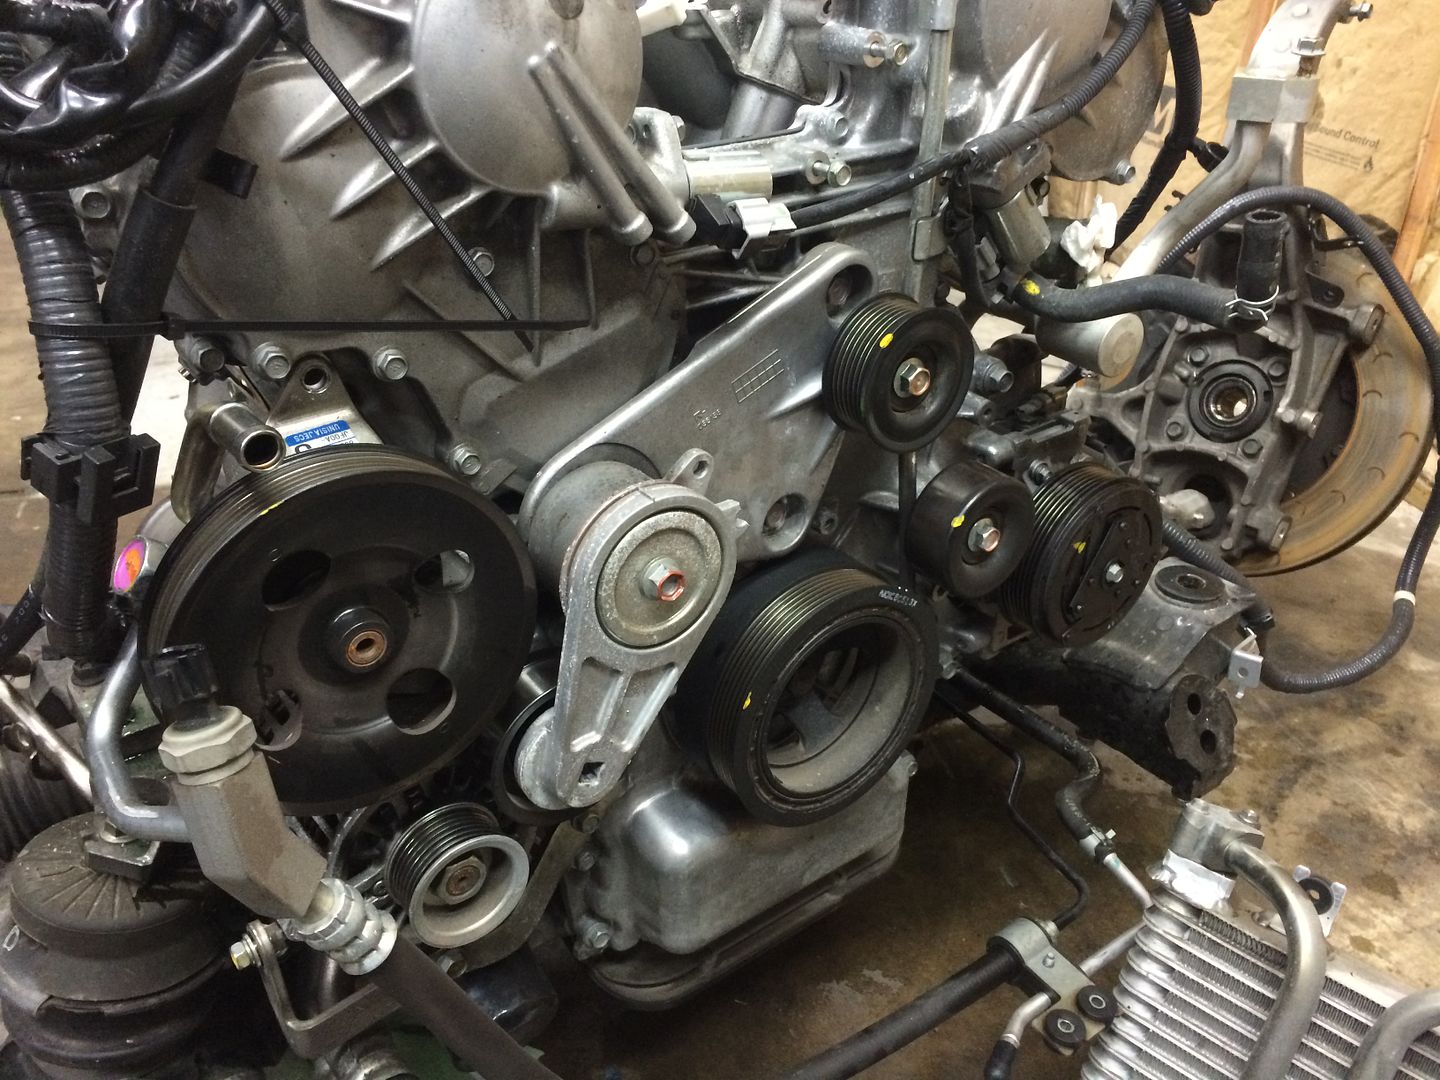
I got the alternator, power steering, and AC stuff removed a long with the starter and pulled the wiring harness off of the engine 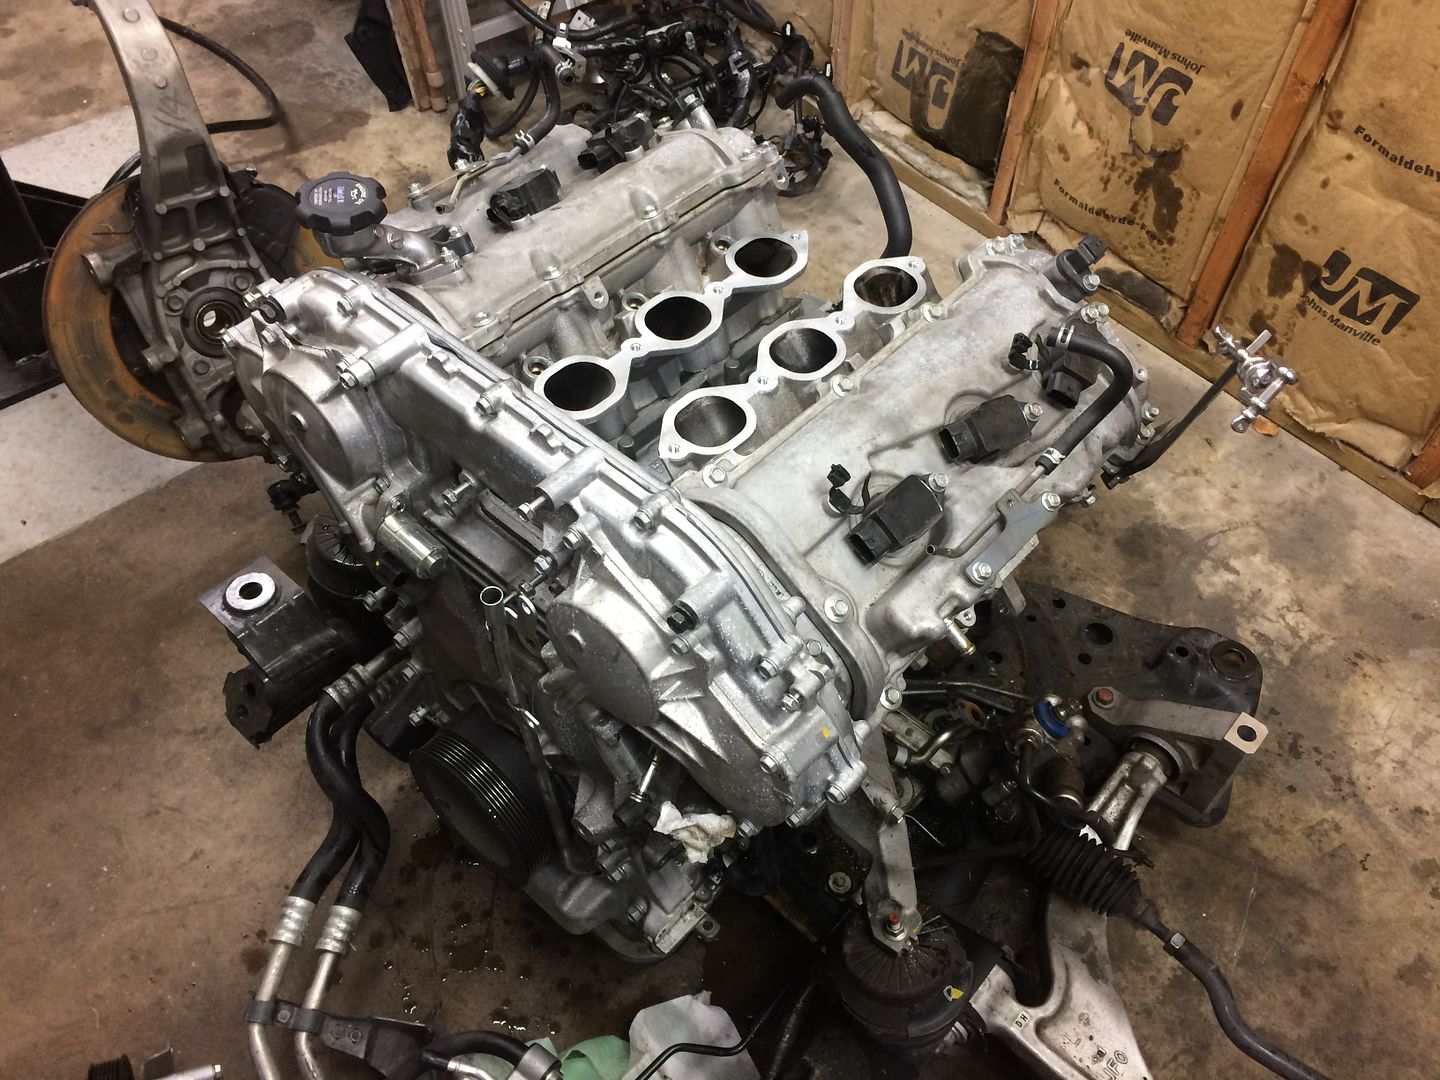
This is the oil filter tree which has attachments for the OEM oil cooler 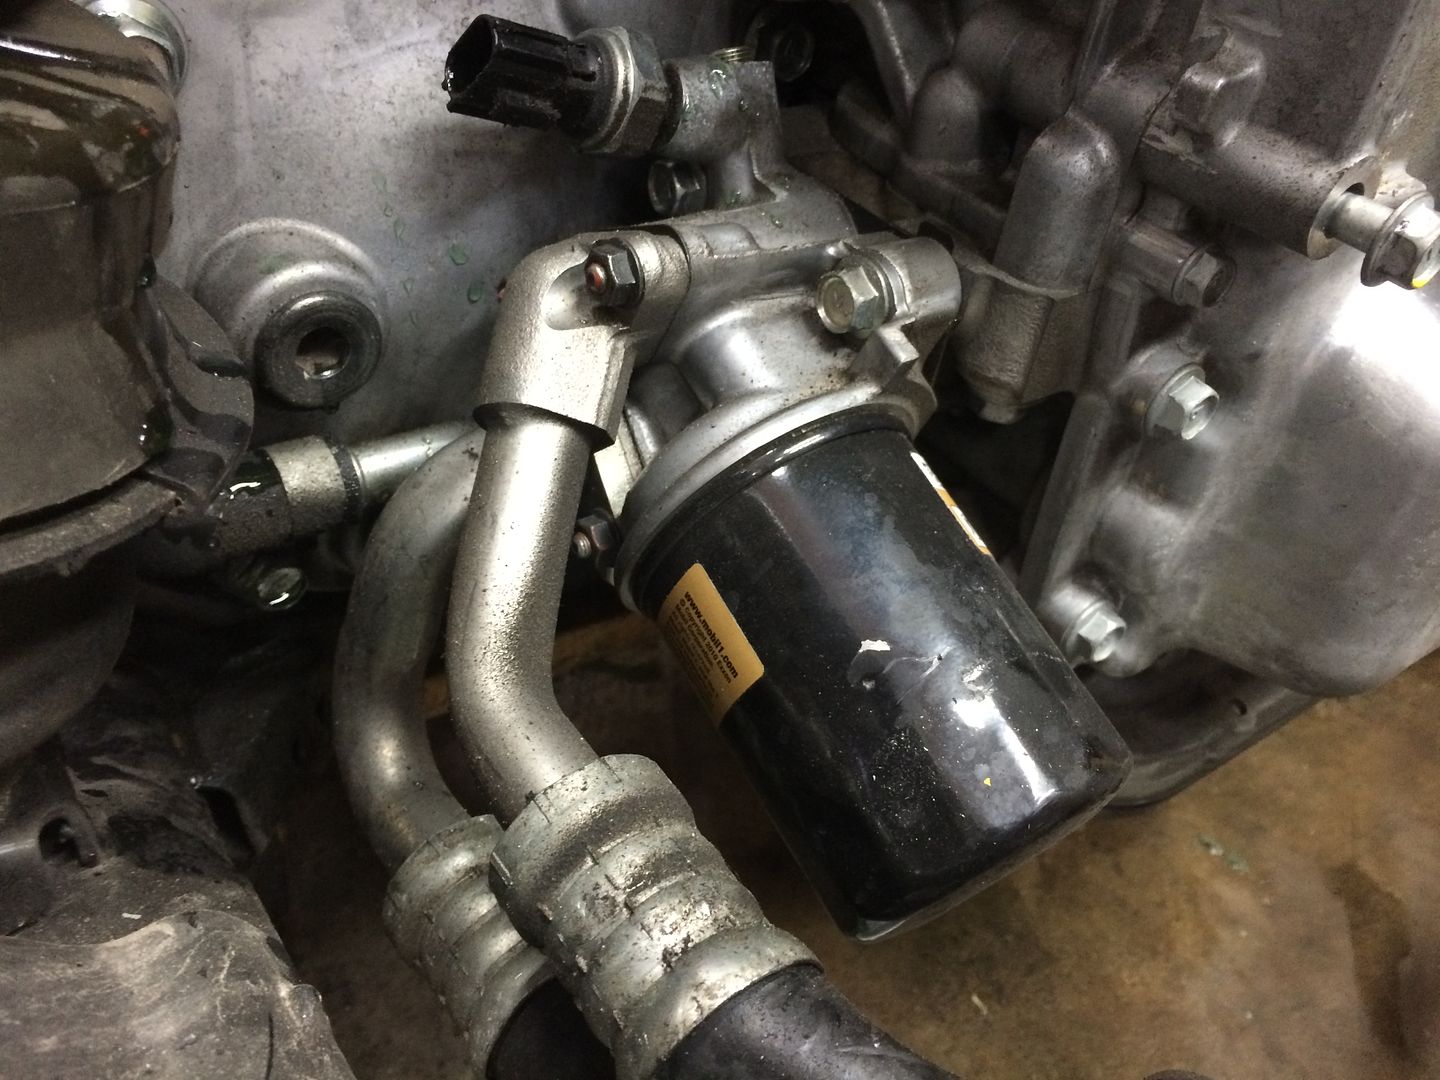
Now that I've got all the accessories off, I can unbolt it from the cradle and put the engine on the stand 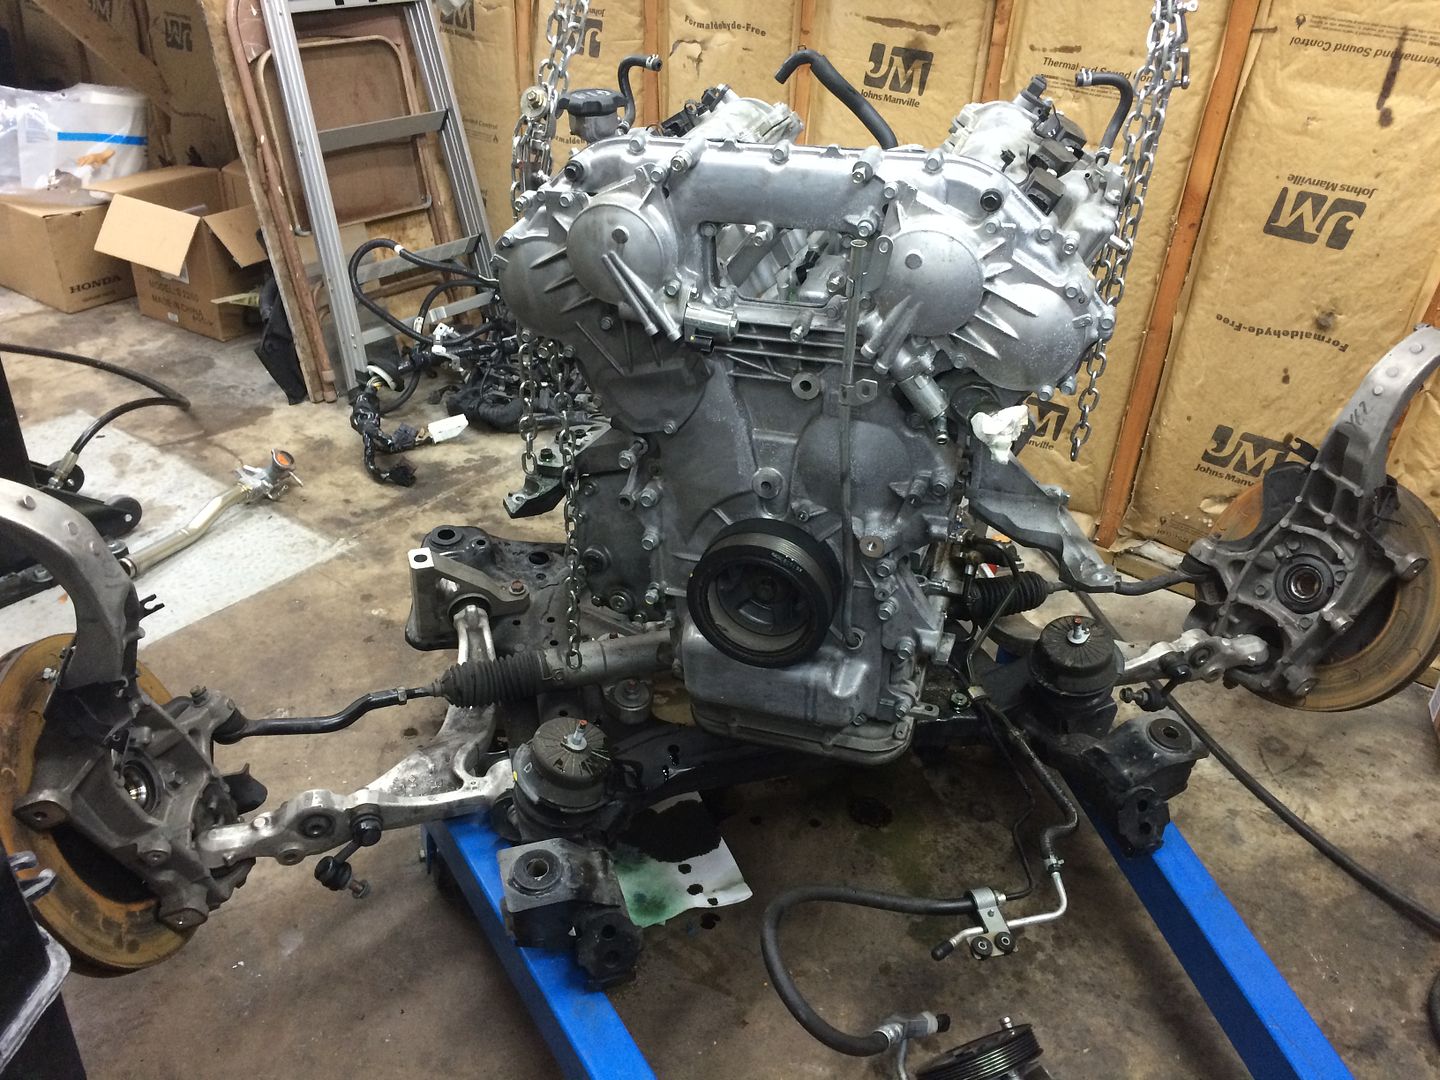
First I should probably get that pesky transfer case out of the way 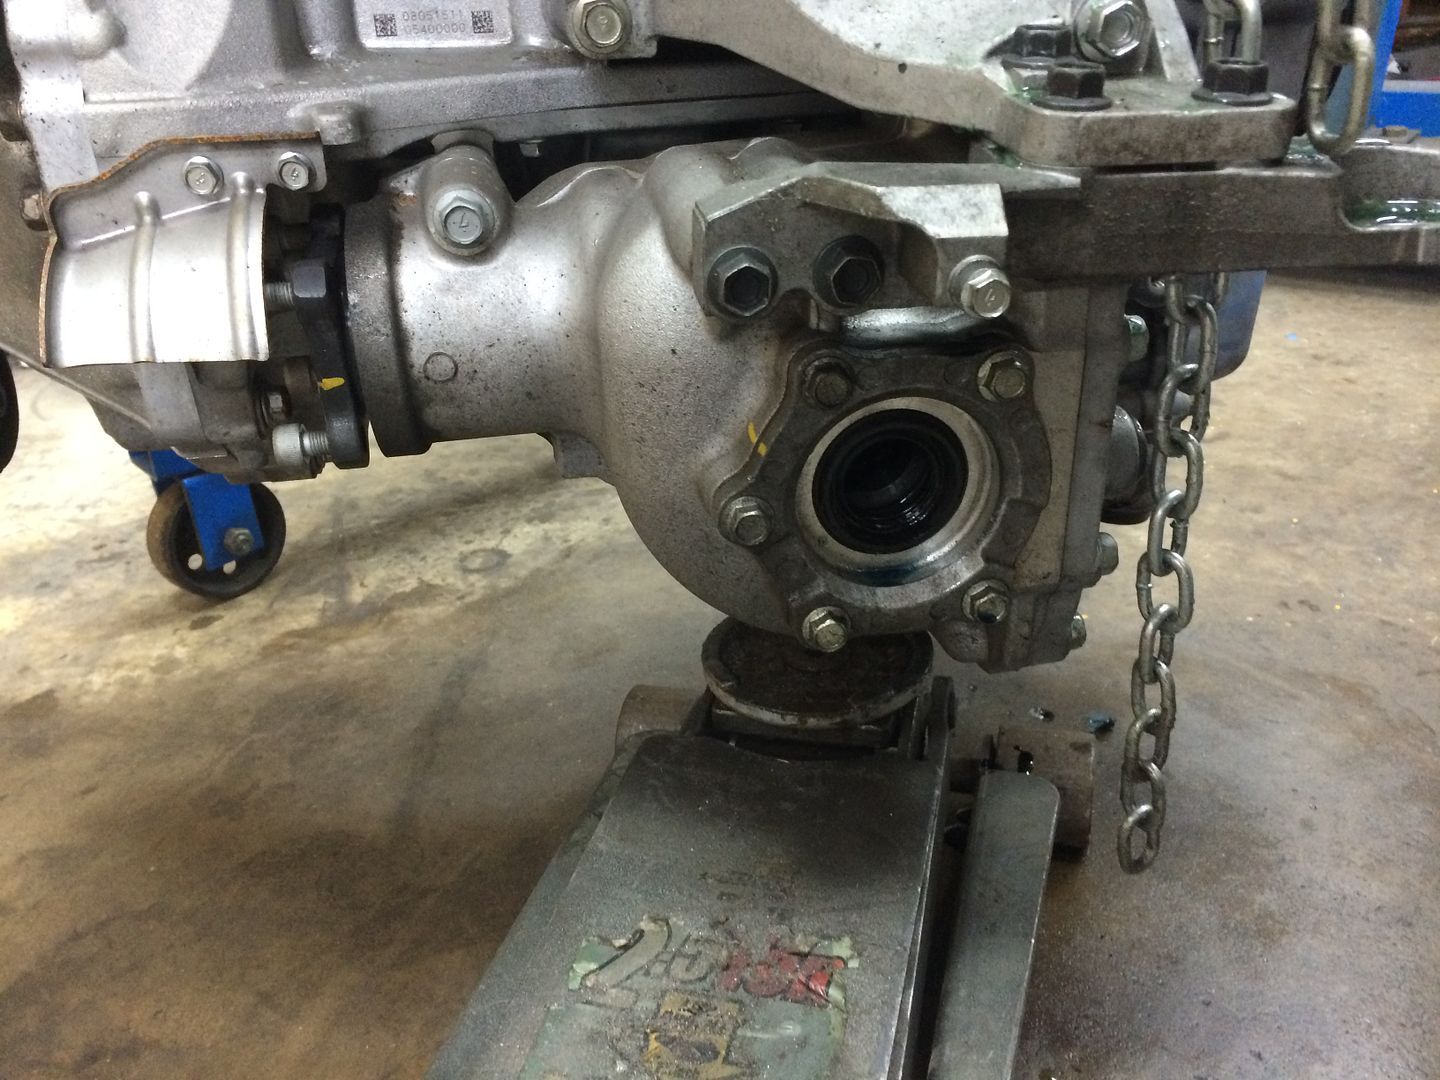
And then I need to remove the bell housing, it works kind of like a flexplate on regular automatics 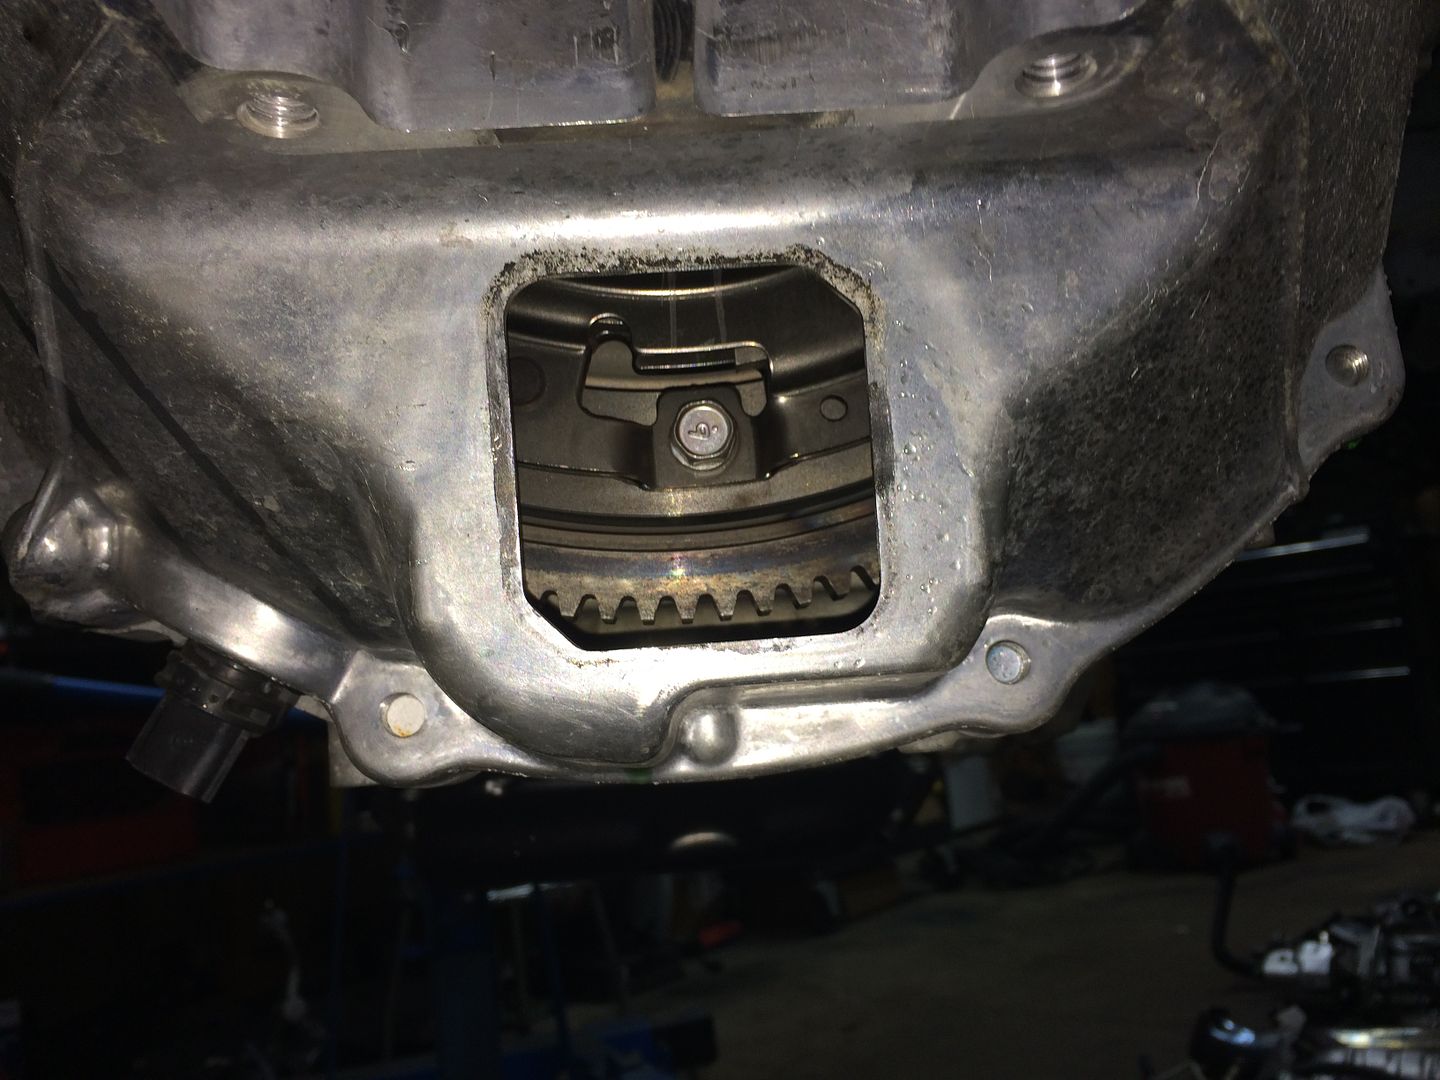
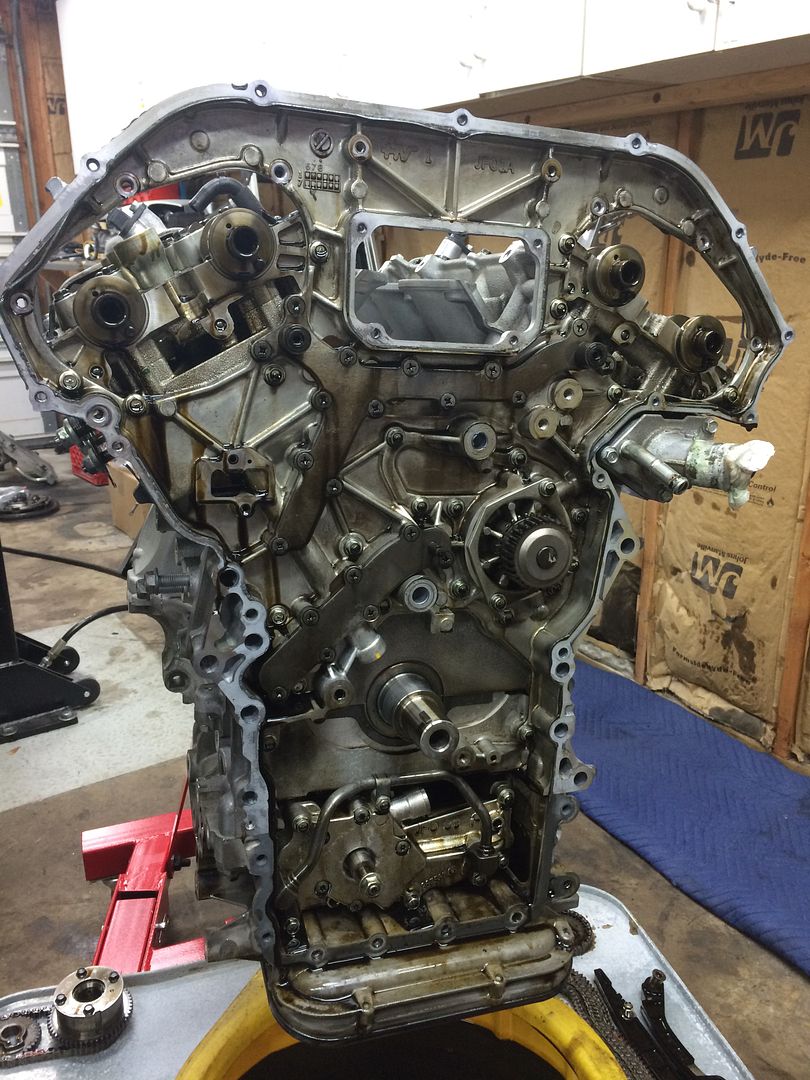
Now its looking pretty good! 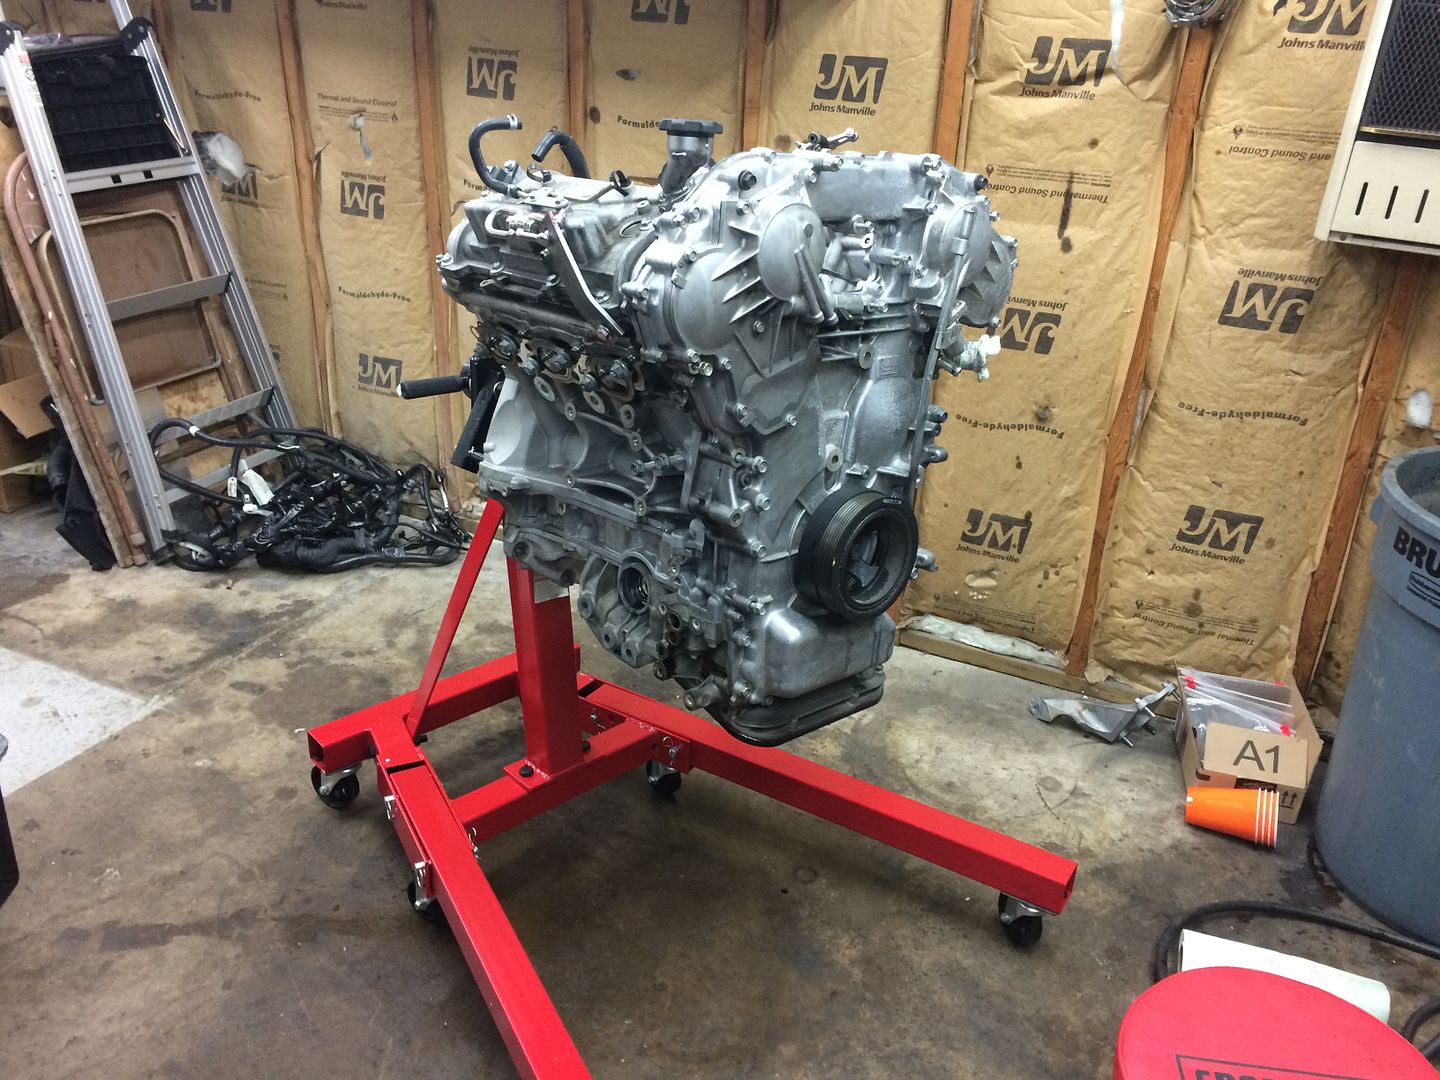
Time to start taking the engine apart 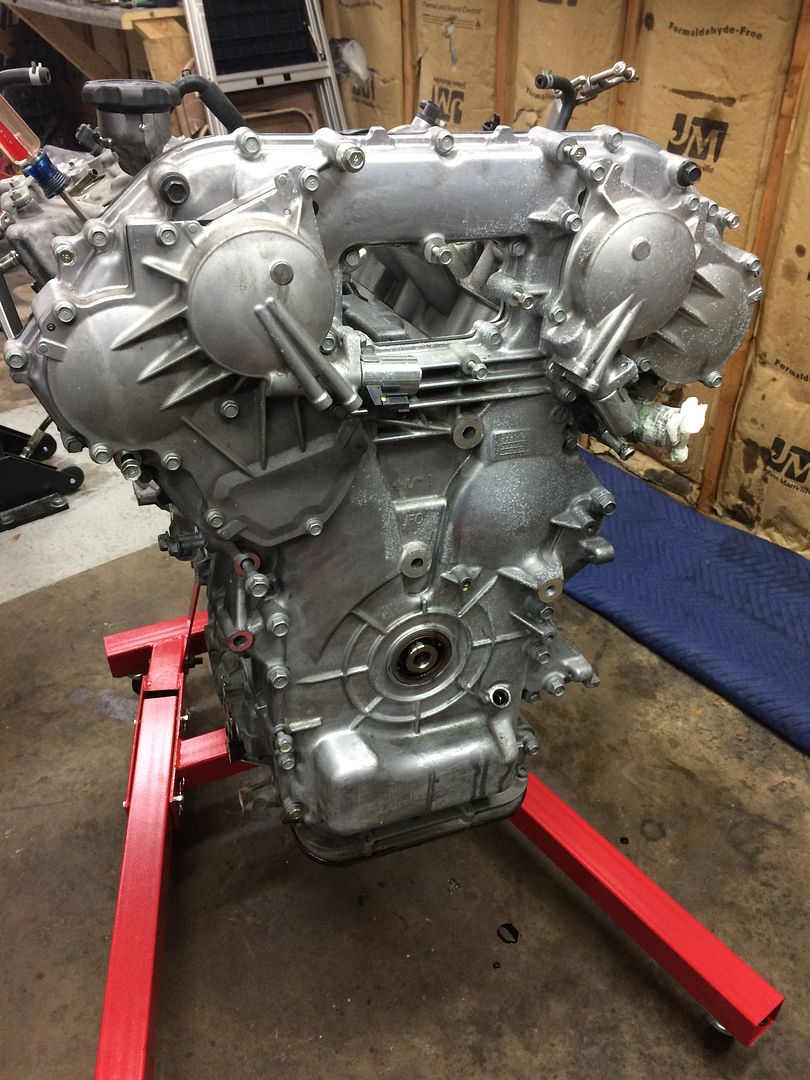
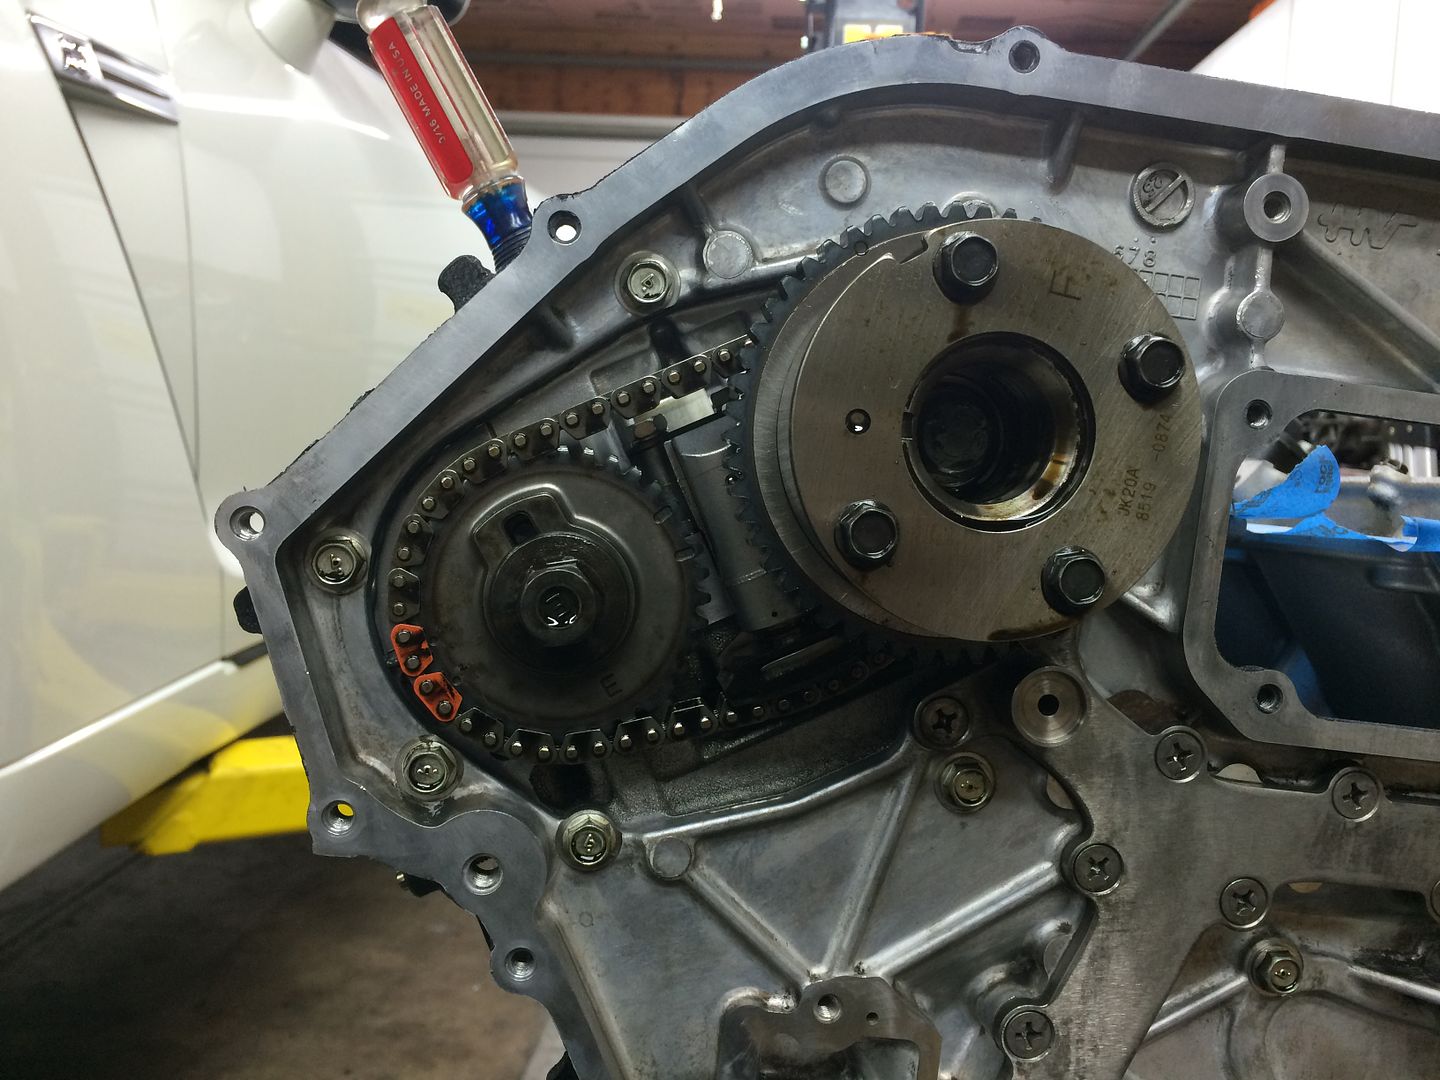
The timing cover has two secondary covers which house the VVT circuits. They use a solenoid to direct oil which acts as a hydraulic system to activate the VVT 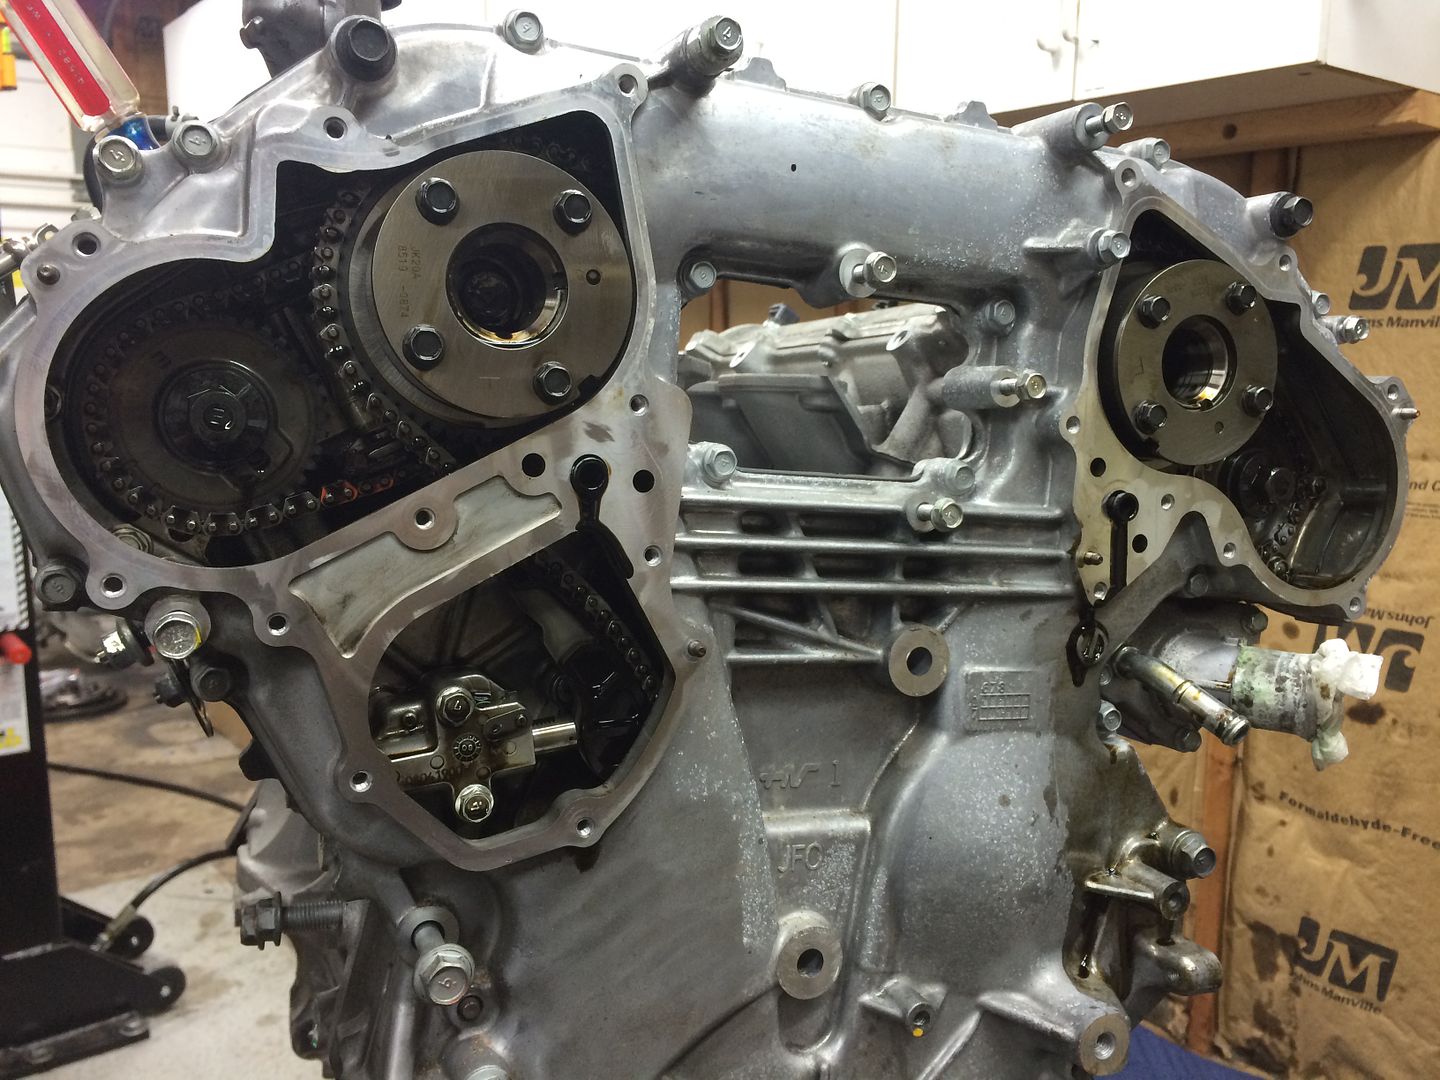
After removing the 25+ bolts that hold the front timing cover on, and significant prying - the cover comes off. Nissan uses RTV on the entire cover so its kind of a daunting process. The timing system looks like a convoluted mess, but its really not that bad. 
Primary chain removed 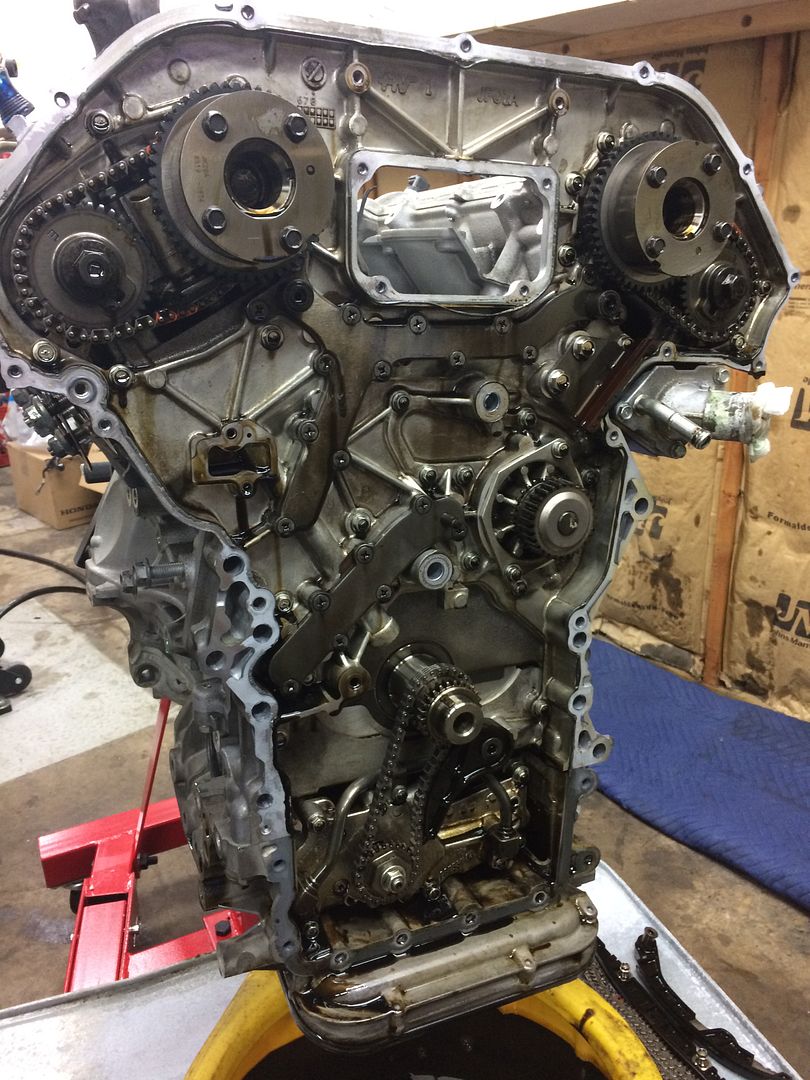
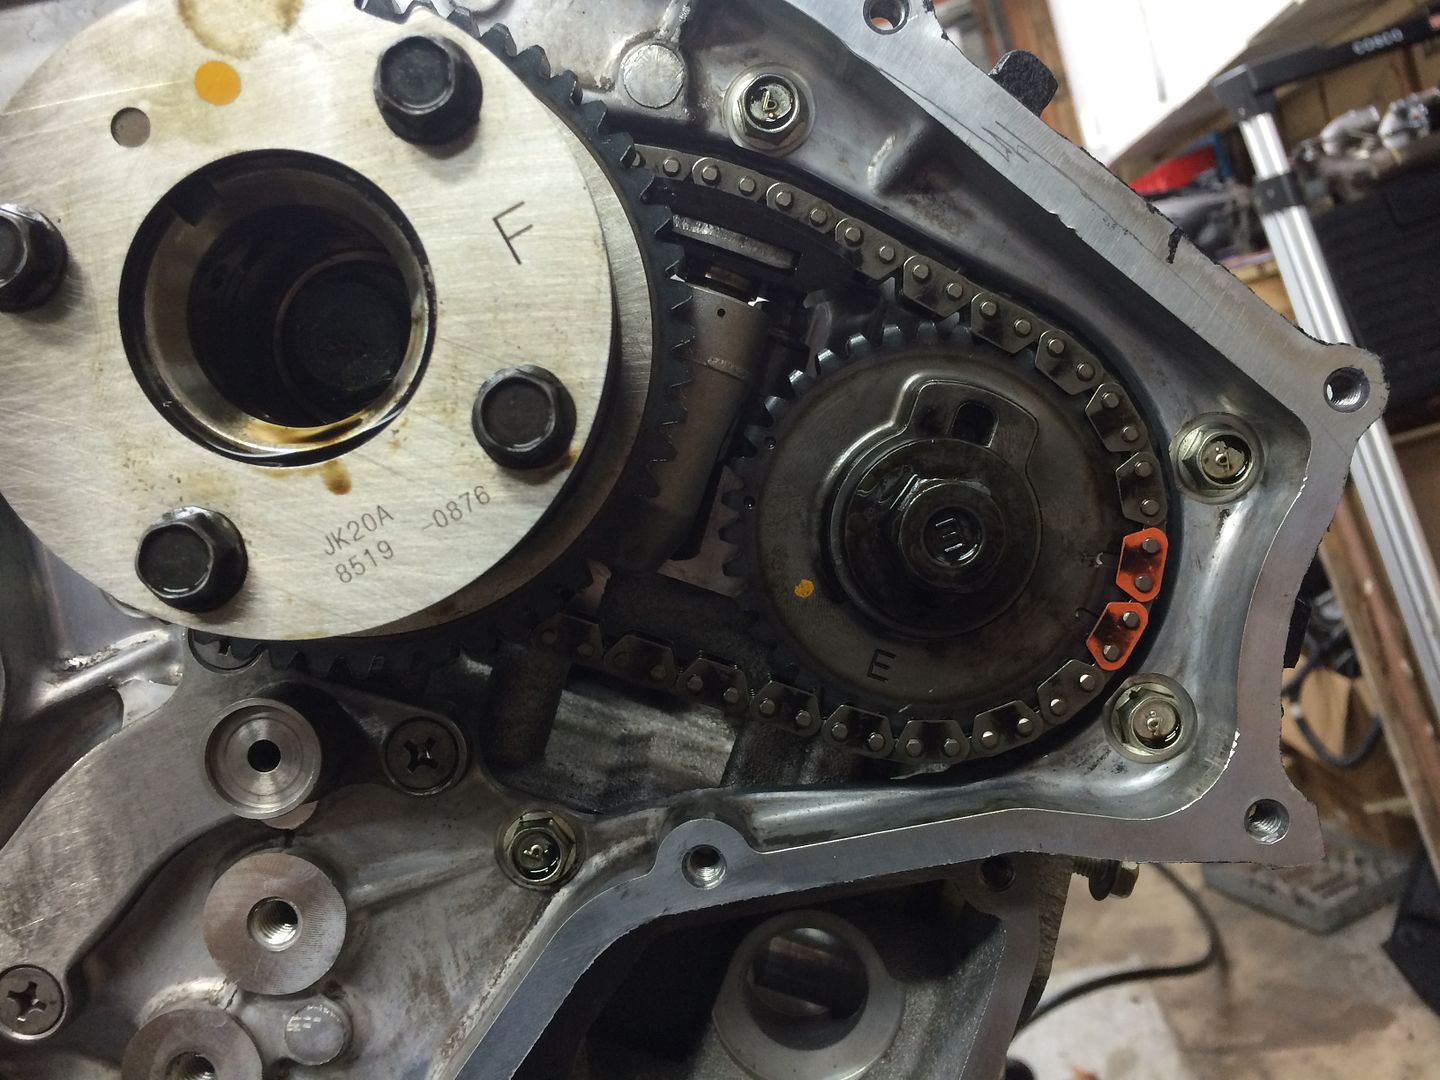
The oil pump is driven separately, and the intake/exhaust cam gears are mated on their own chains and tensioners
Next, lets go ahead and get access to the cams 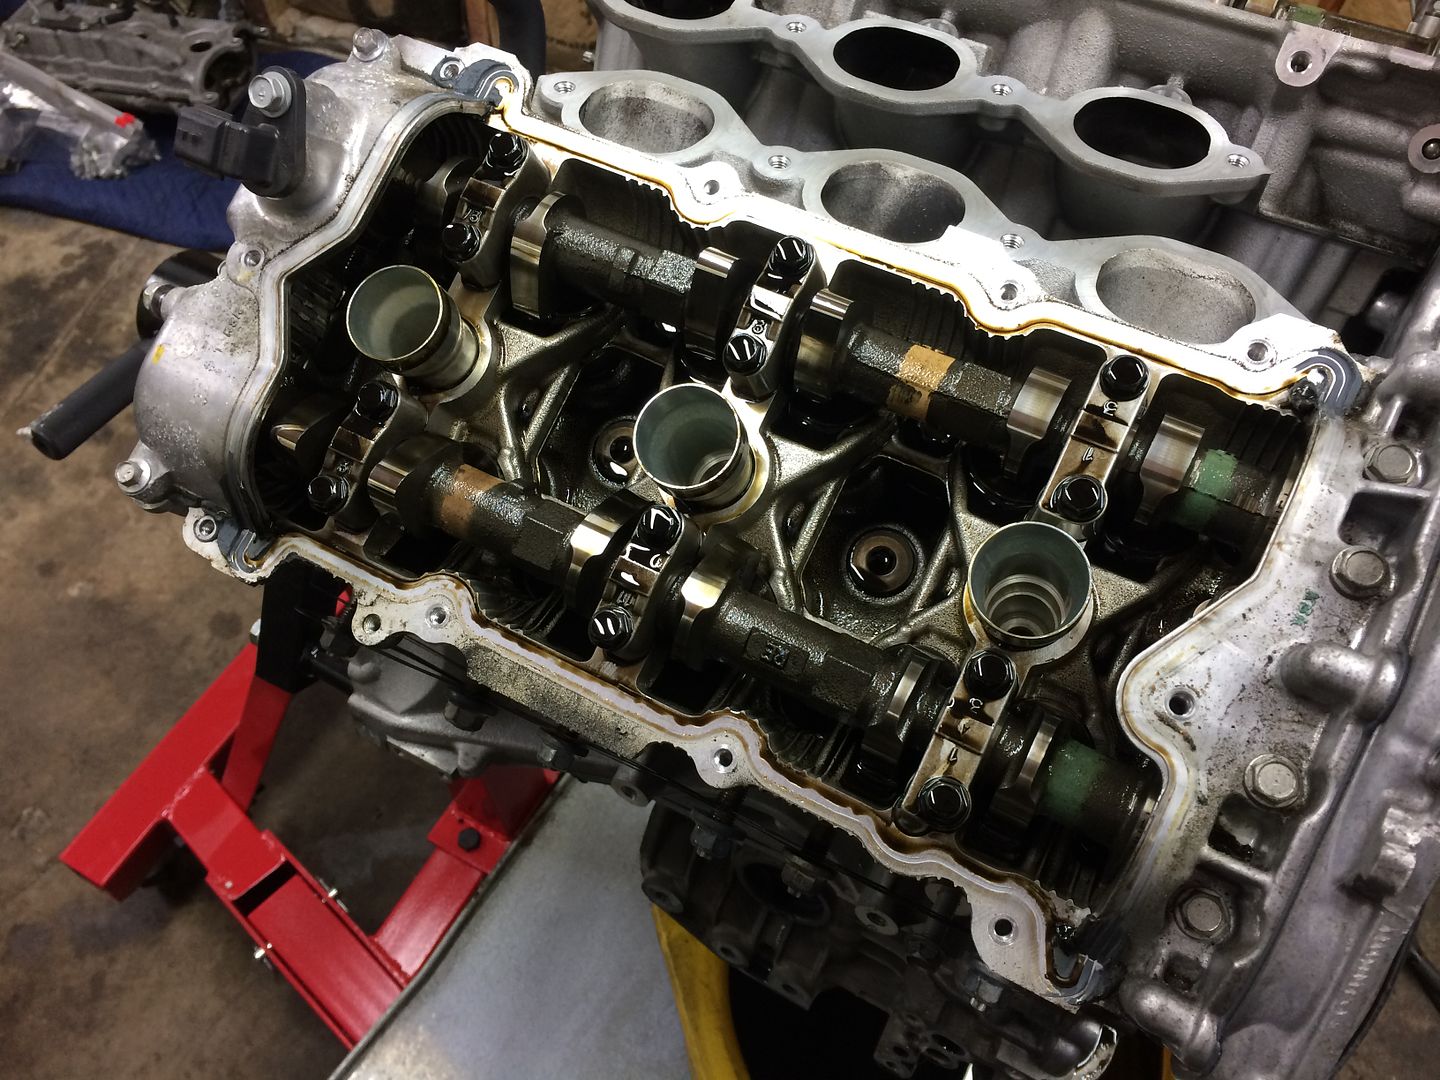
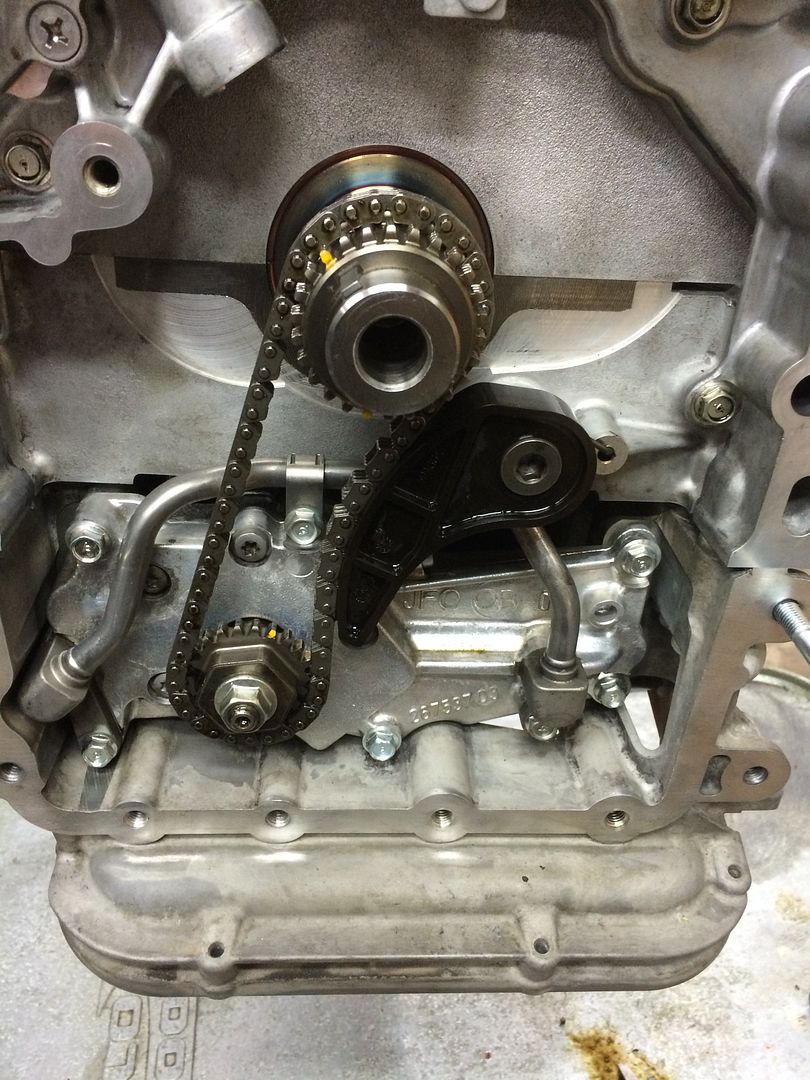
Tensioners and chains removed 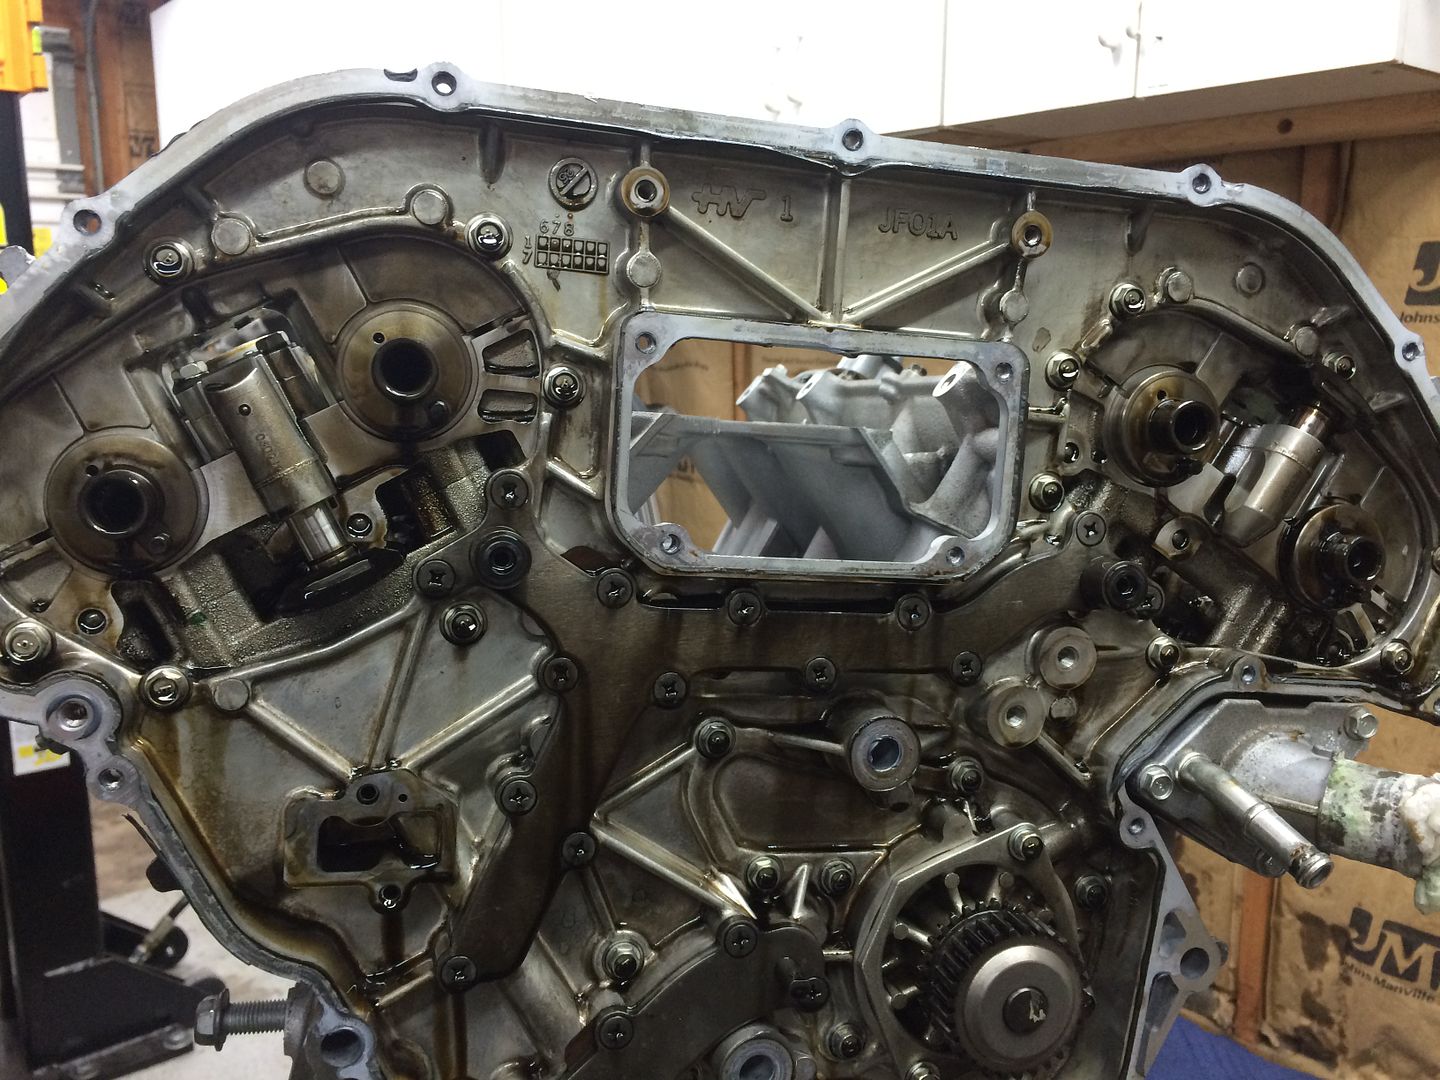
The water pump assembly can be pressed out by using larger bolts that thread into the mounting holes 
Labeling every cam cap and orientation 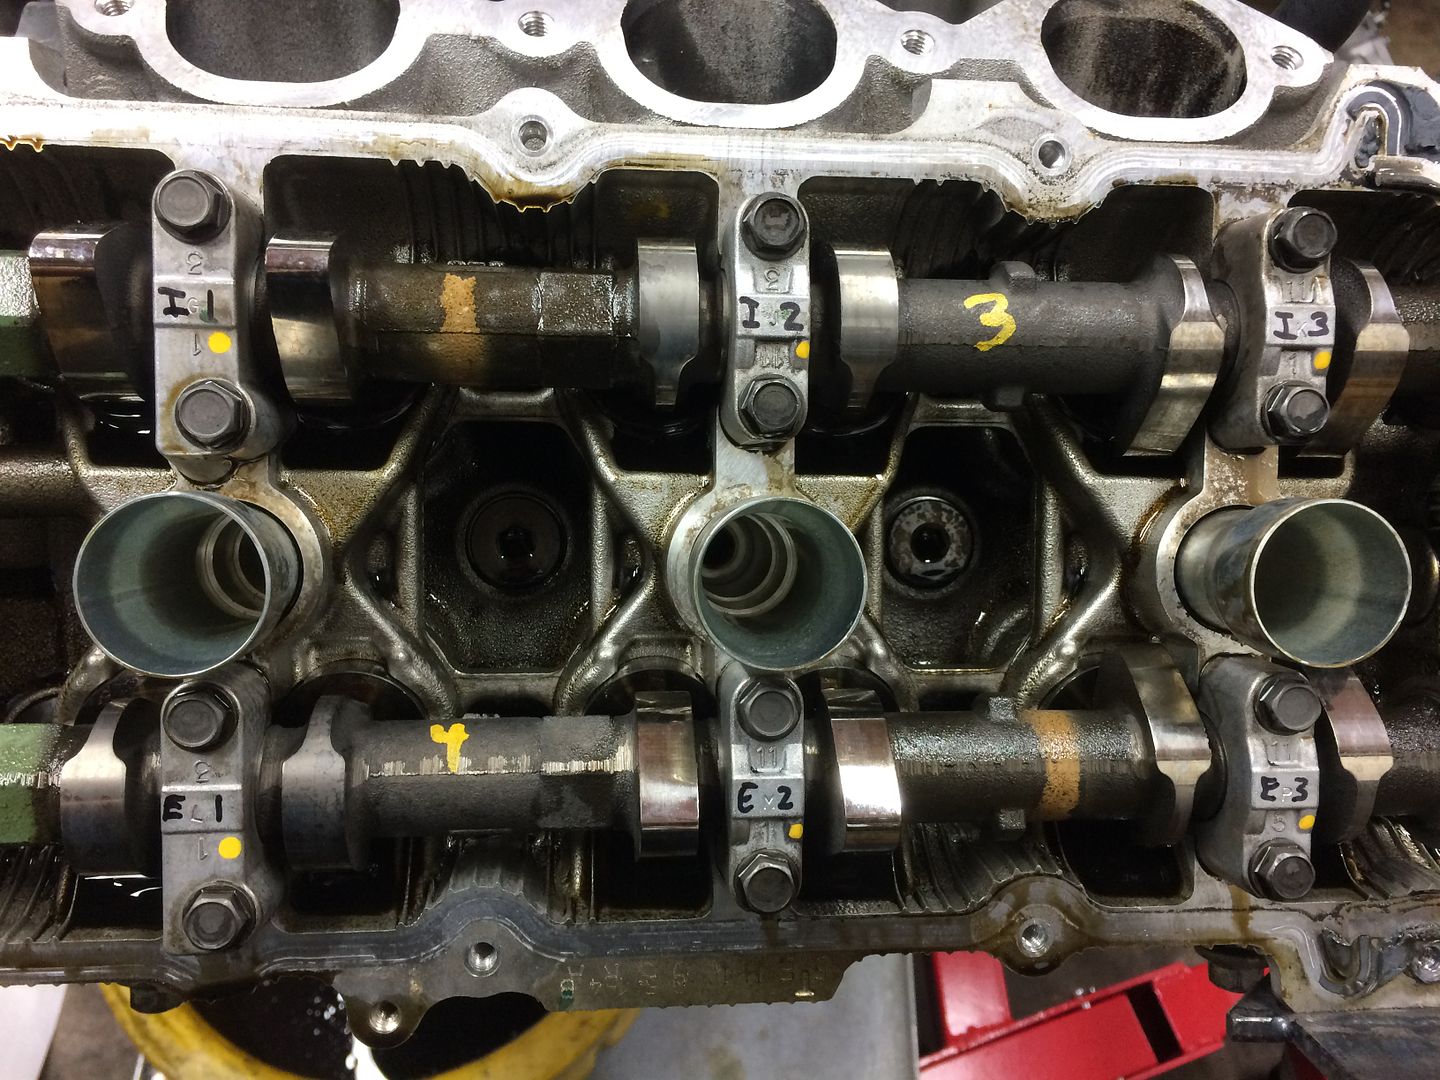
Cams out 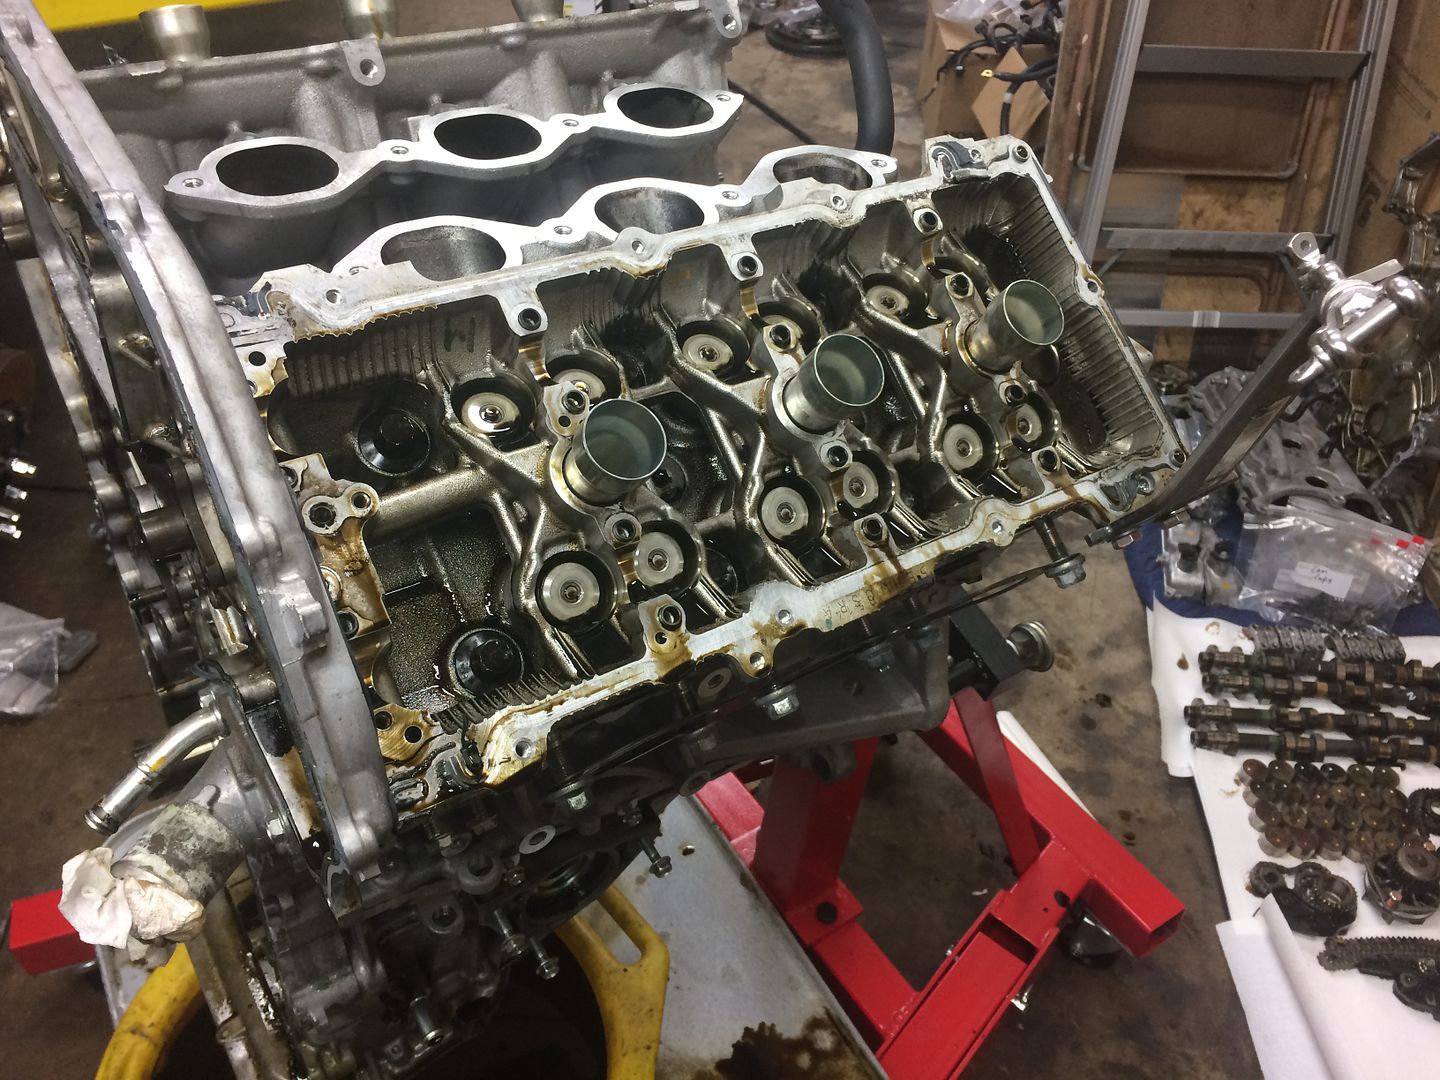
And here's your entire valvetrain assembly 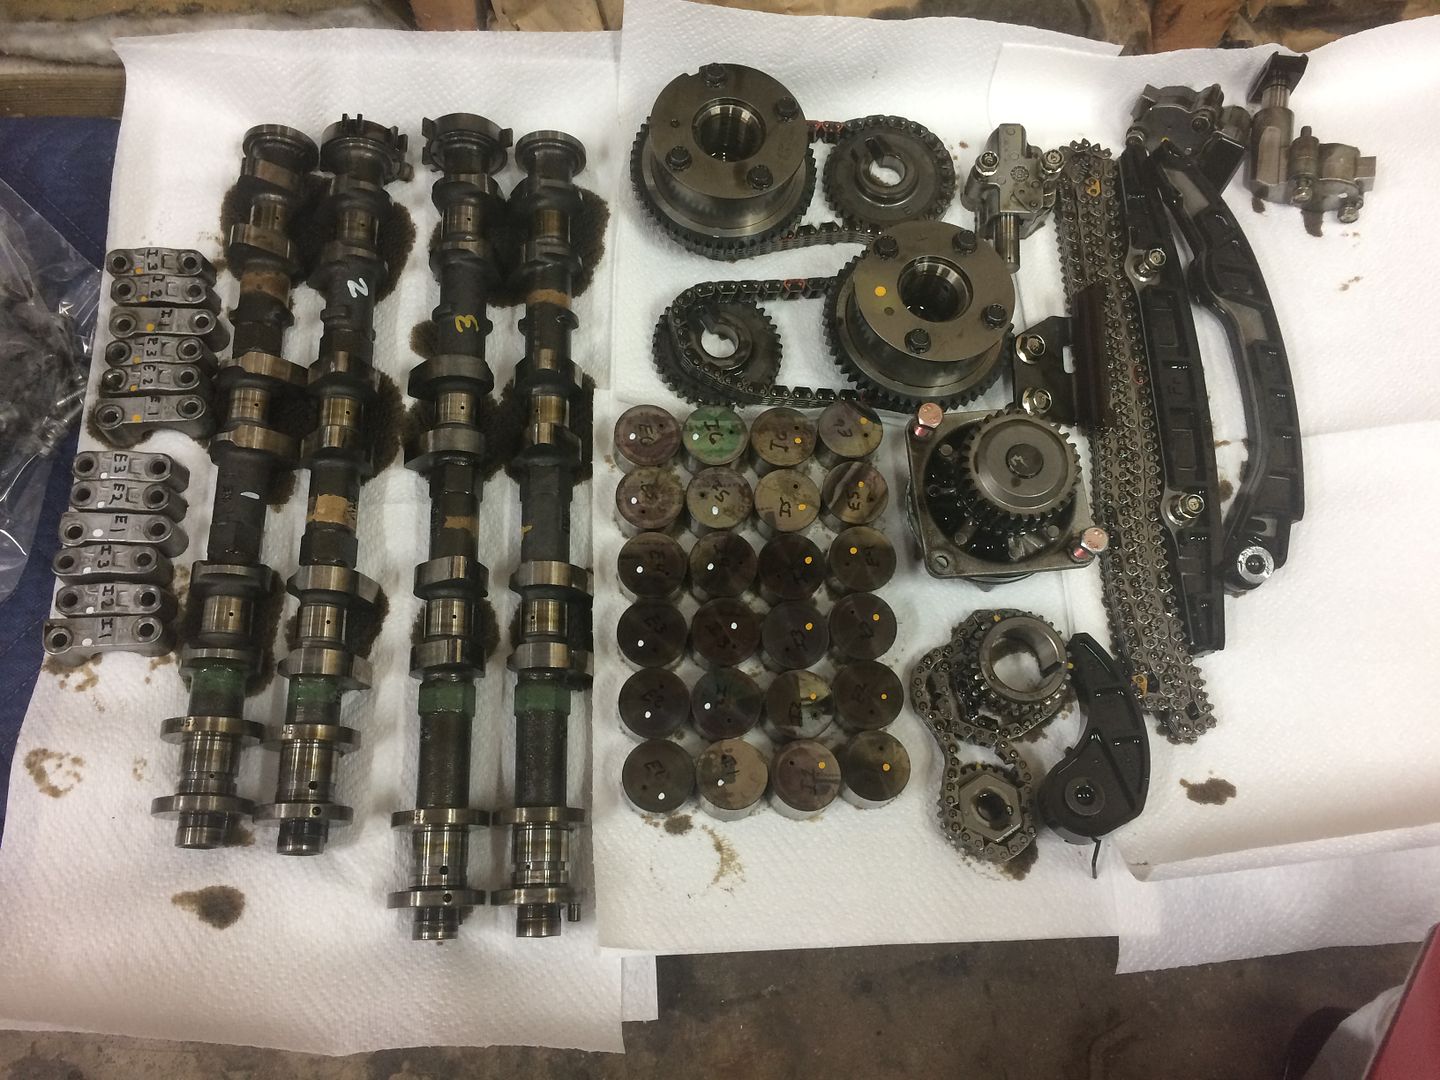
Now lets get to some shiny parts. For the shortblock, I went with Manley Drop-In pistons and Manley Turbo Tuff Rods. From the factory, nissan stamps the cylinder bore diameter by way of a "grade" There are only 3 grades available. So as long as you measure your cylinder and it still coincides with the grade diameter, these pistons go in w/out issue (although you should still check your piston to wall clearance) 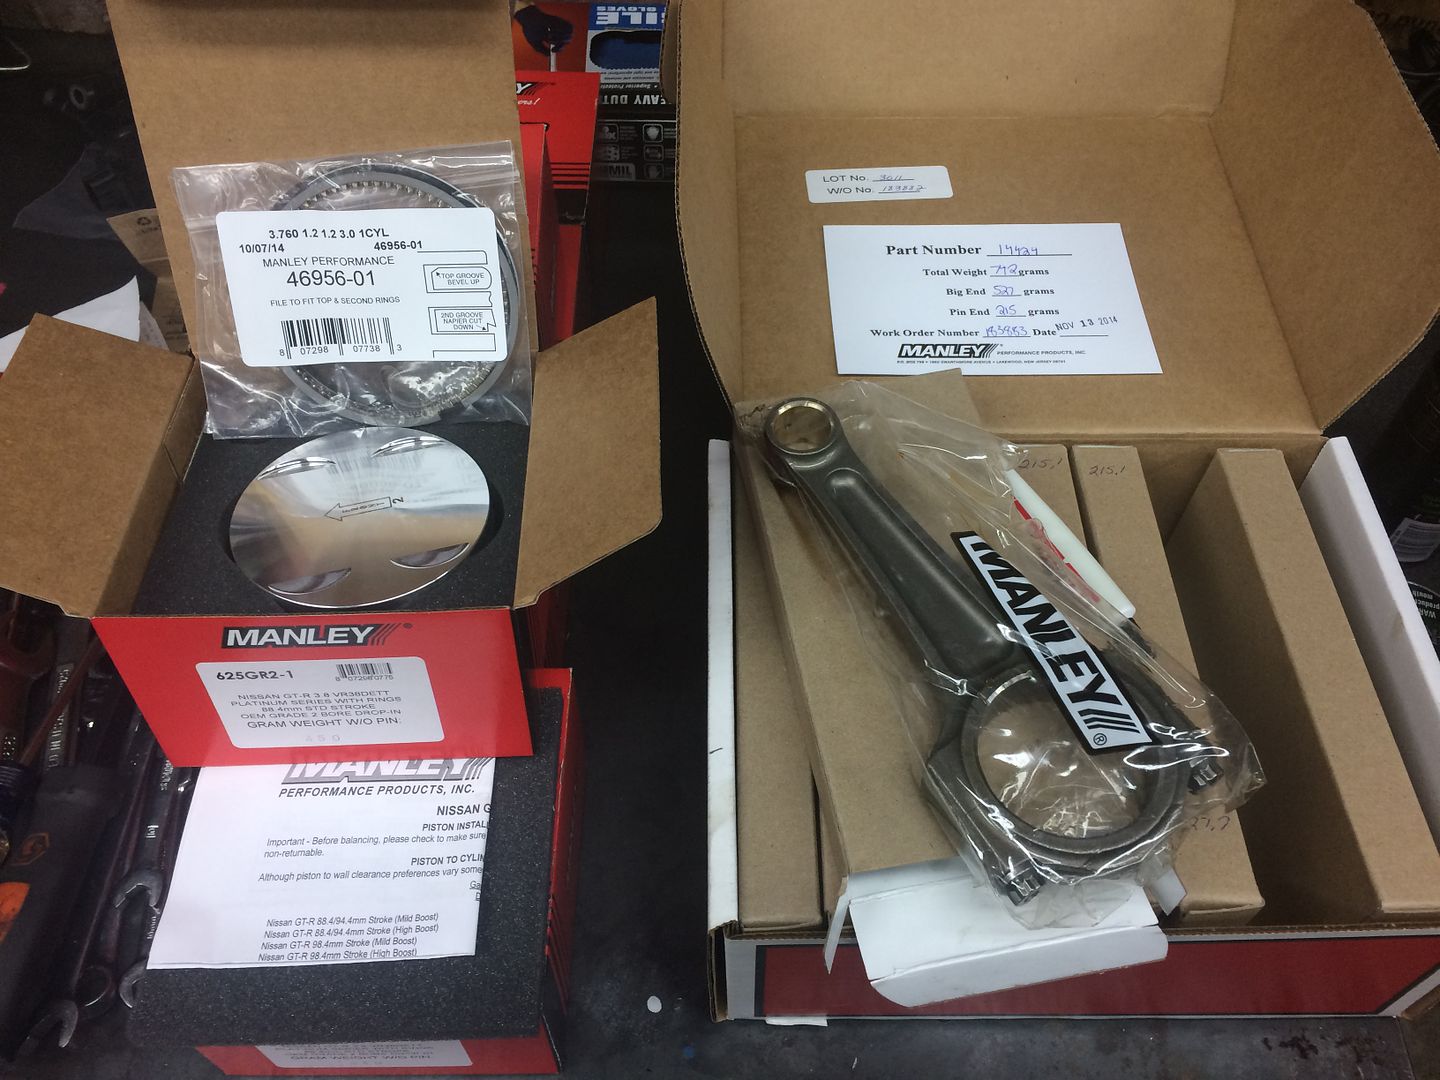
So lets flip the engine and work on getting the factory stuff out 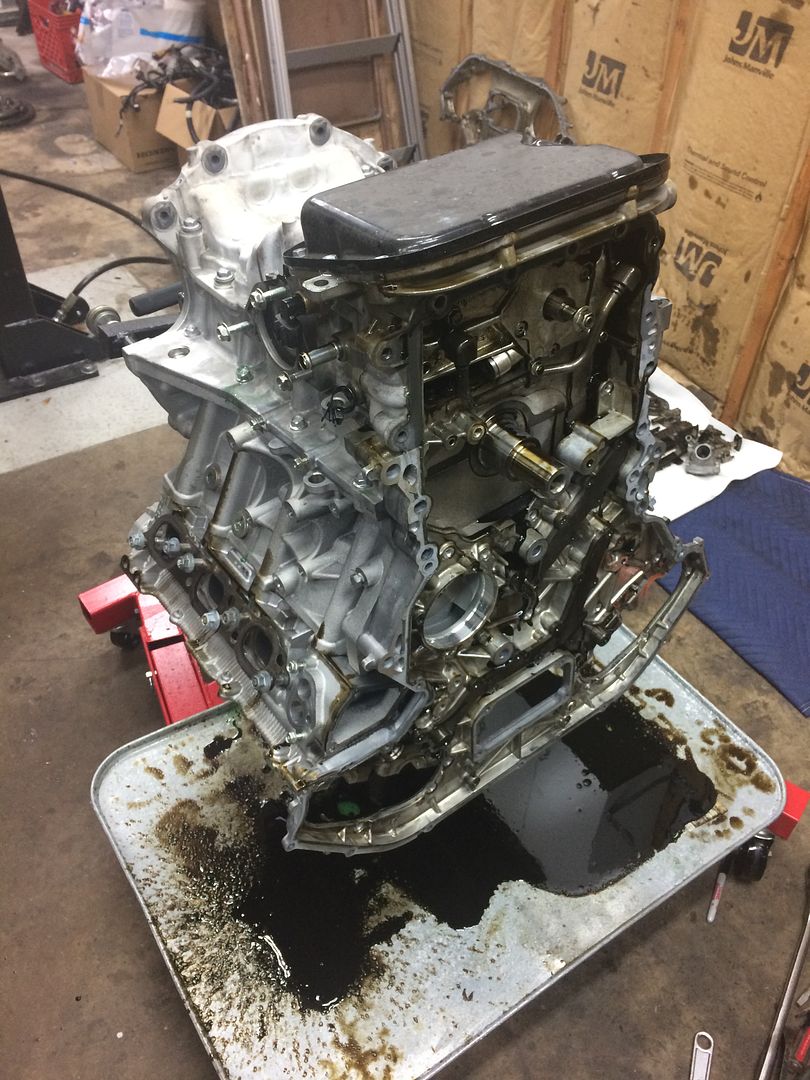
Nissans oil pan design really changed here. It starts with a small "sub" pan for the sump 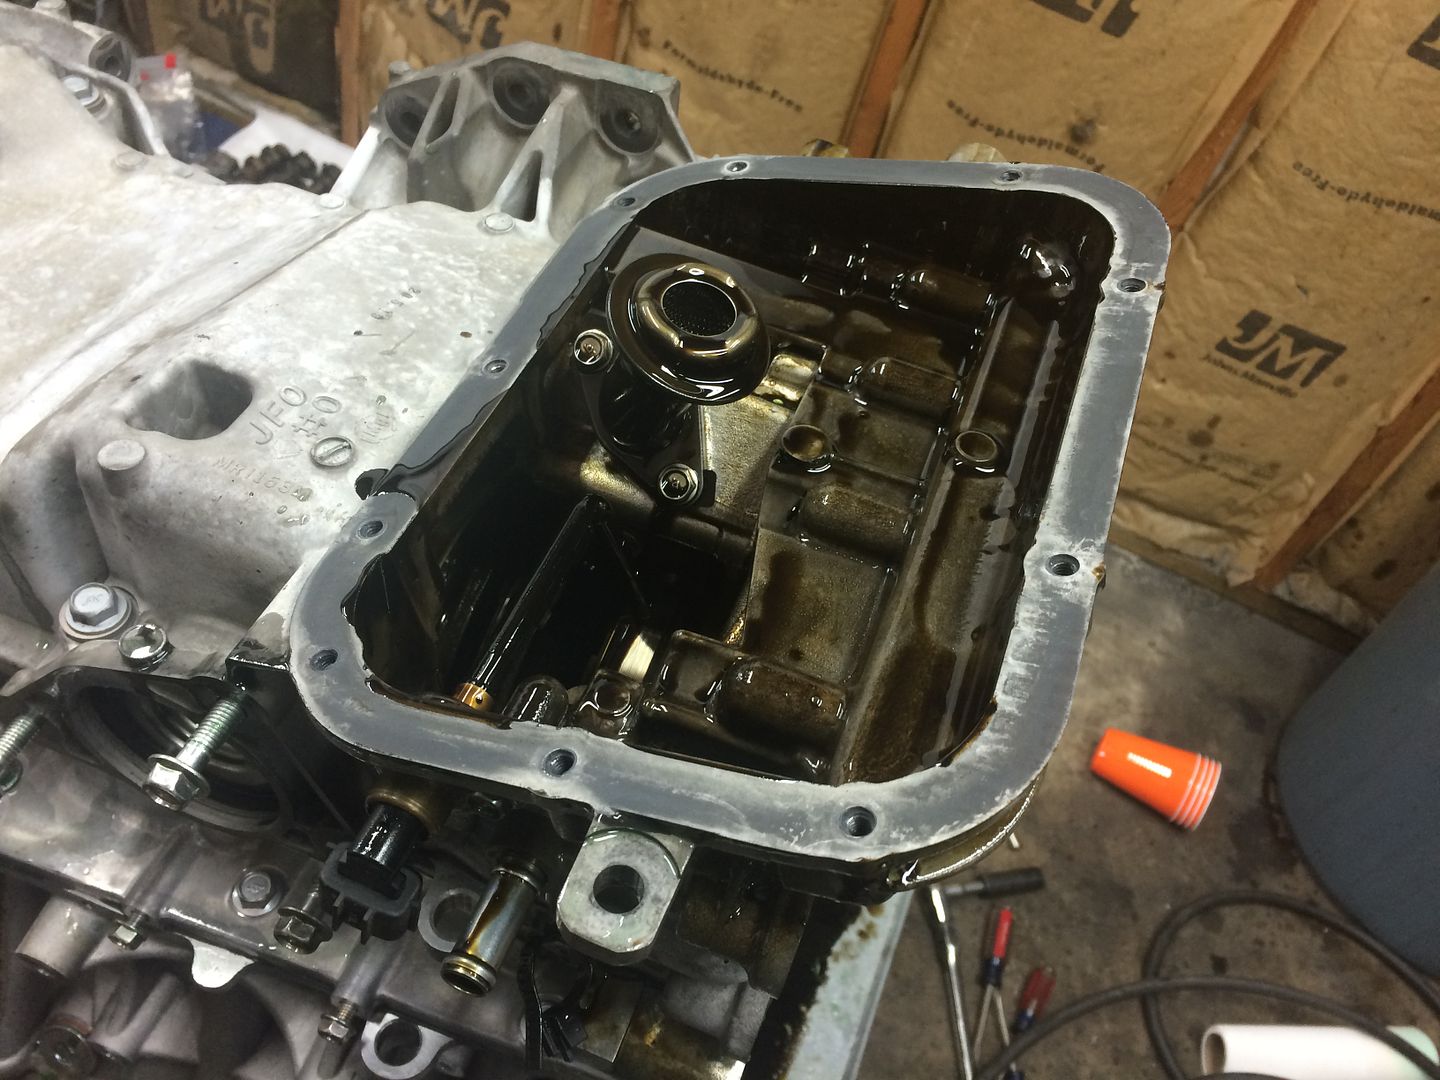
You can see it down and to the right but the primary oil pan assembly its giant. It actually houses the oil pump so it all comes off in one assembly - kind of neat actually 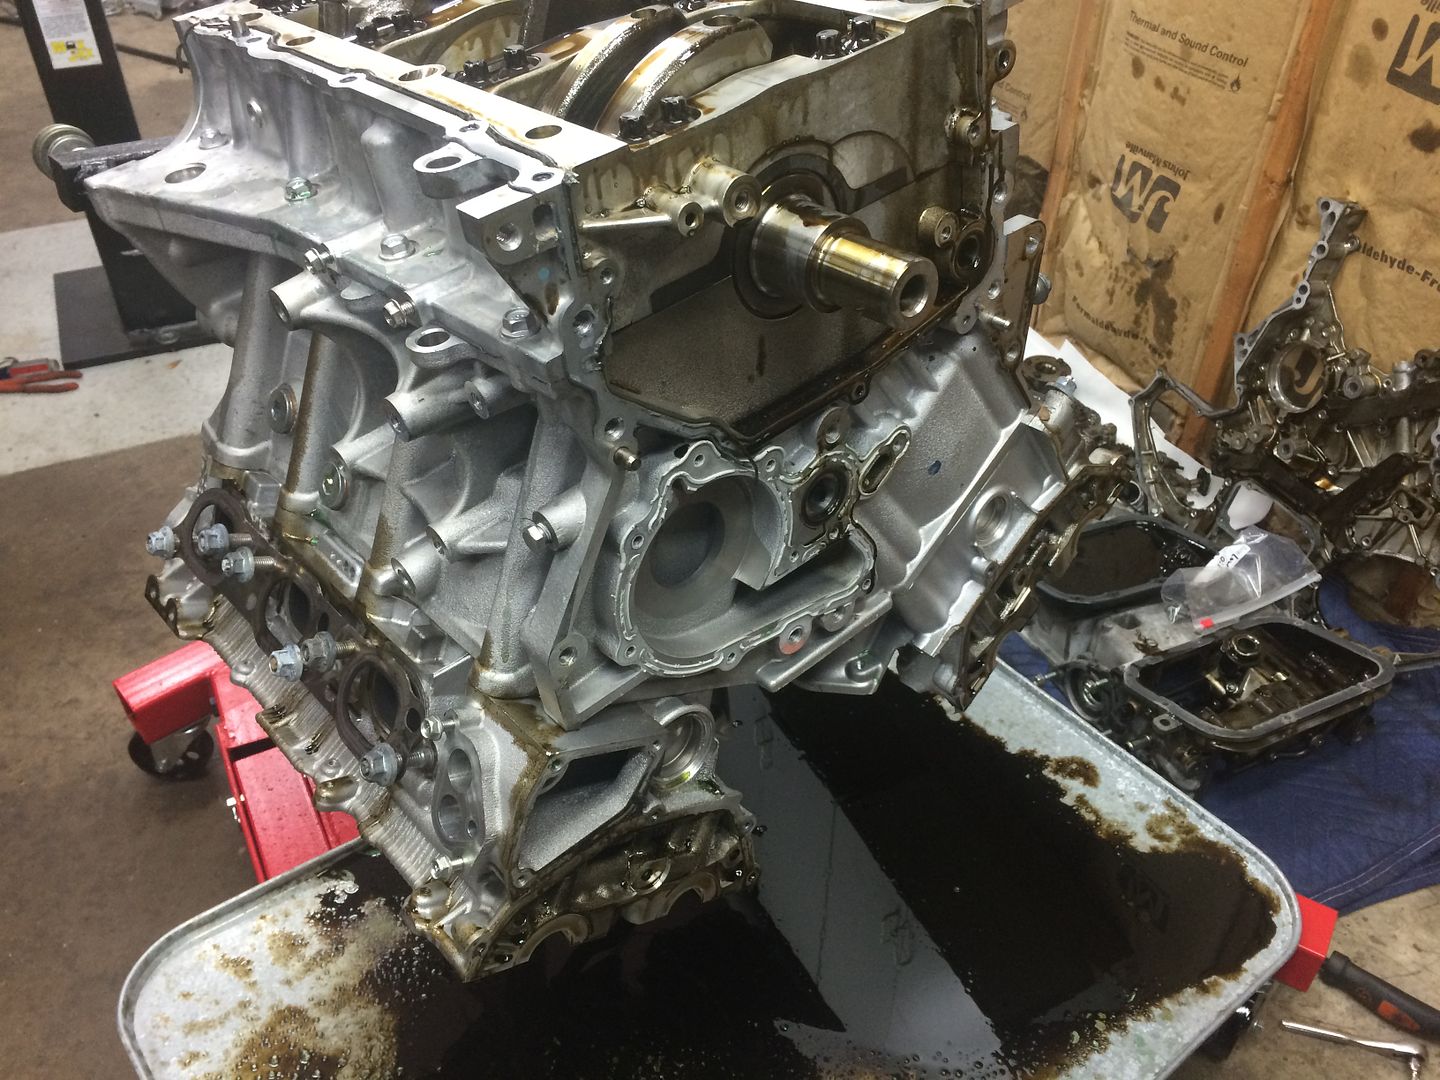
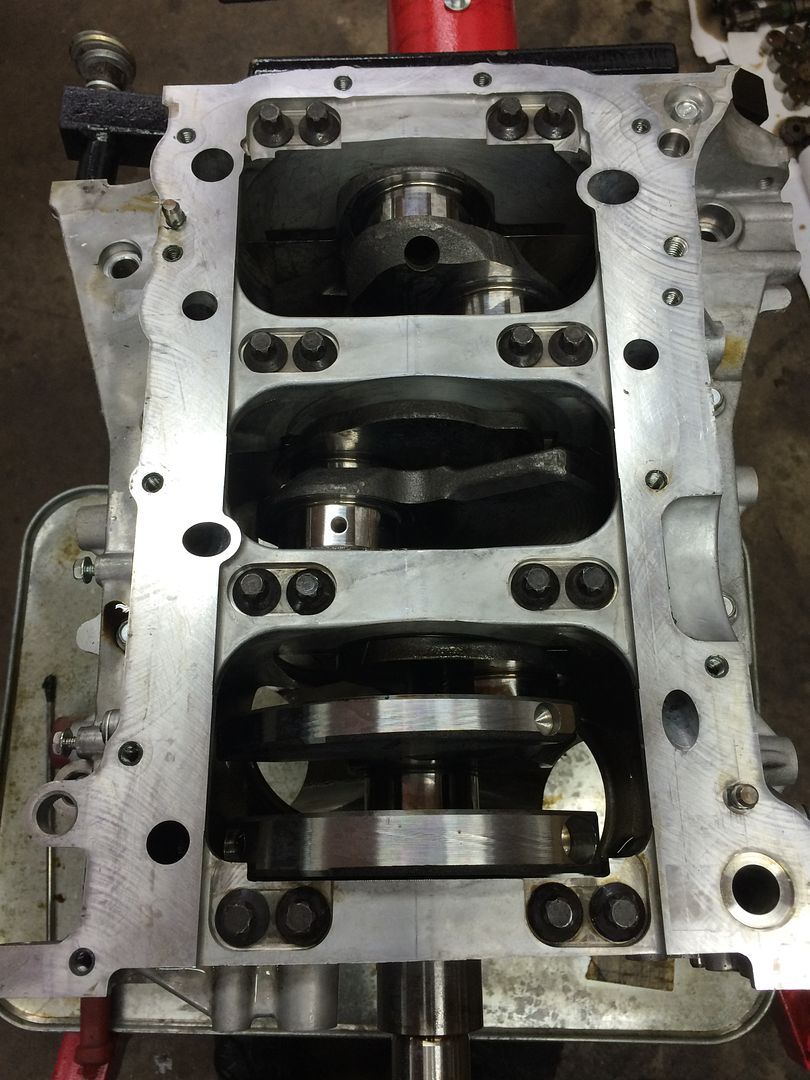
Now here we have the lower block assembly which acts as the girdle 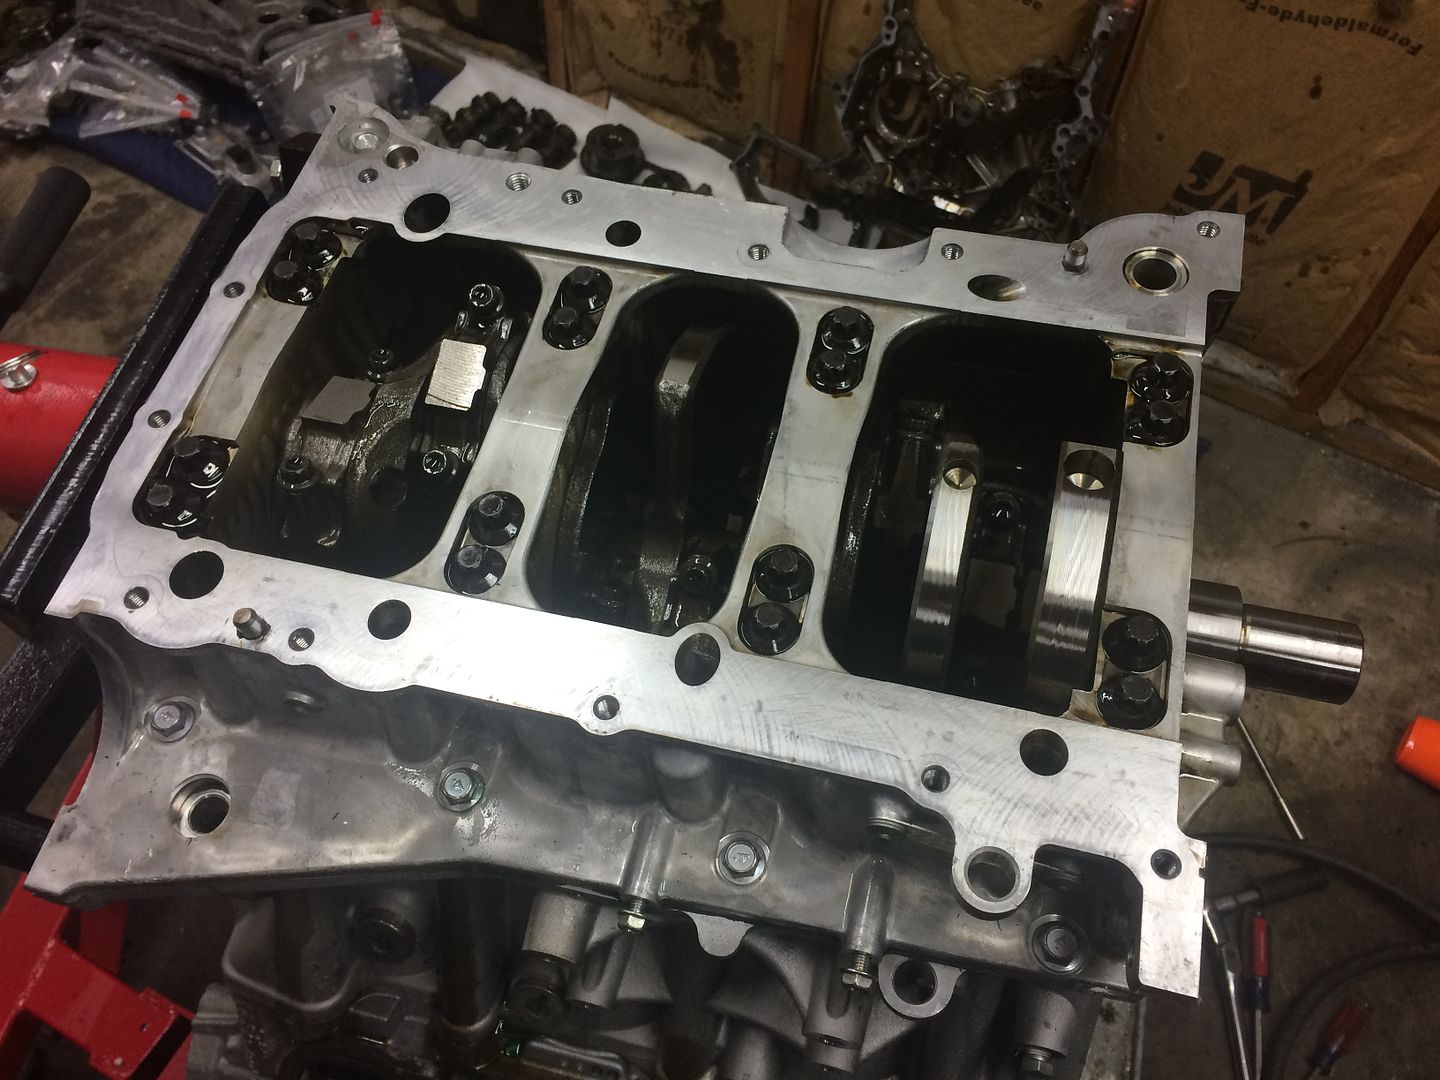
I spent some time cleaning the heads up in preparation of taking them off 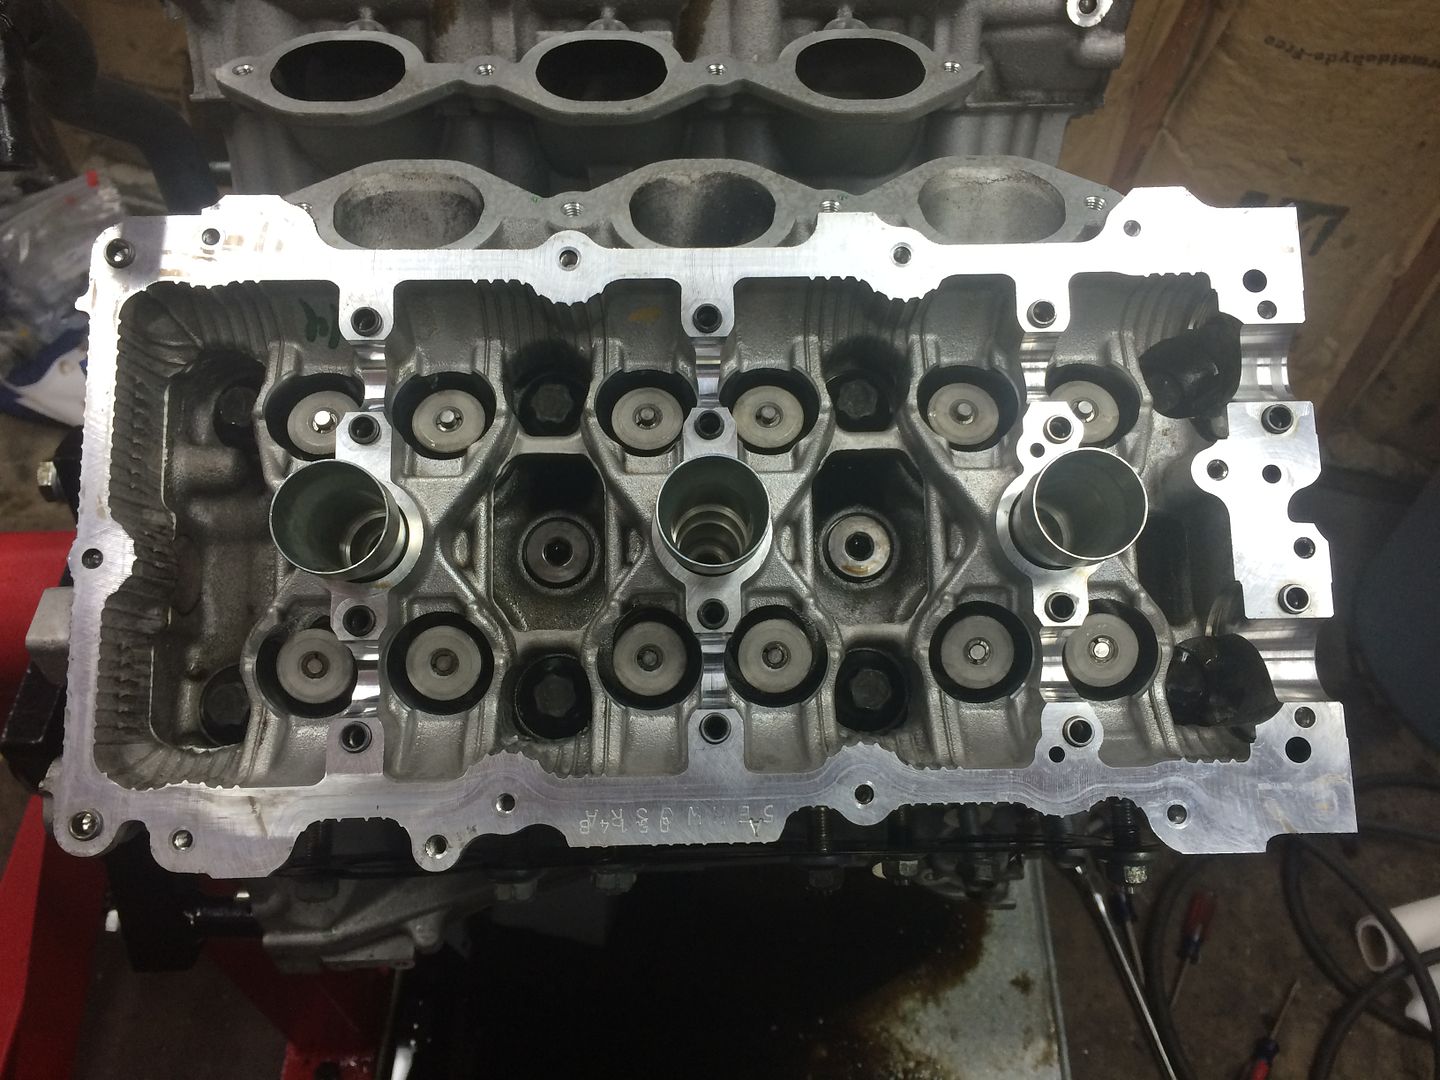
That water pump housing area looks familiar doesnt it?
Here's a whole mess of GTR parts 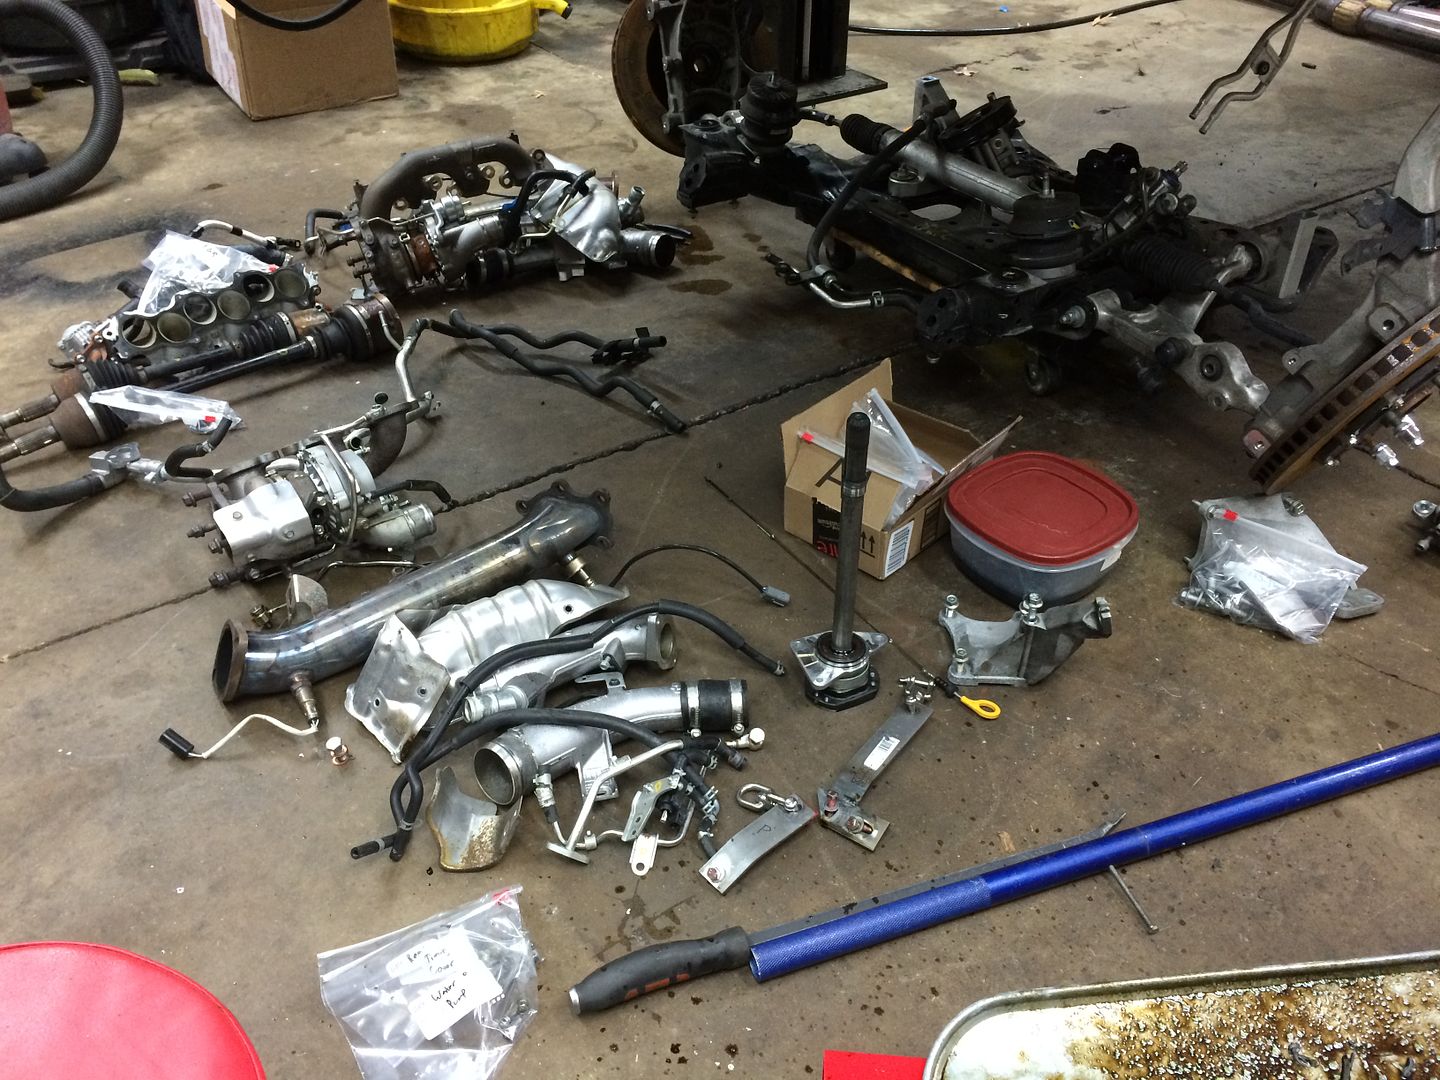
Cleaned up 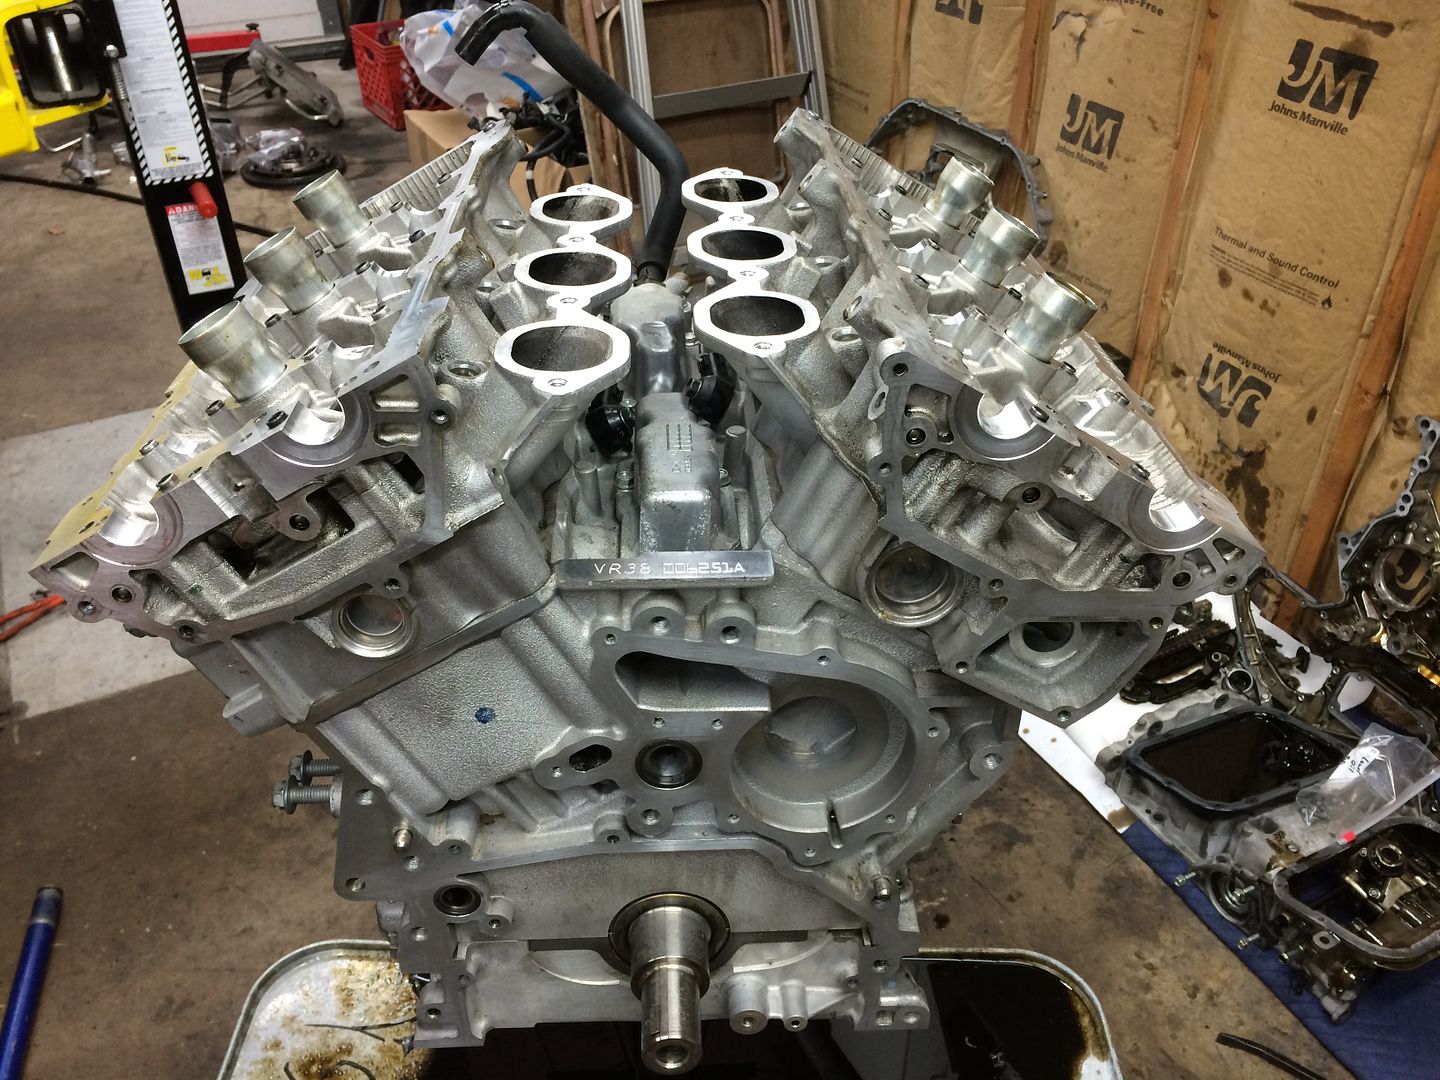
Here's the back of the primary timing chain cover...you have to clean the entire thing to get all of the RTV off of it.... 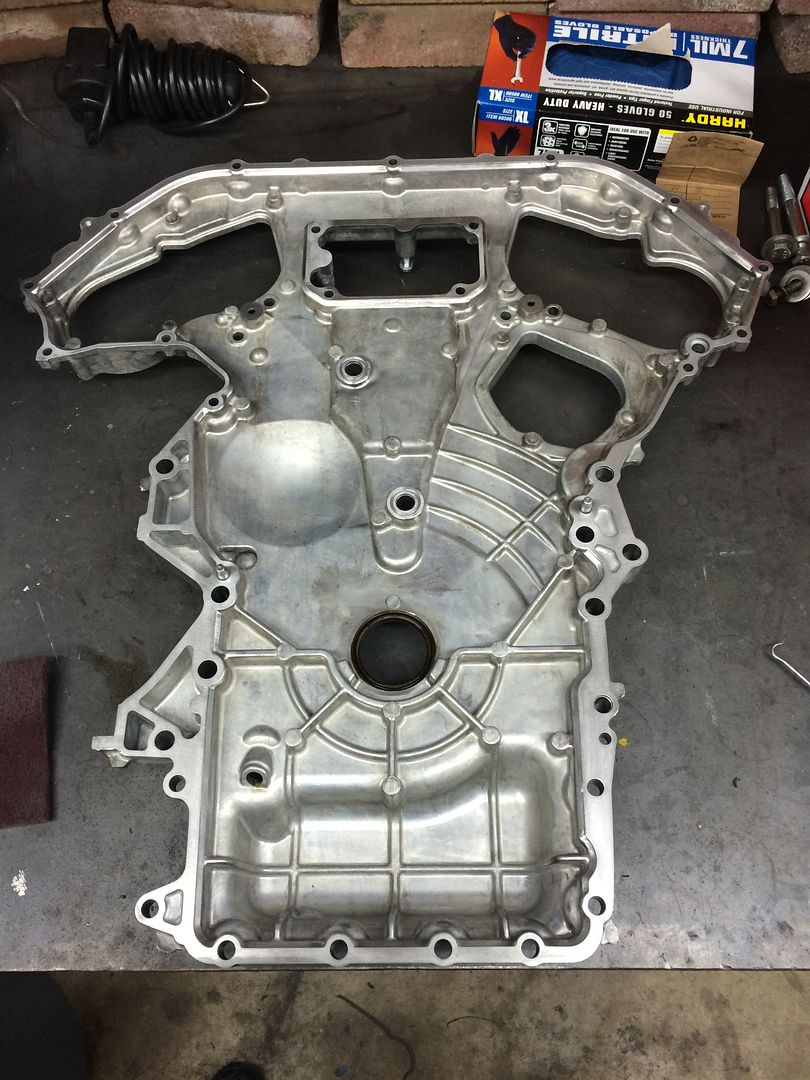
Here is the rear timing chain cover....notice all of the provisions for oil and cooling circuits 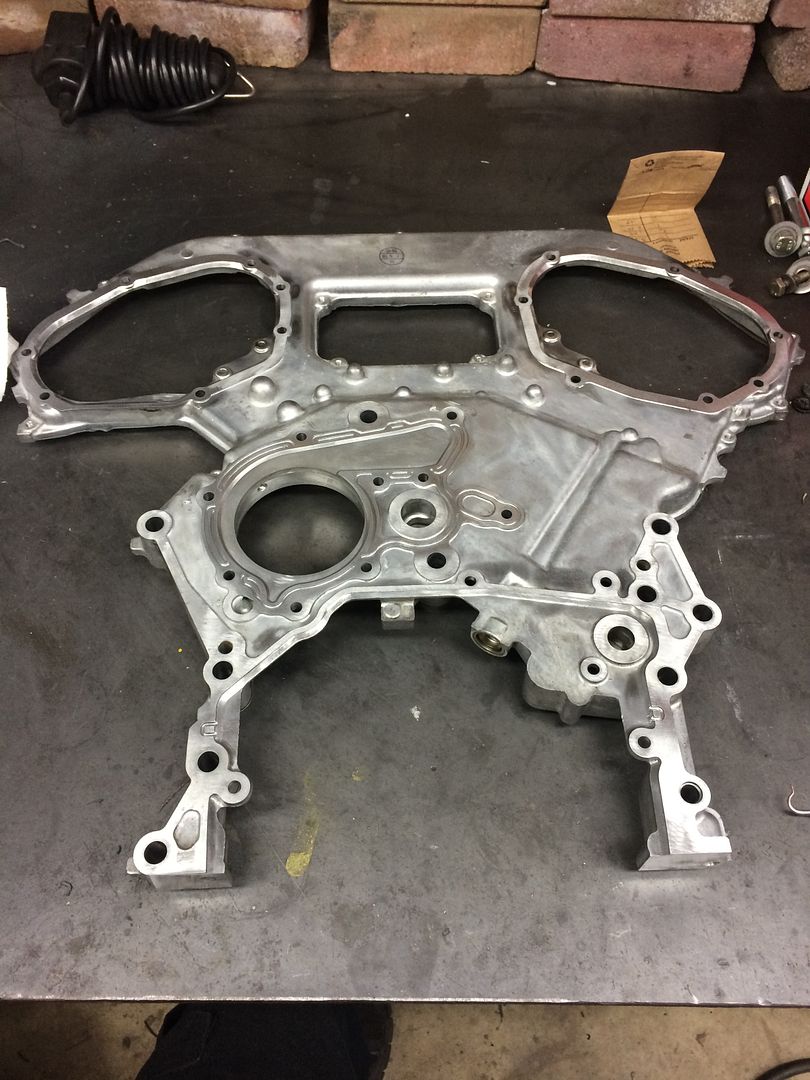
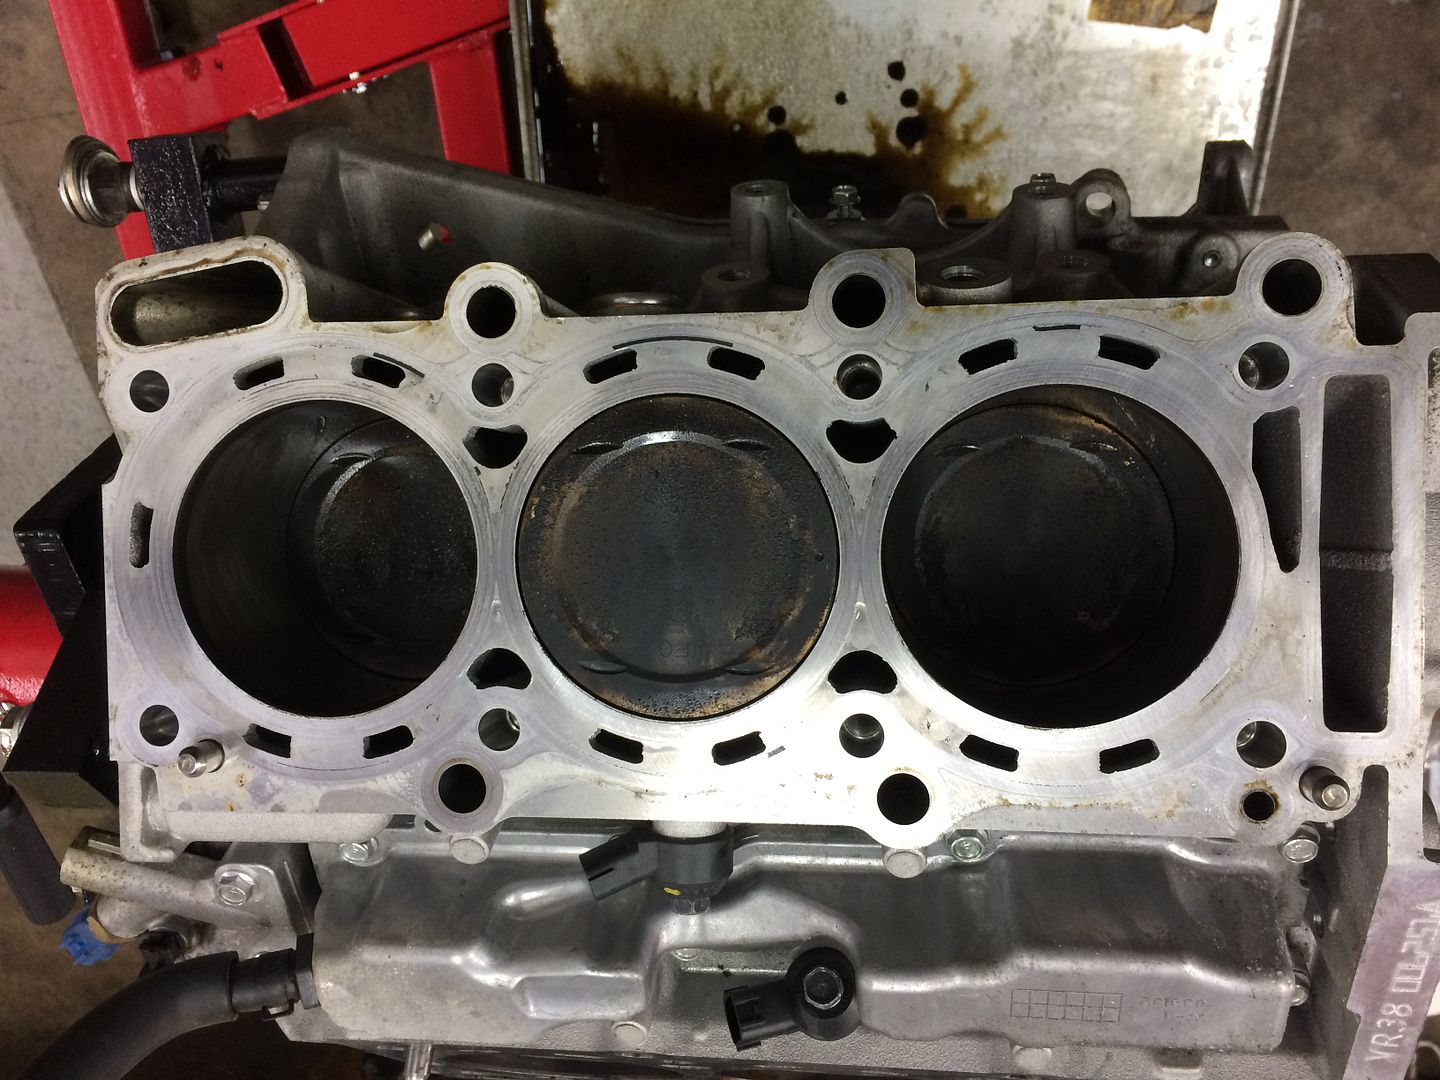
Next I removed the cylinder heads to gain access to the pistons 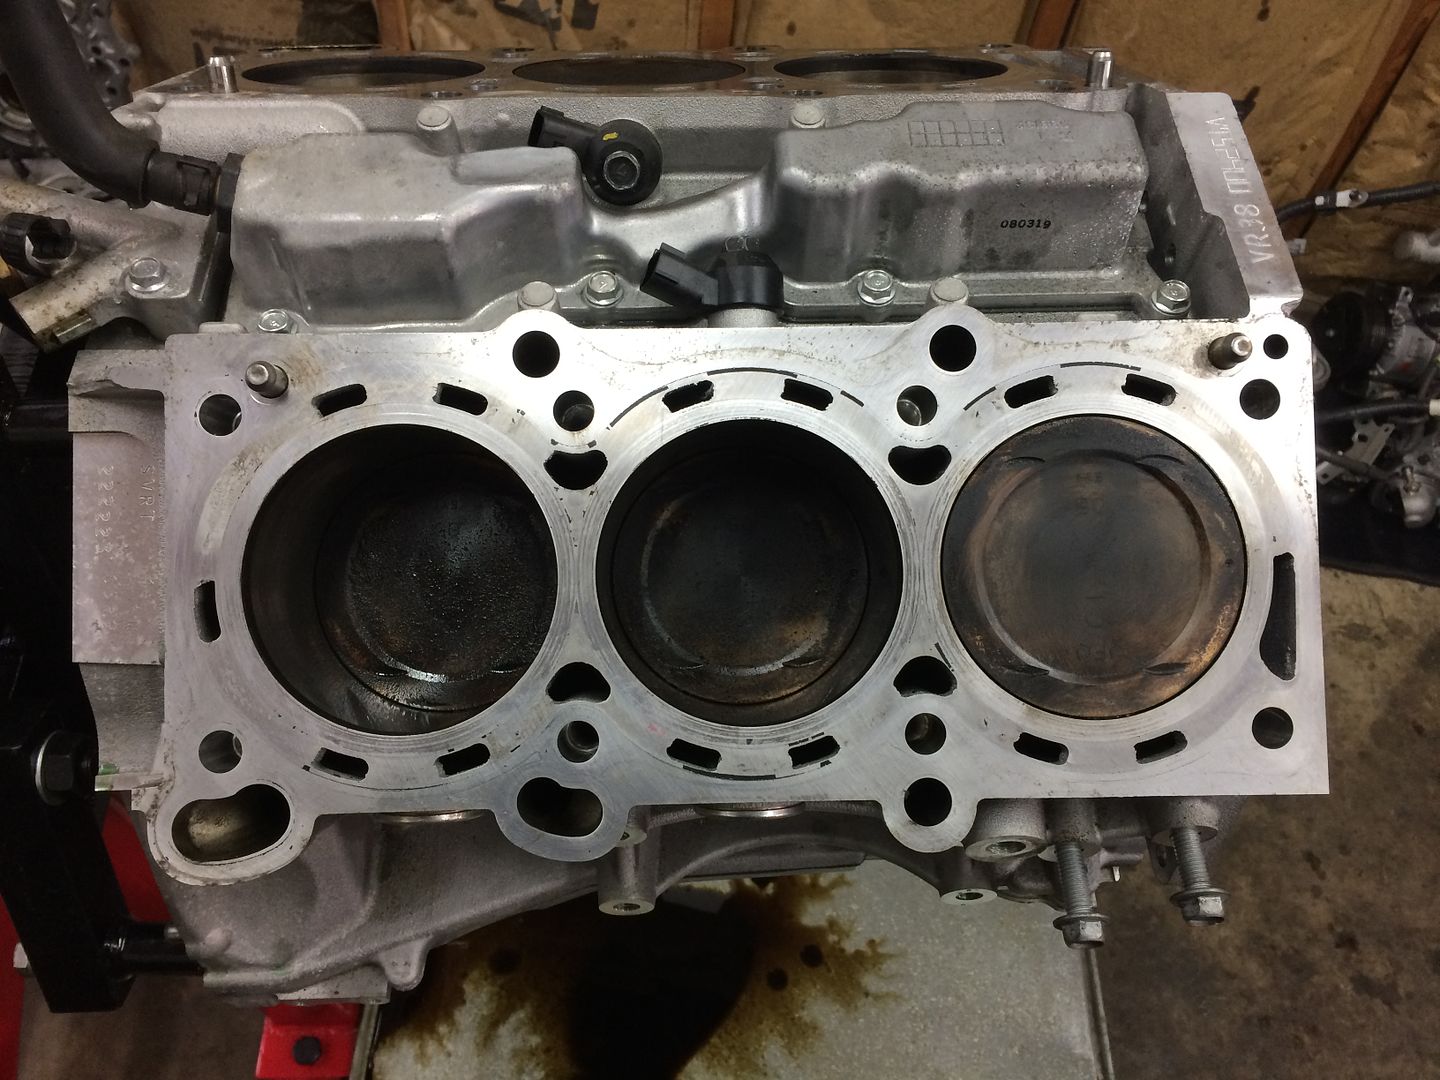
After that I popped the girdle off to gain access to the rods and crank 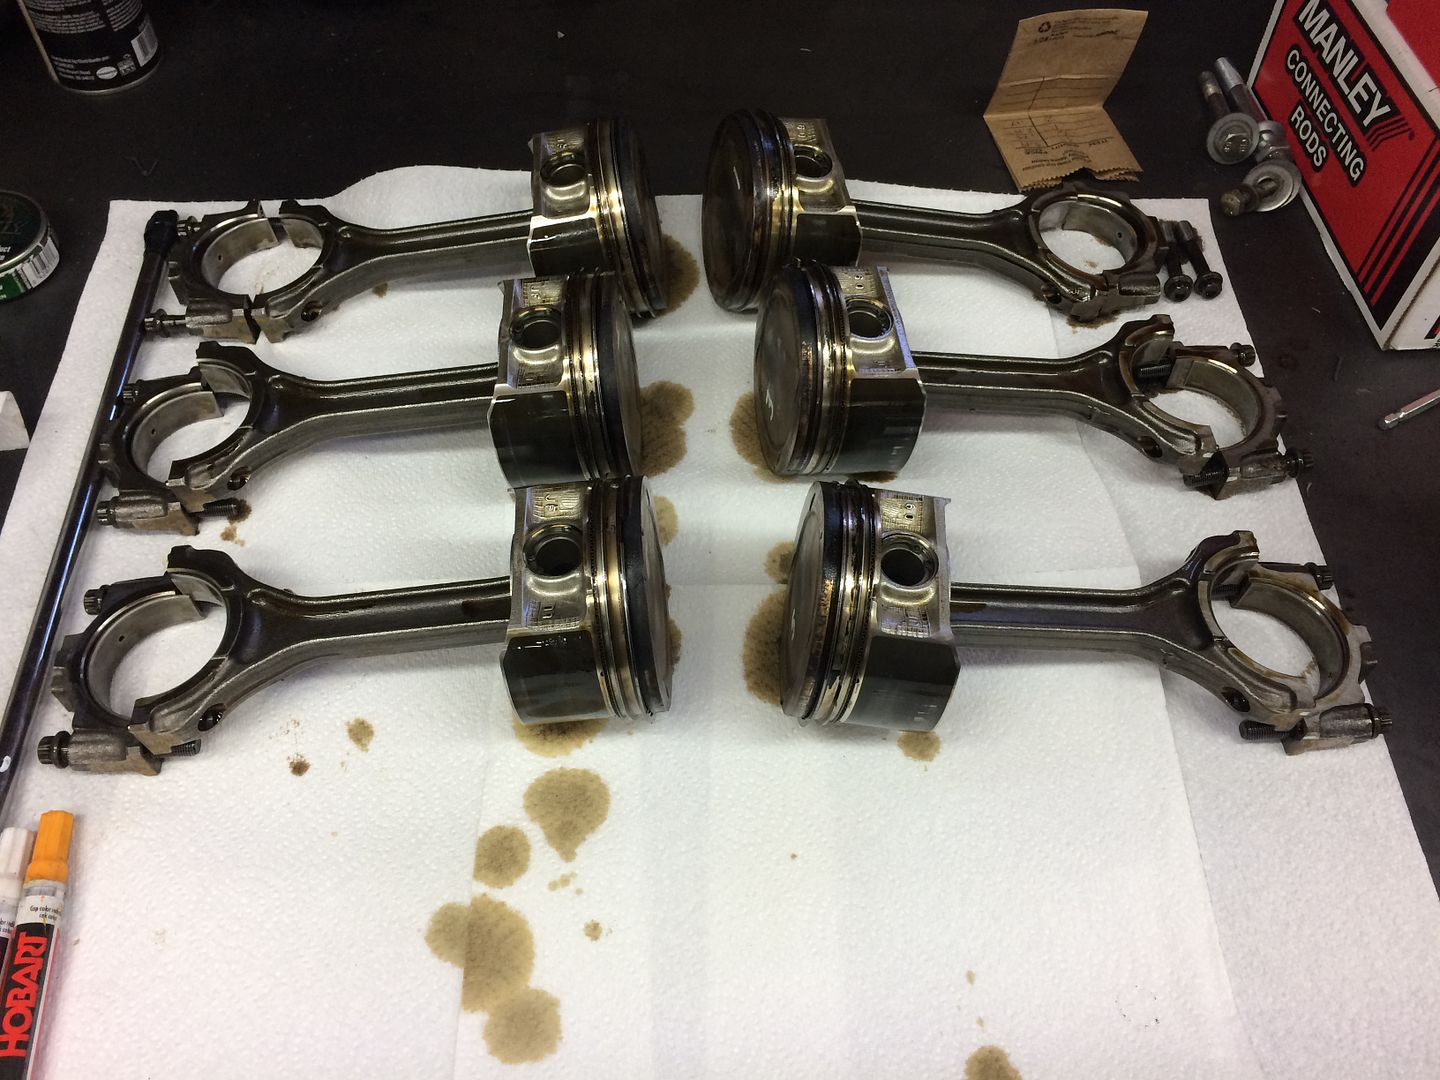
Pistons removed
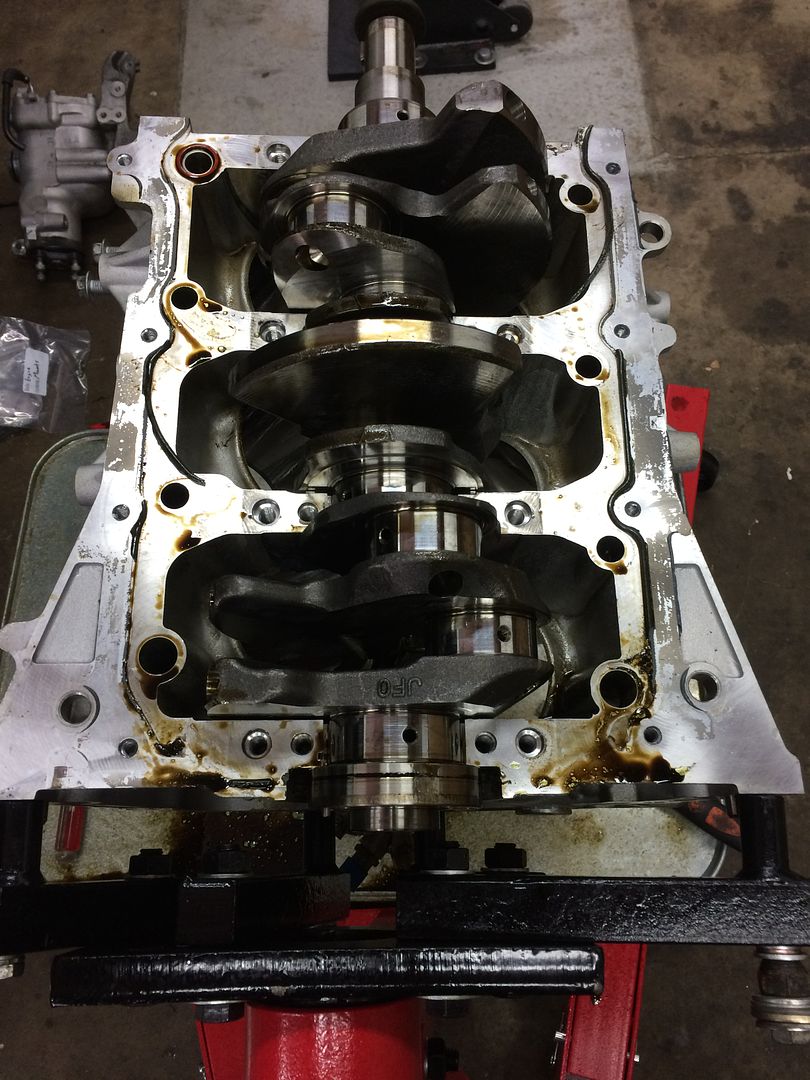
Crank removed 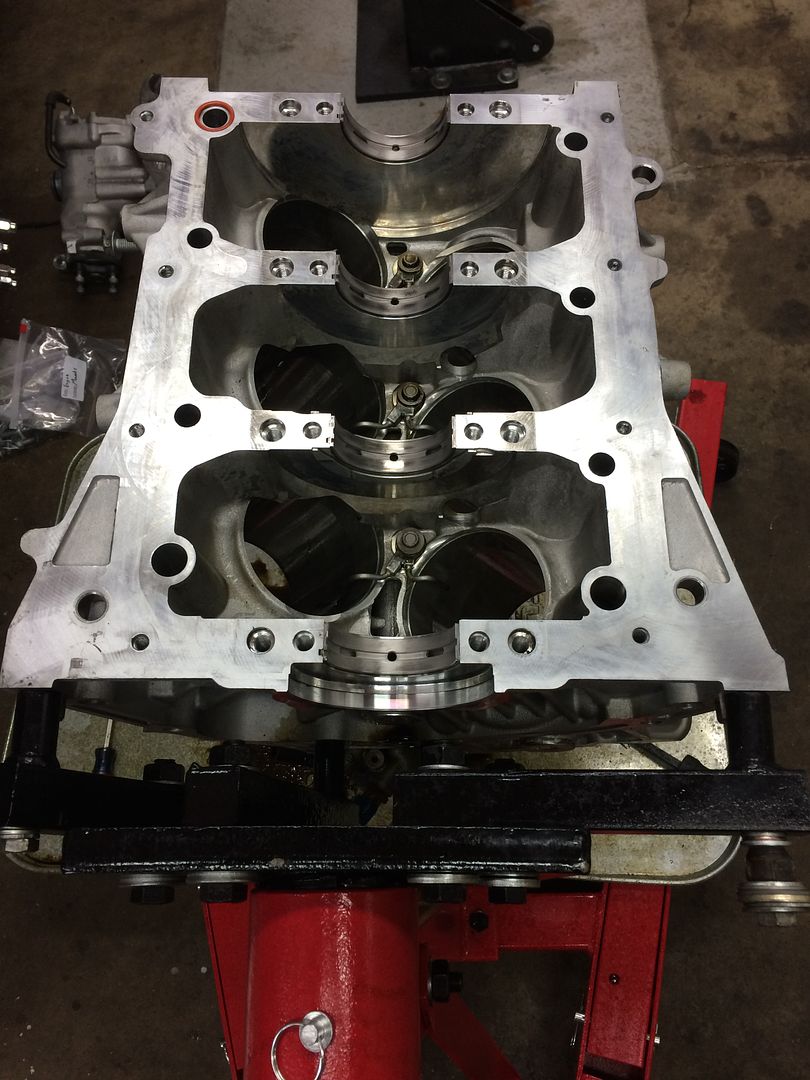
Bare block assembly 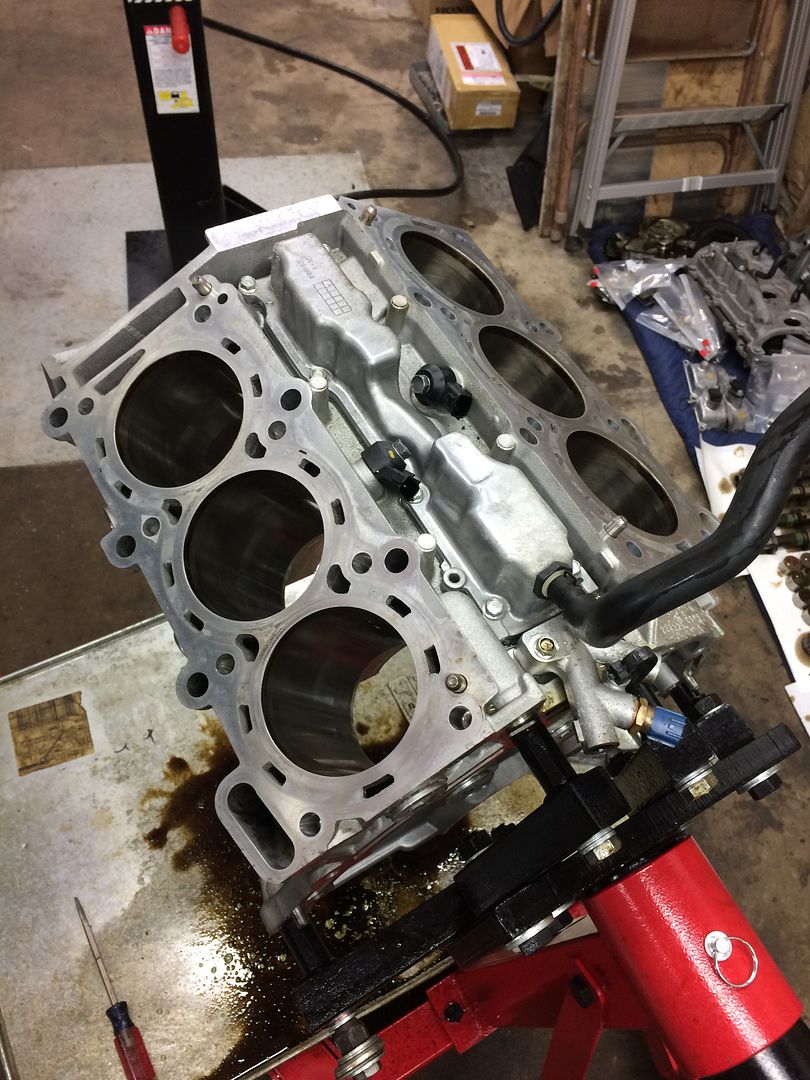
Grade stampings on the crank 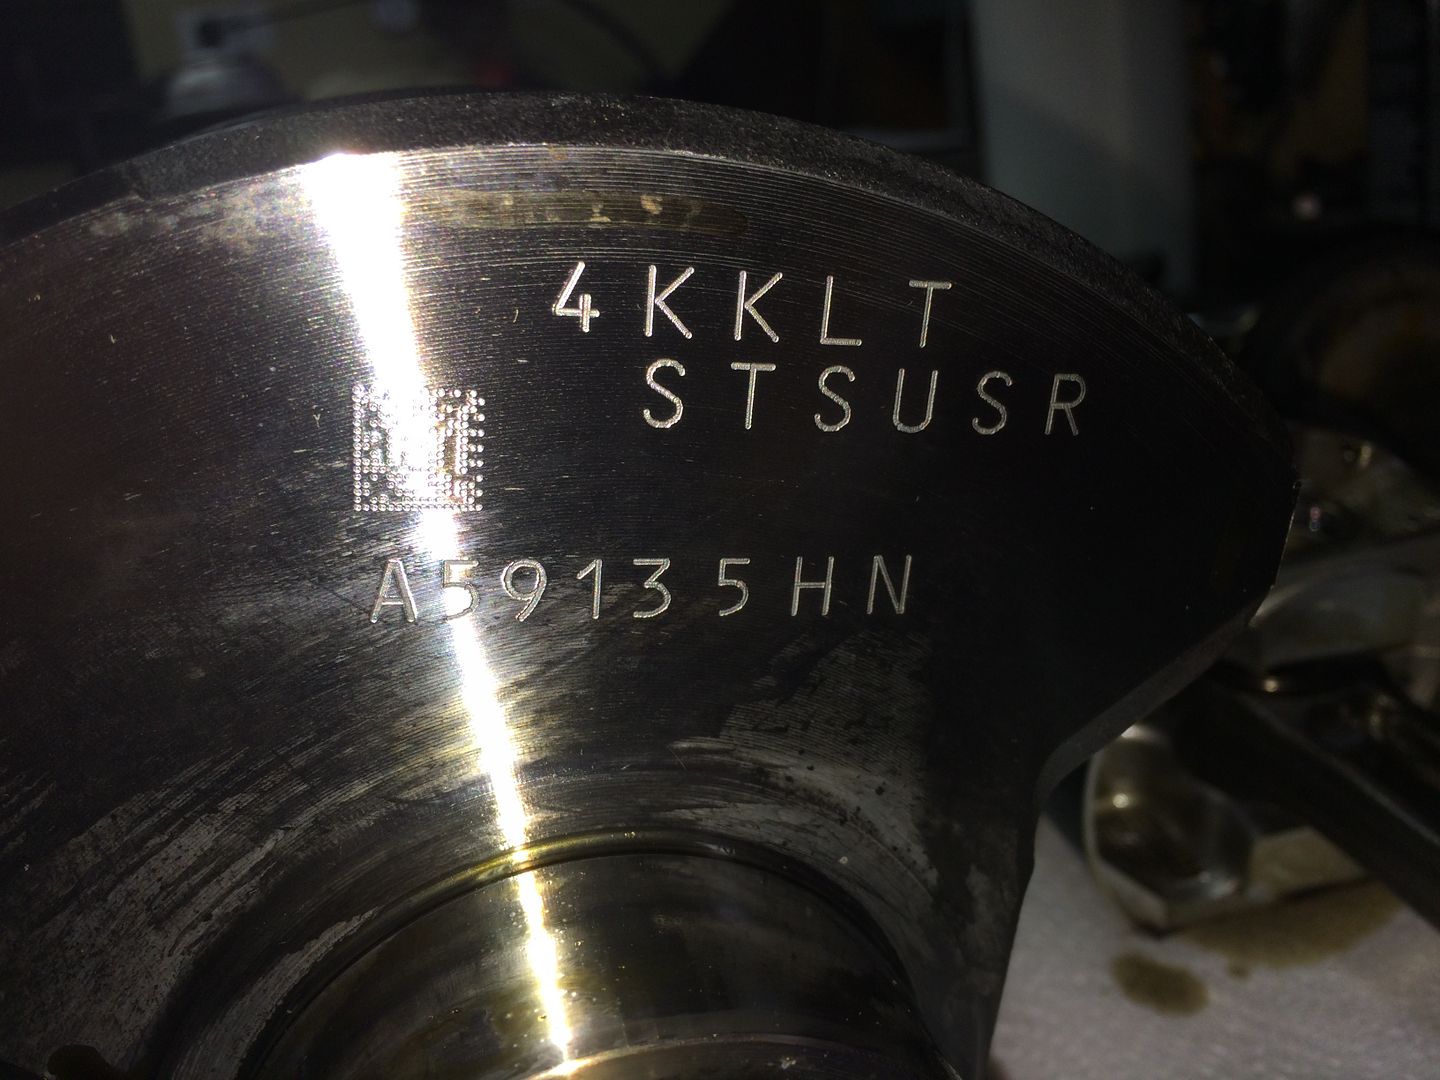
Next I took the whole rotating assembly off to the machine shop to get balanced 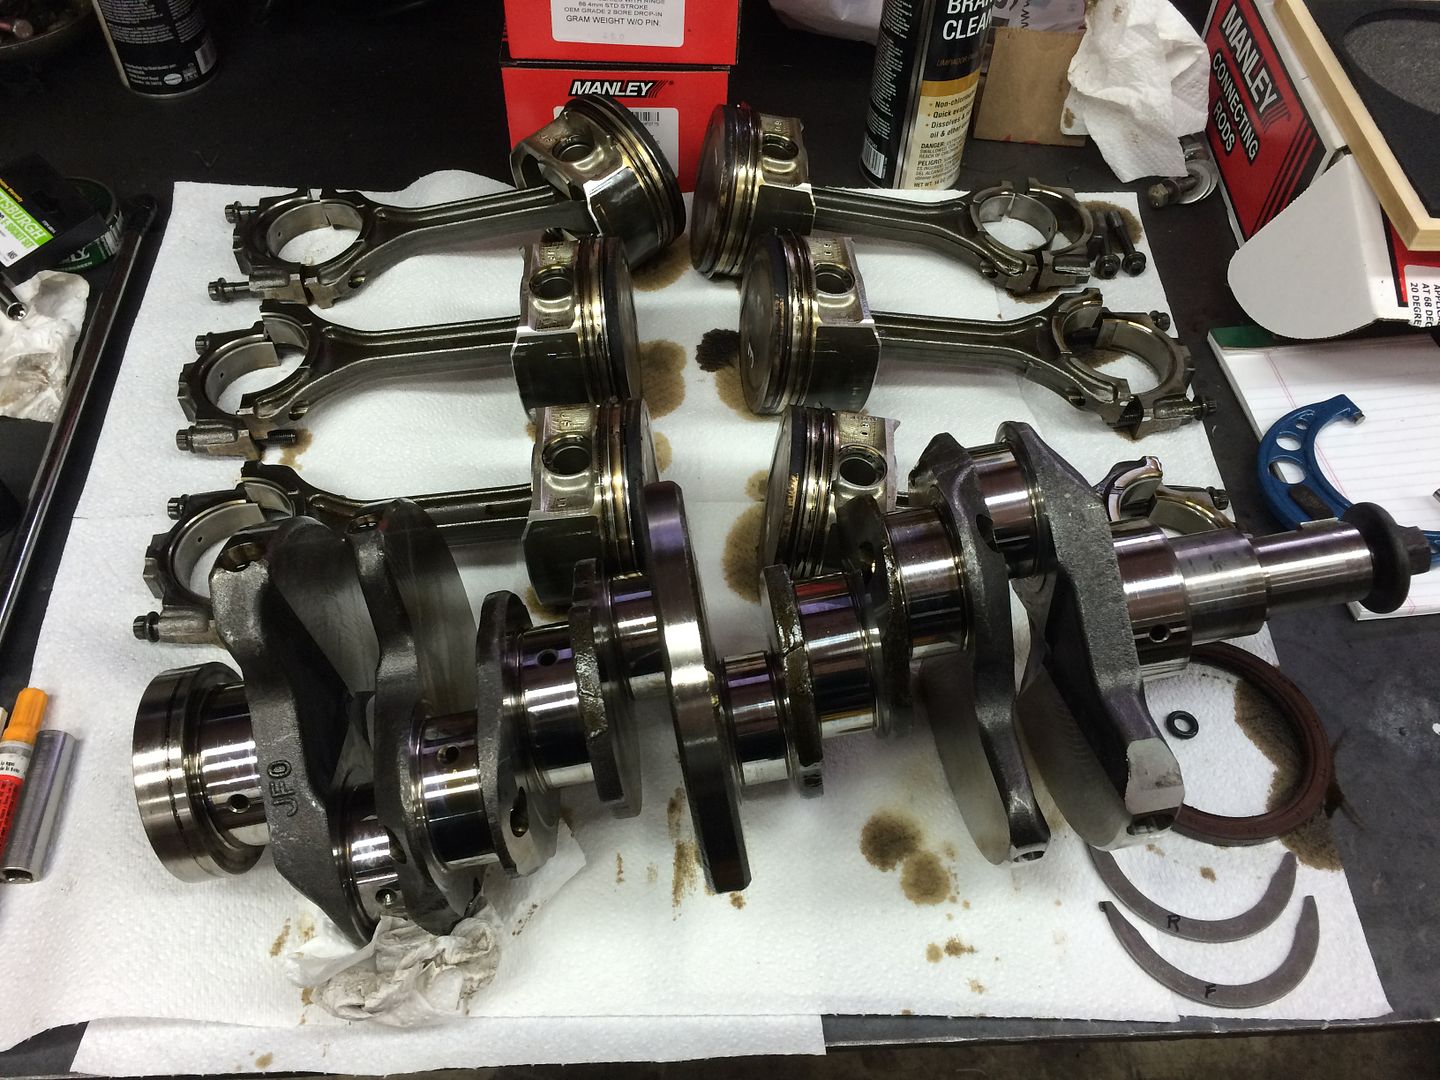
Here's a better picture of the primary oil pan. Notice it has the pass through for the transfer case and drive-shaft, very similar to the older GTR setups 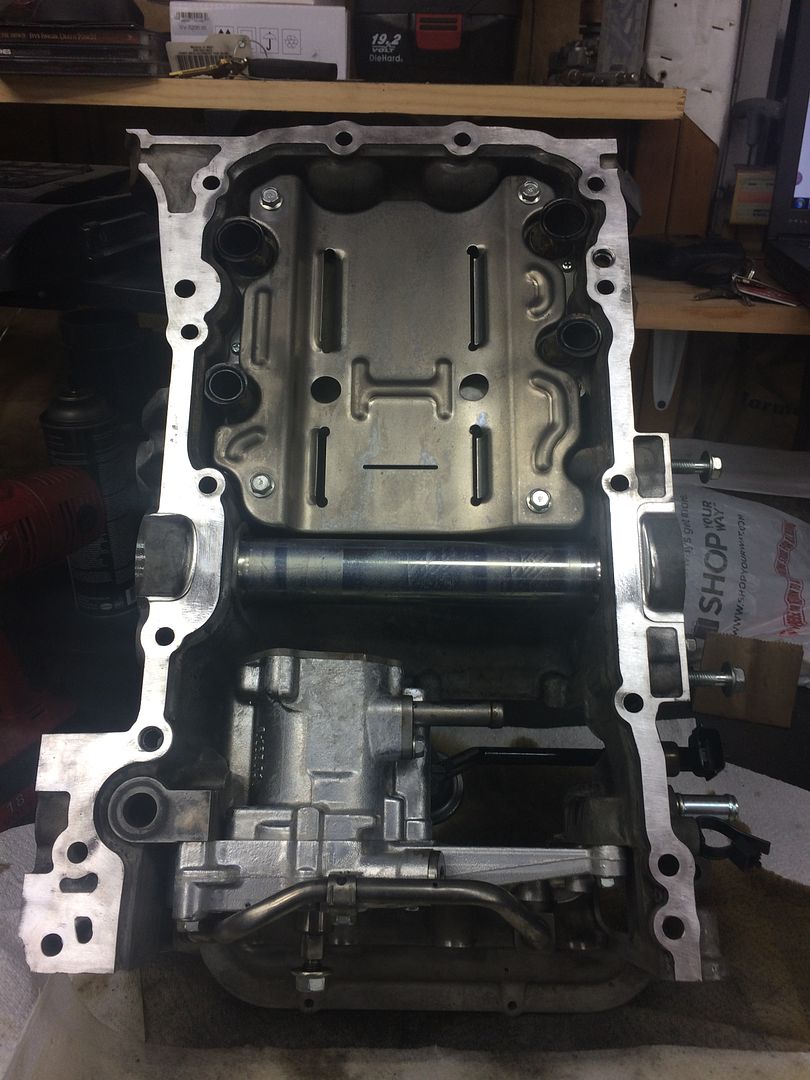
Girdle cleaned and new bearings in 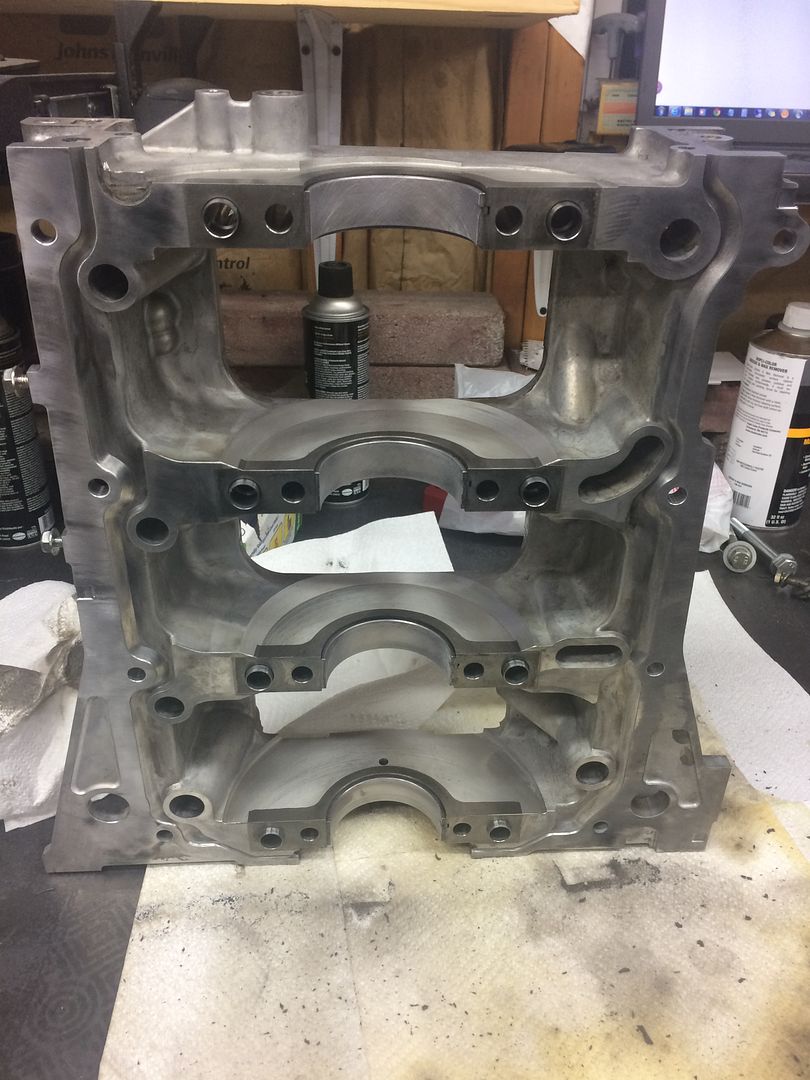
While the assembly was at the machine shop I had some downtime so I decided to start cleaning things 
Much nicer 
New OEM gasket rebuild kit 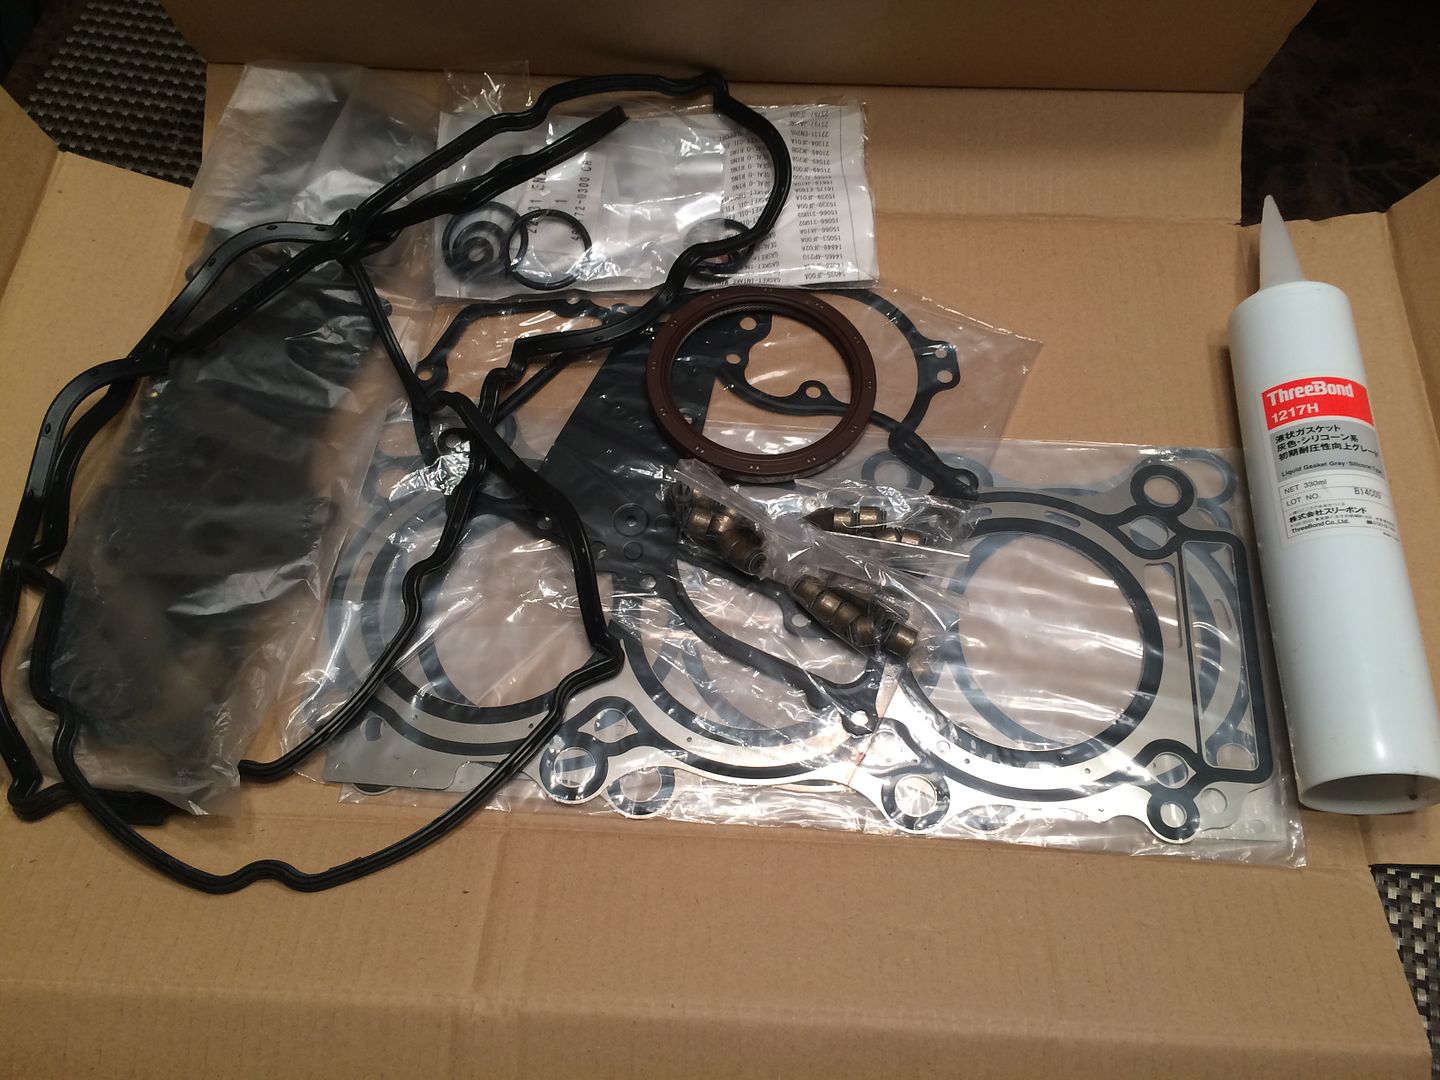
New head and main bolts 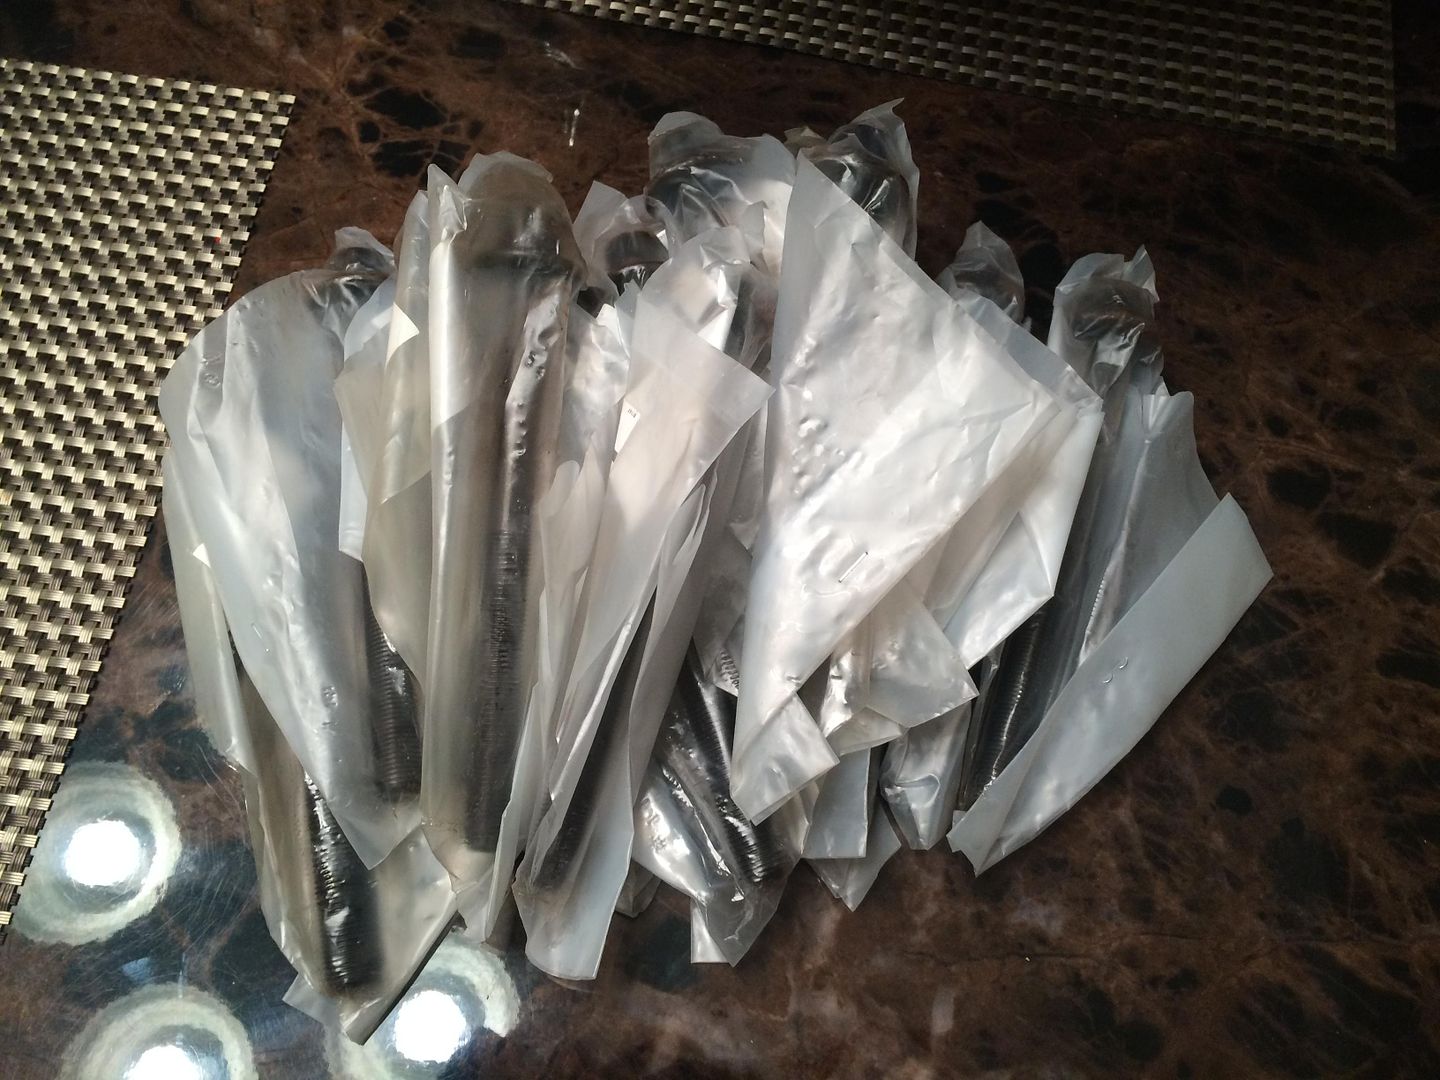
Here I am laying out the pistons and rods for assembly 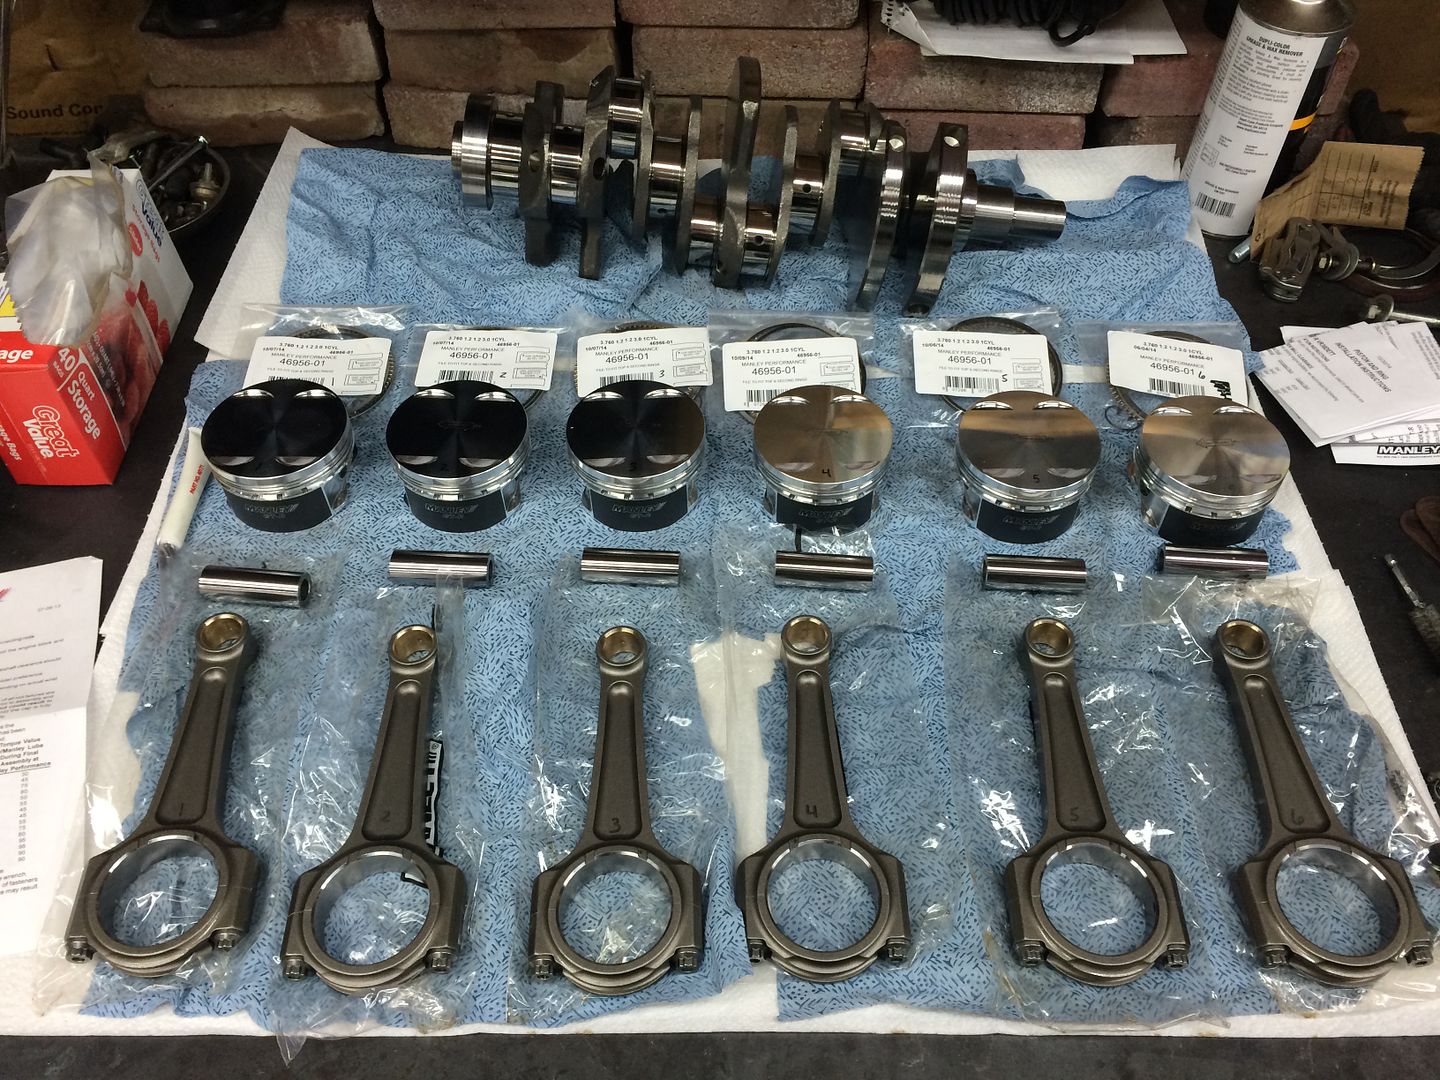
The pistons come like this, pretty cool touch 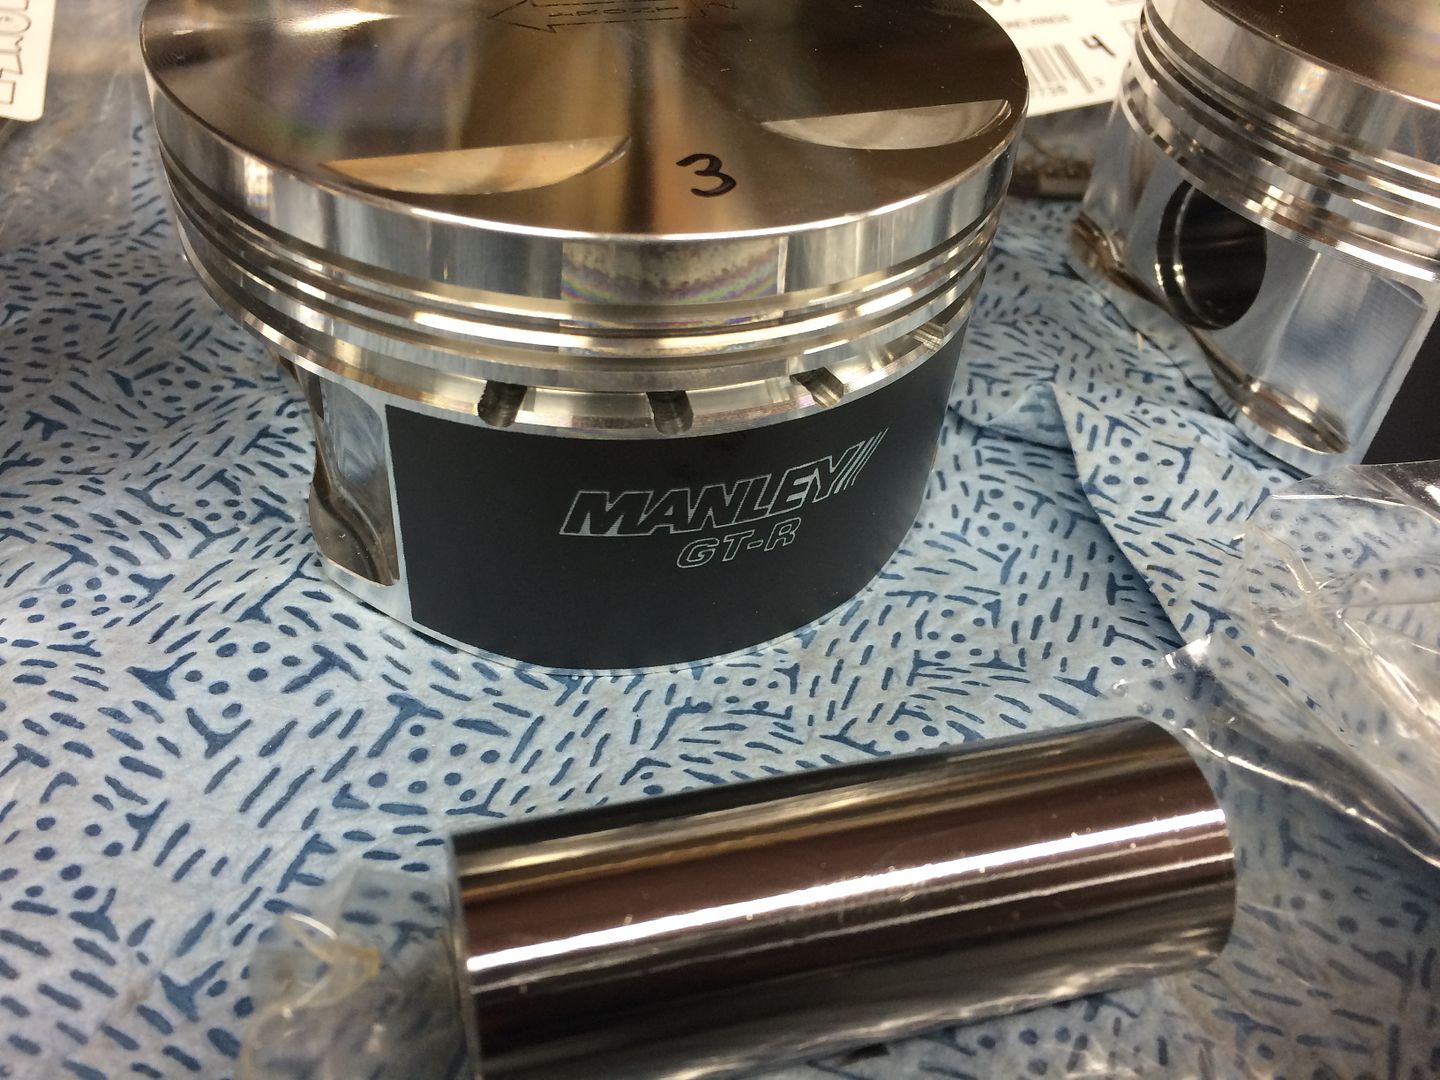
Rotating assembly ready to go 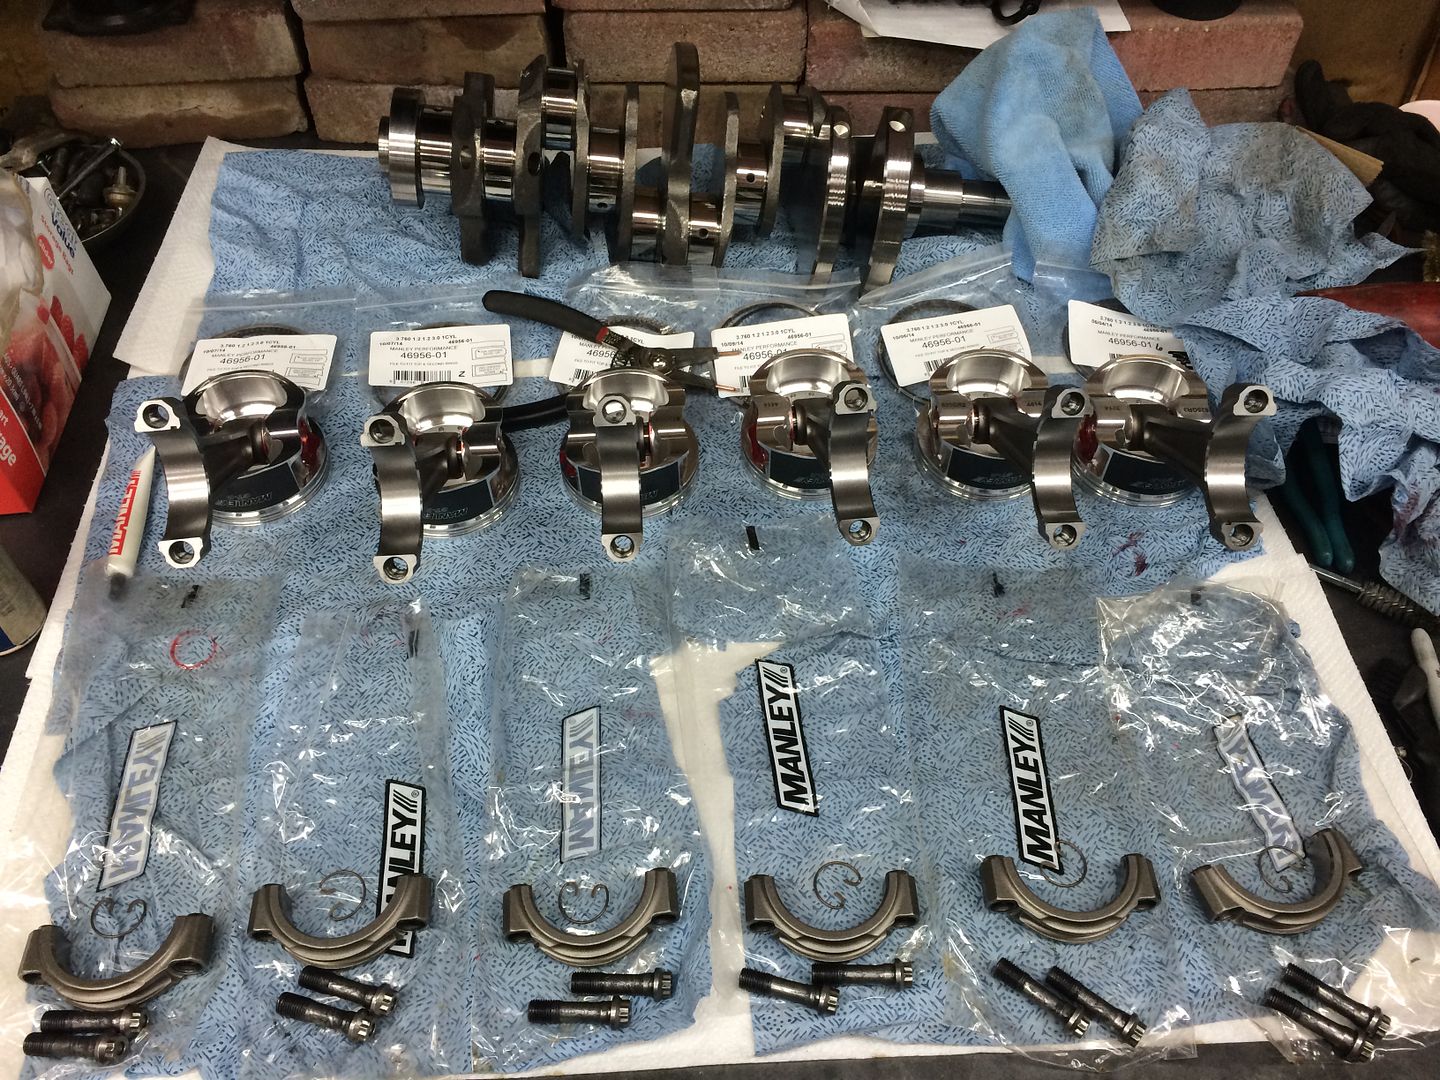

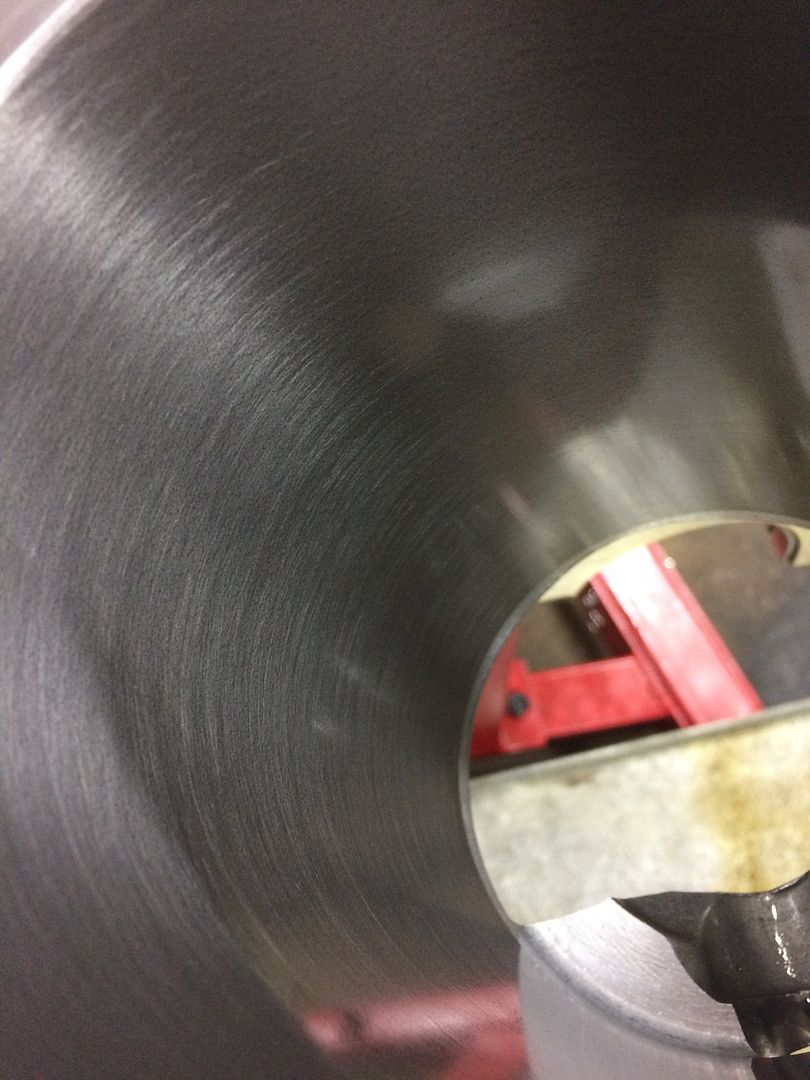
Next I used a ball hone tool to clean up my cylinder walls and add a little crosshatch to help seat the rings 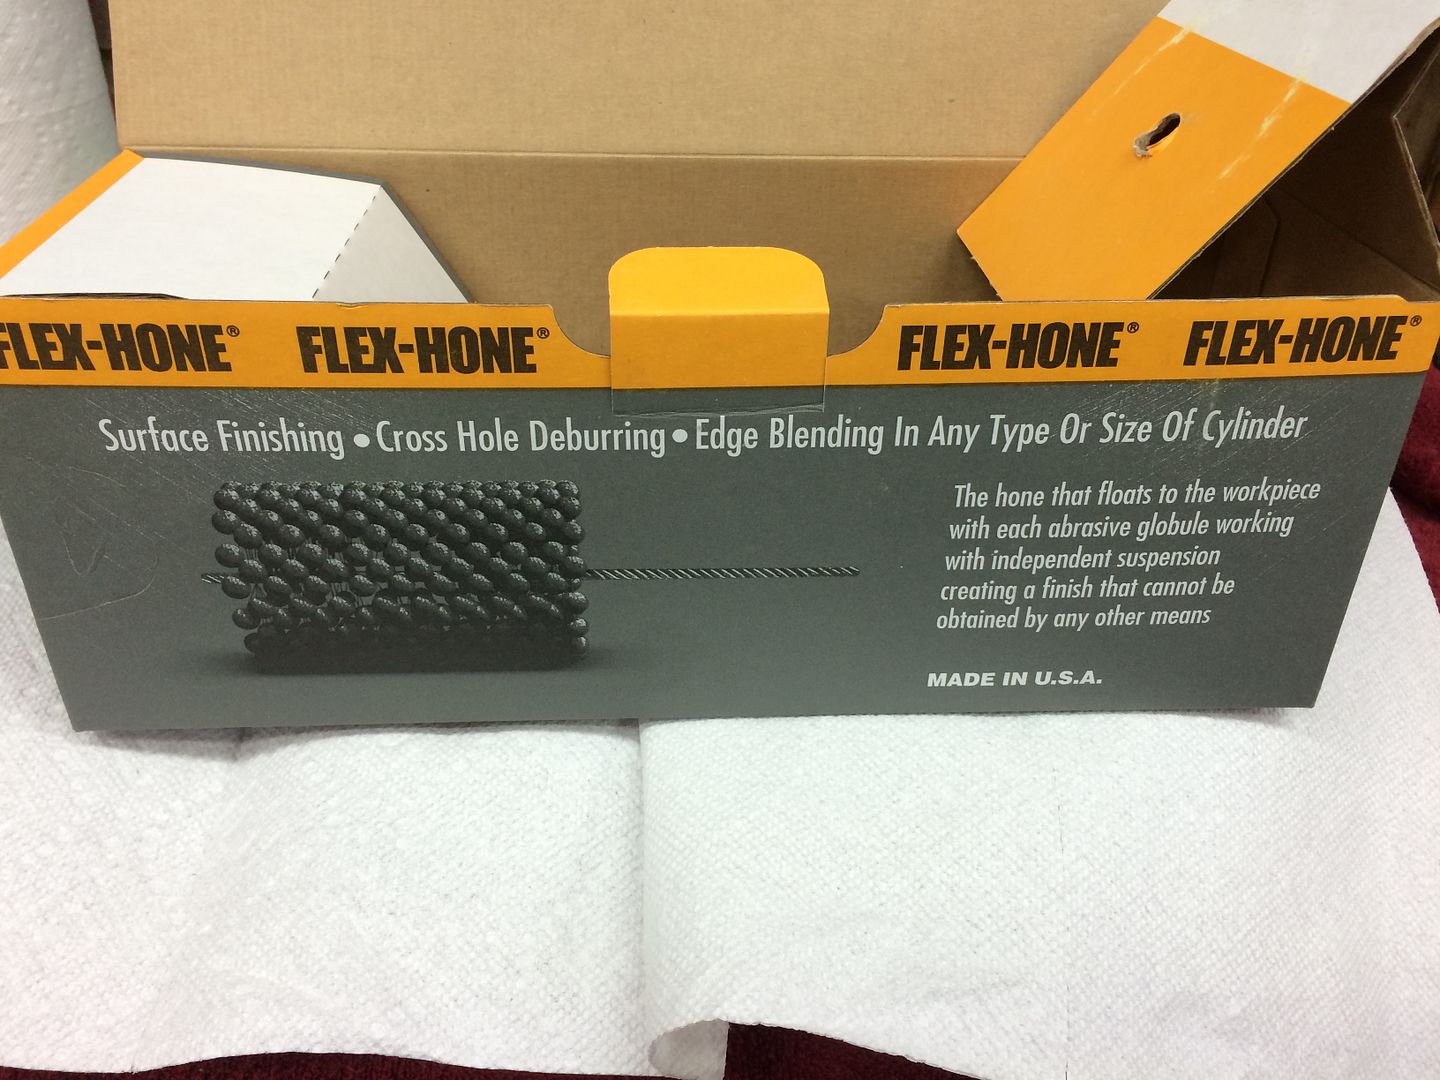
Nice finish on the crank 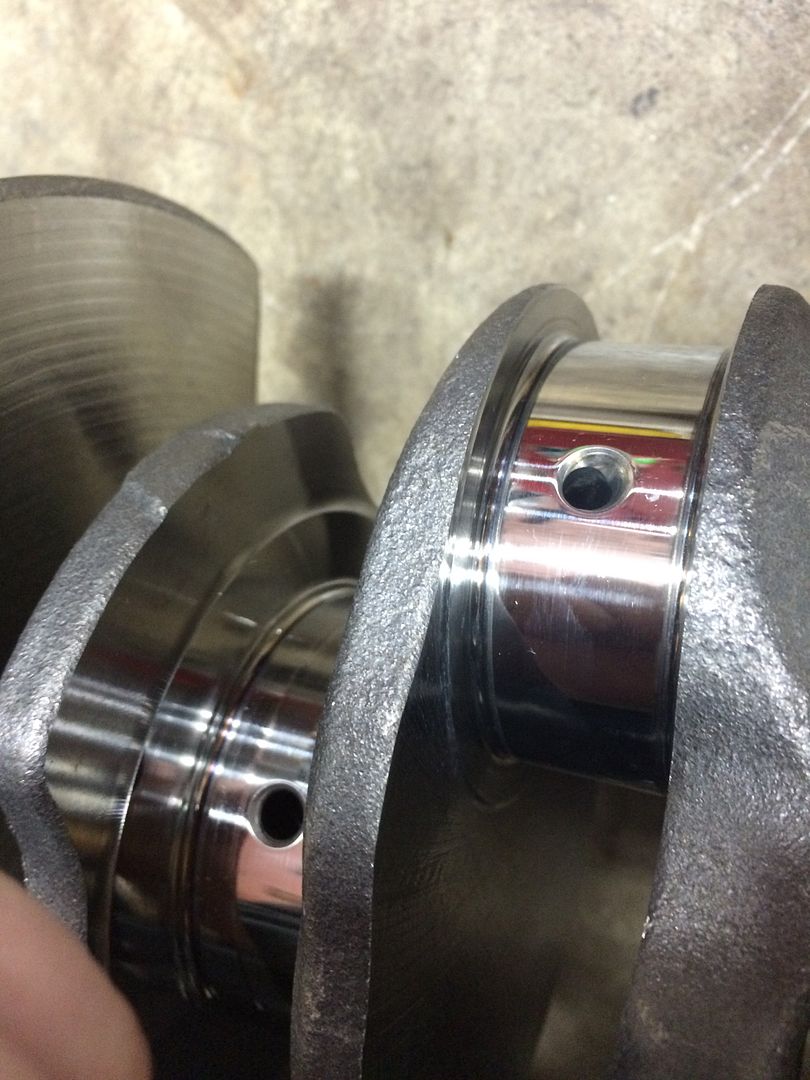
I used WD40 to act as a lubricant on the ball hone tool so you must thoroughly clean the cylidner walls until your cloth comes out spotless 
Piston oil squirters look familiar 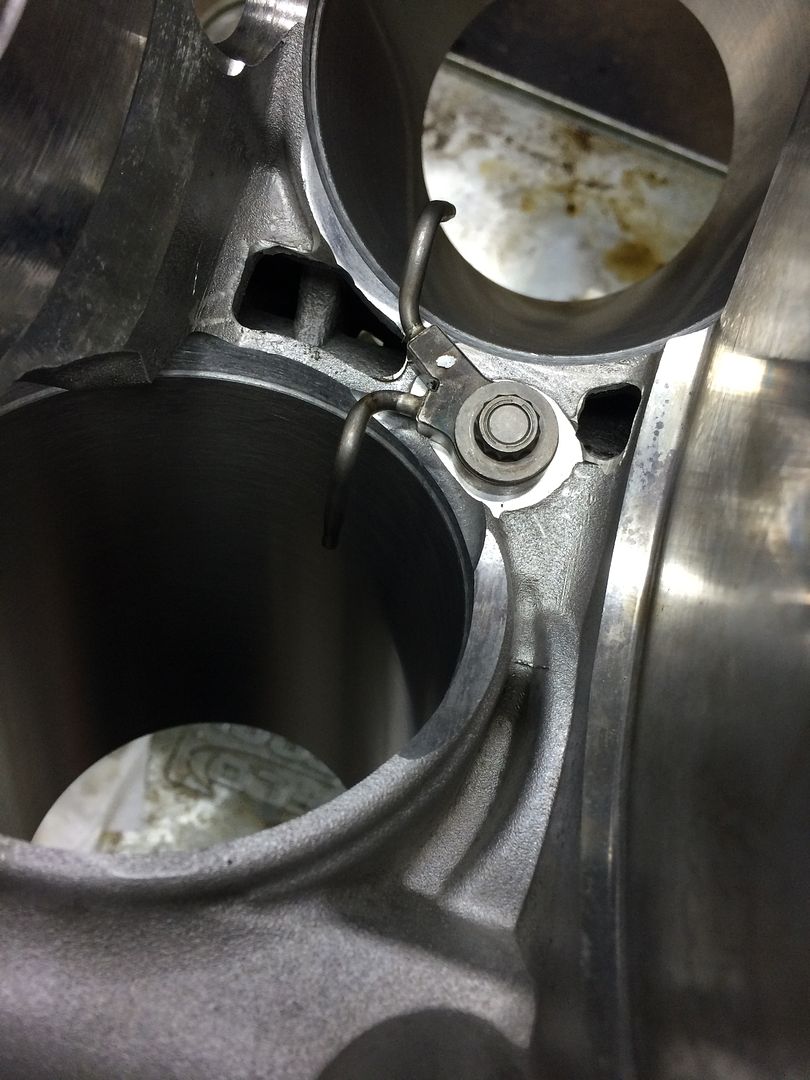
Set the crank in and spin it over a few times 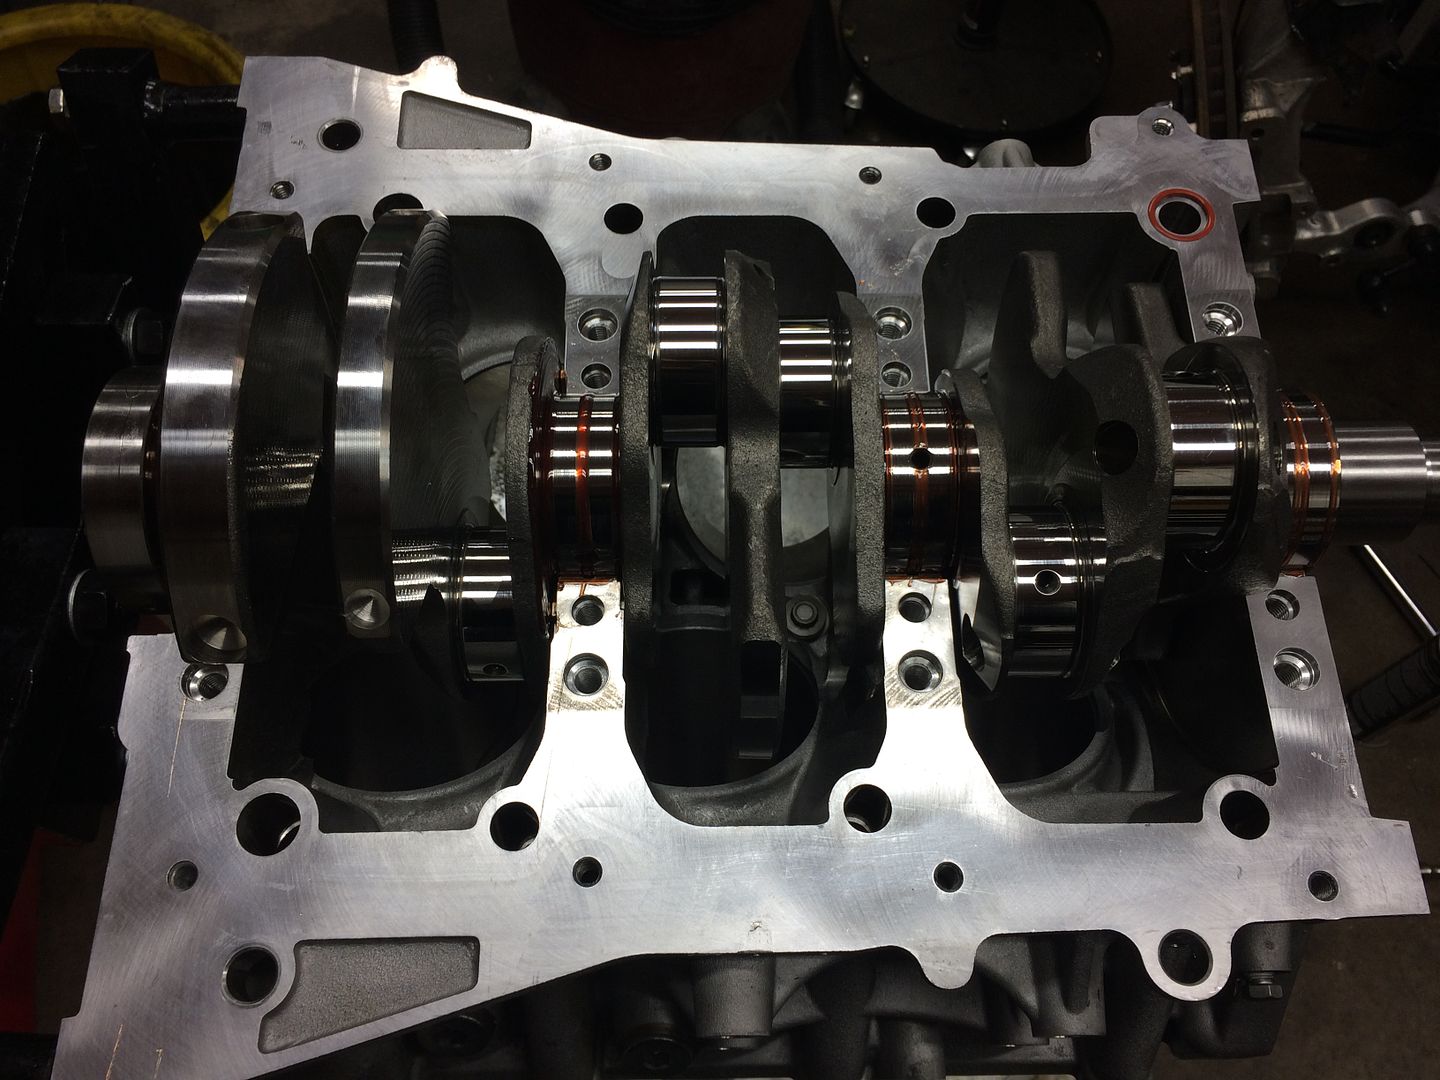
Girdle ready to go 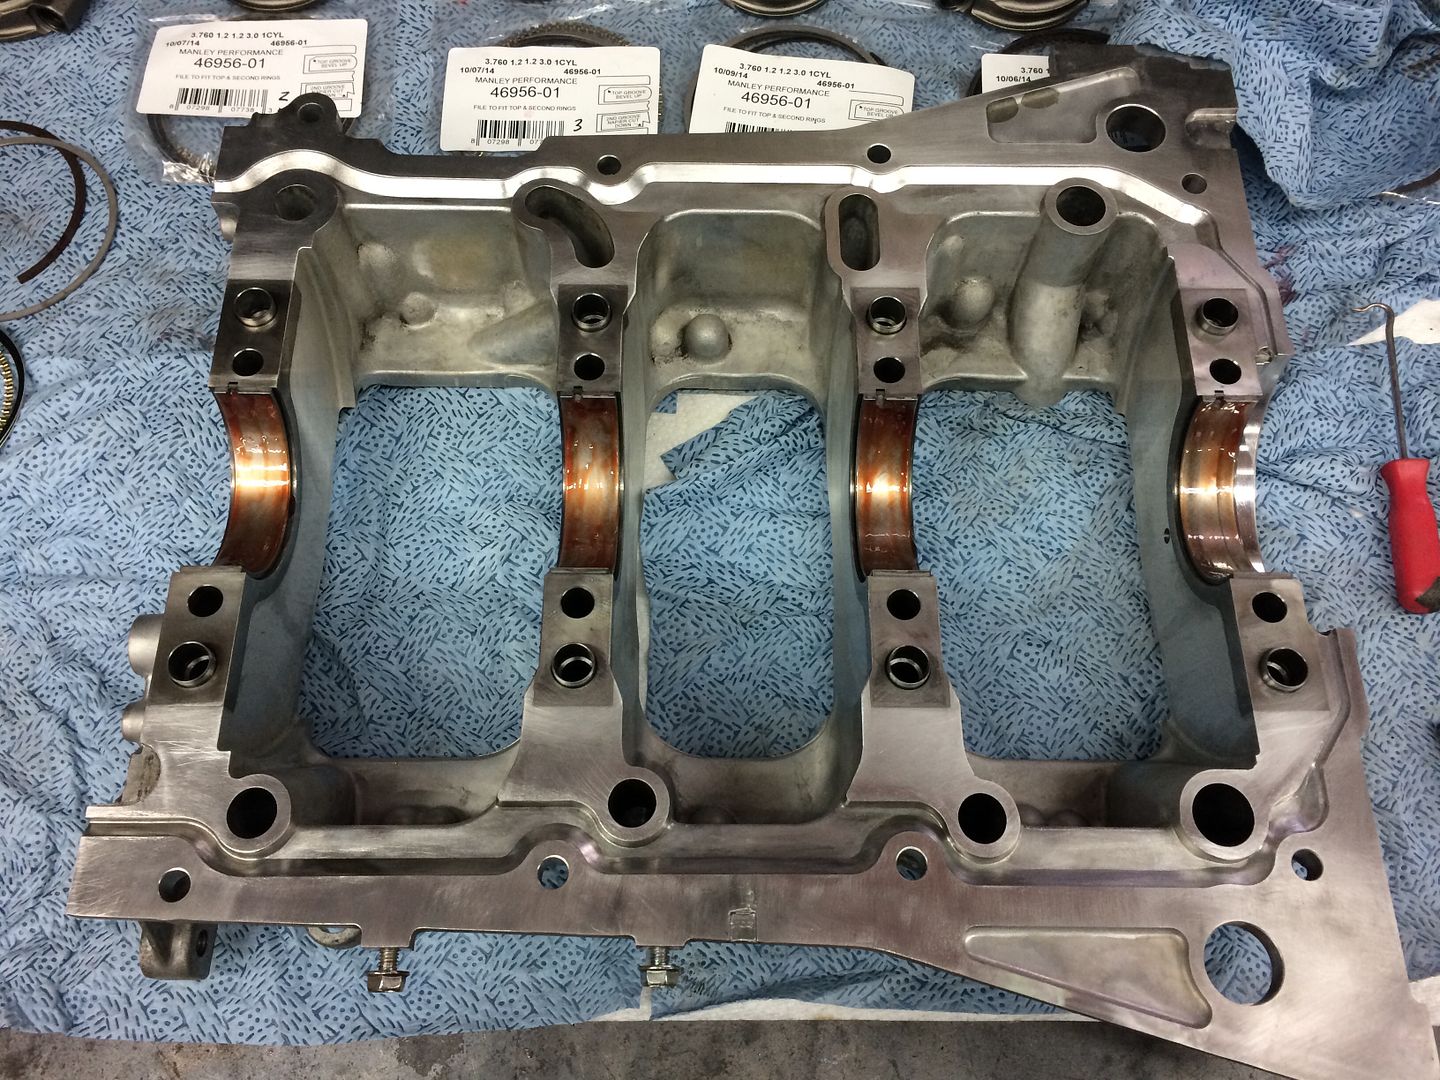
Girdle back on and torqued 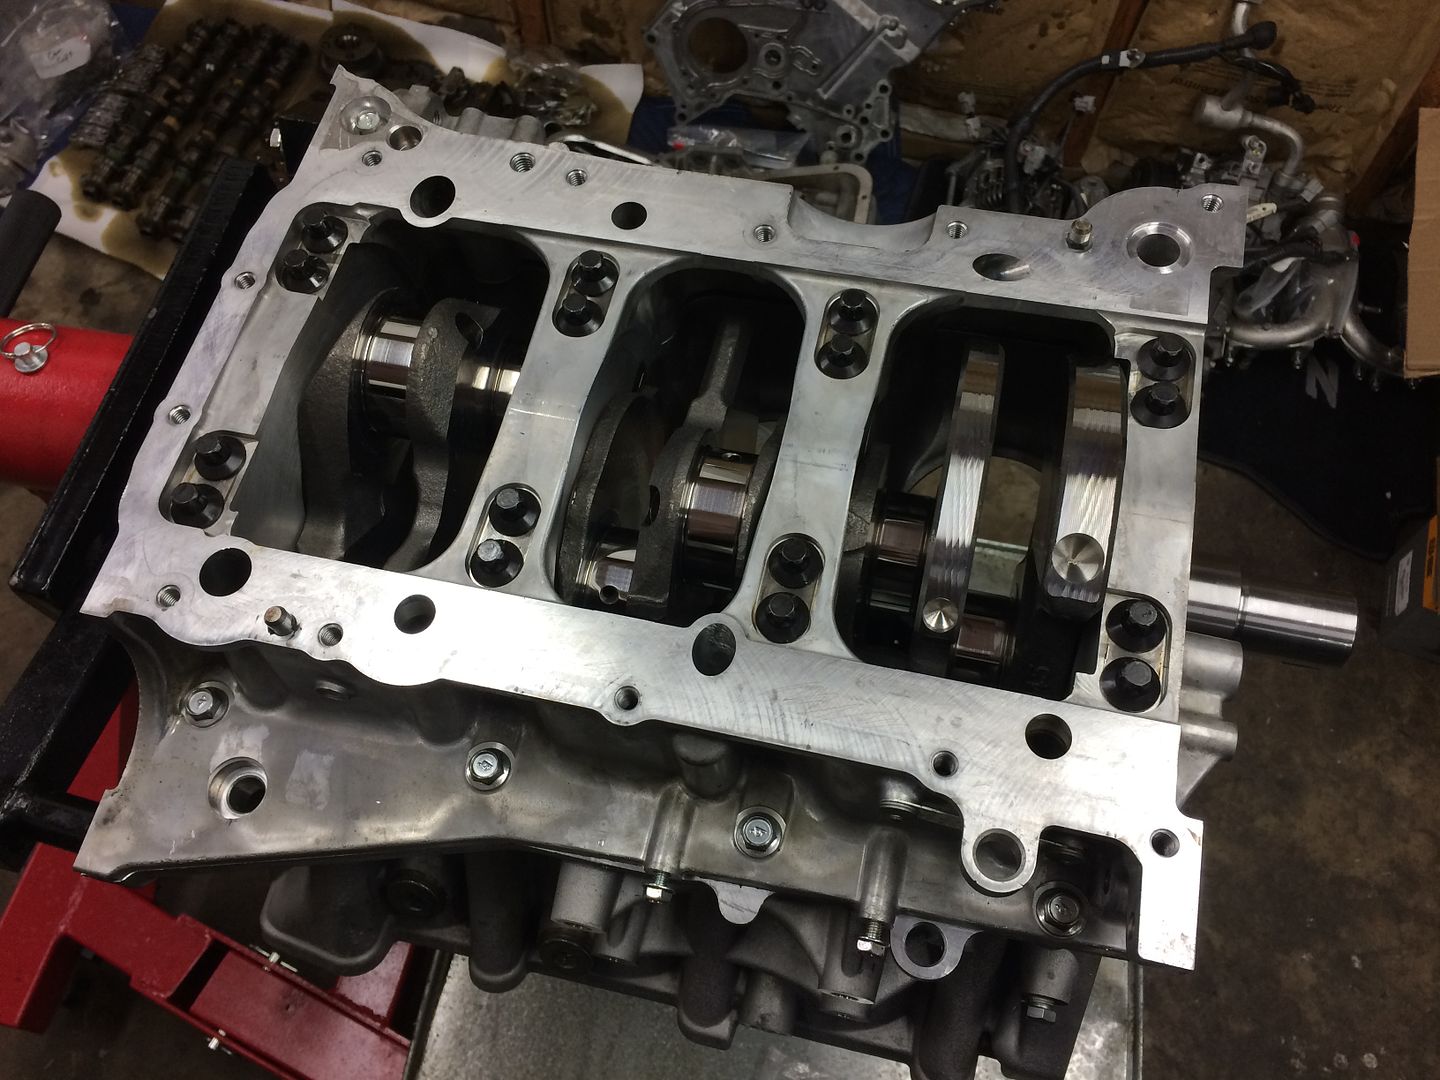
Pistons and rods installed 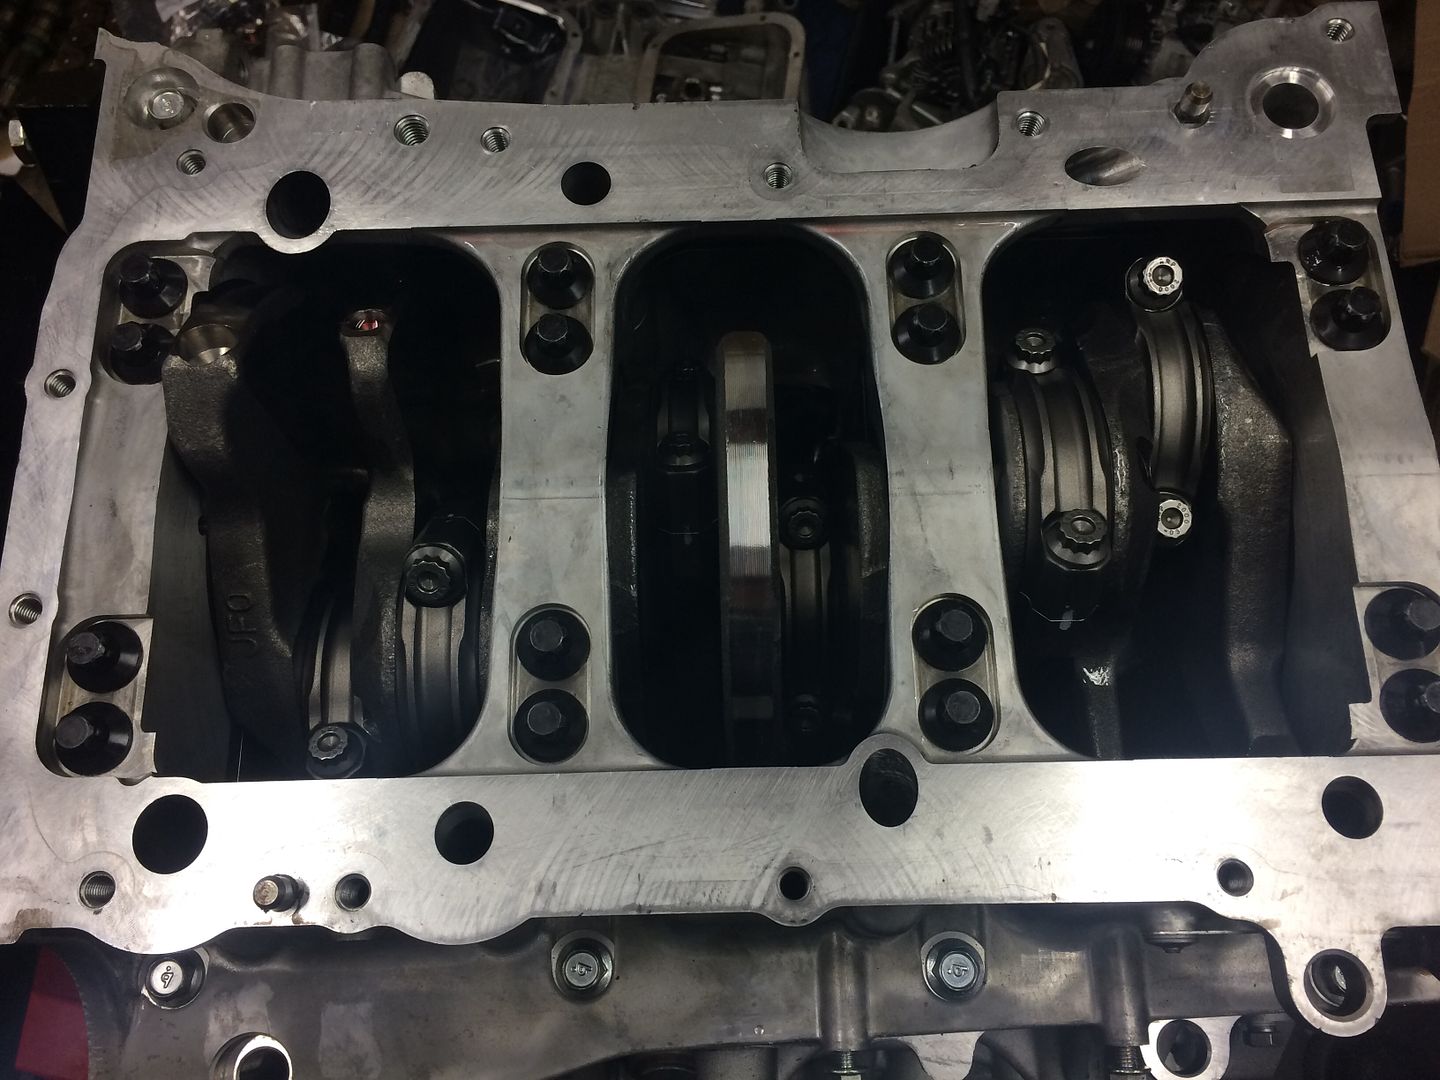
The primary pan assembly also uses RTV to seal itself 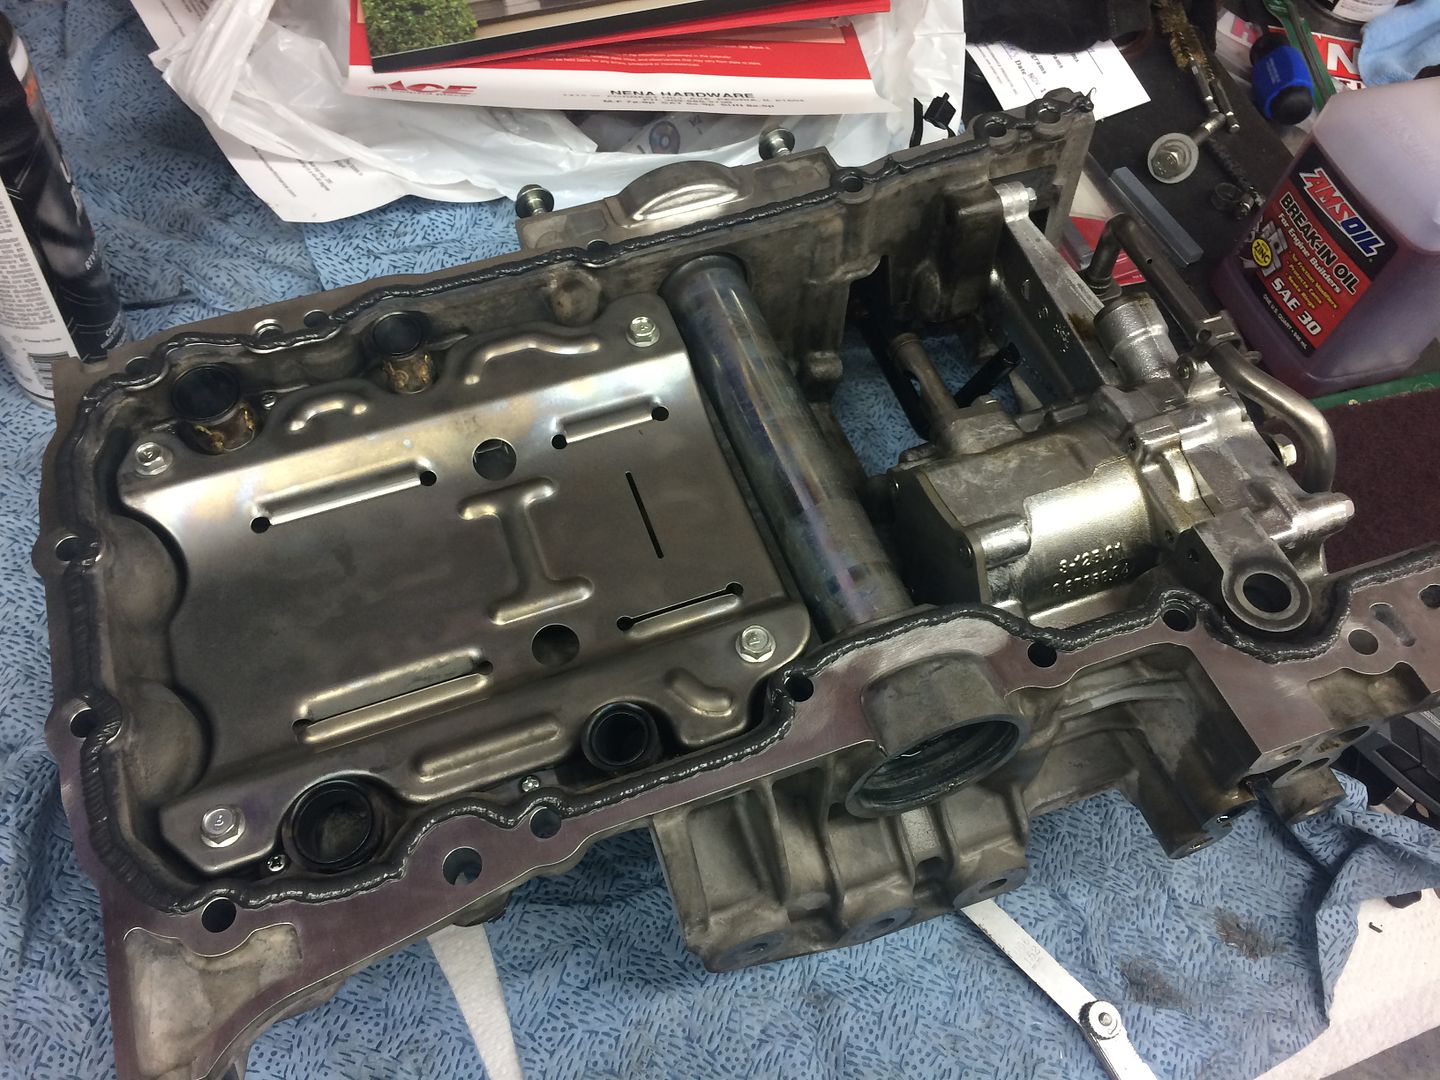
I used long studs as guide pins to set the pan on correctly without damaging the fresh RTV 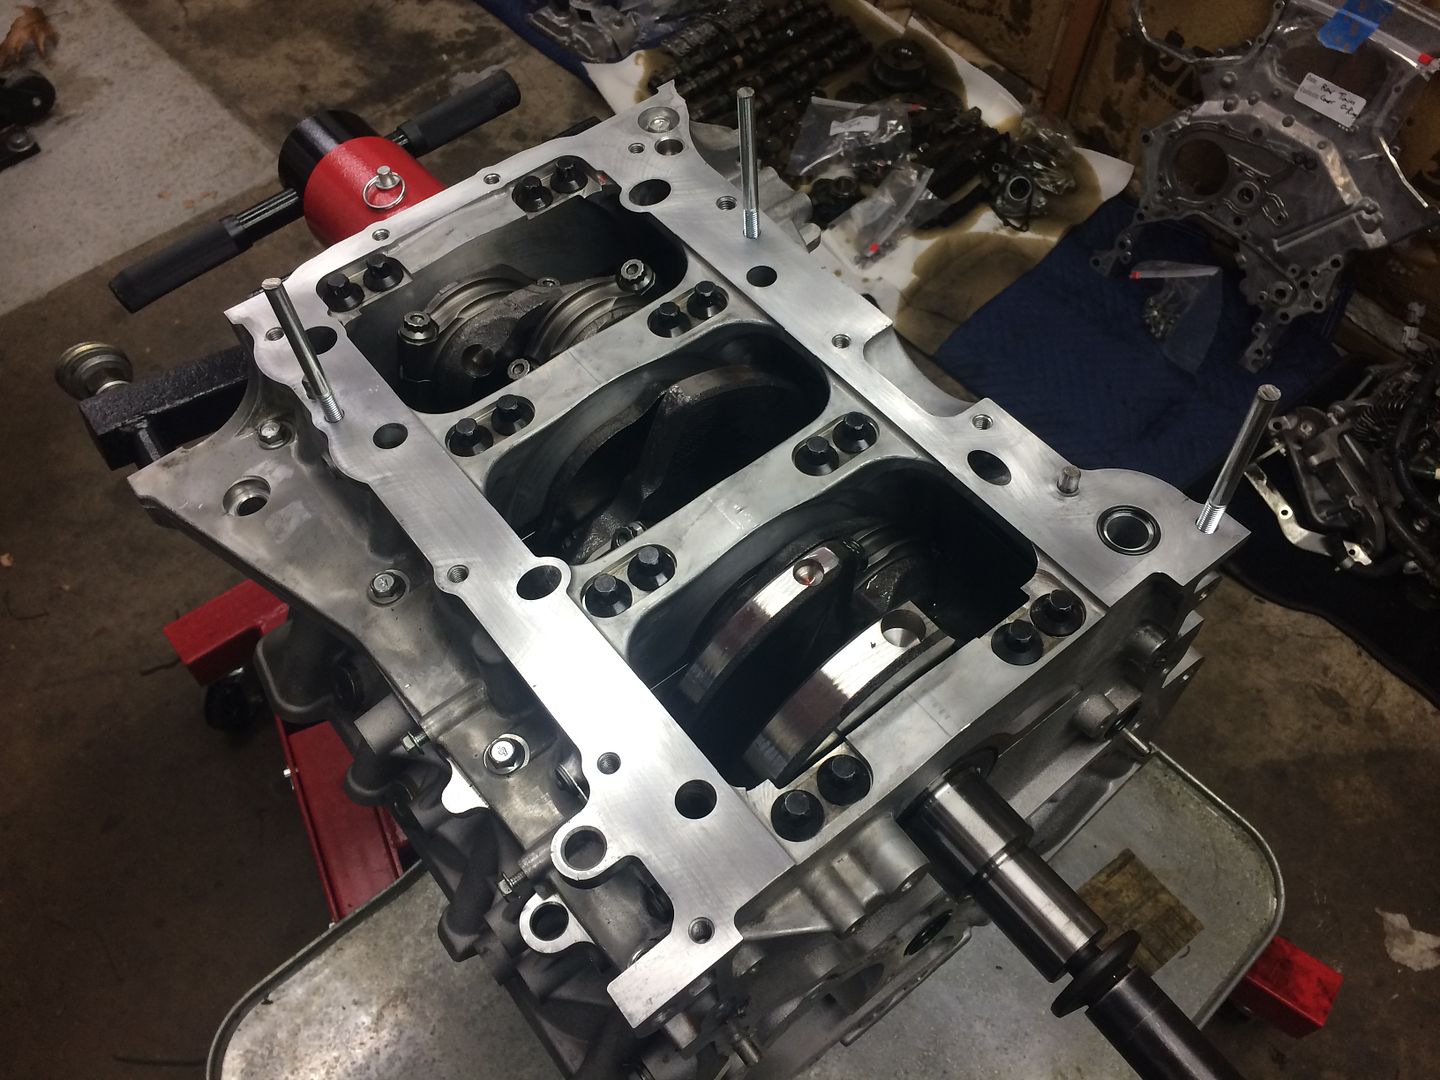
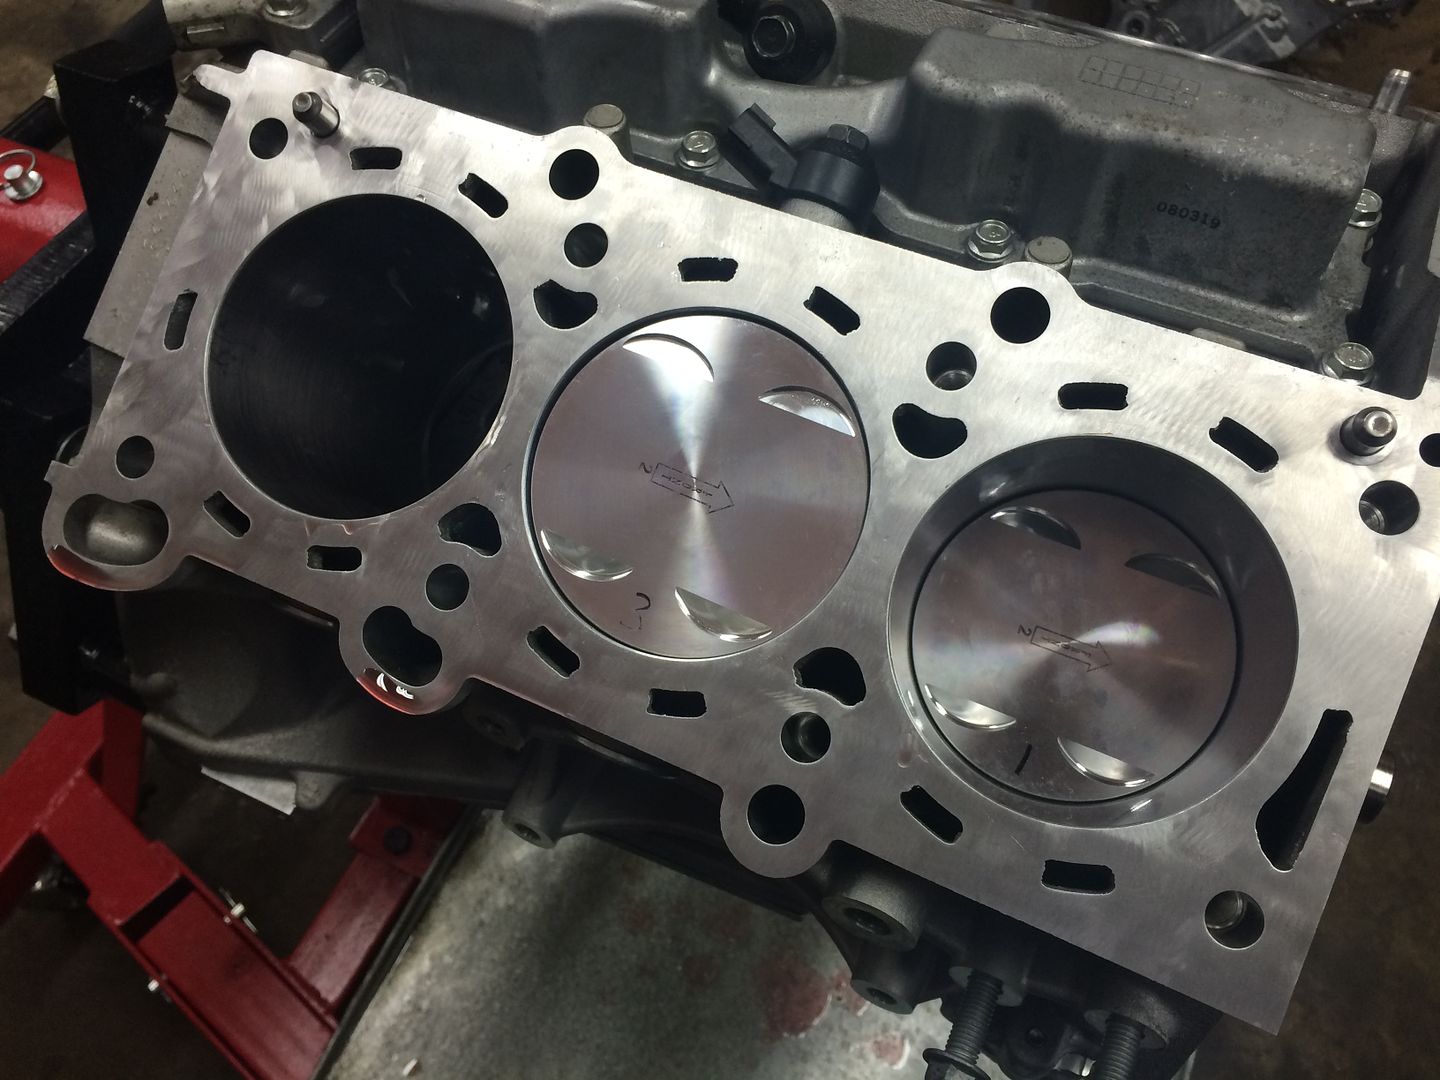
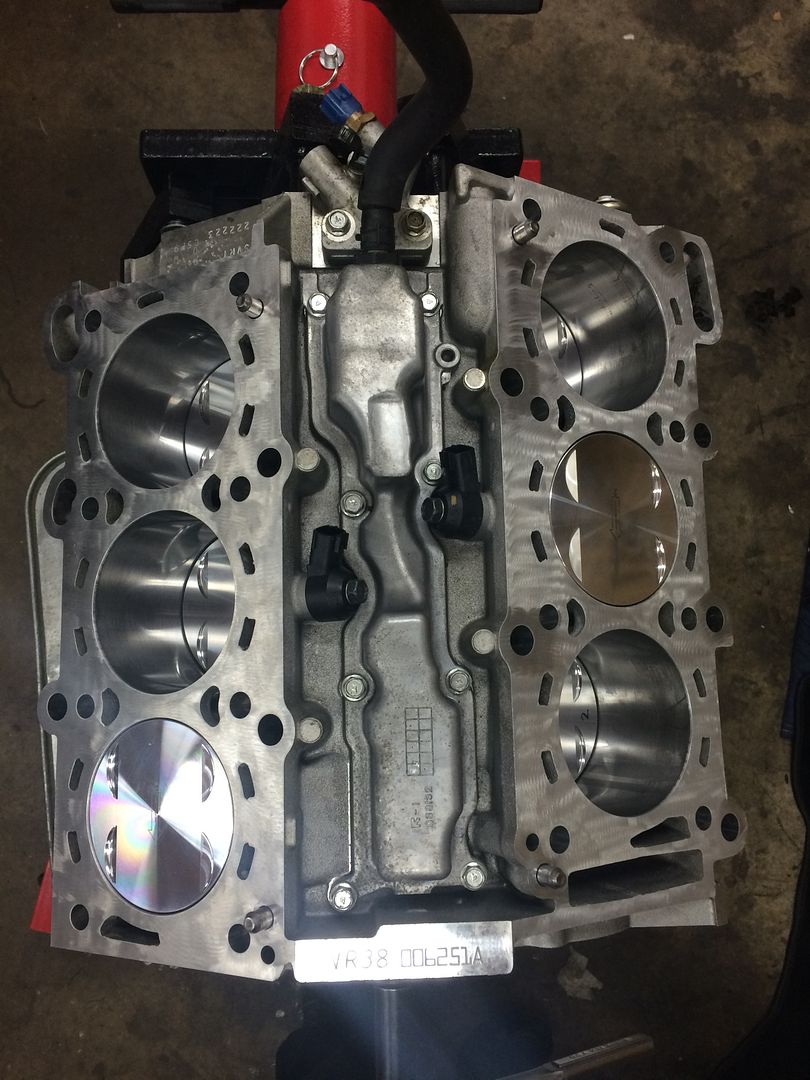
New OEM head gaskets 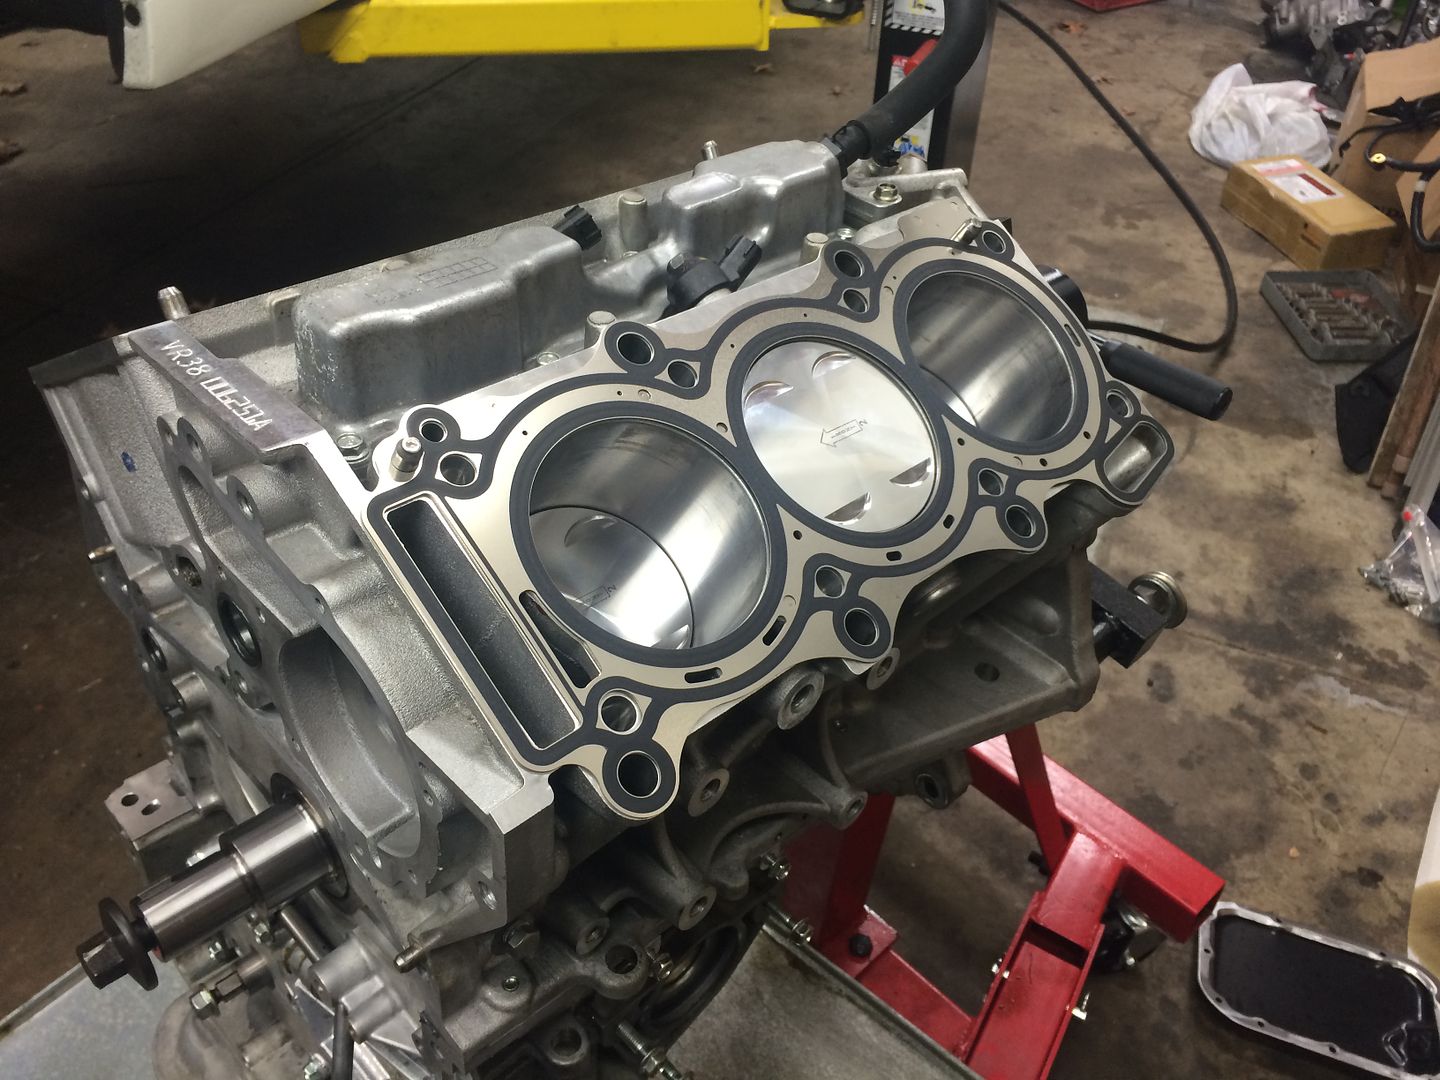
Cylinder heads back on 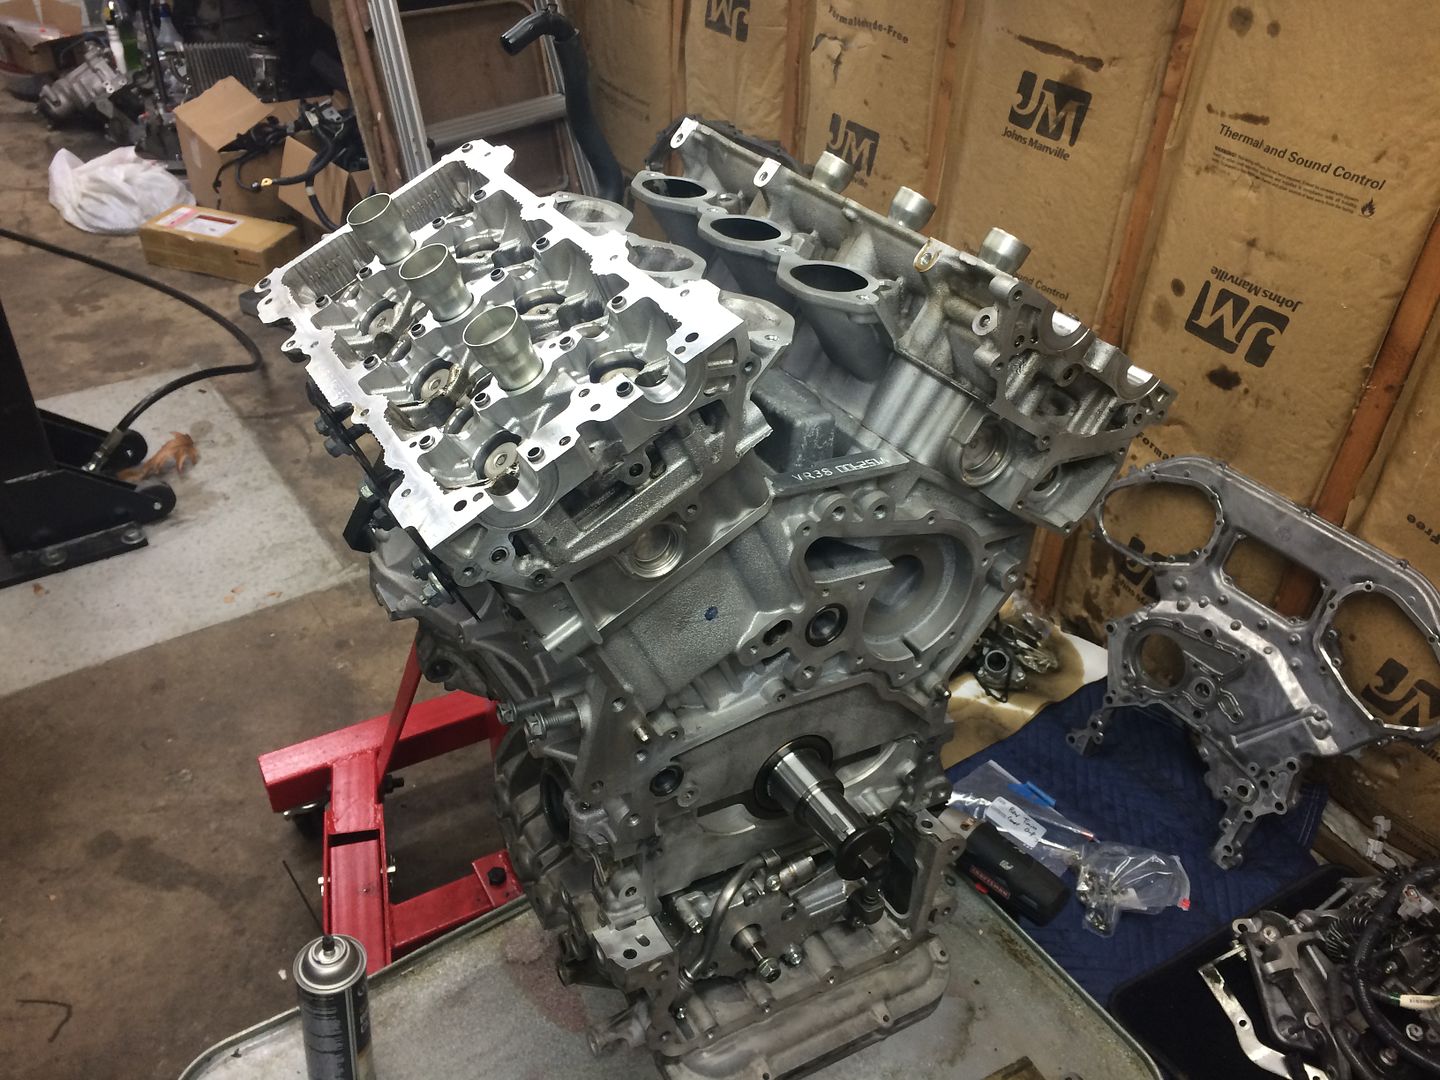
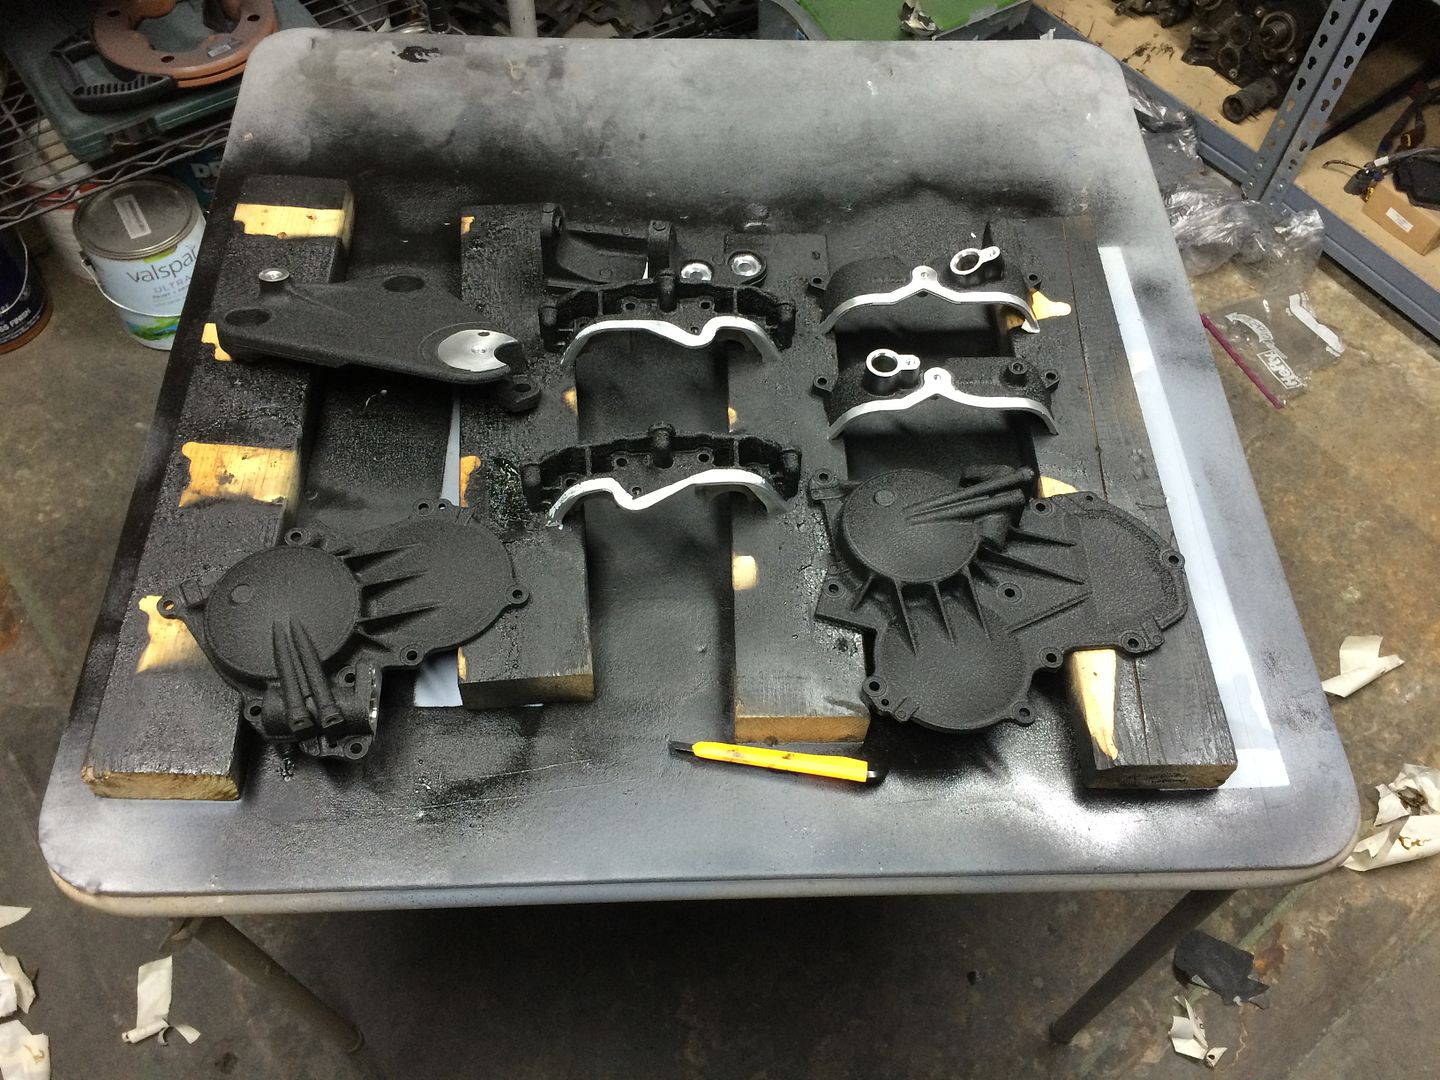
Now here's where I deviated a little and got crazy with the amount of time I put into this build. I wanted my engine to look top notch and like it was done by the pros. I ended up coating everything that was visible with VHT wrinkle black. Next to a wrinkle powercoat - I cannot tell the difference (and with close to 1000 miles on the car now the coat has not faded, chipped, or cracked) Here I am taping the rear timing cover off for prep 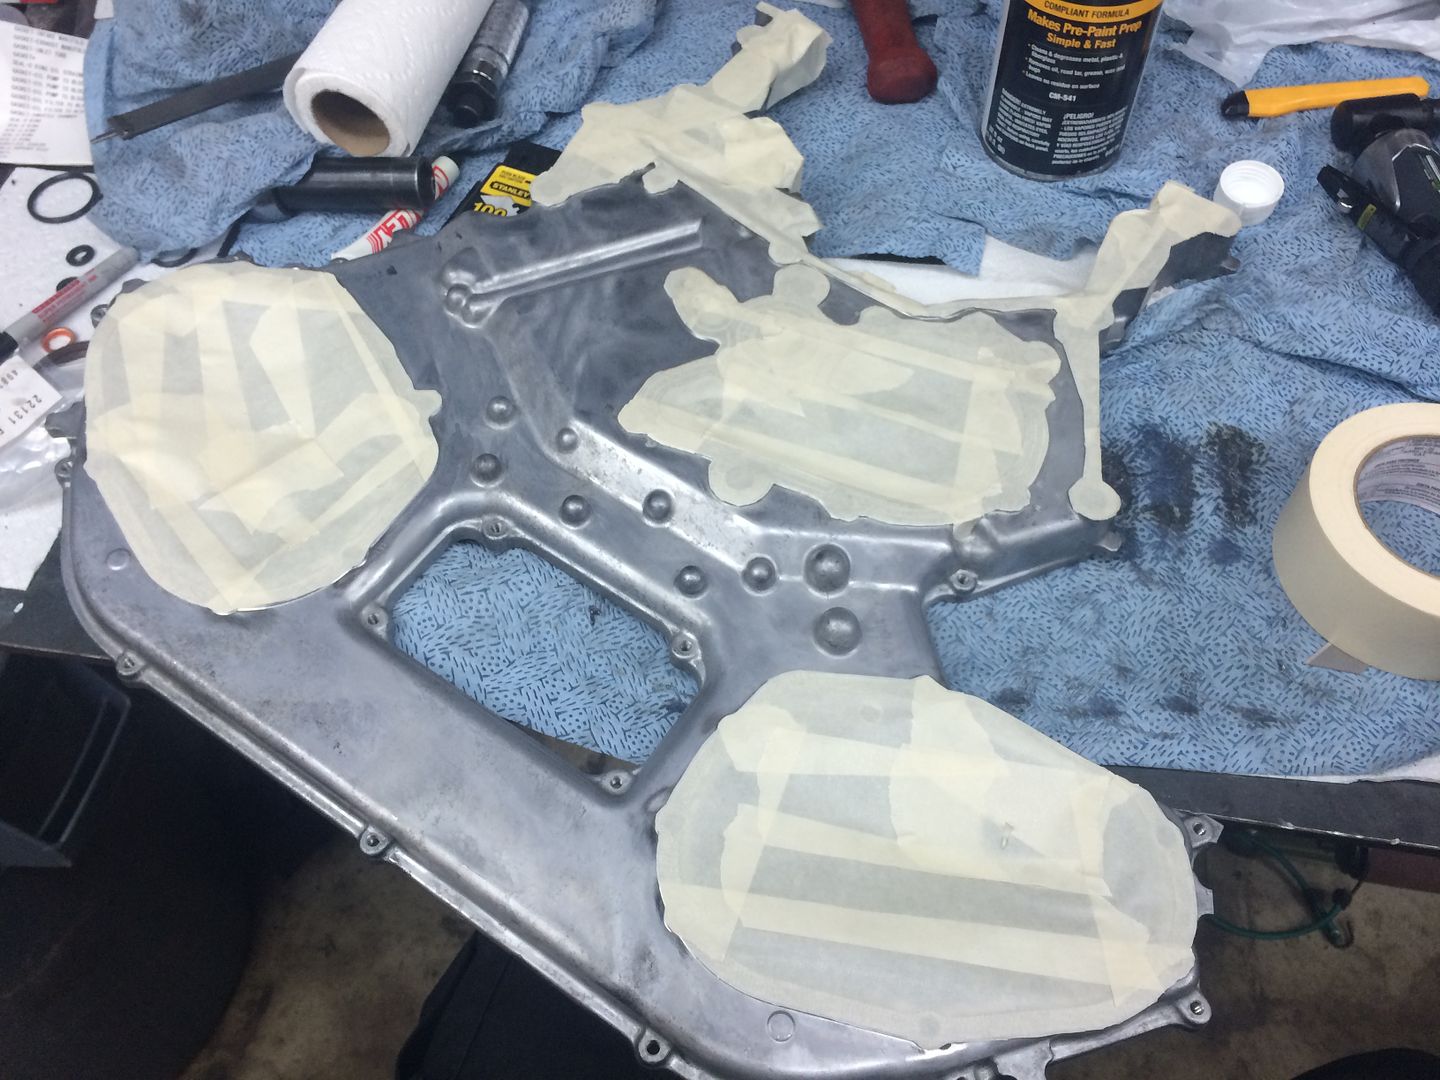
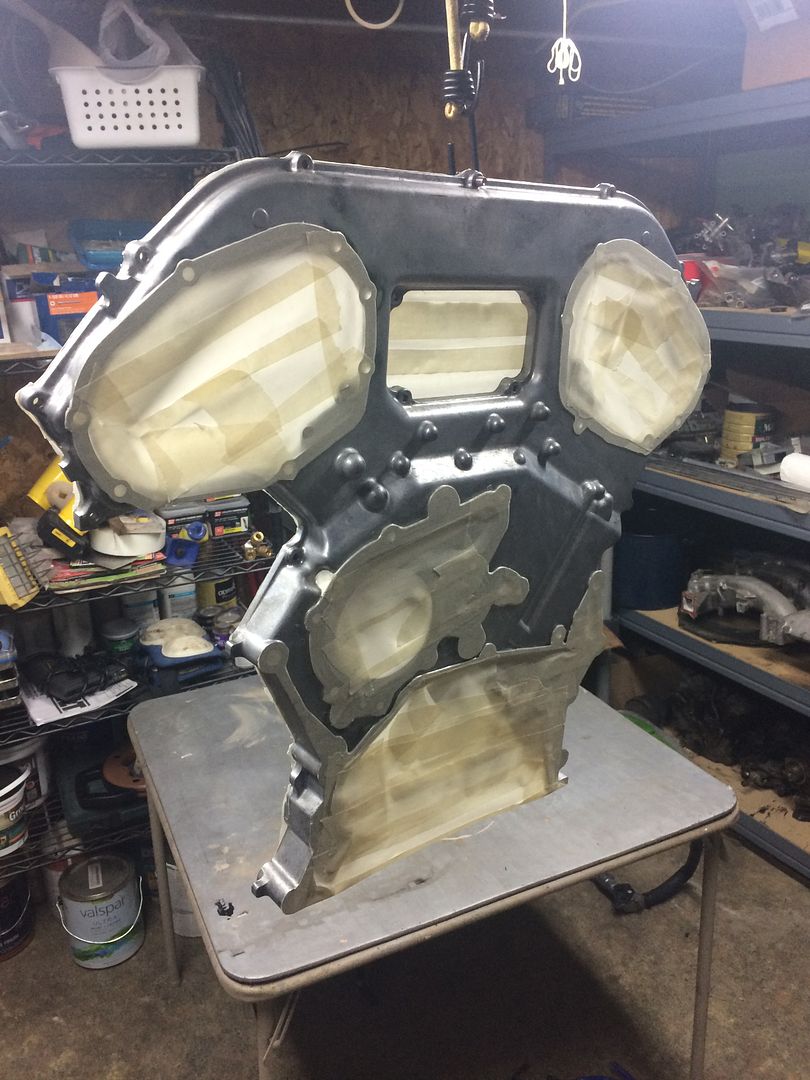
Primed 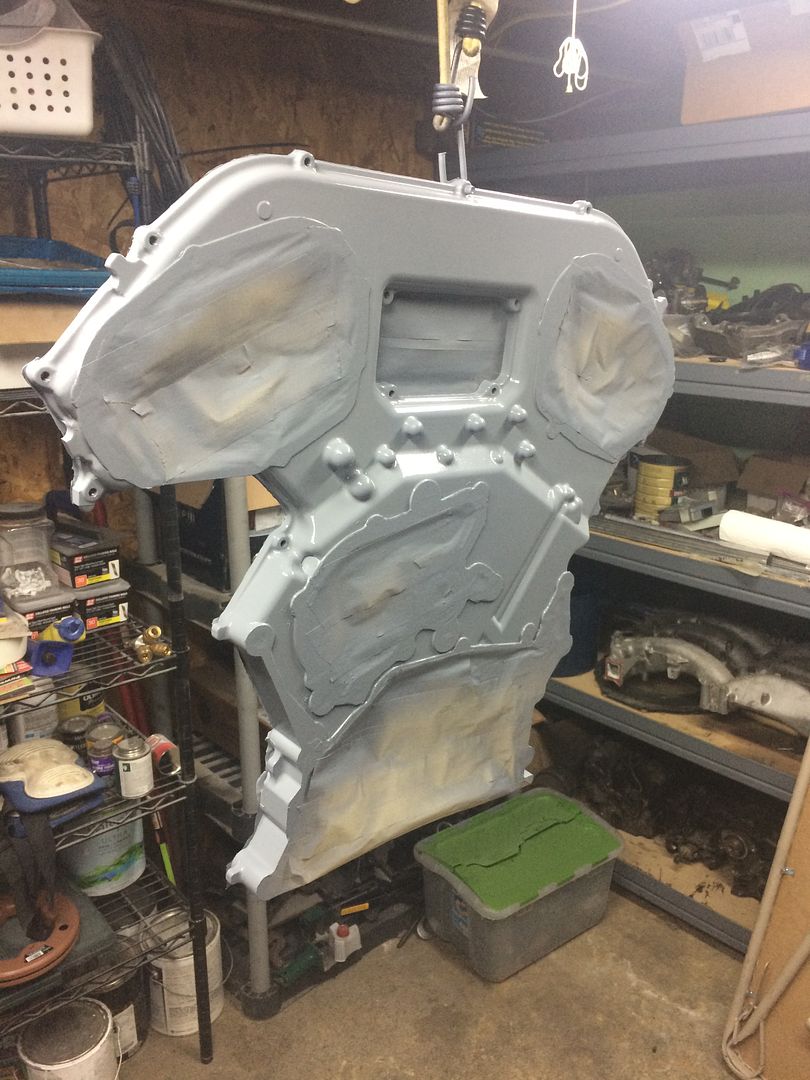
Coated 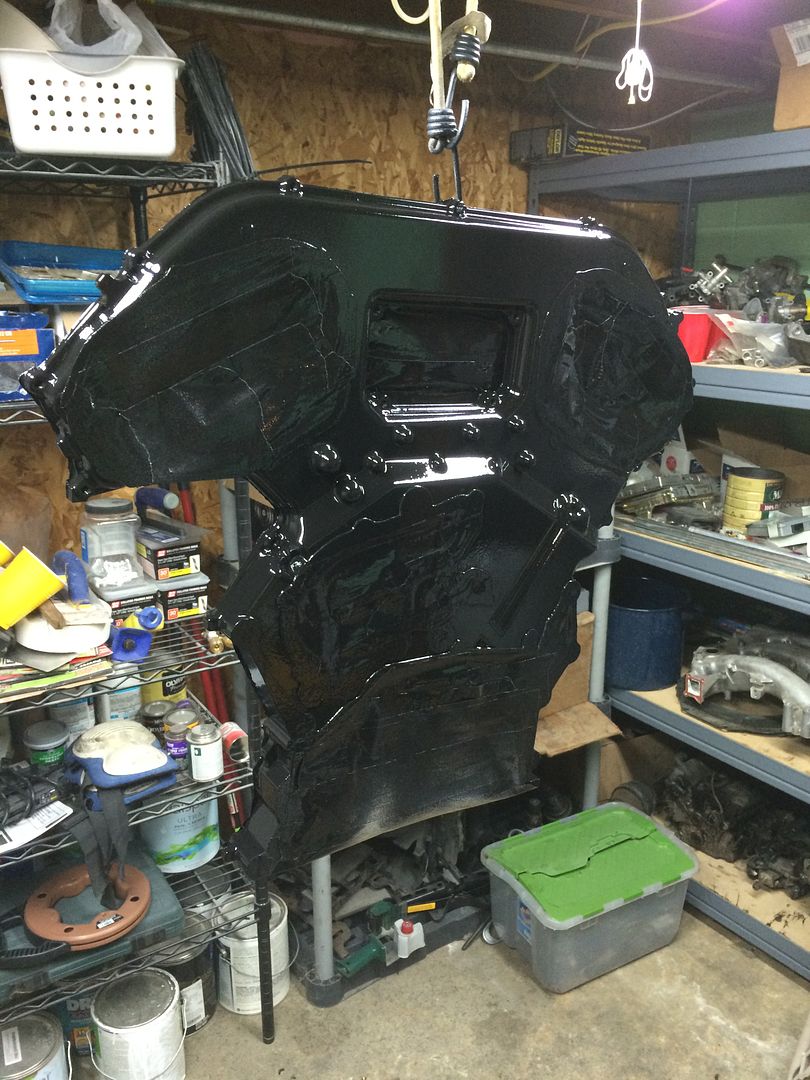
To get the coating to wrinkle, you have to hit it with a heat gun up to around 160-170F. It turns out awesome 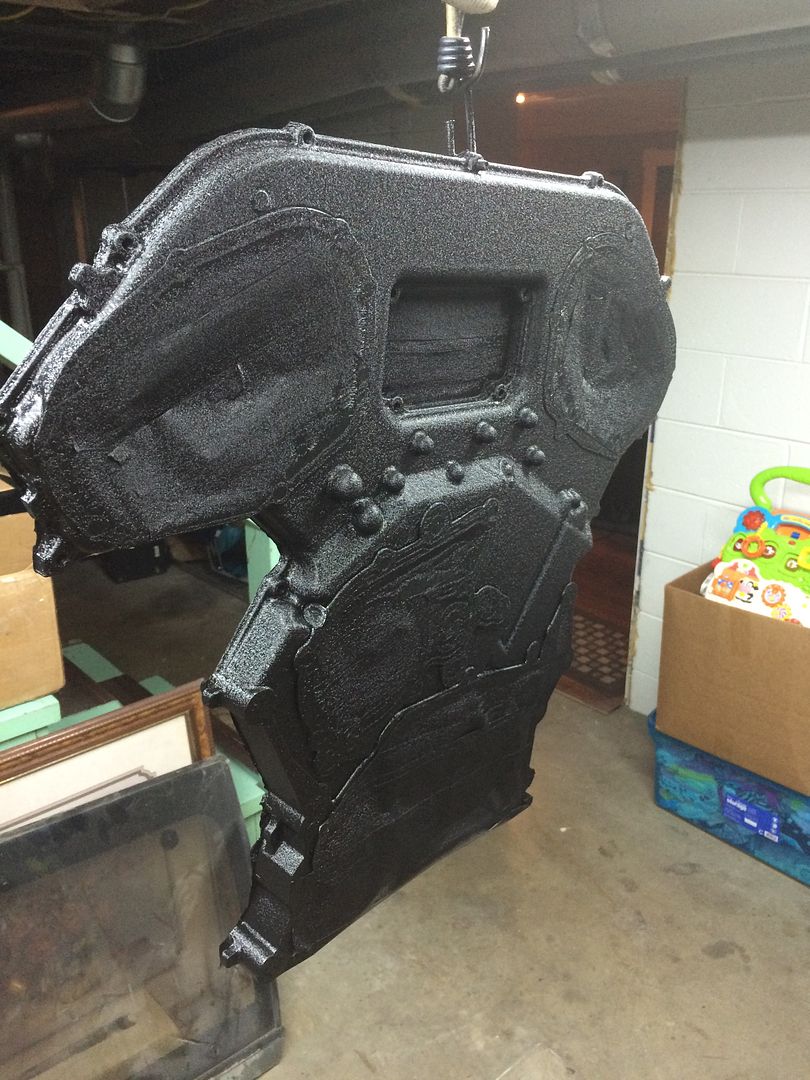
Finished product 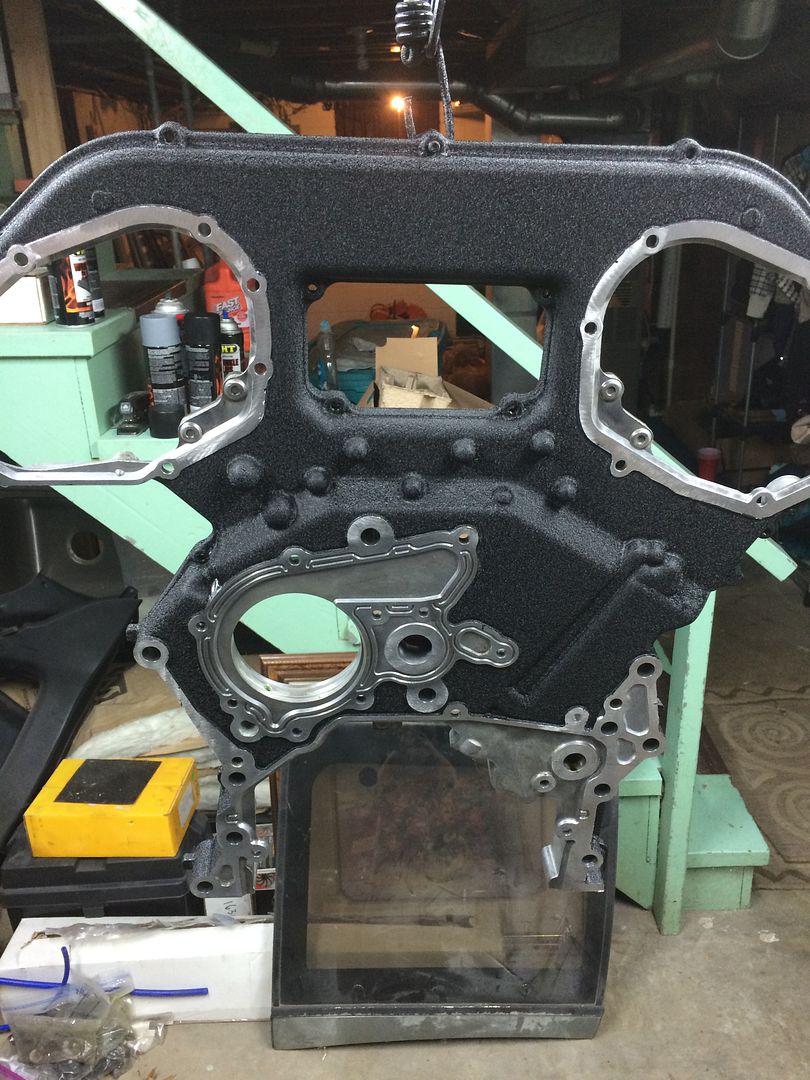
Same process for the front timing cover 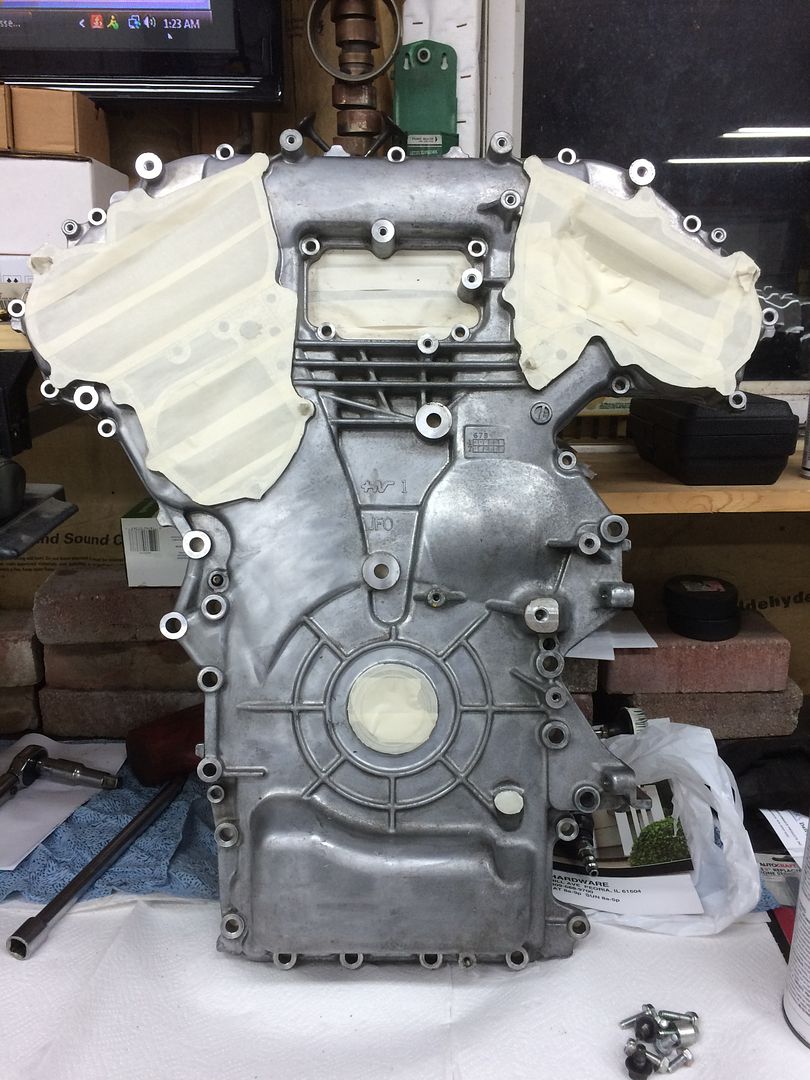
Drying 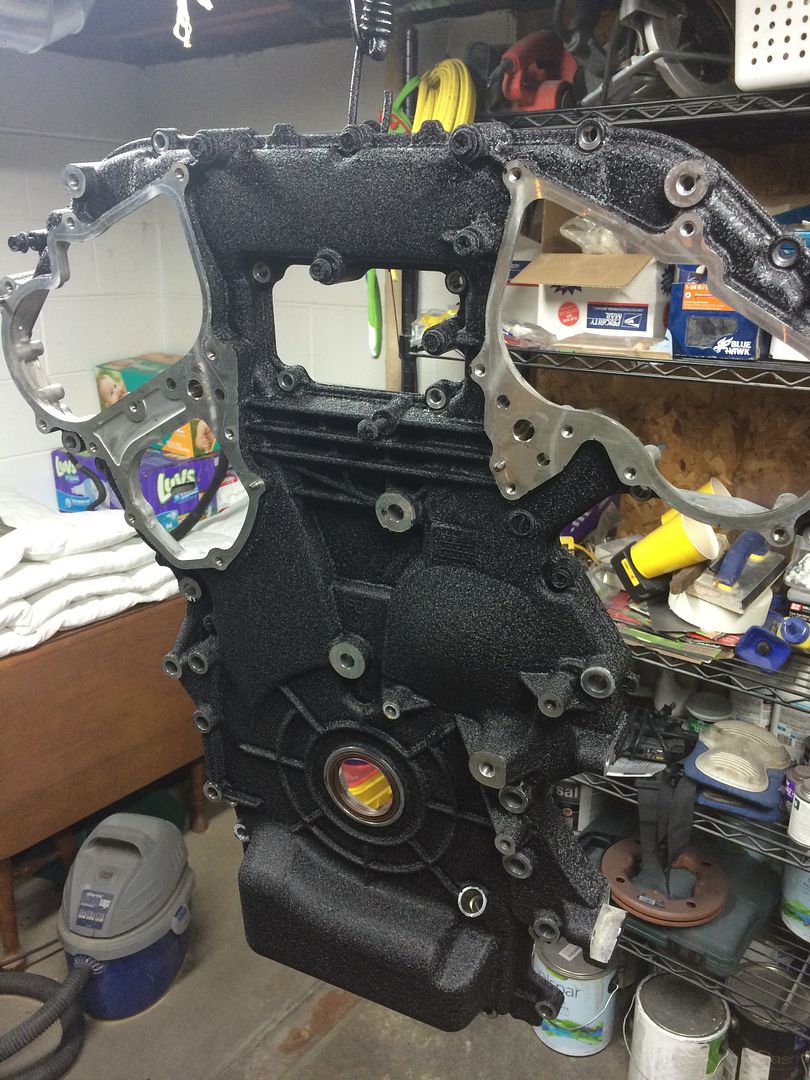
Notice all the RTV that goes back on 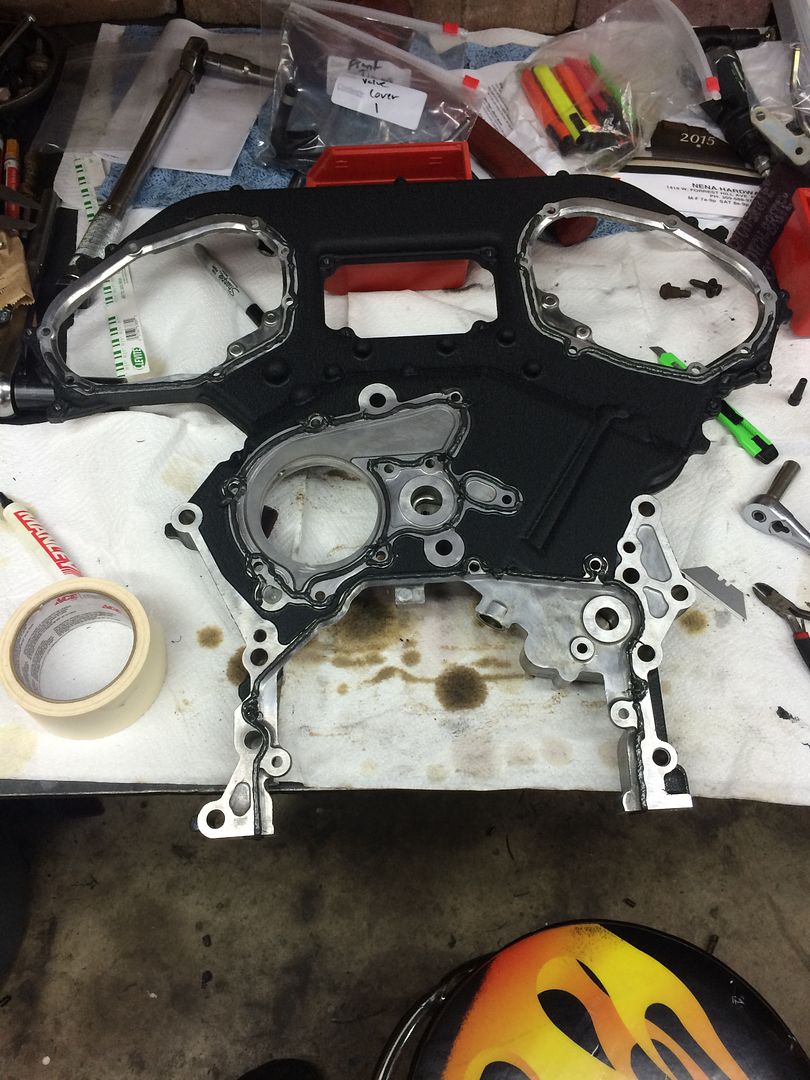
Rear timing cover installed 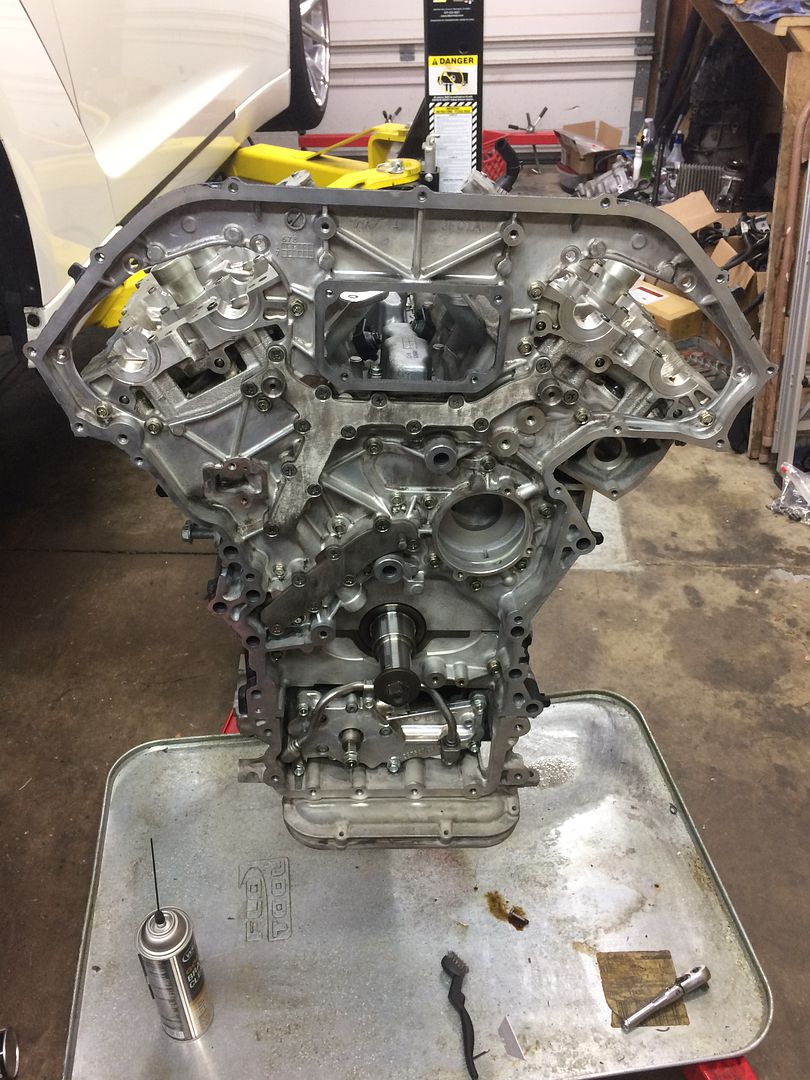
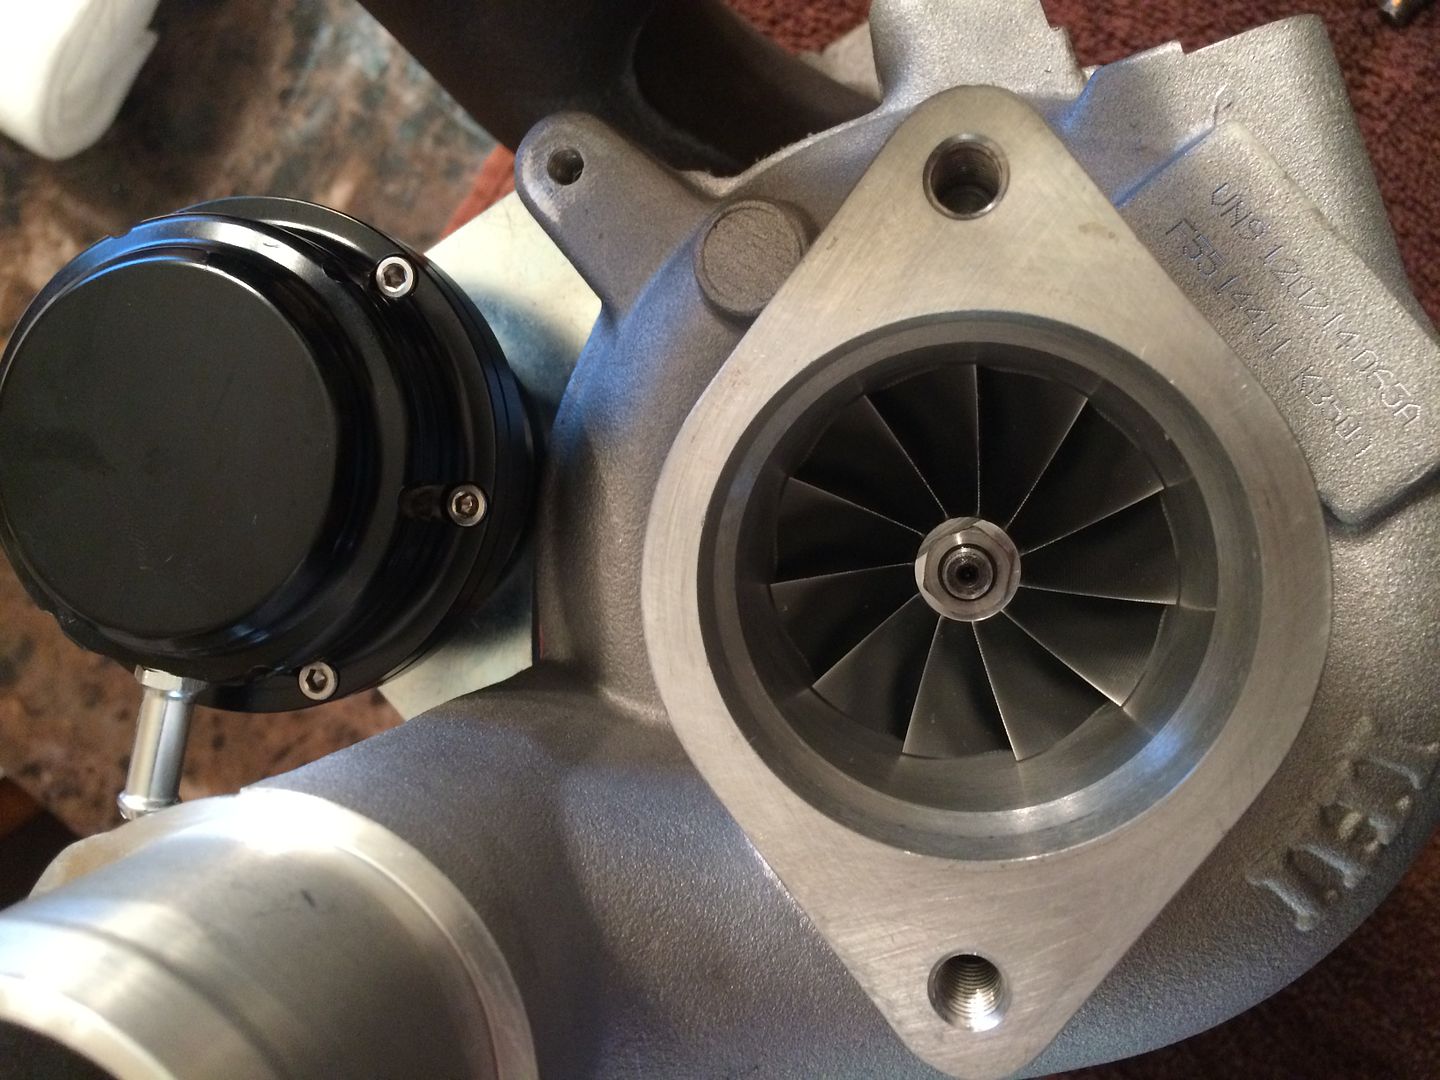
Next up for the fun parts is the turbos. I went with a stock manifold turbo (notice how its integrated into the turbine housing) I expect above 8xxwhp and have seen several dynos with supporting mods make above 950whp with these identical turbos 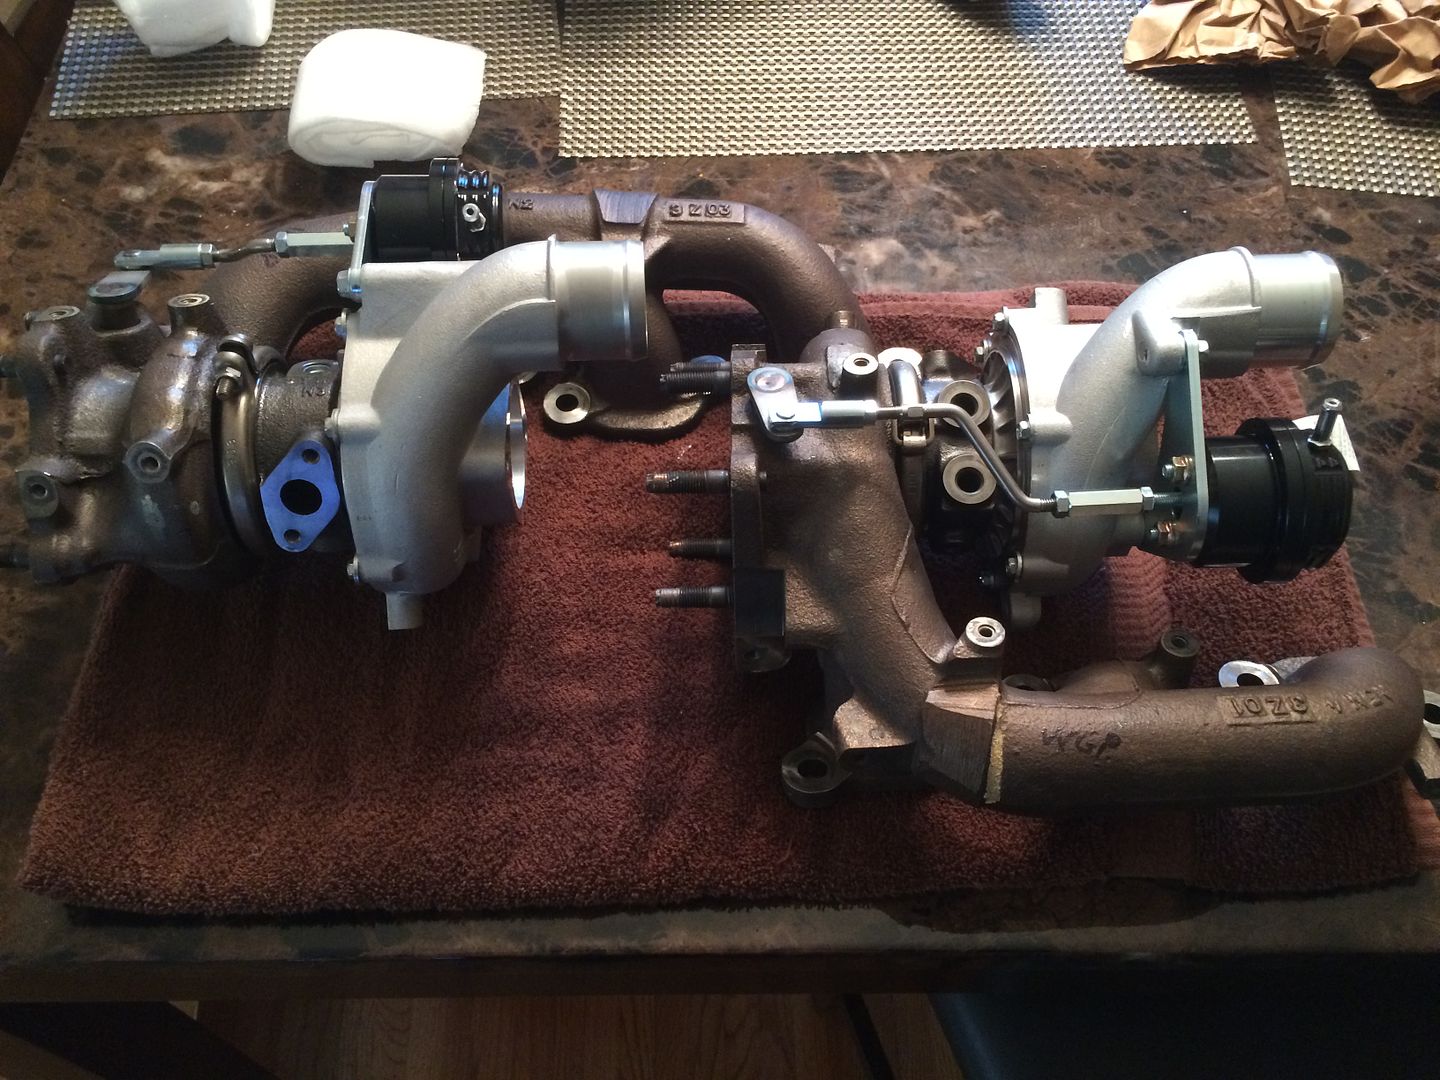
Now back to getting stuff painted. 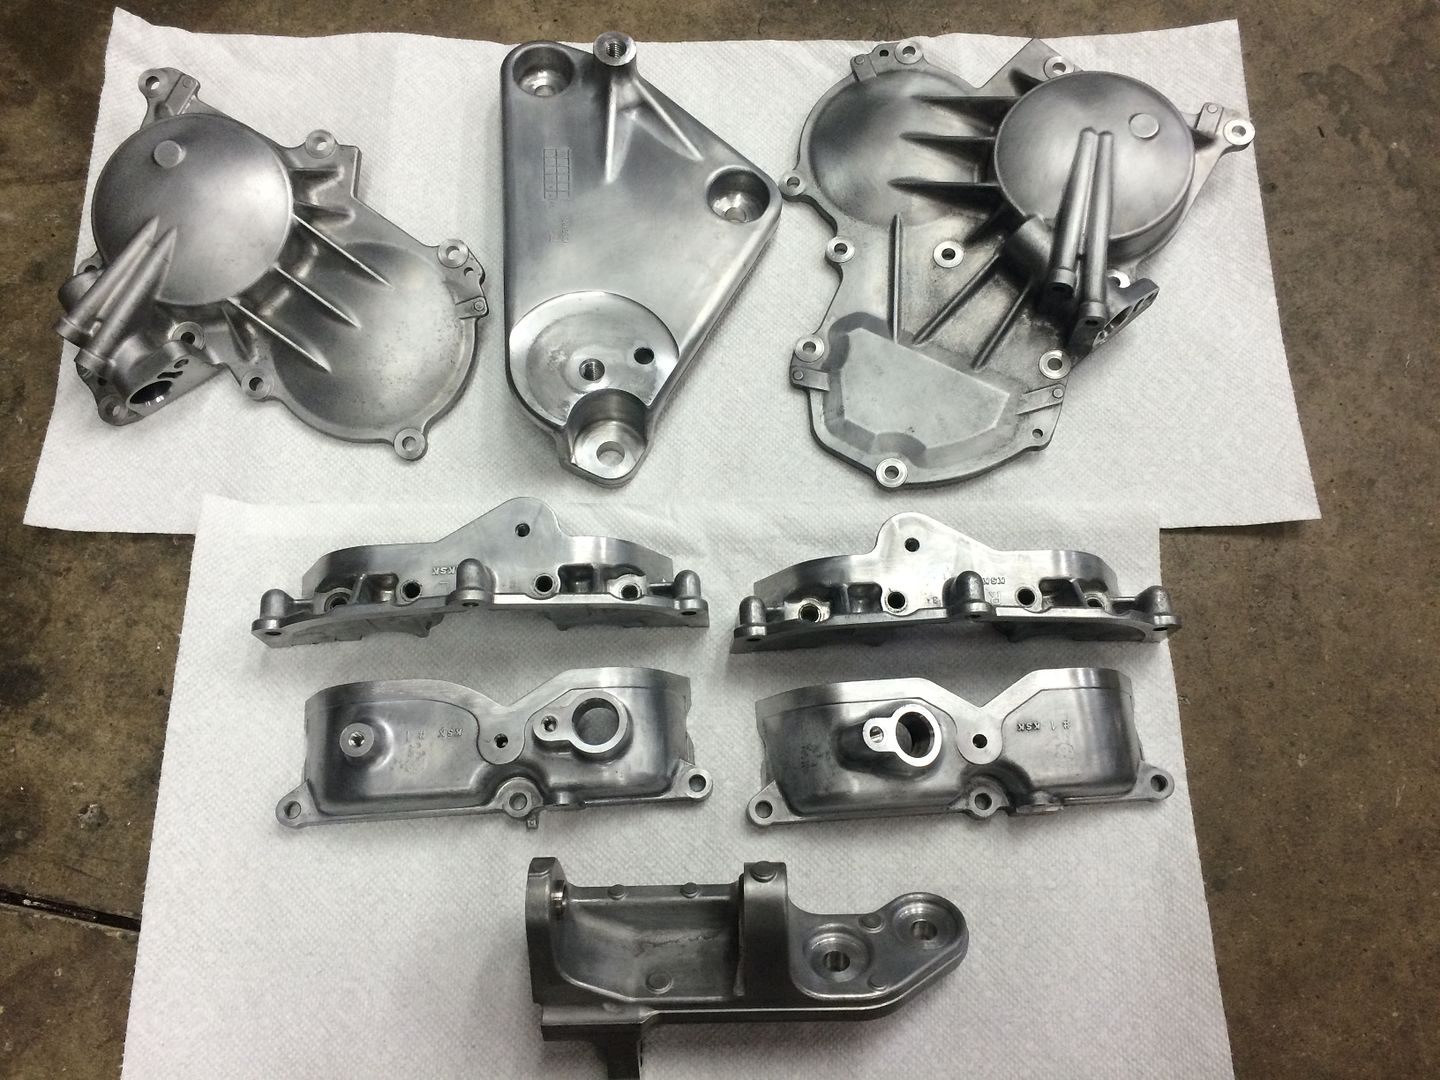
Now getting the cams back in 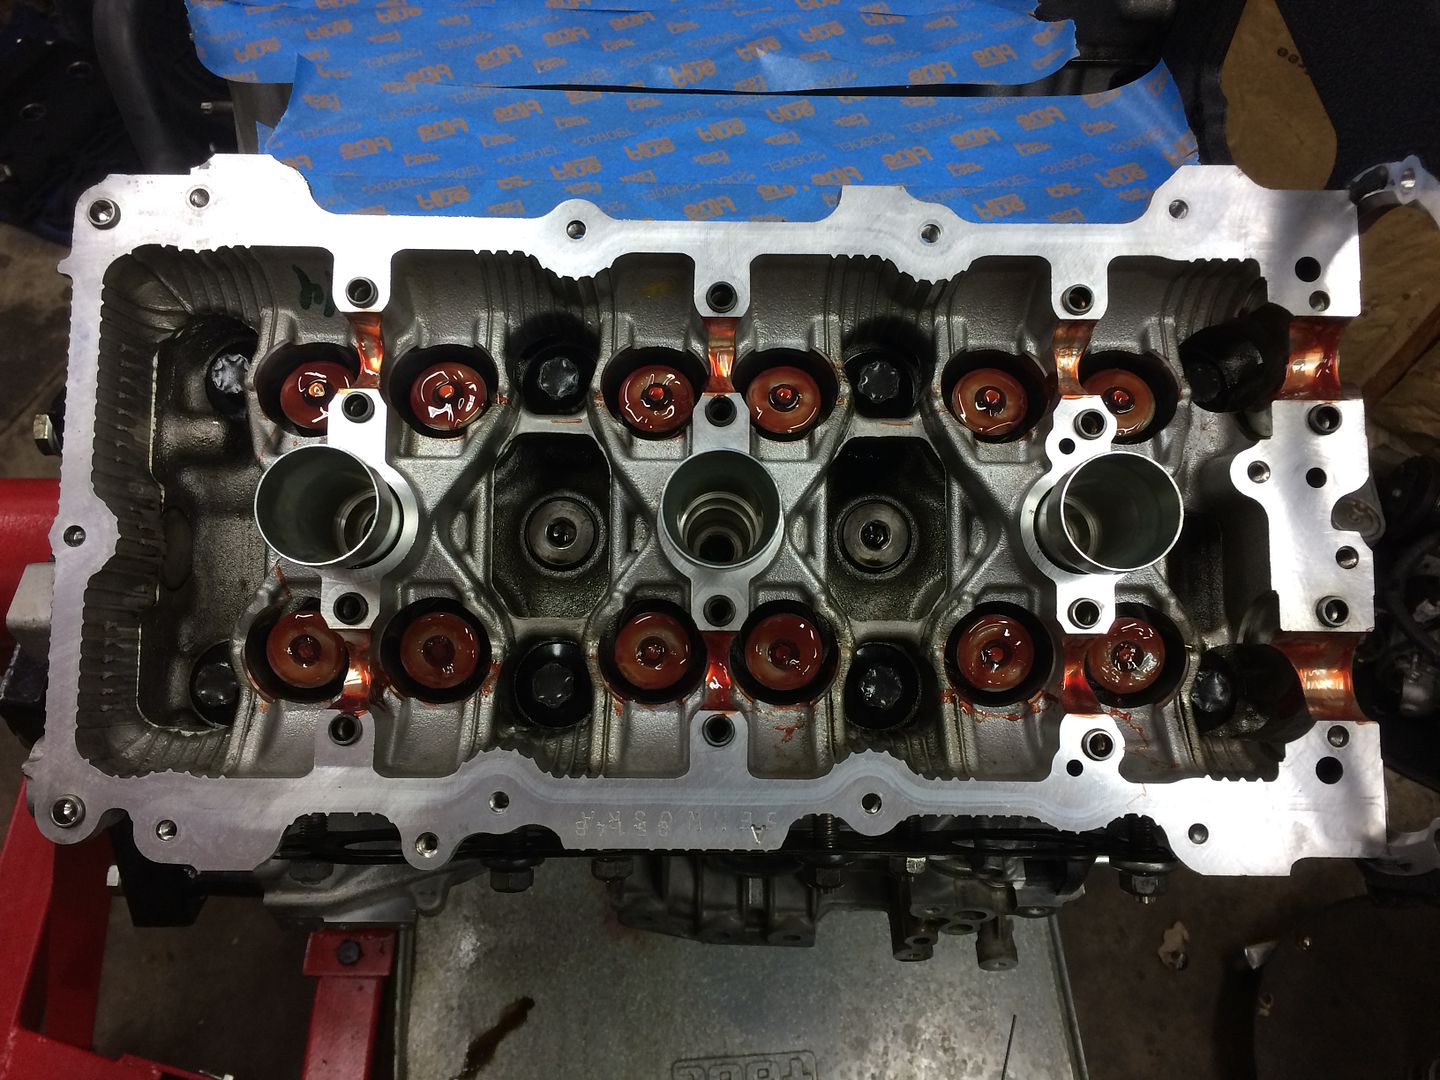
Cams and covers on 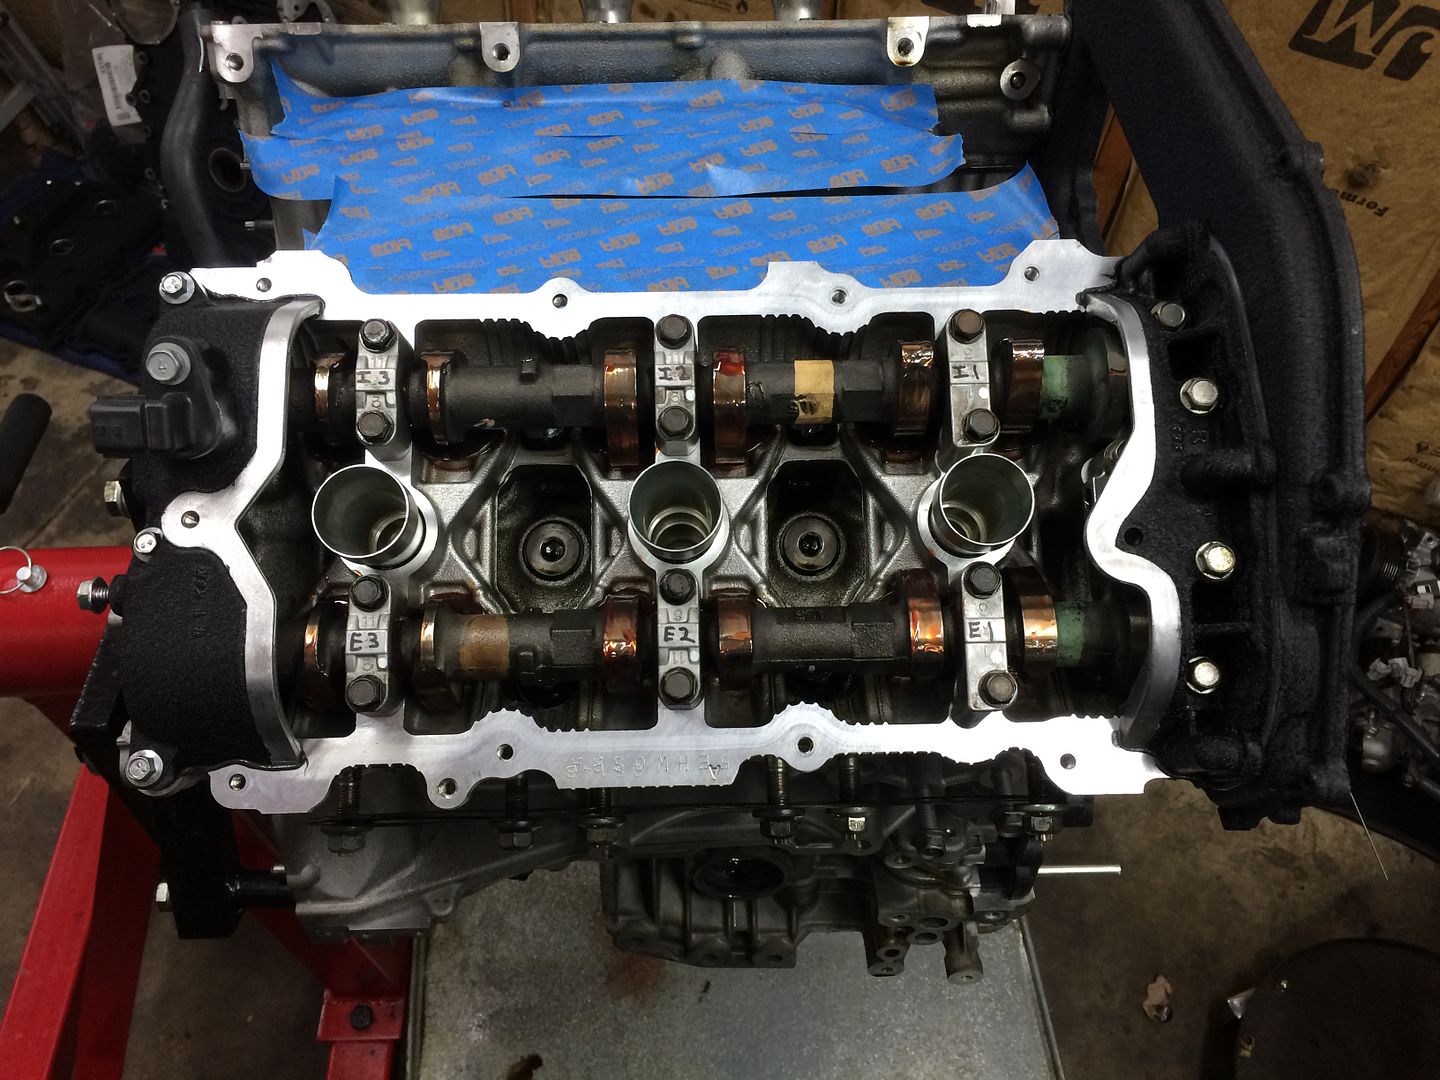
Now I can begin re-assembling the valve train 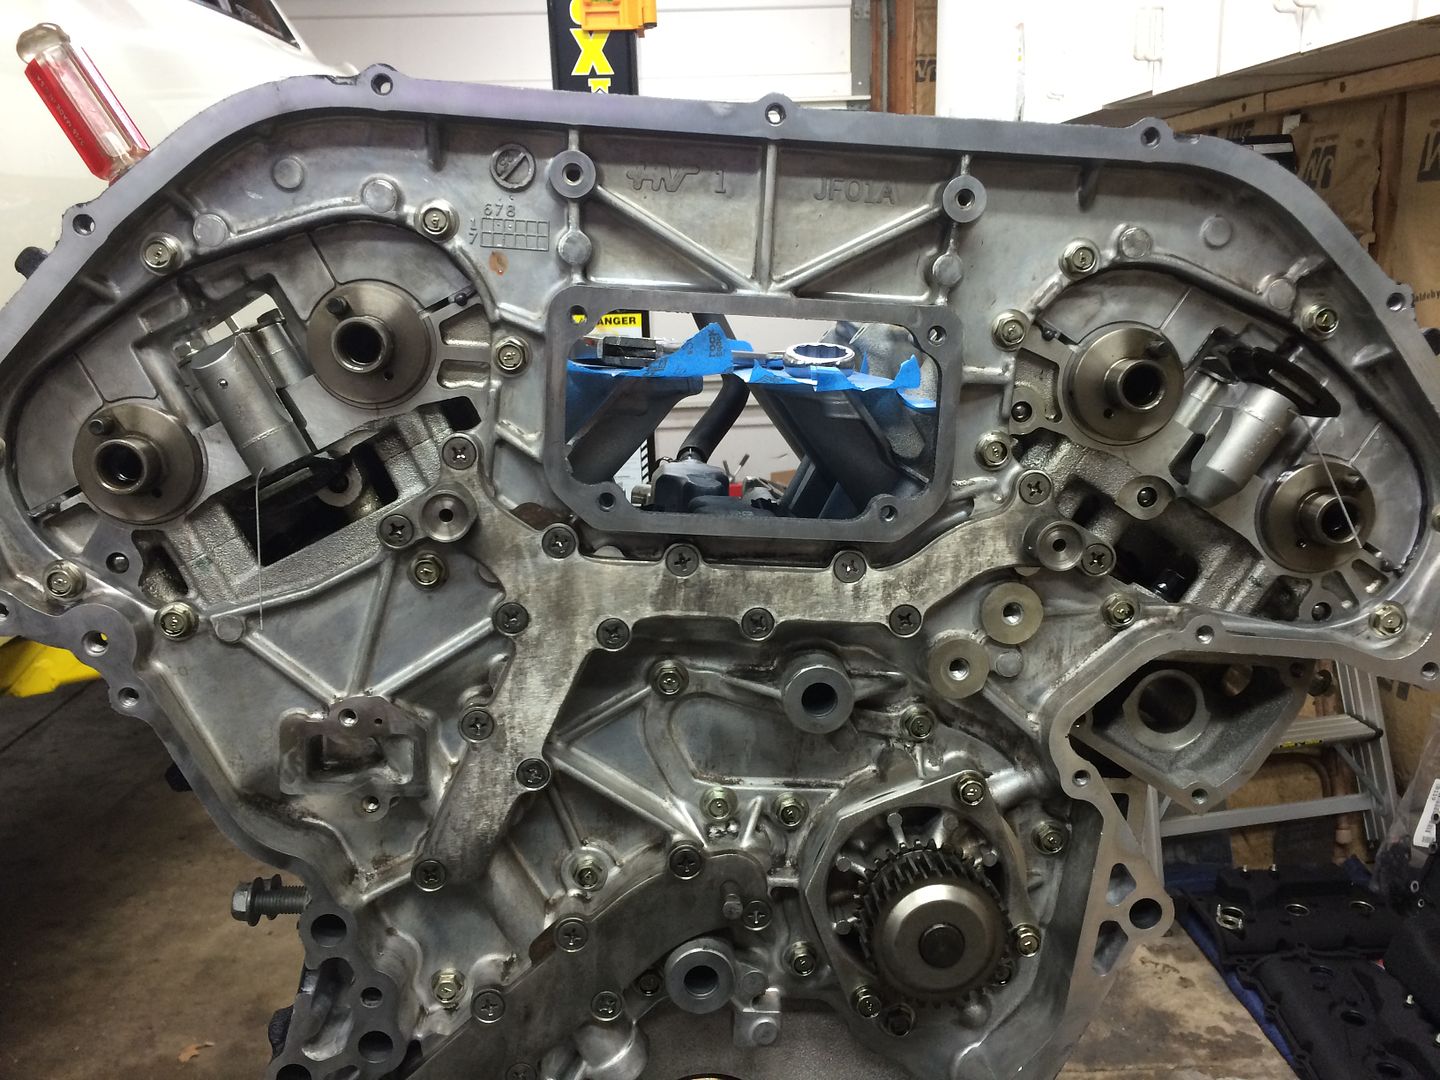
Timing marks 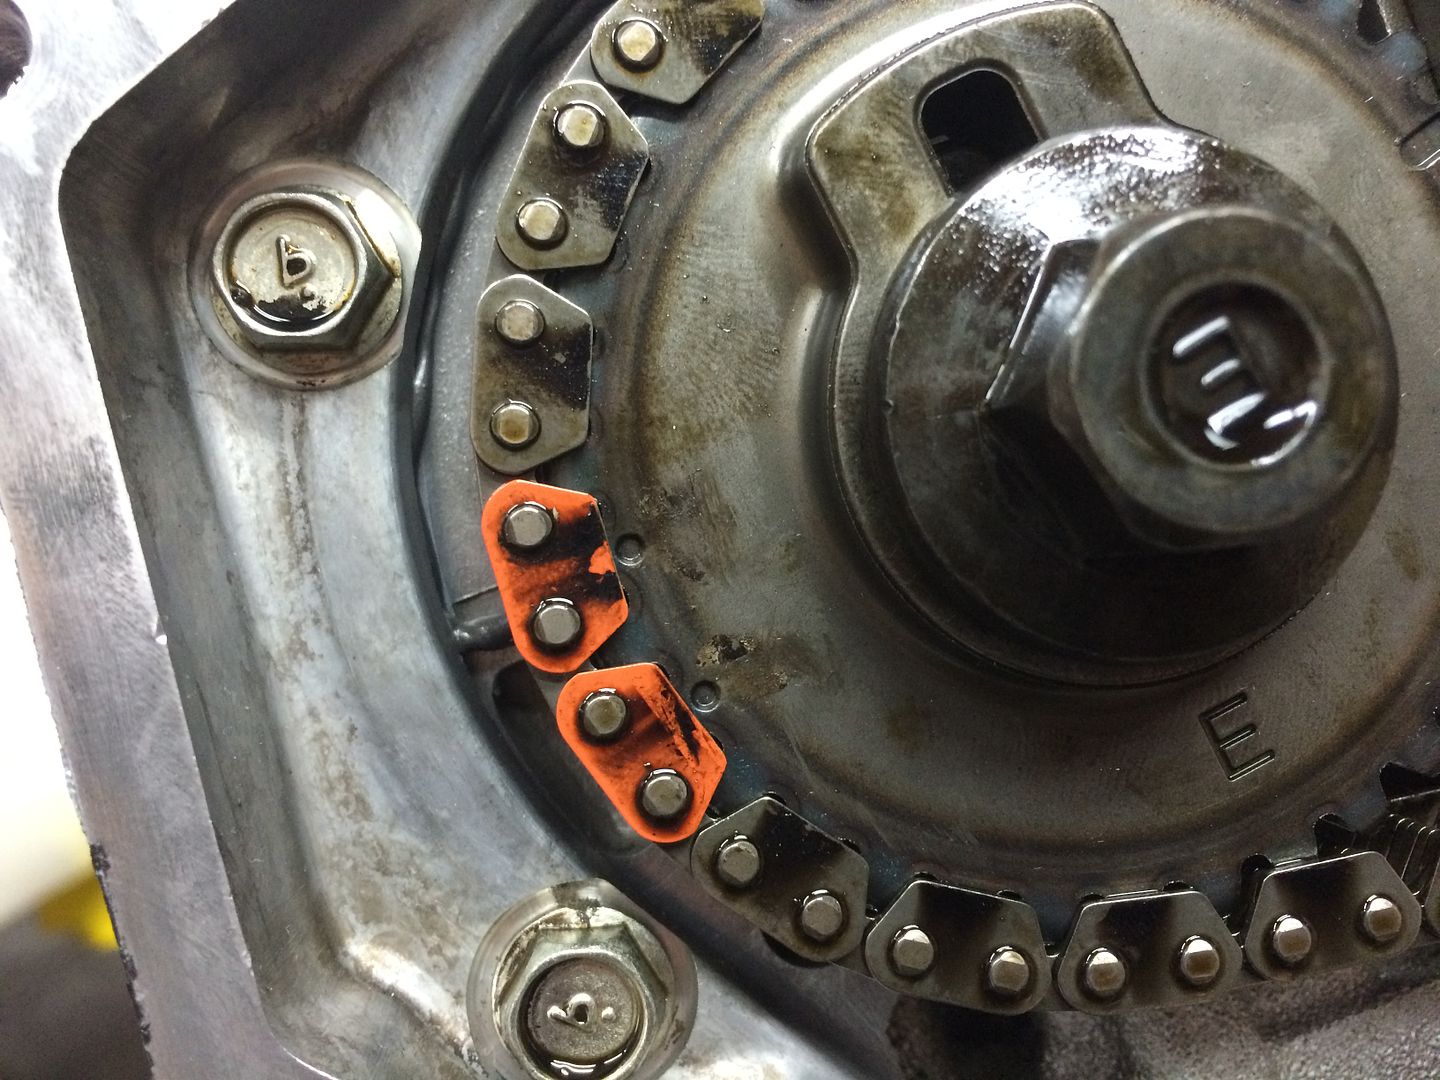
All installed 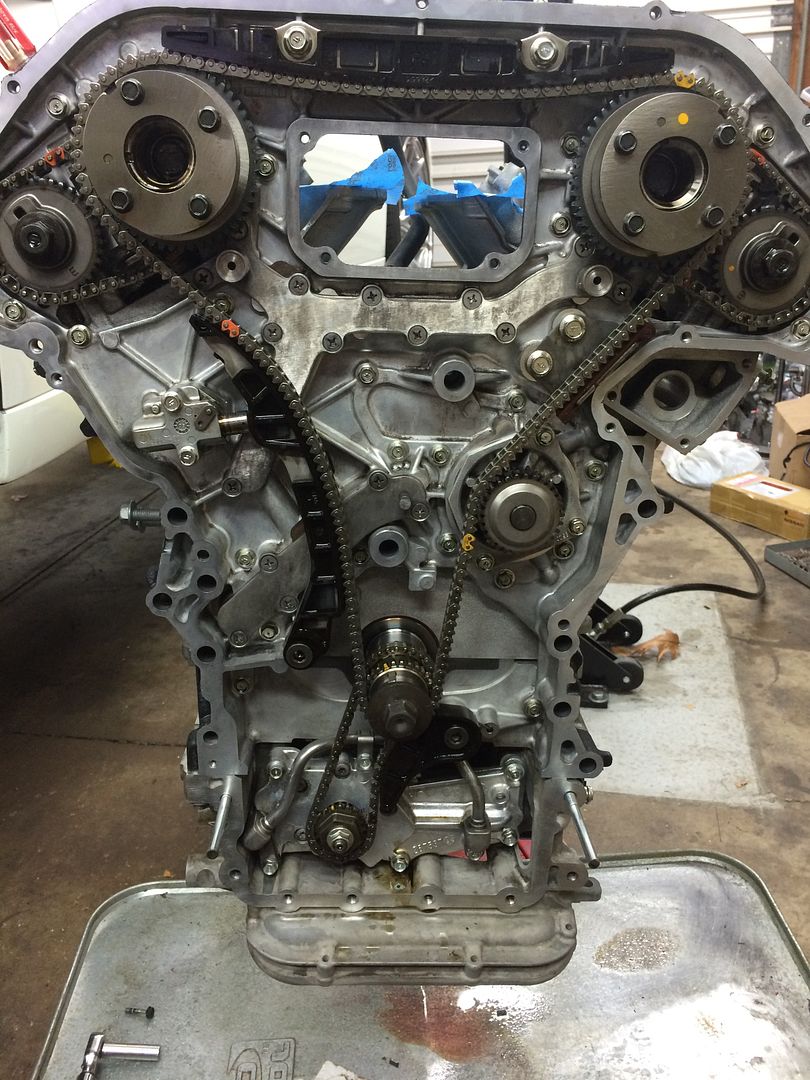
Again, with the crazy amount of RTV!!!!! 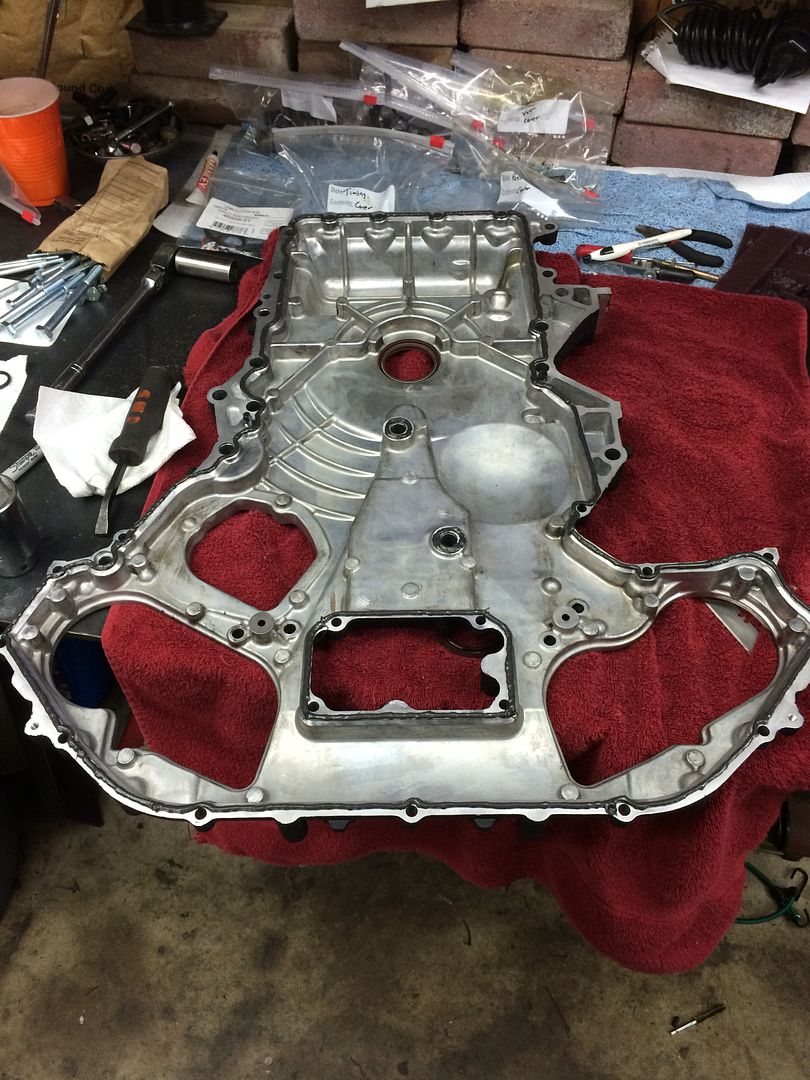
Front of the engine back together 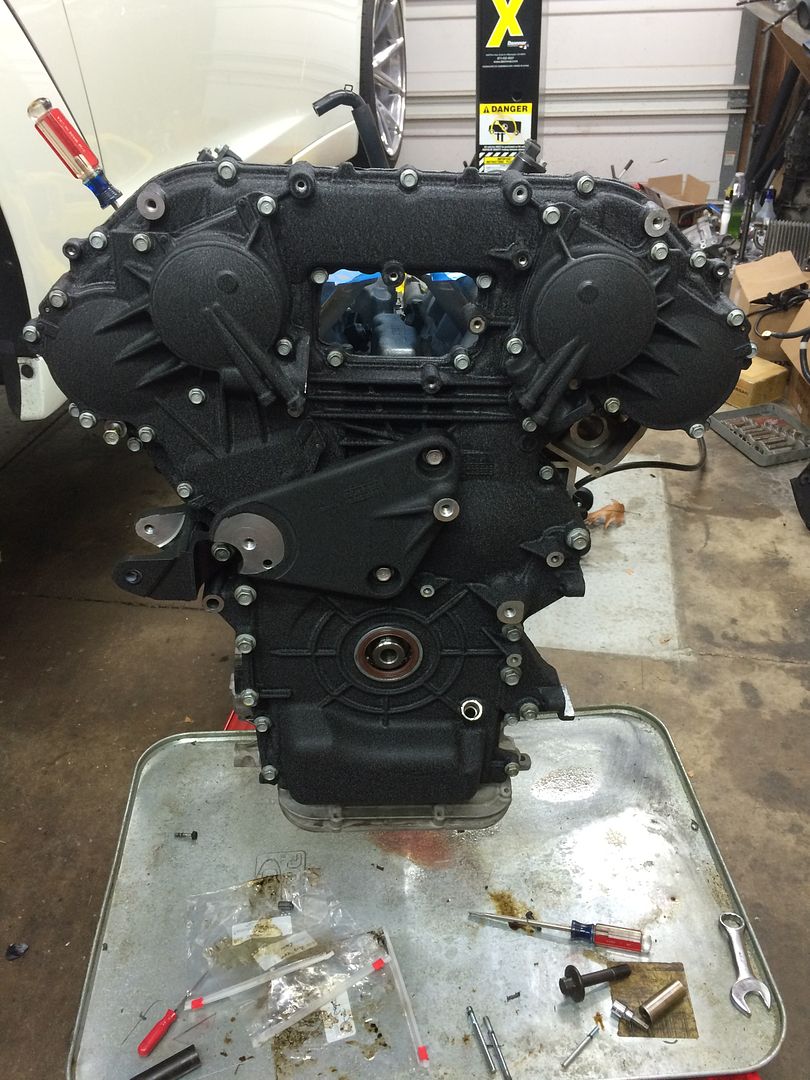
Valve covers on 
Now the engine is ready to come back off the stand and begin with the accessories and turbos 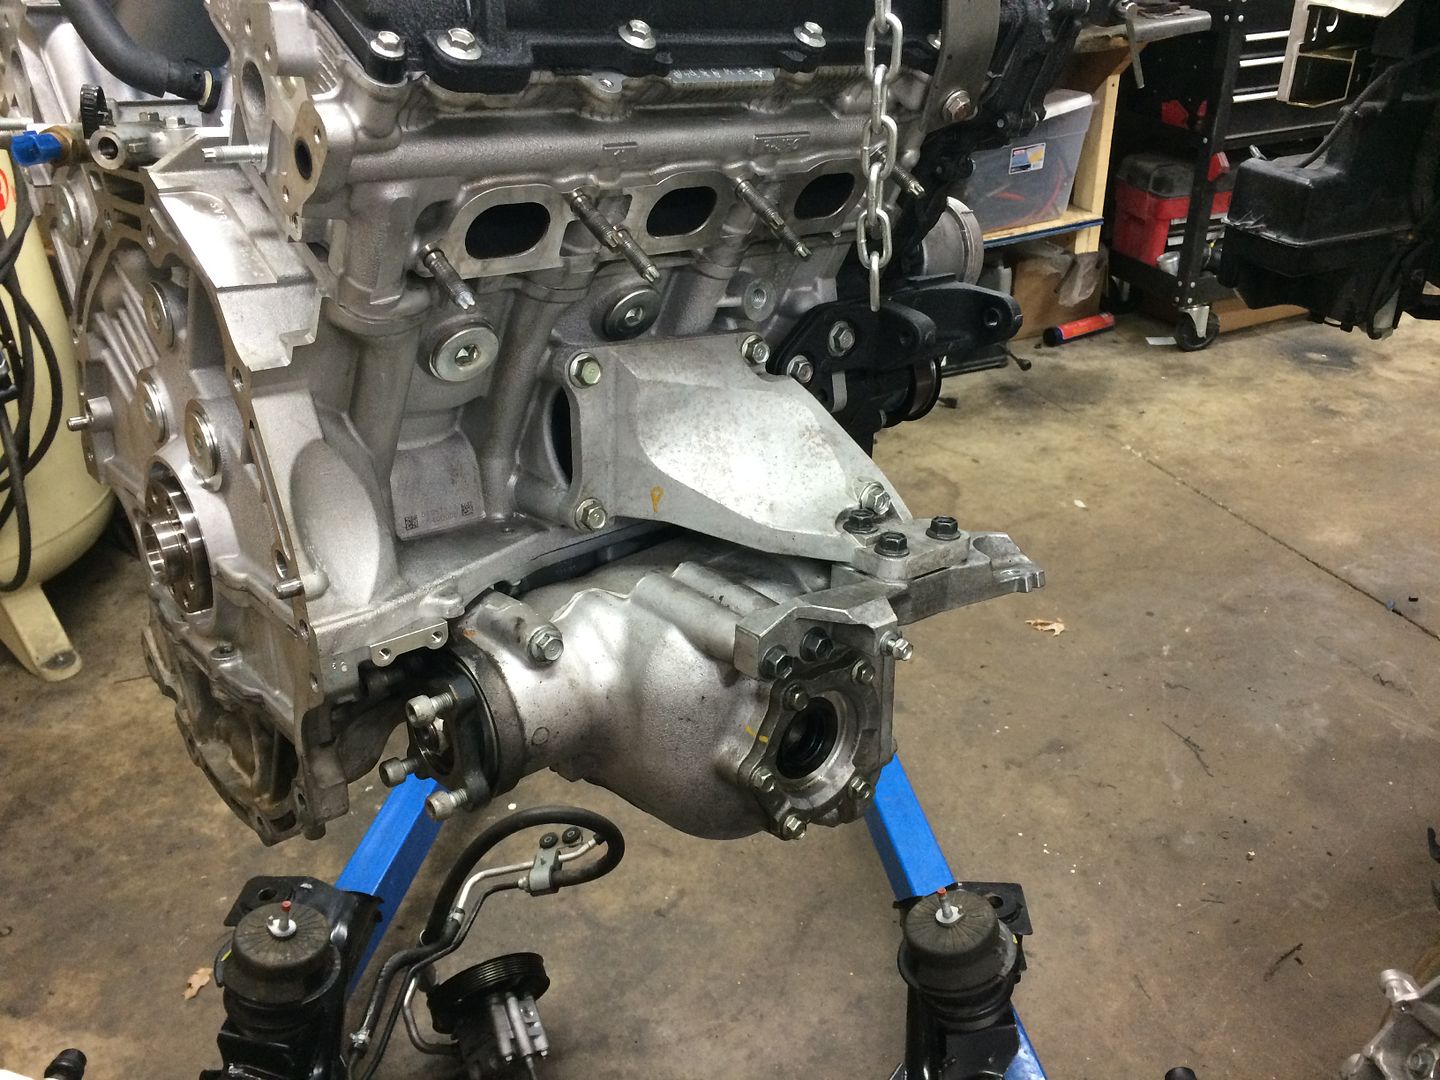
Bell housing back on 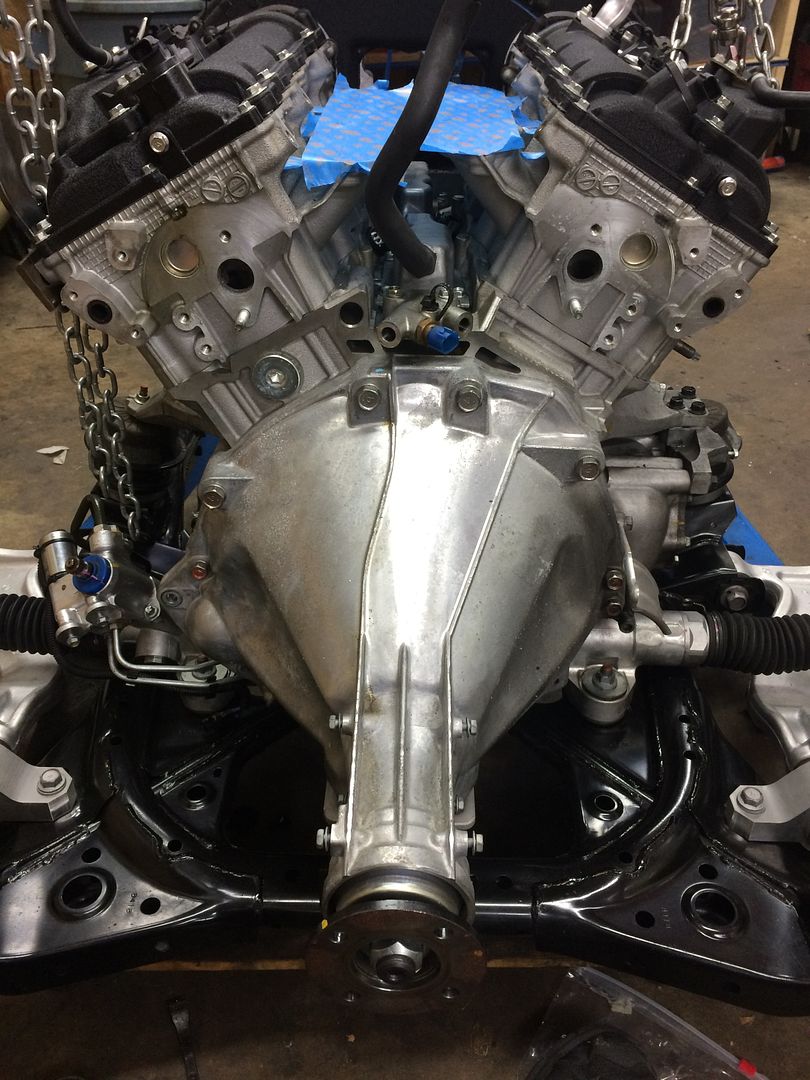
Also coated my 3" turbo inlets 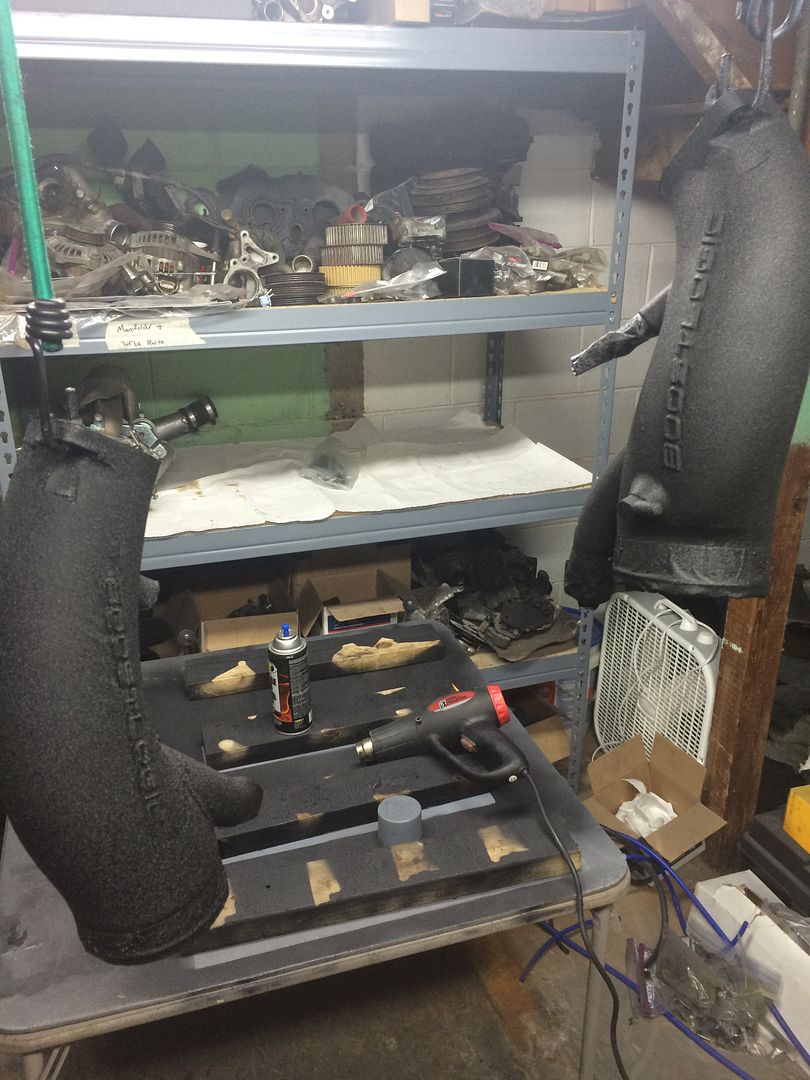
Turbos and inlets are on 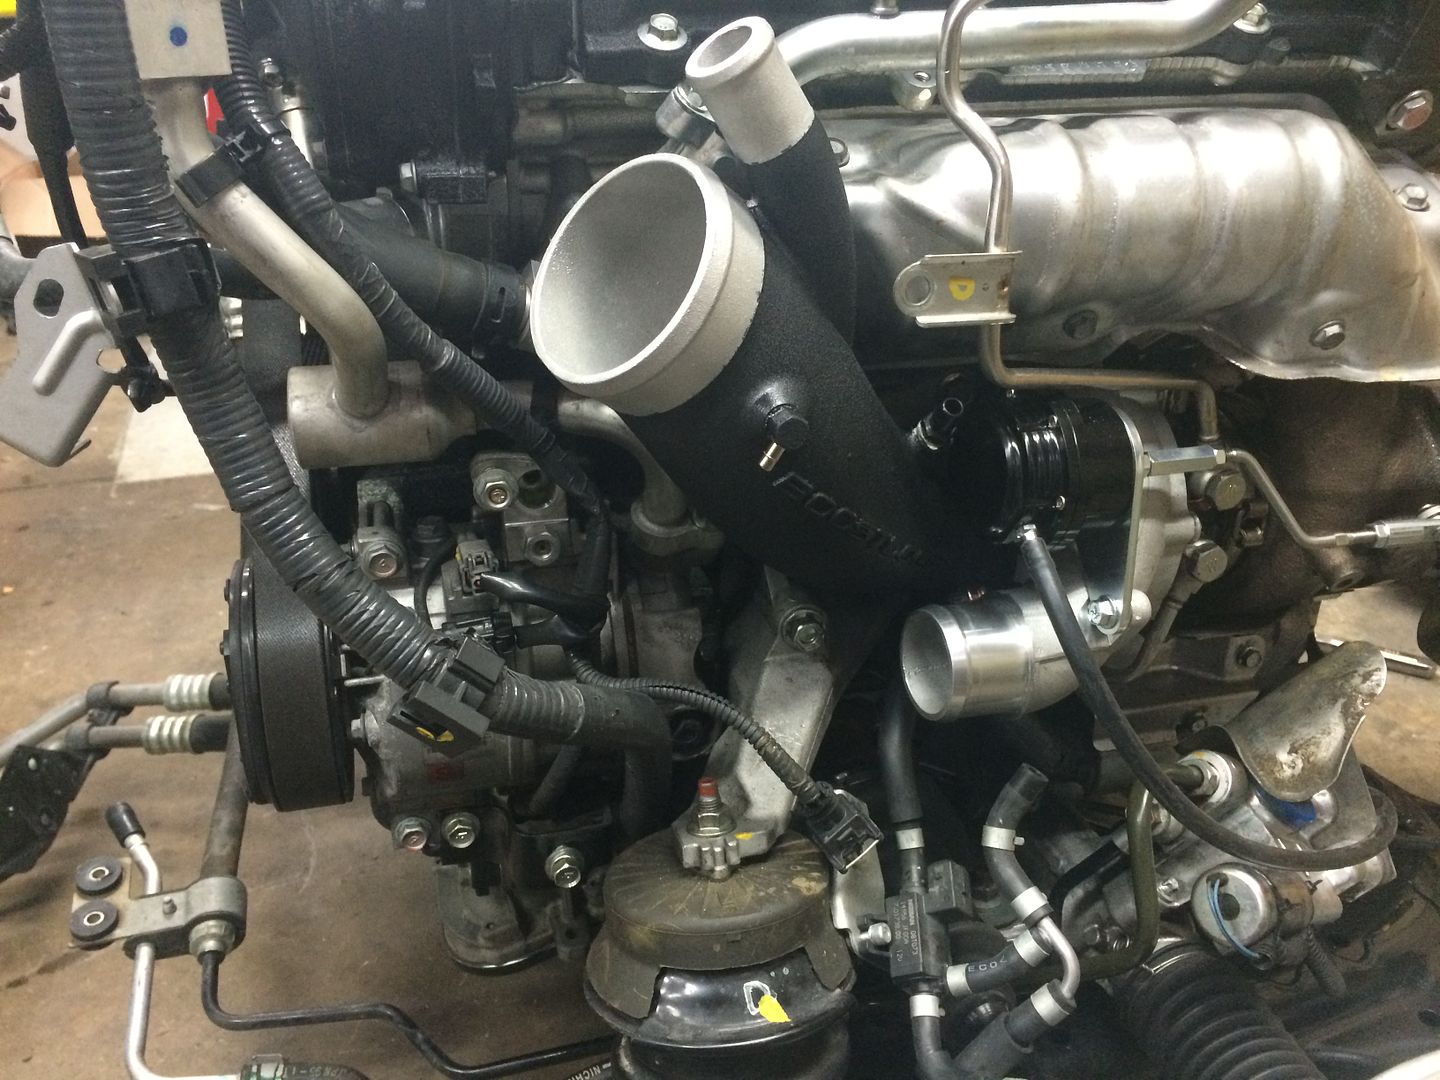
Test rig I setup to balance the wastegates 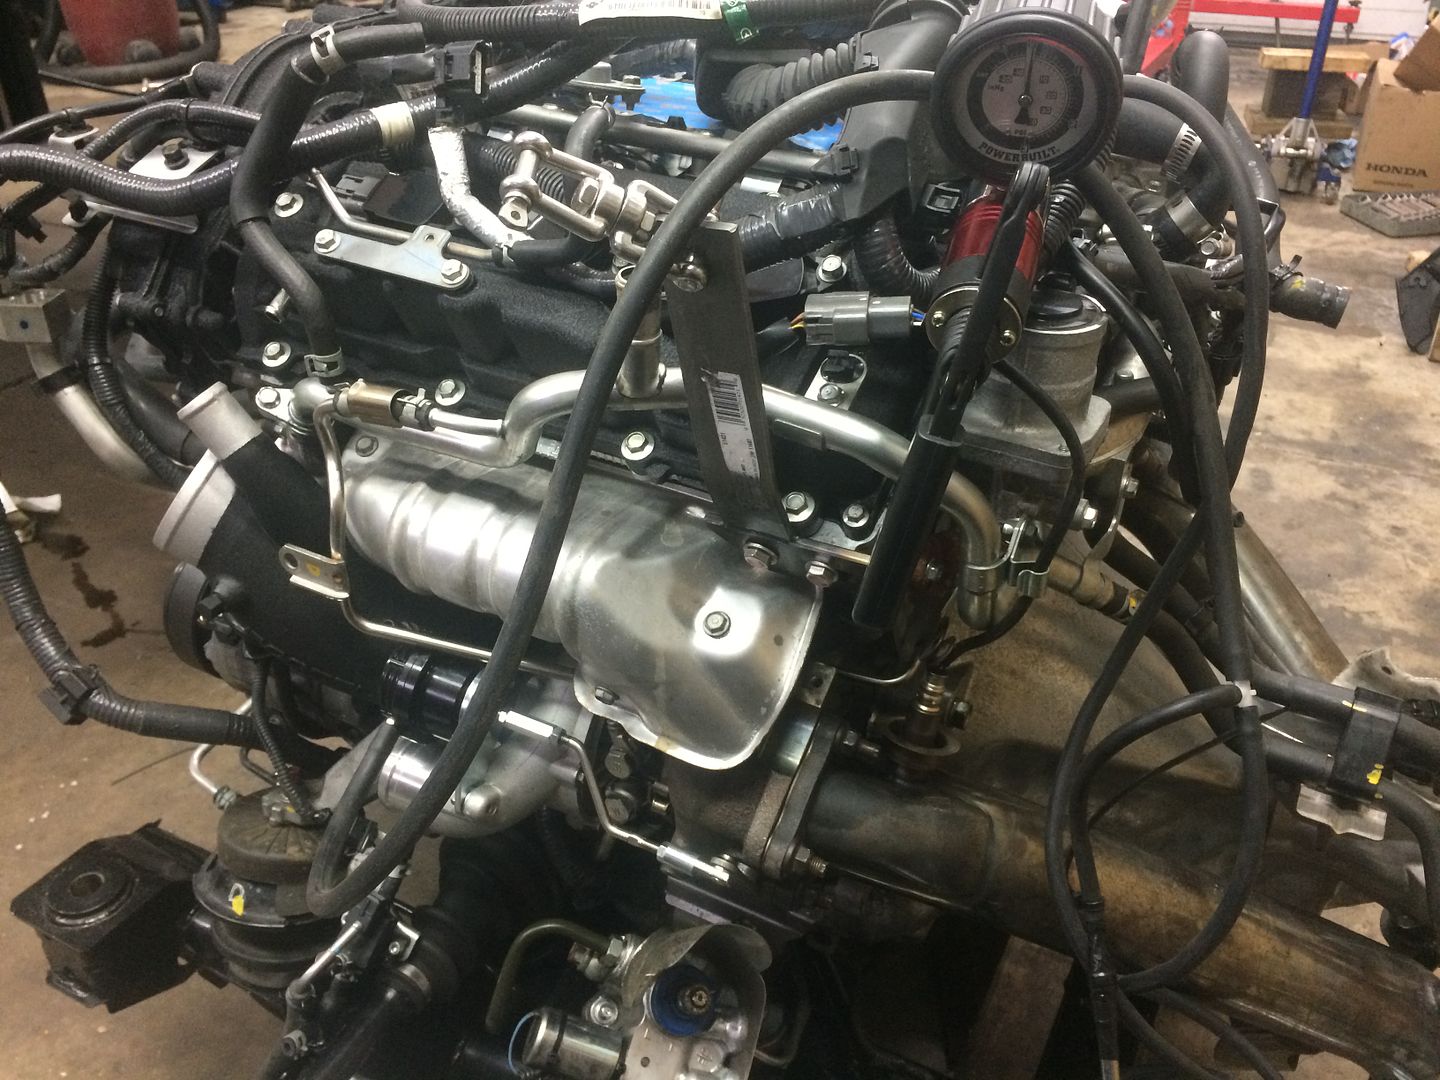
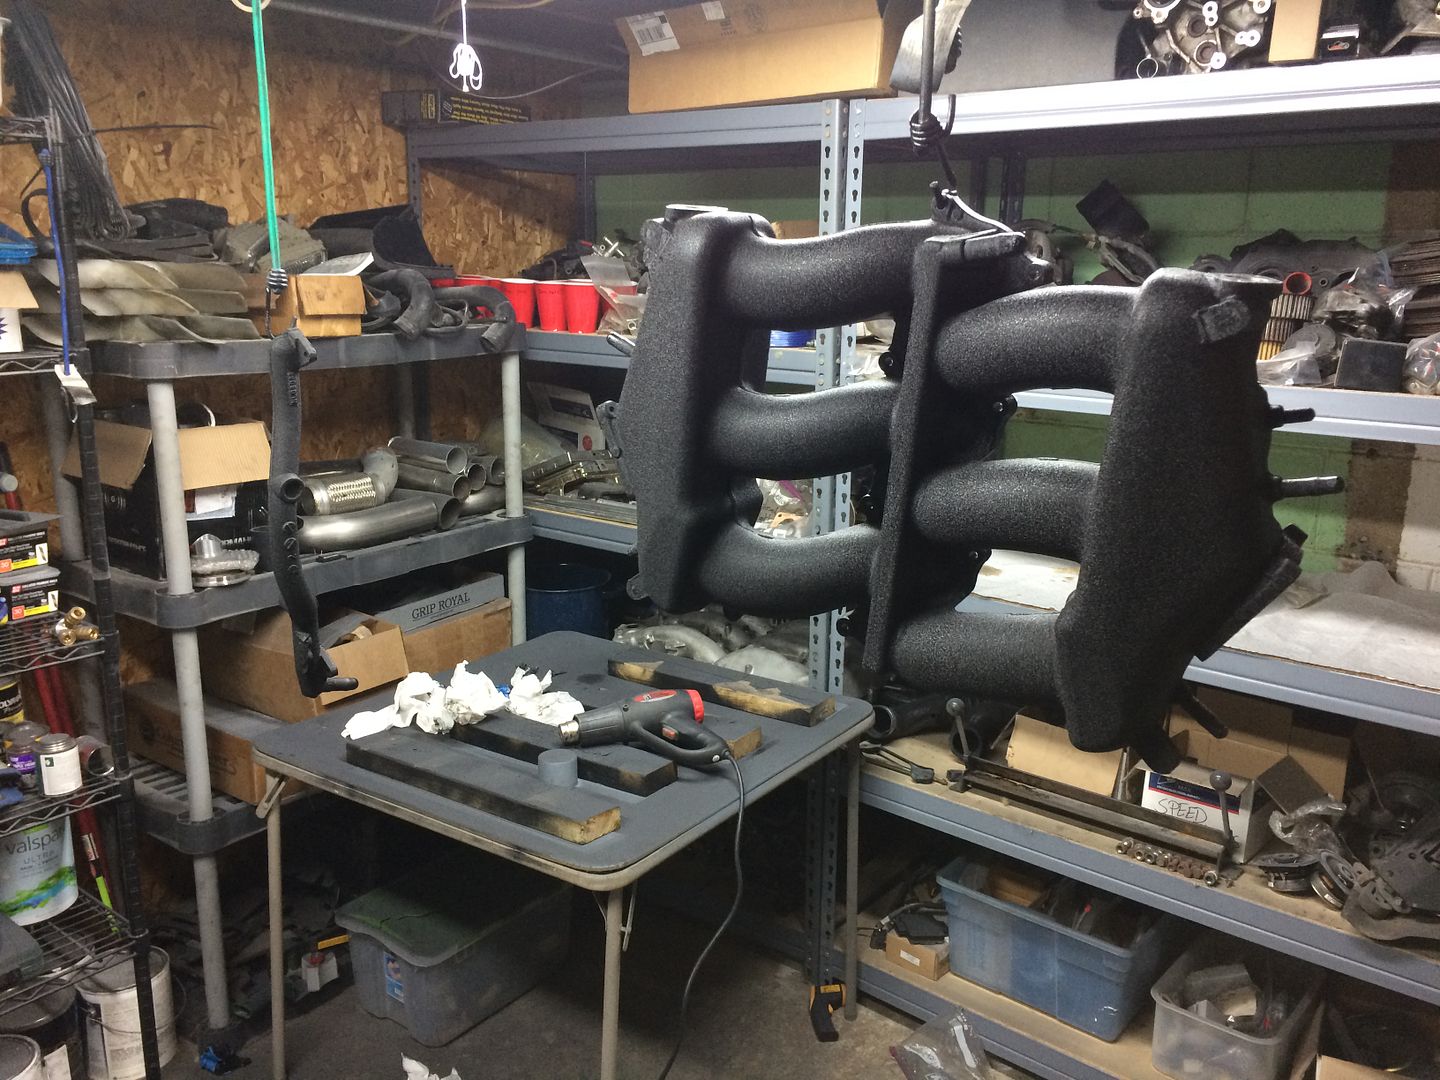
Getting back to painting the manifold 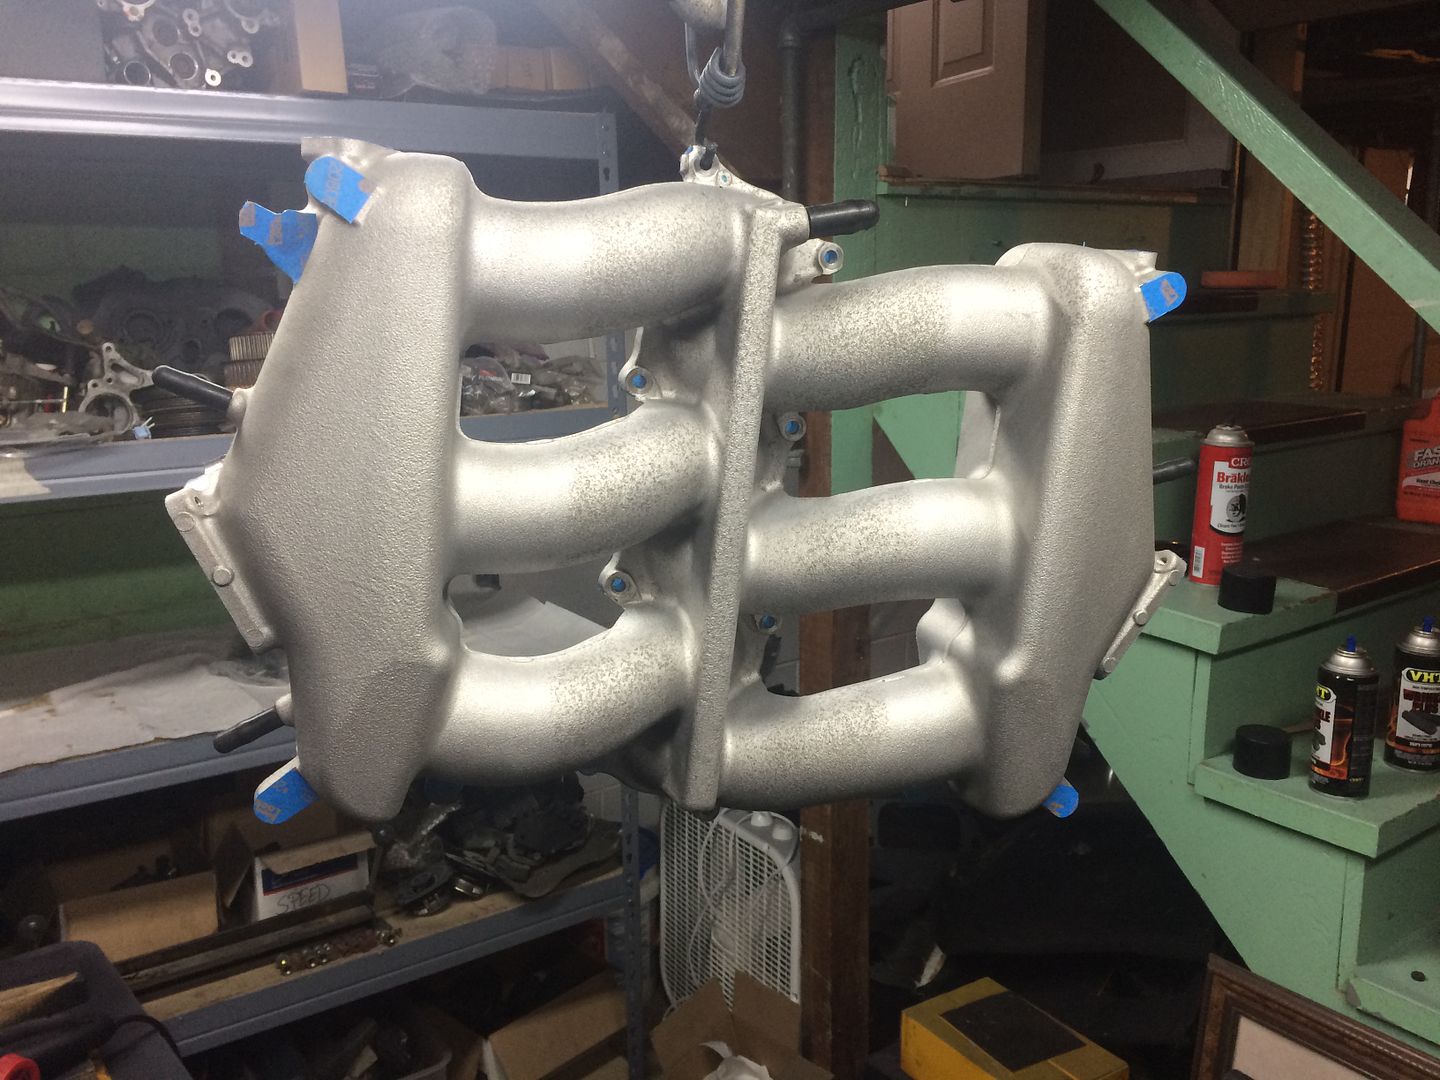
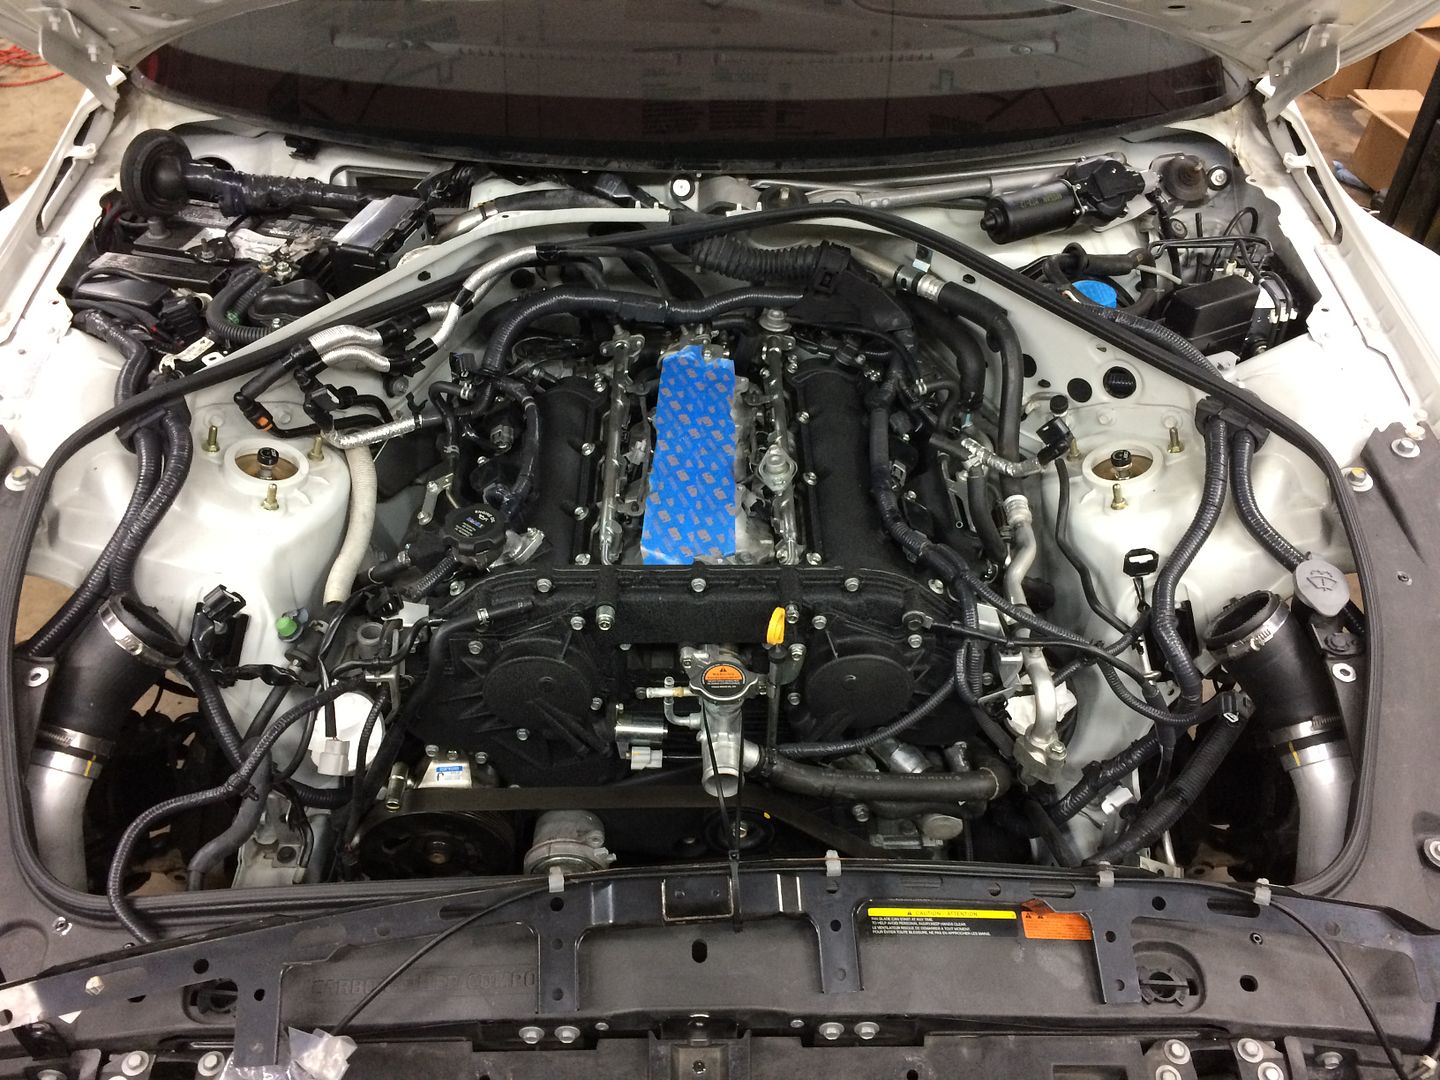
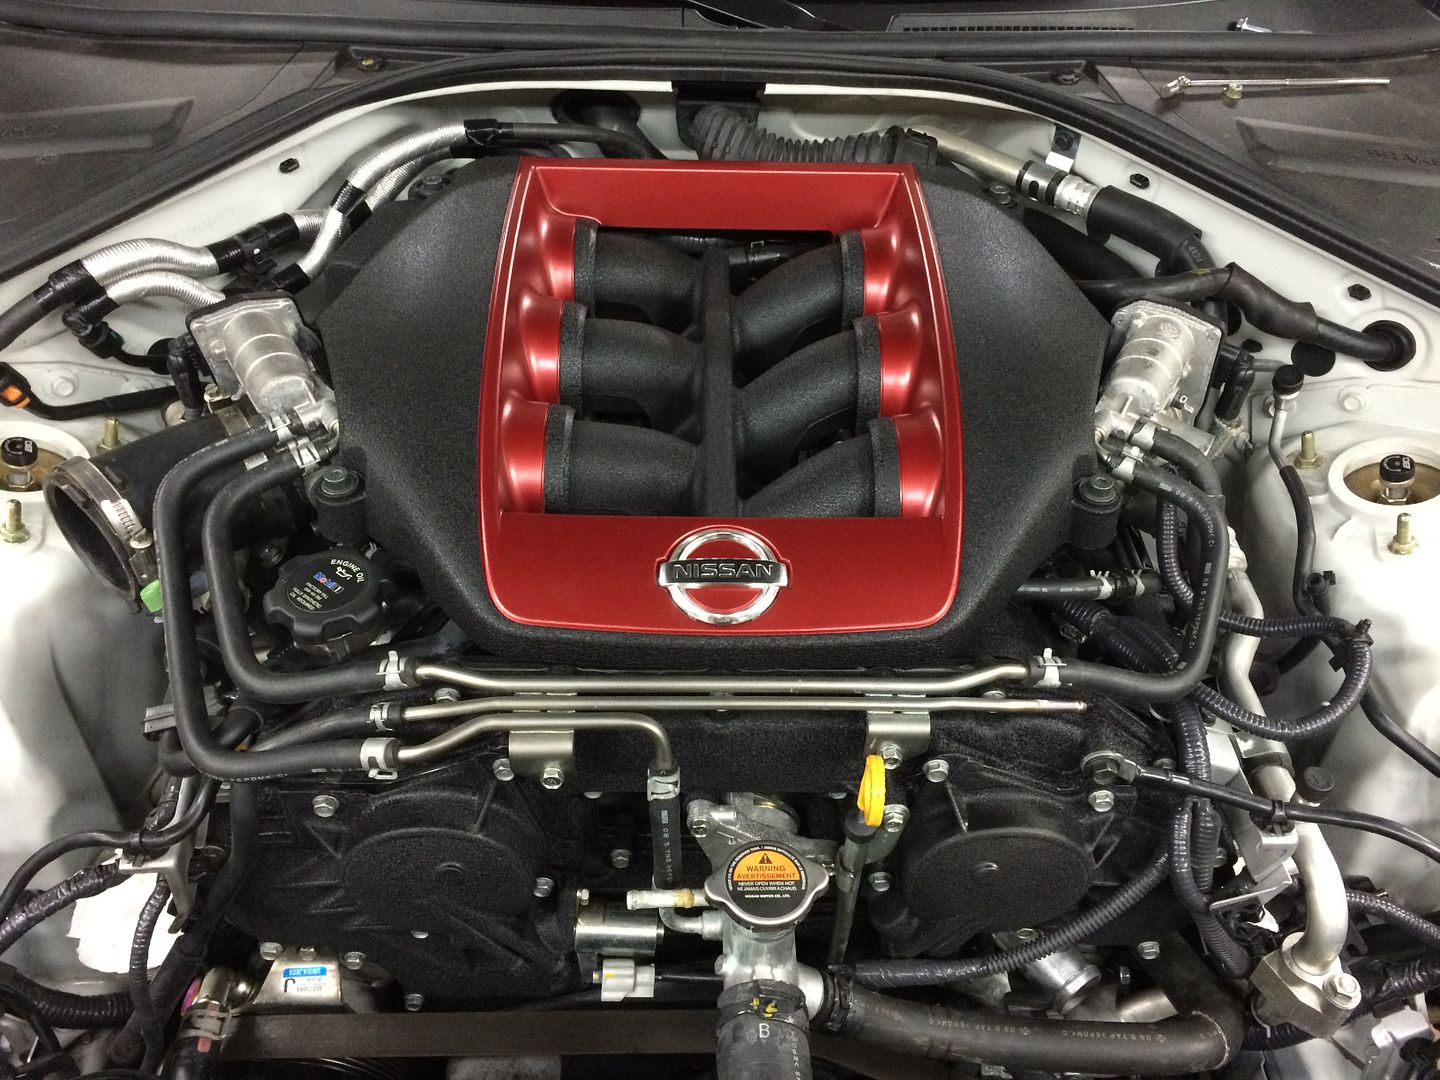
The engine is ready to go back in the car 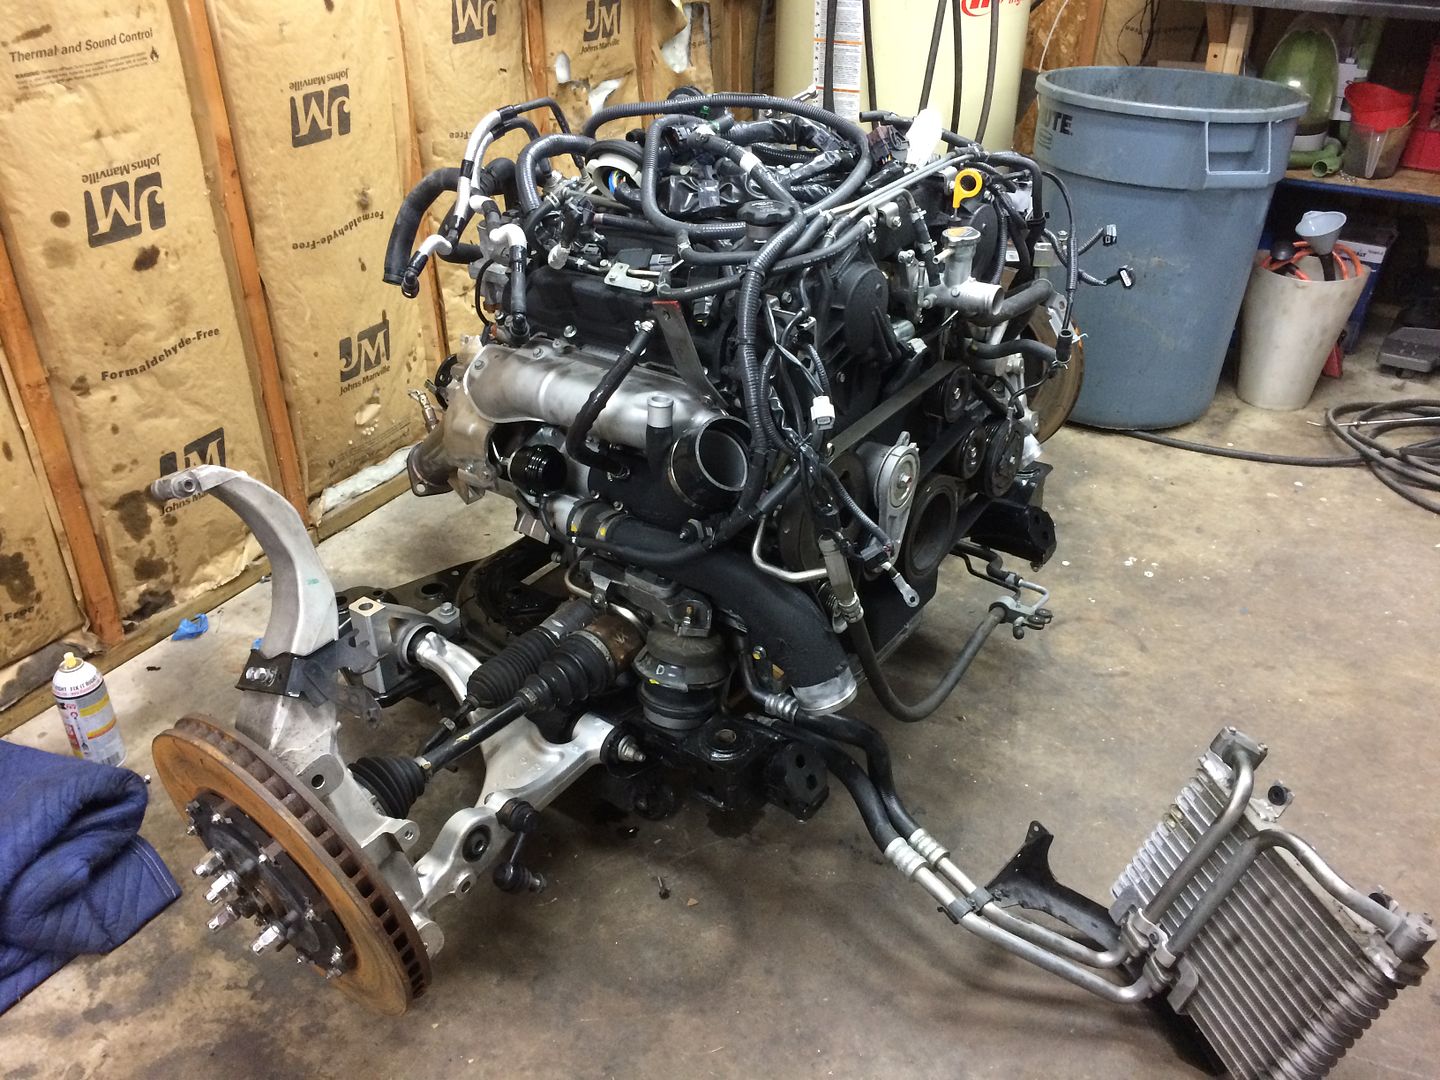
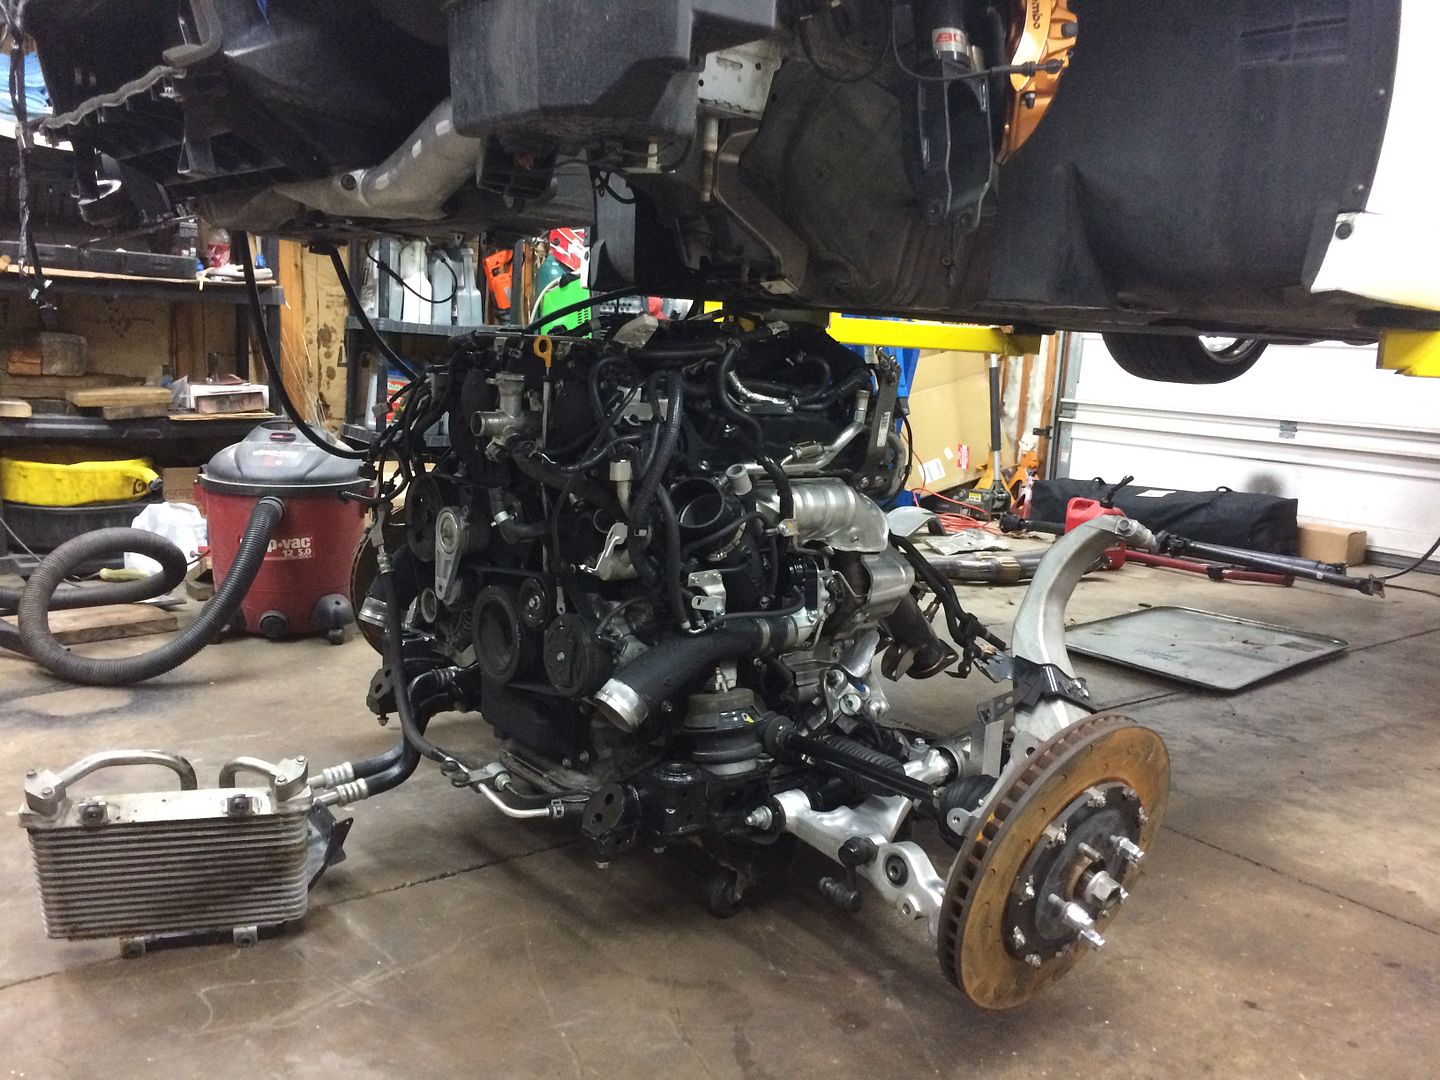
I used the same slinger to bring it back into place 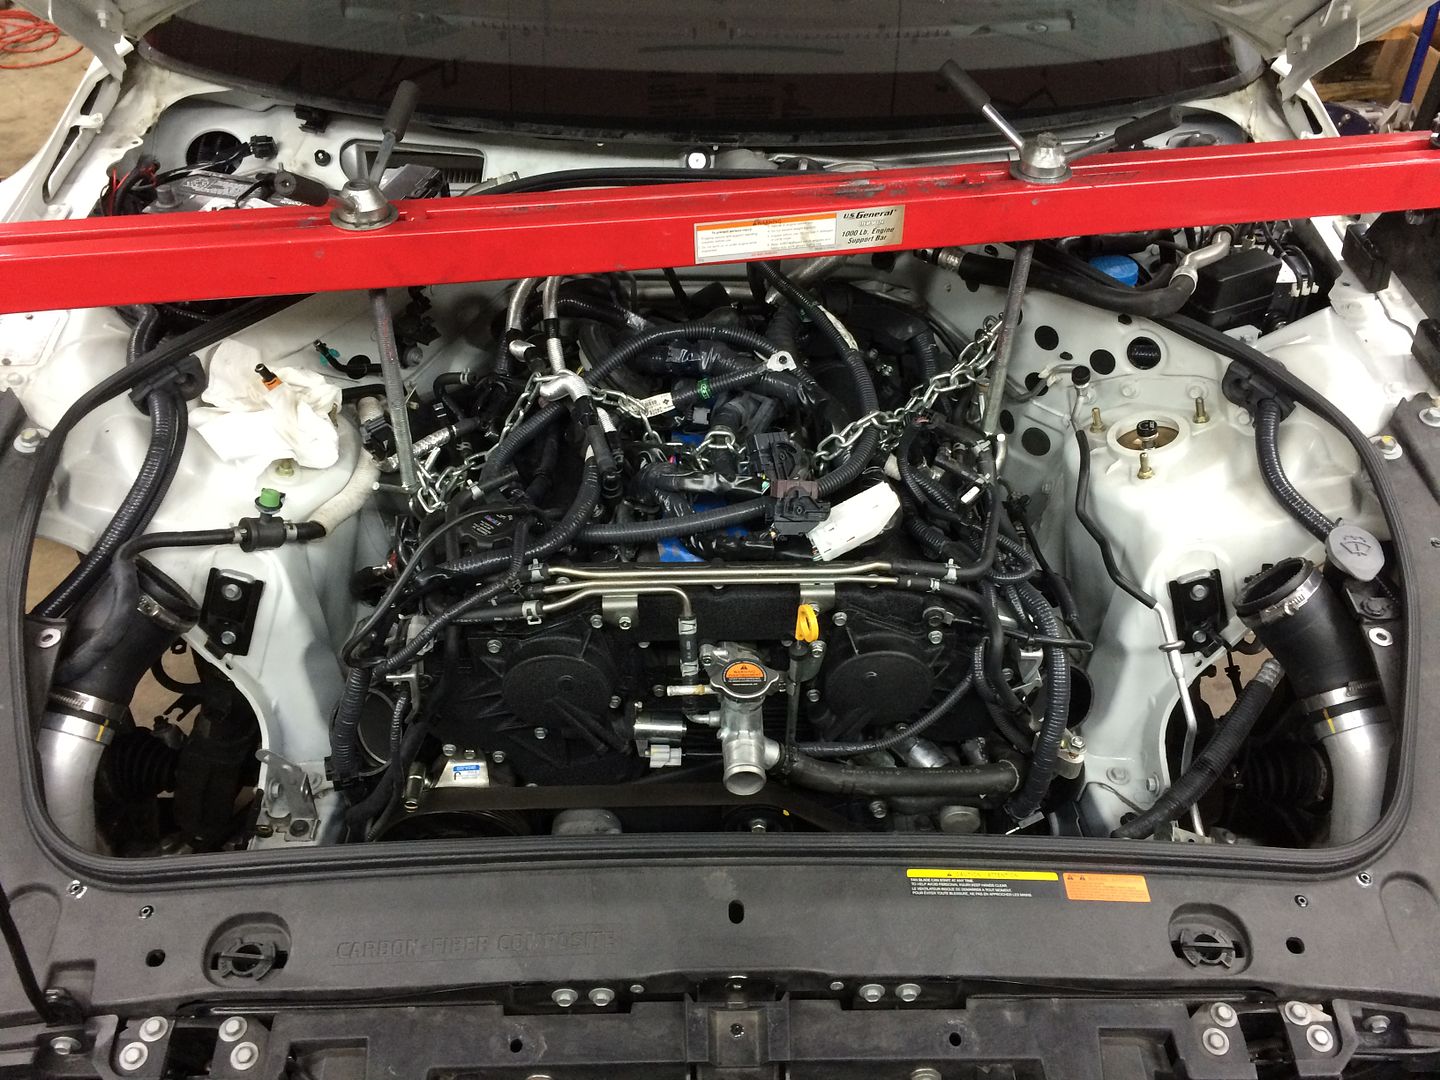
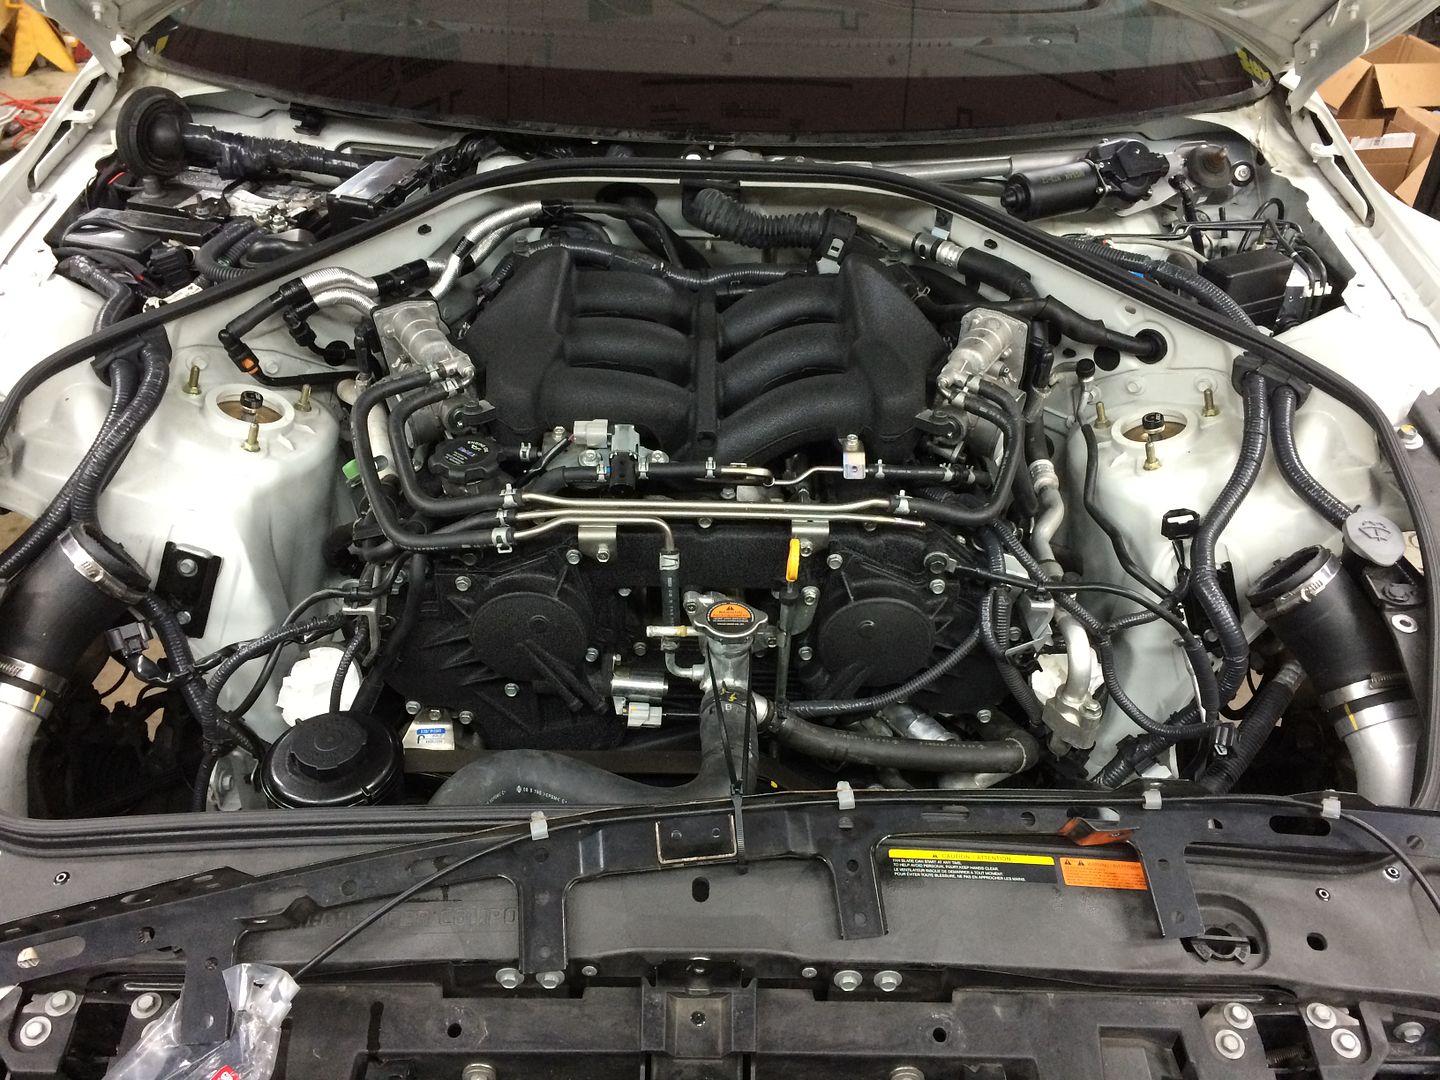
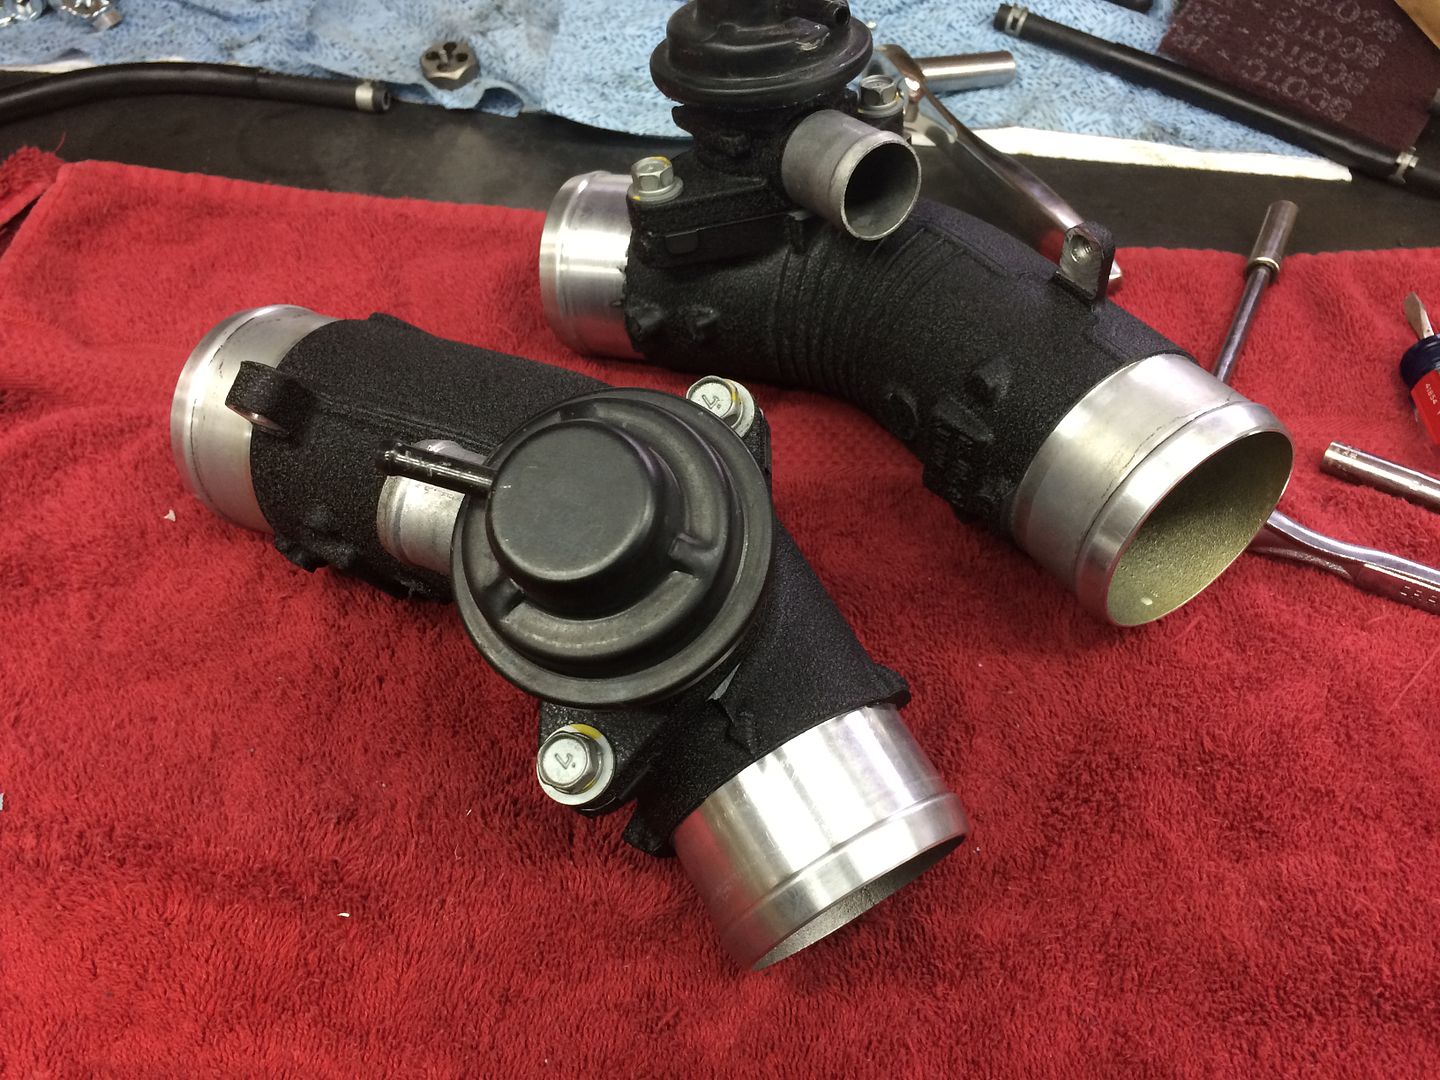
TB's mounted back up to the manifold 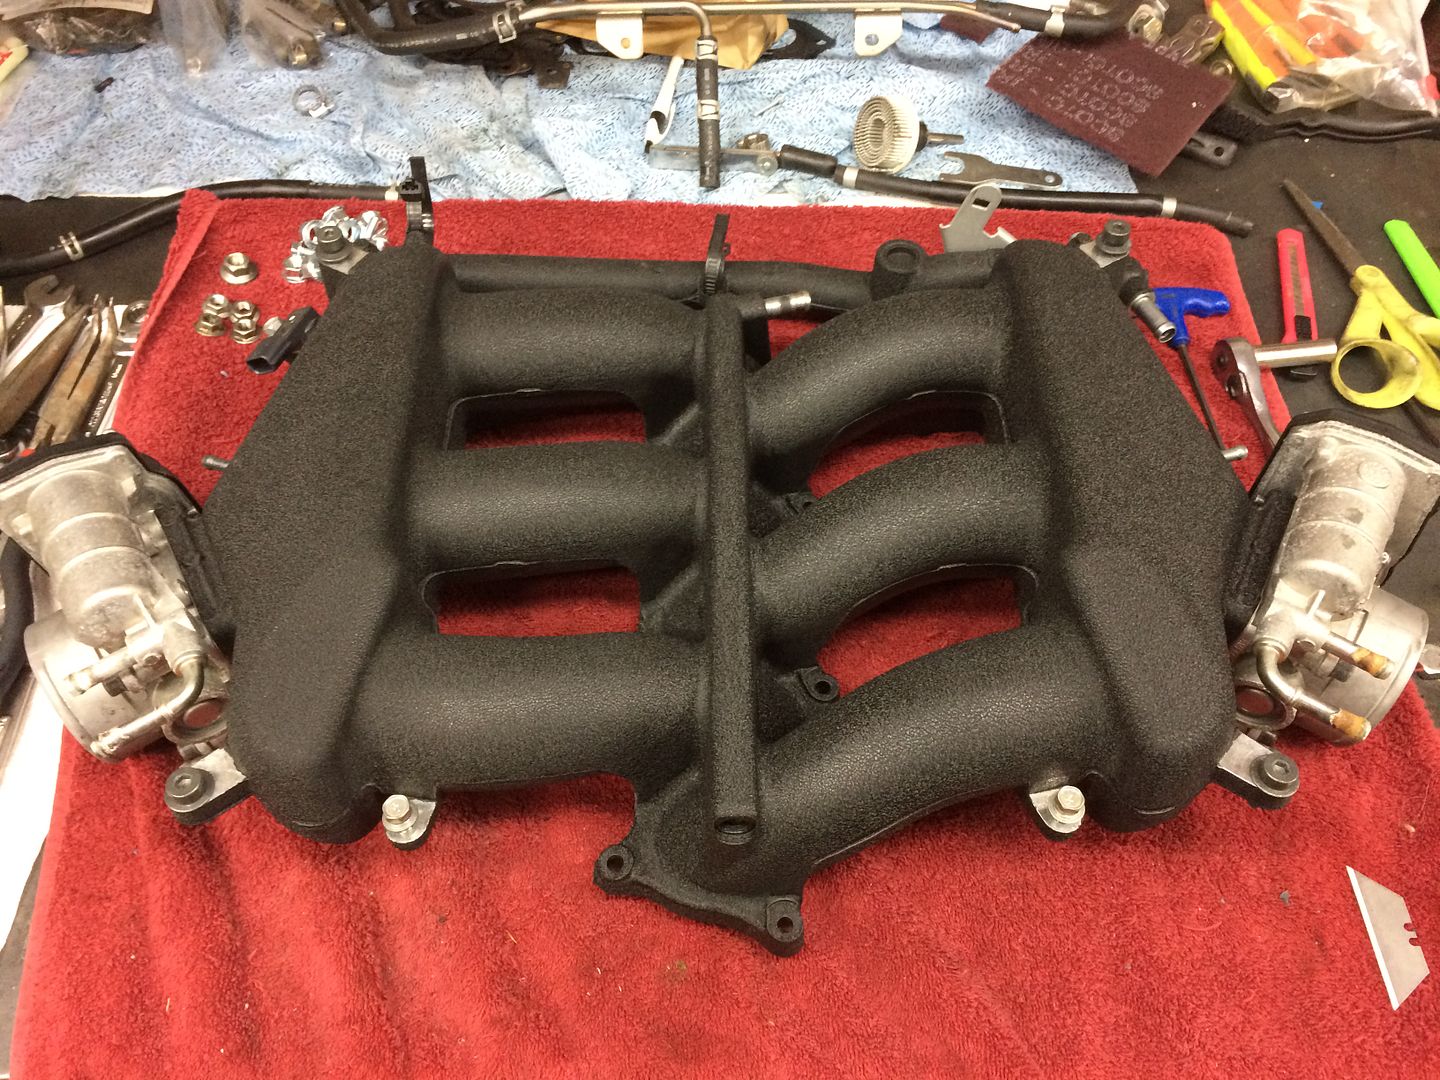
Exhaust back on 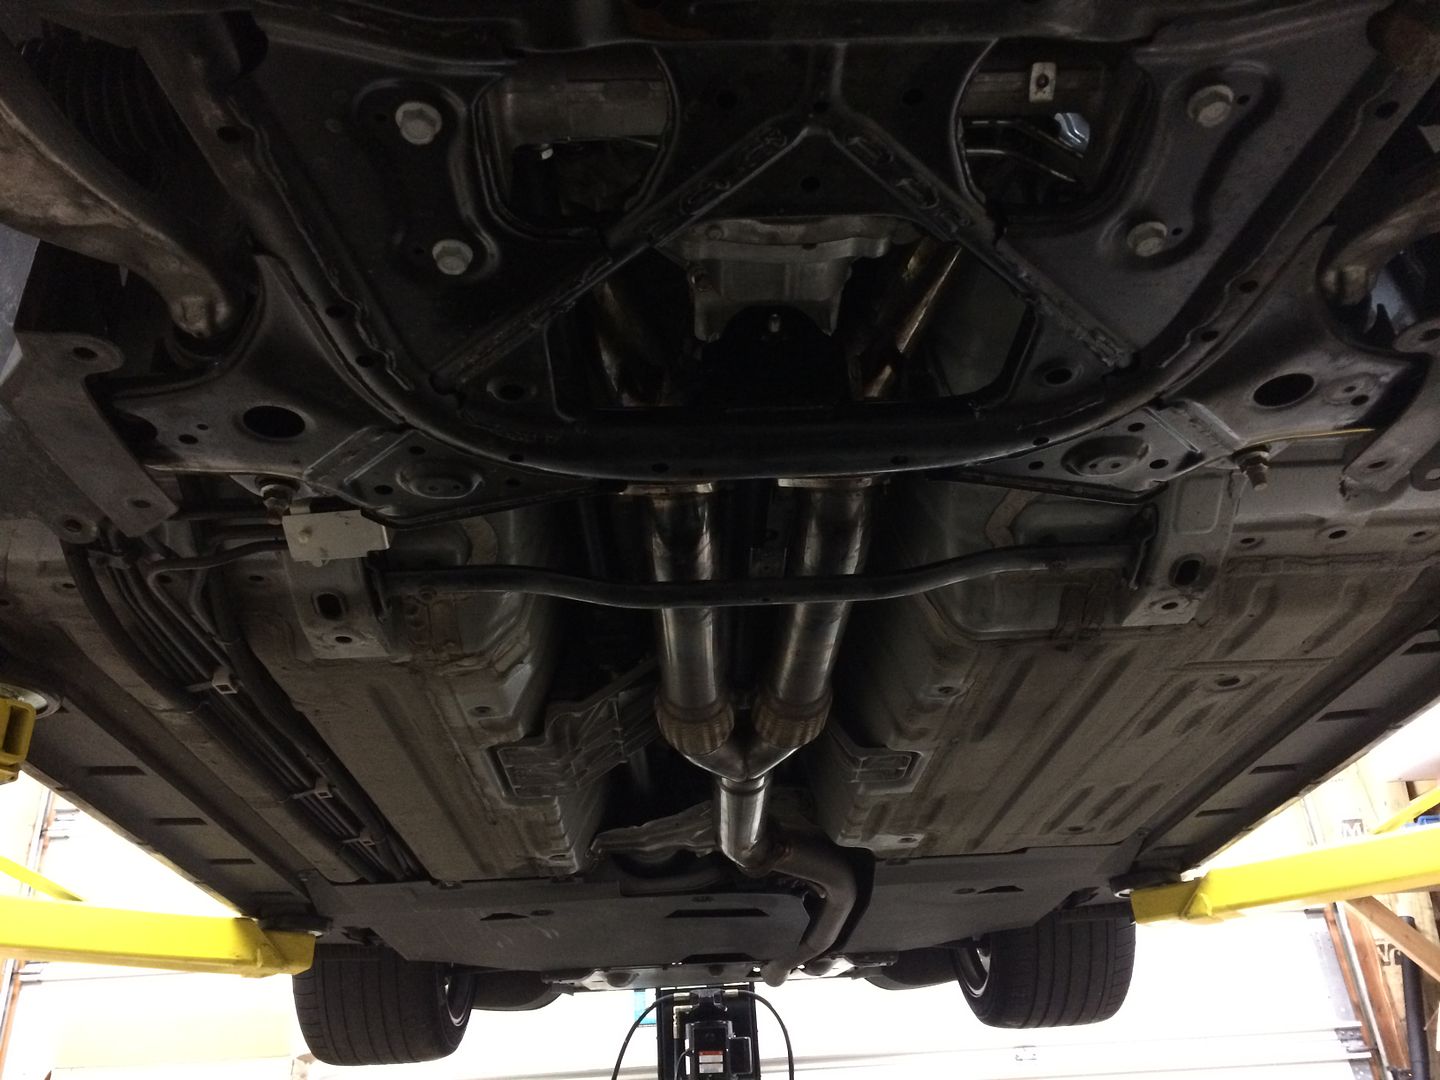
Here's a picture of my setrab oil cooler setup 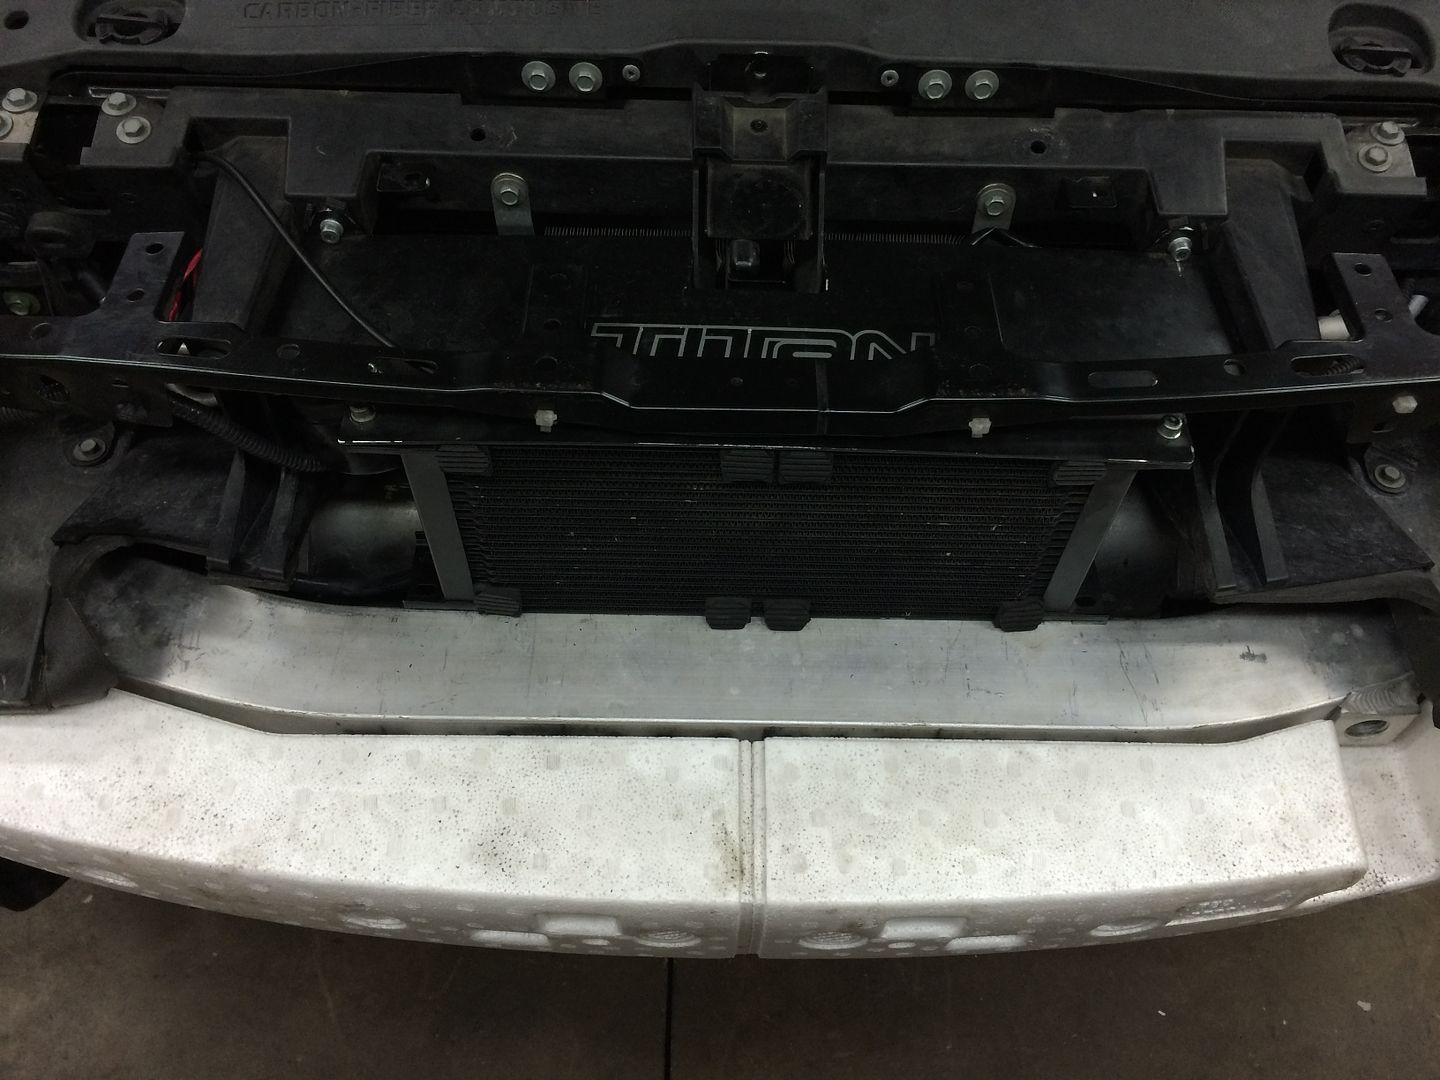
Coated the IC piping as well 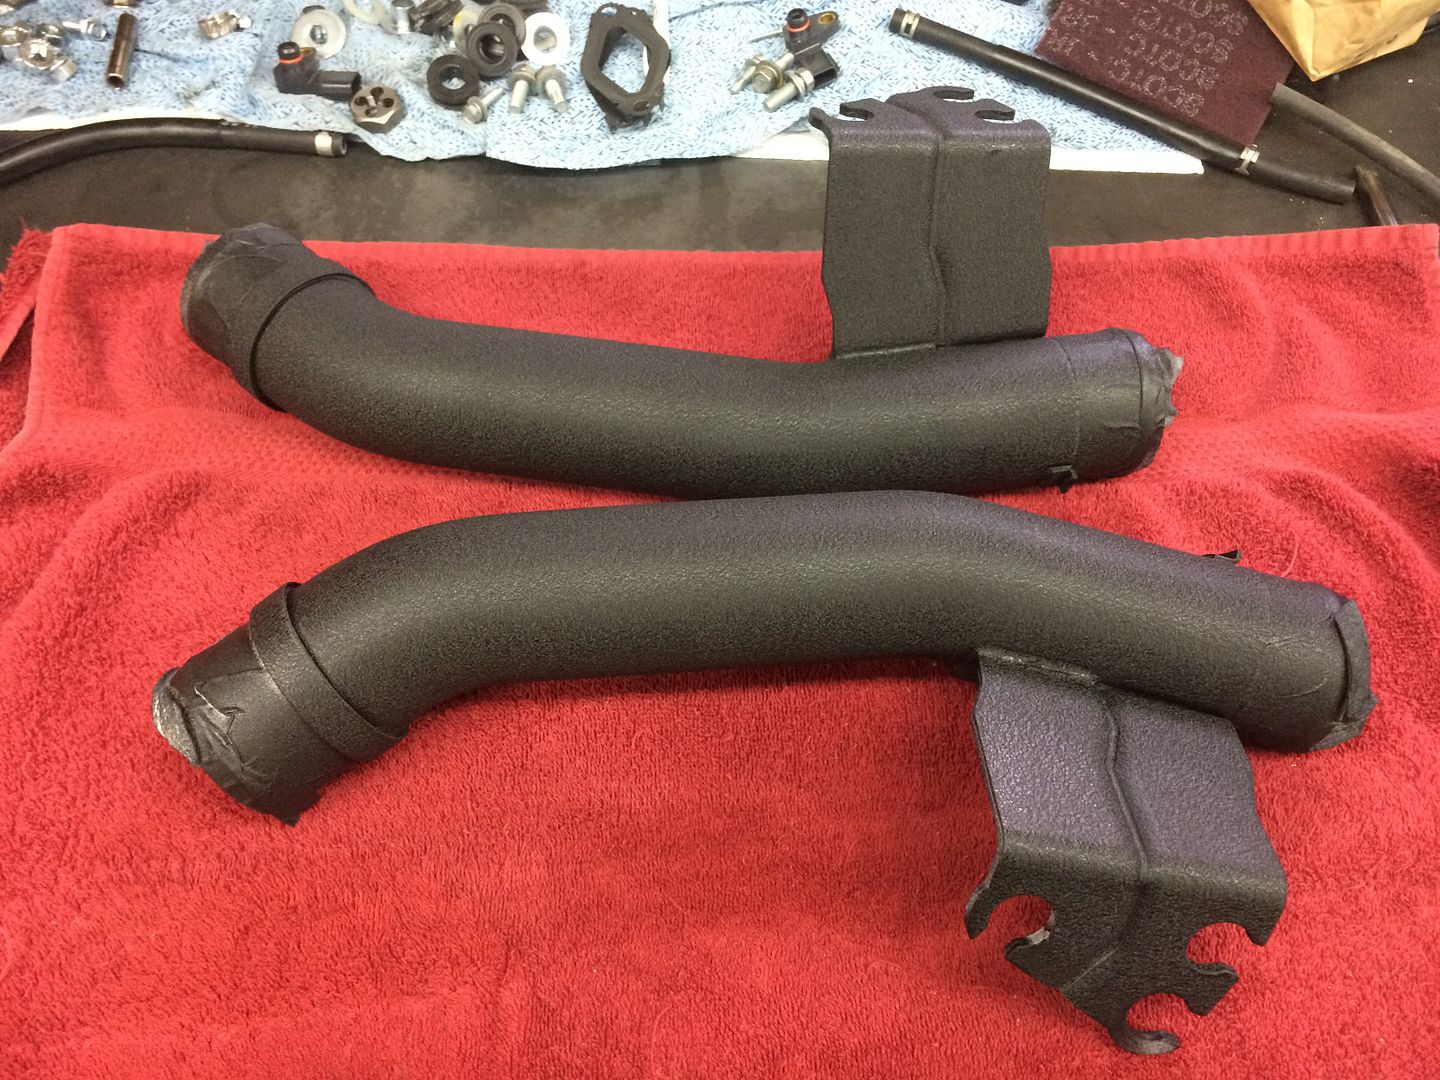
This next one, was a real PITA. I wanted this to look amazing though so I took my time on it 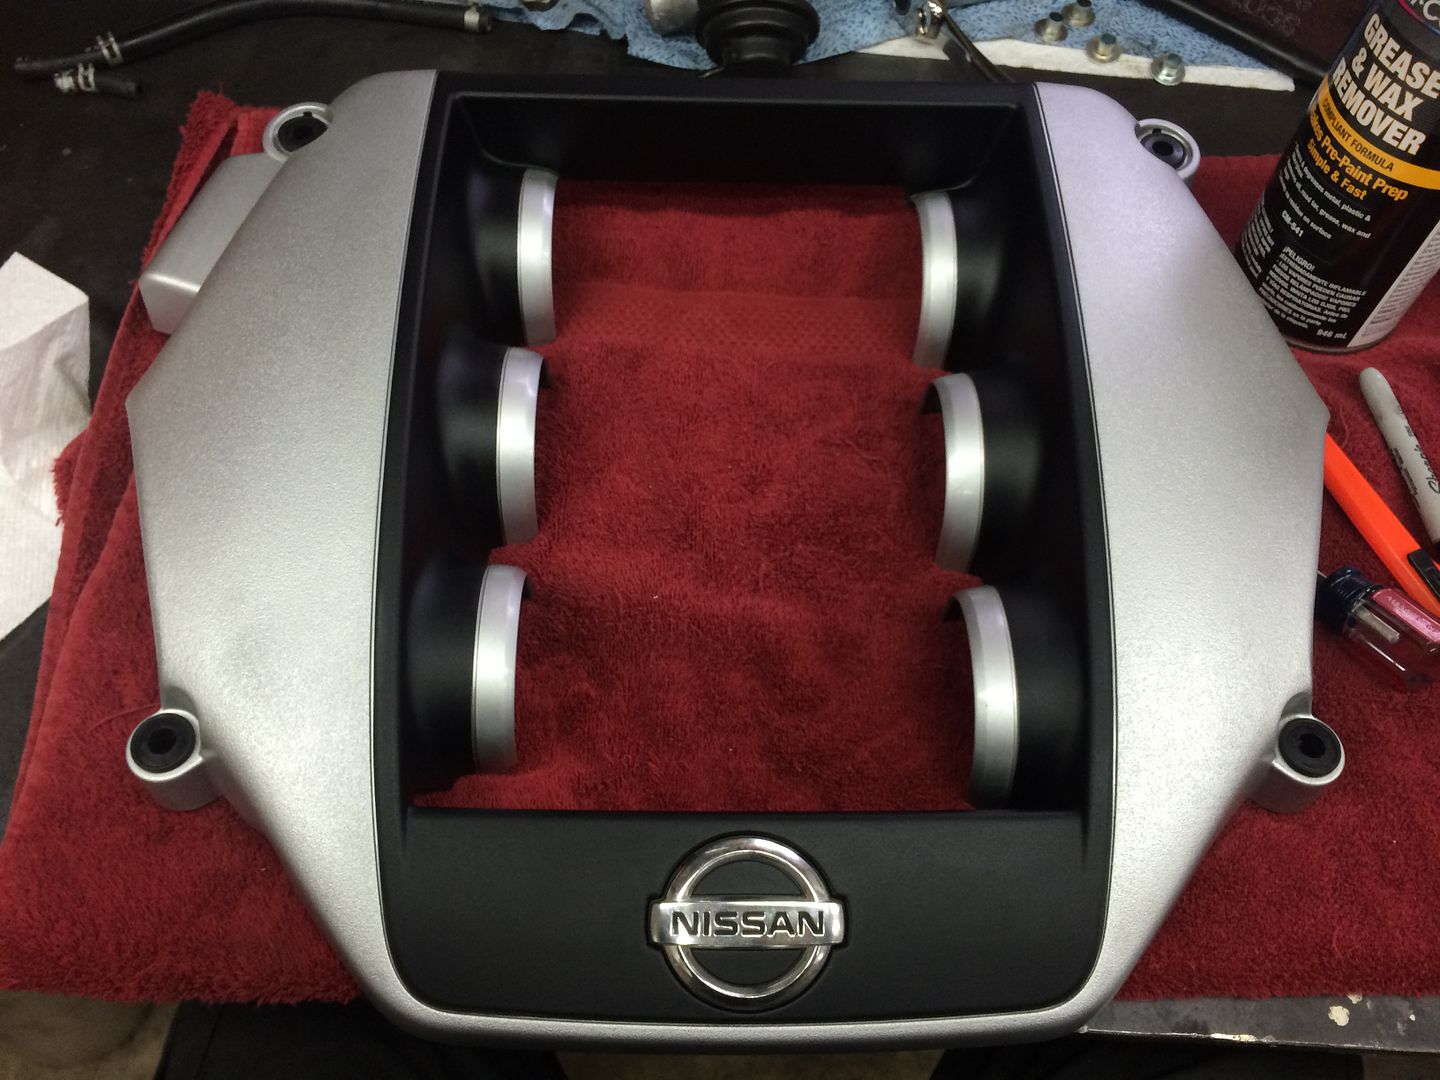
Masked off 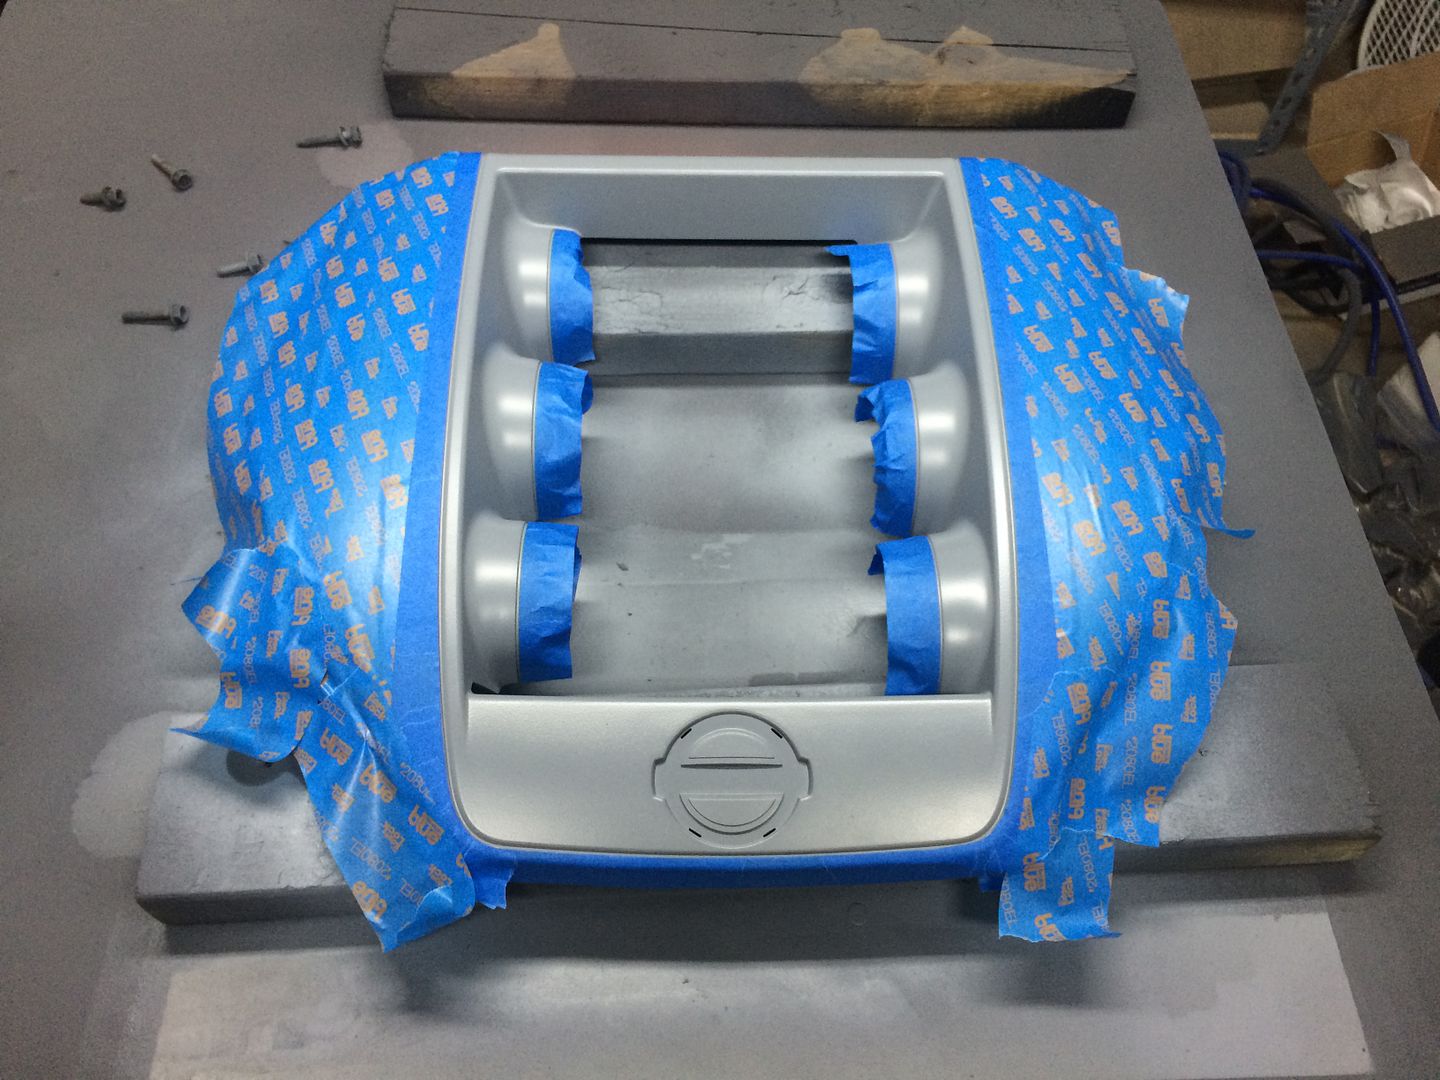
I a custom paint mixed up from my local company. The color matches the "R" emblem in GTR 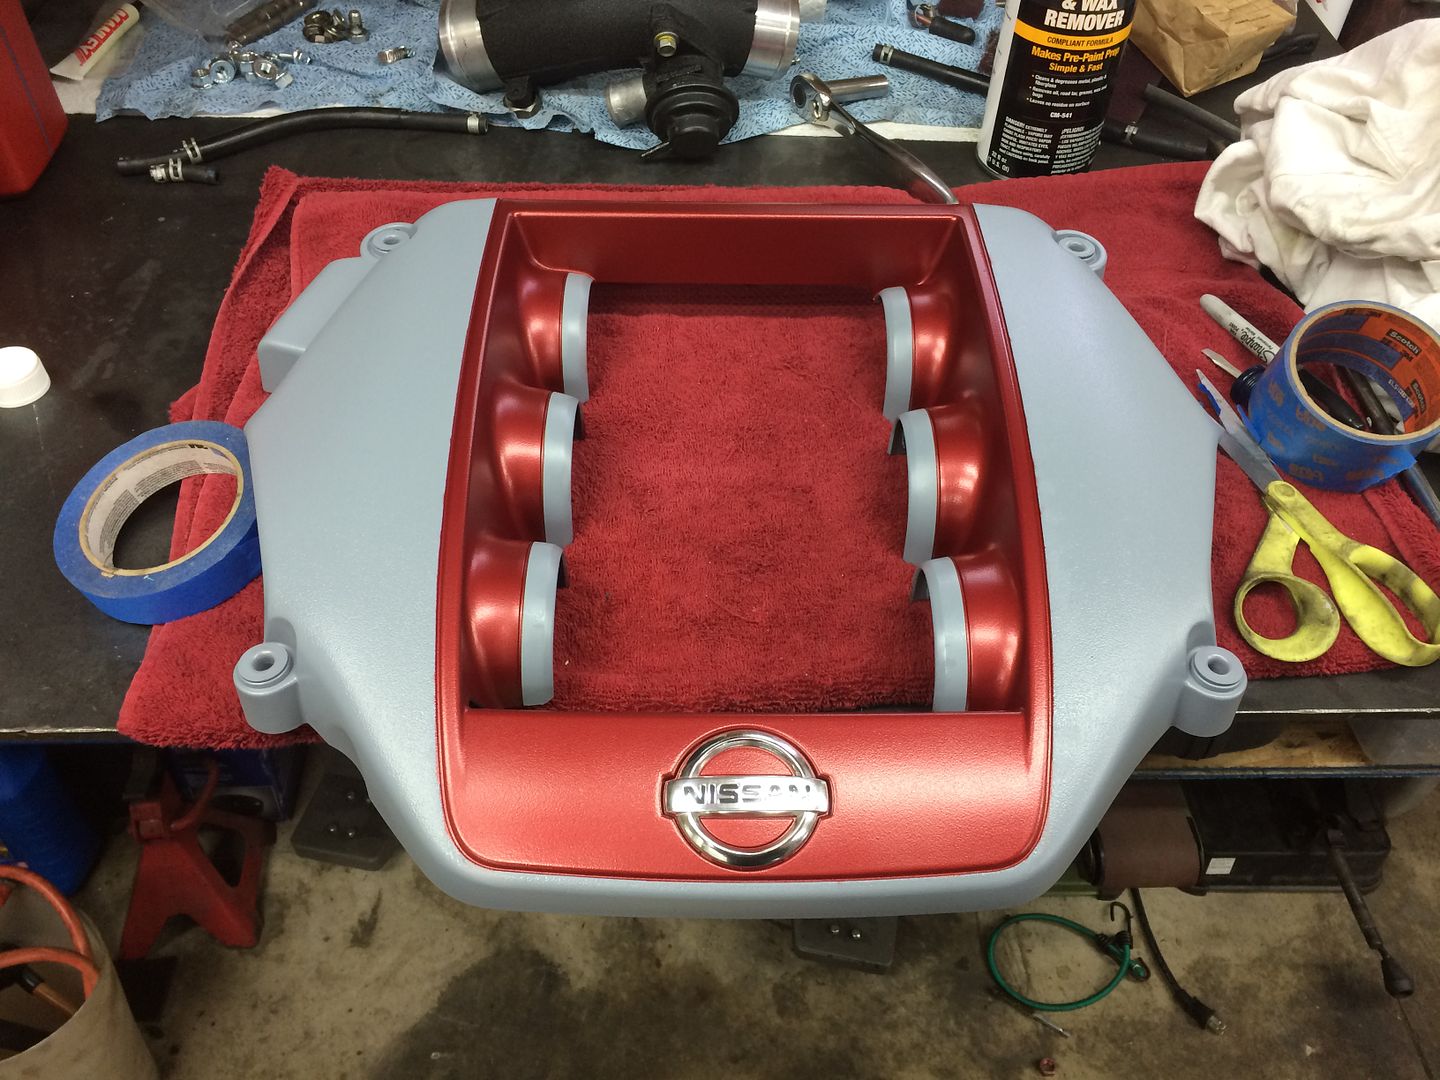
Masked it back off to do the wrinkle finish 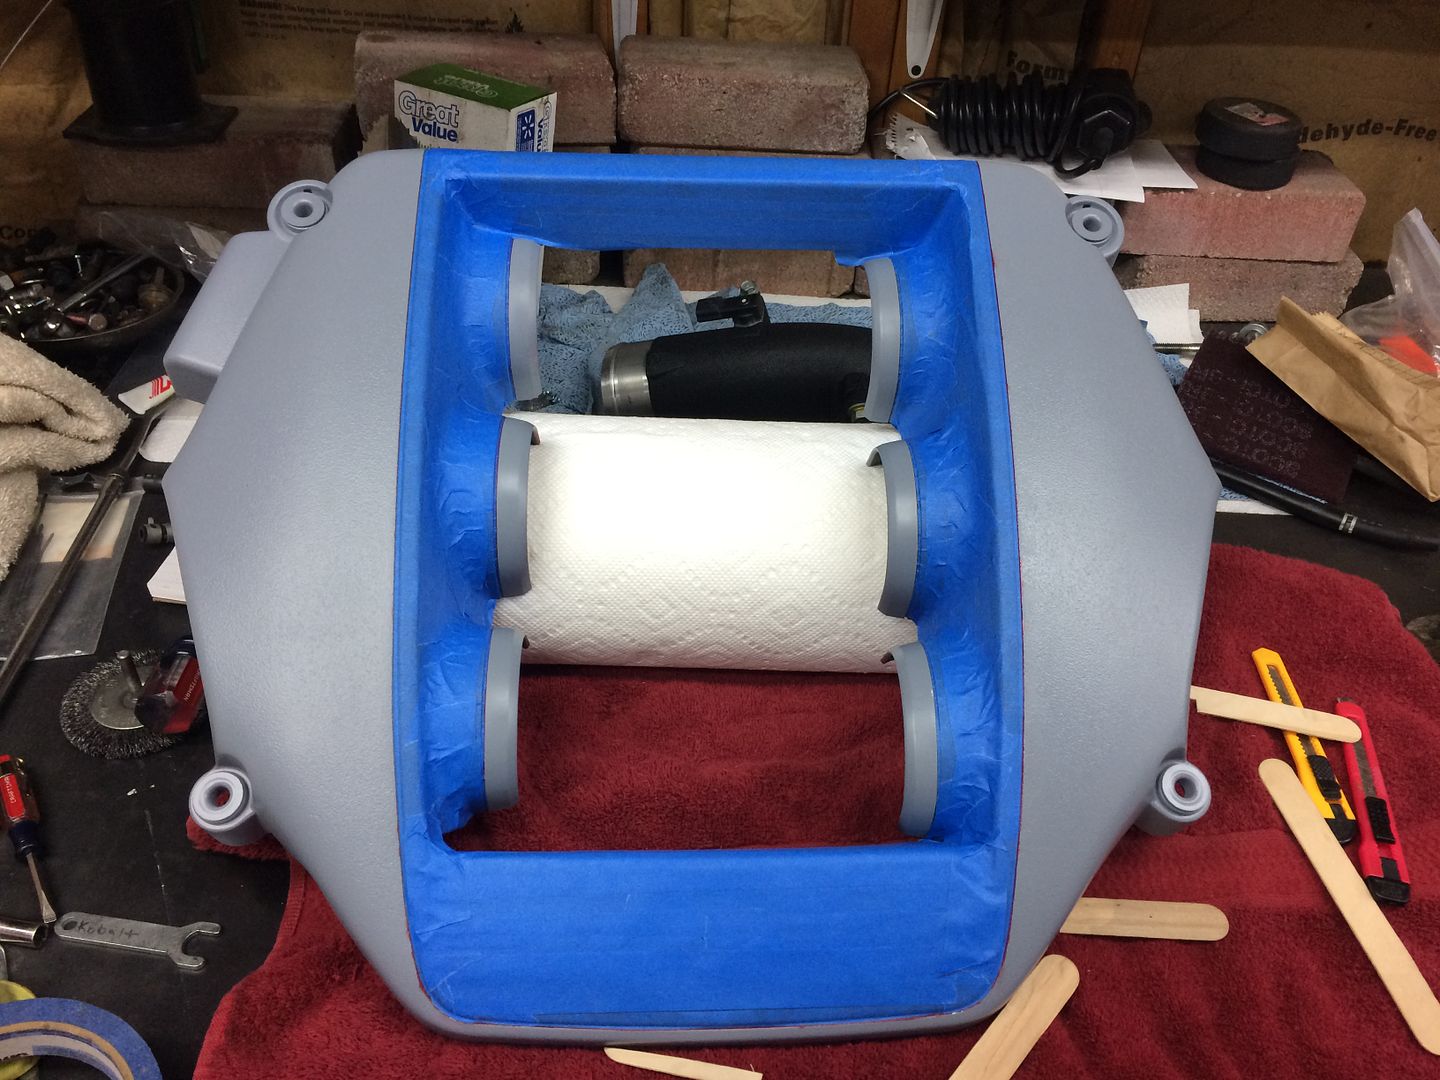
Completed 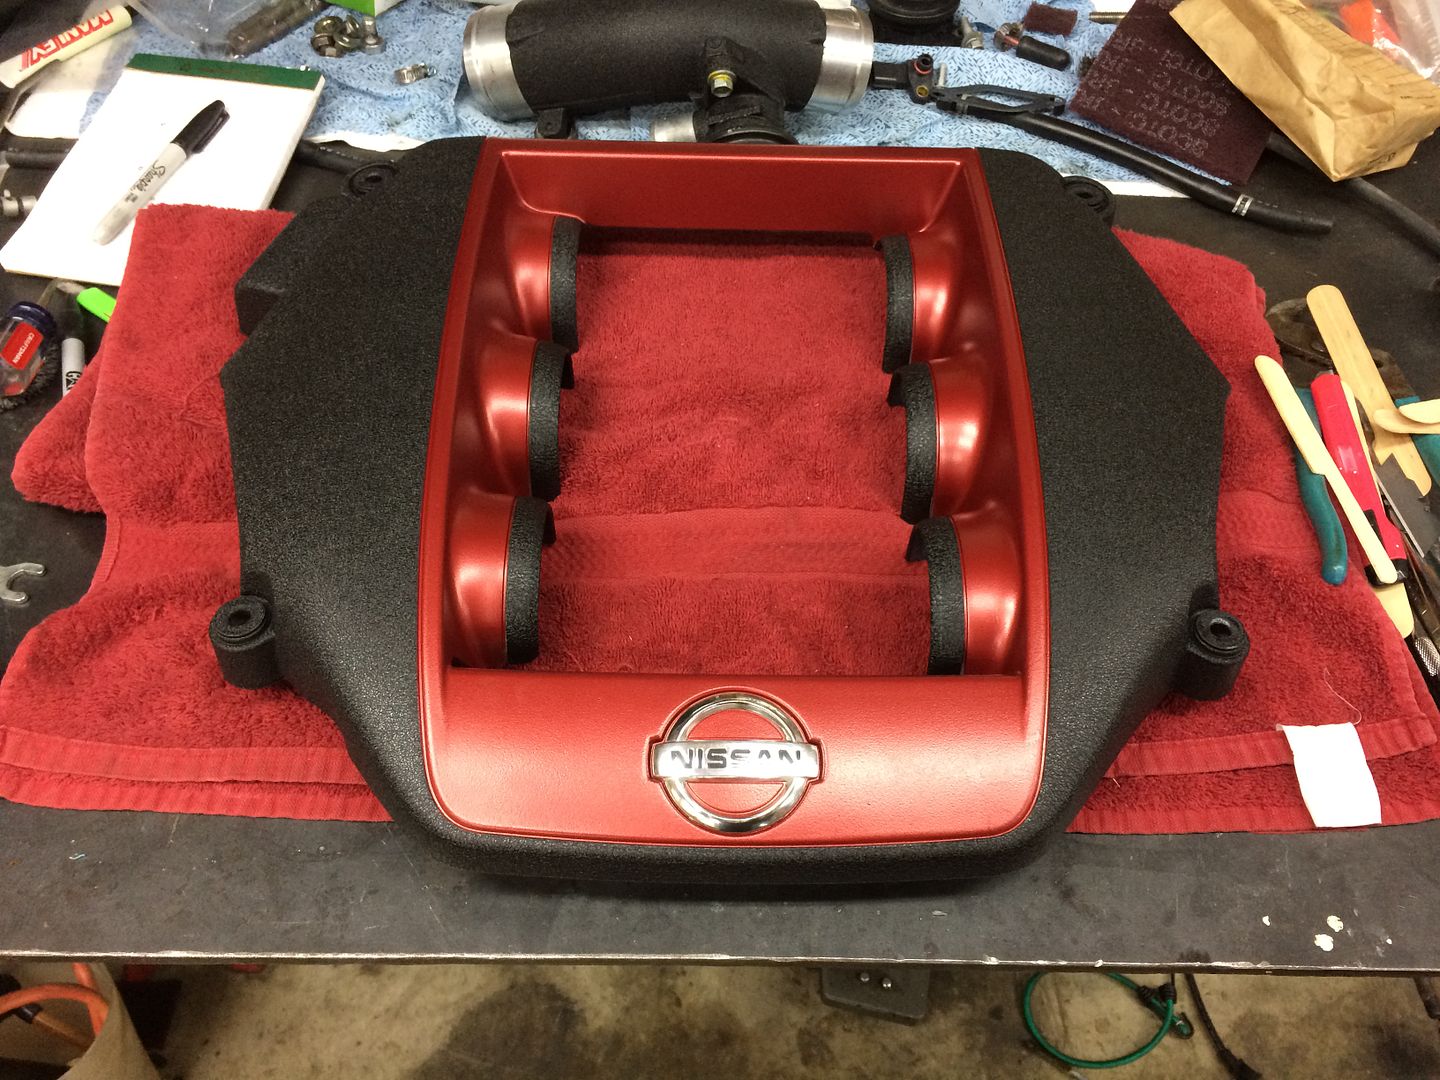
I also coated the expansion tank 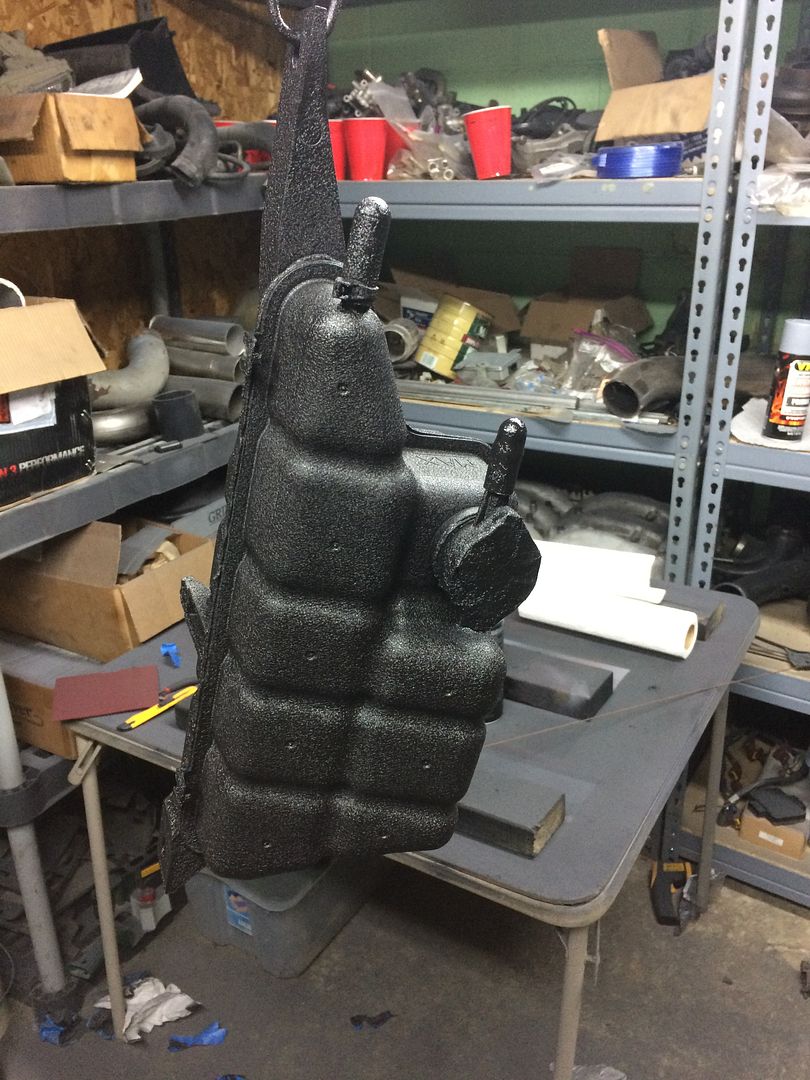
After that I got all the accessories fastened back up and thought, damn it is really looking good 
So I figured it was time to fire it up! 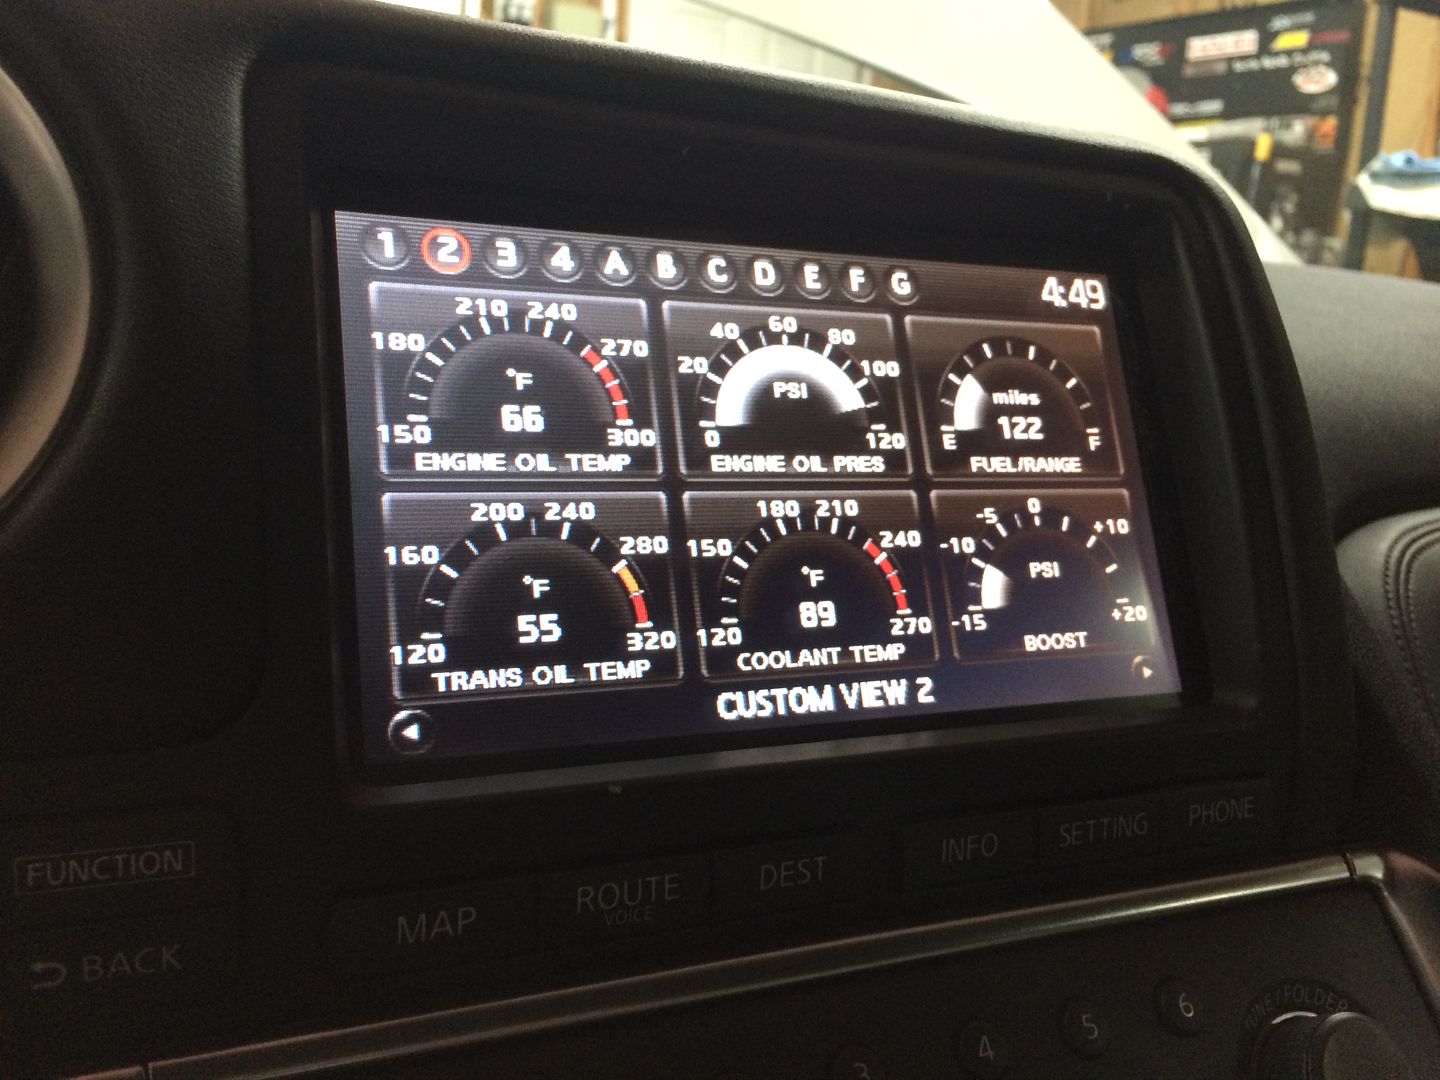
Then I needed to commission the car before taking it on its maiden voyage 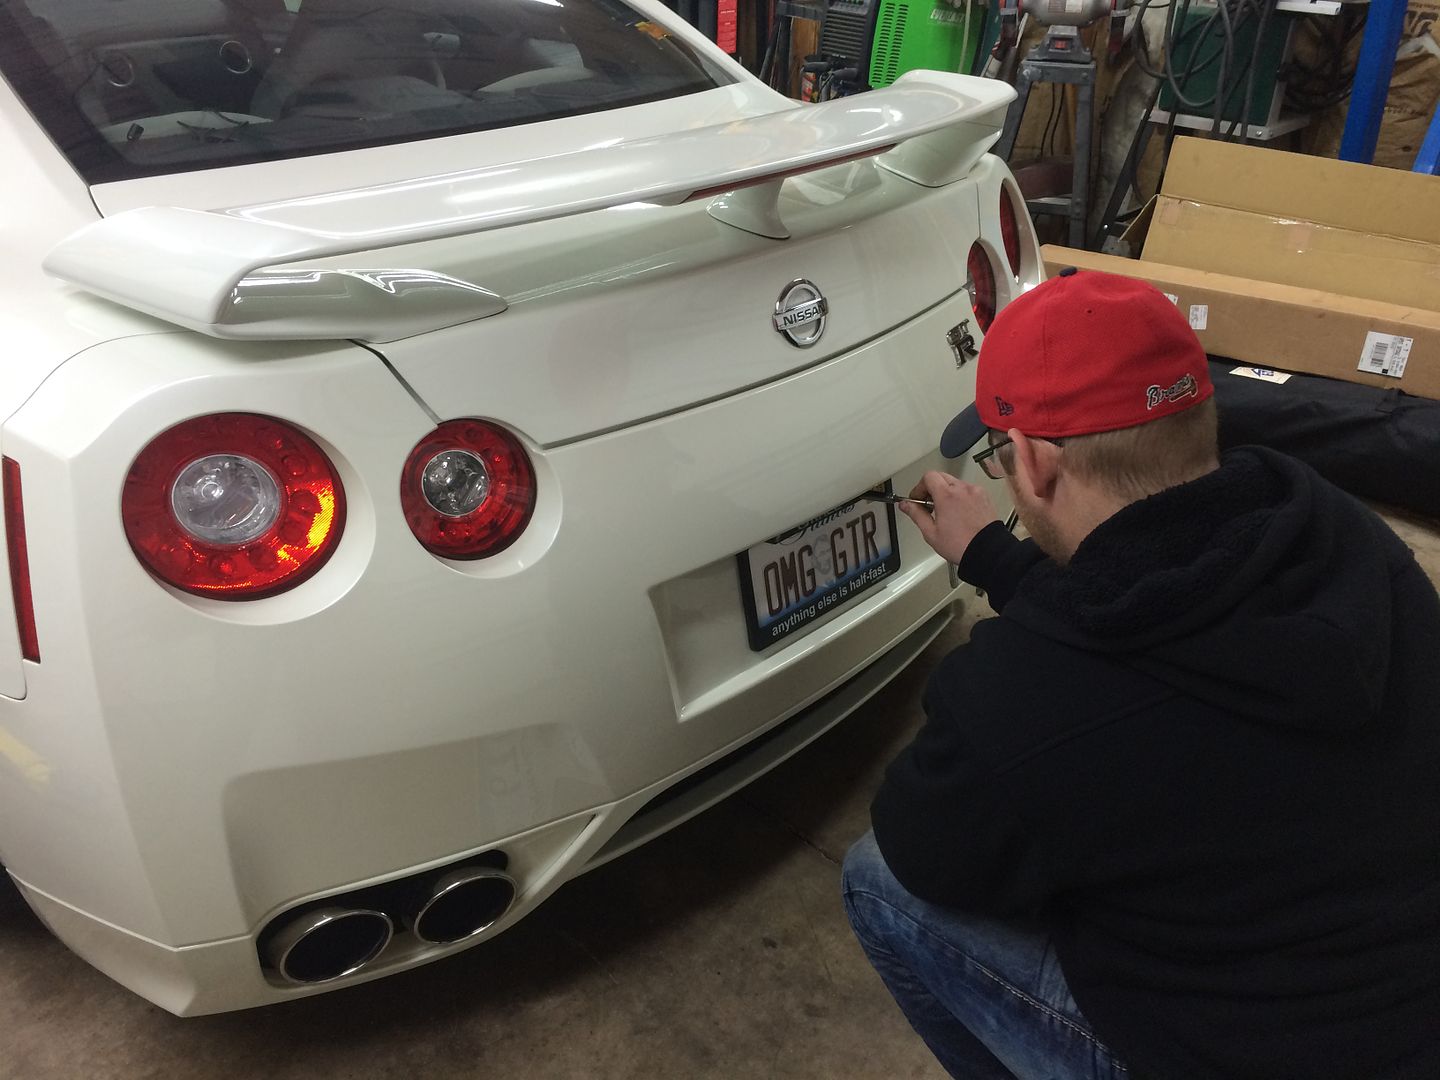
This is me, the man behind all the madness 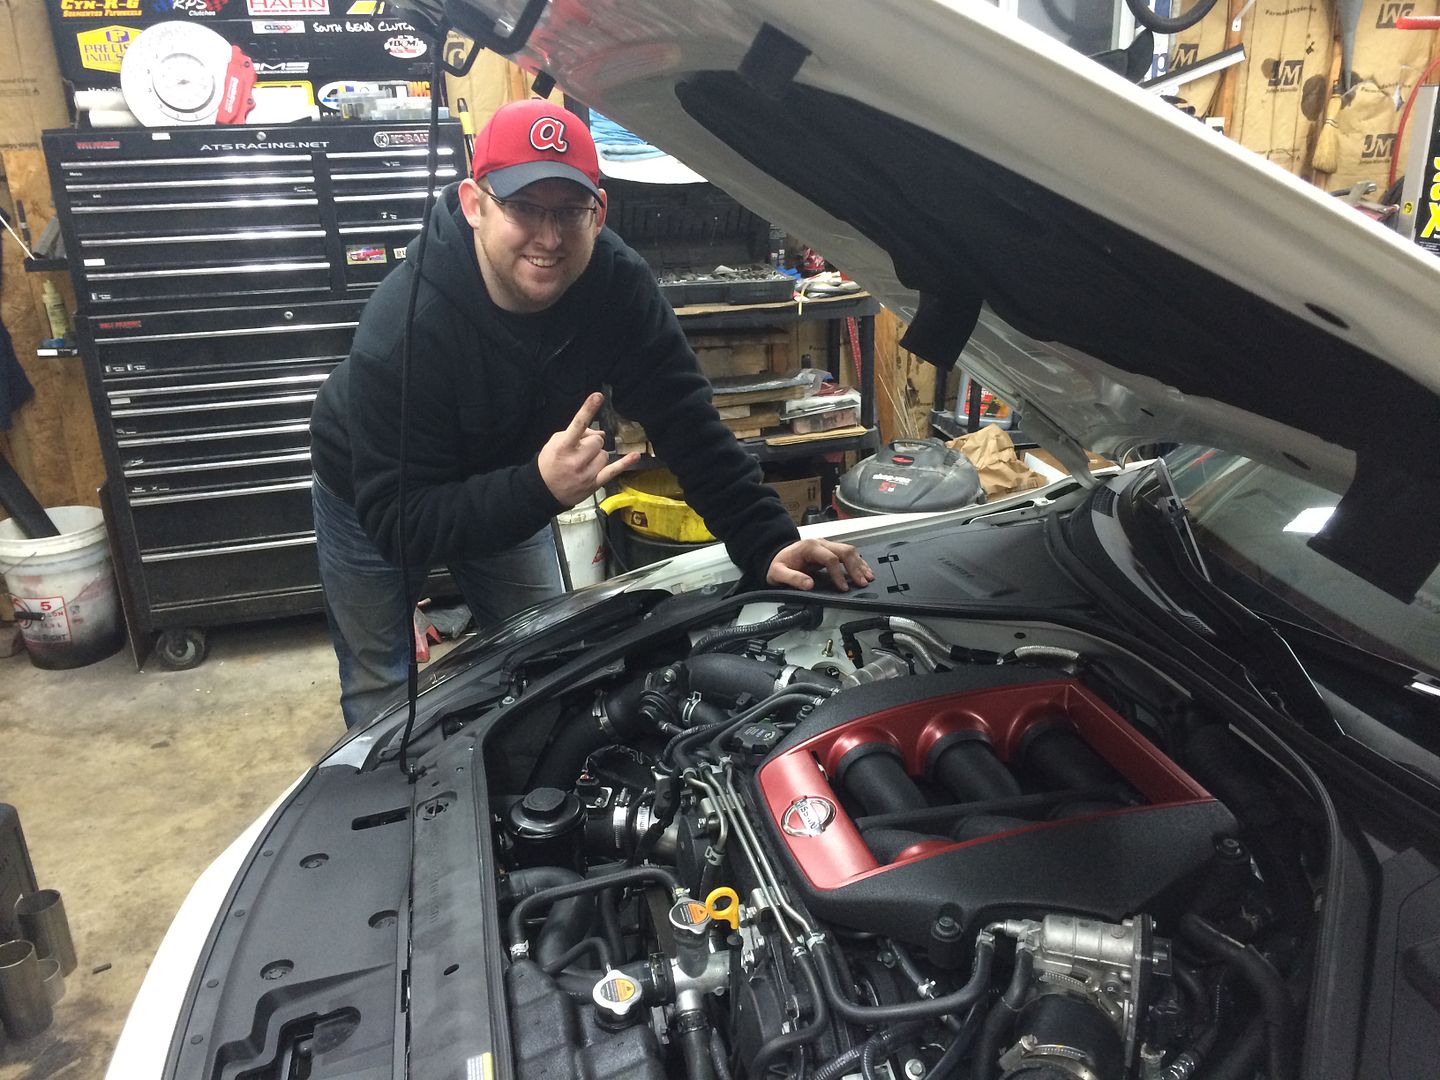
After putting some break in miles on it, I pulled the oil out and cut the filter open. So far it is looking good 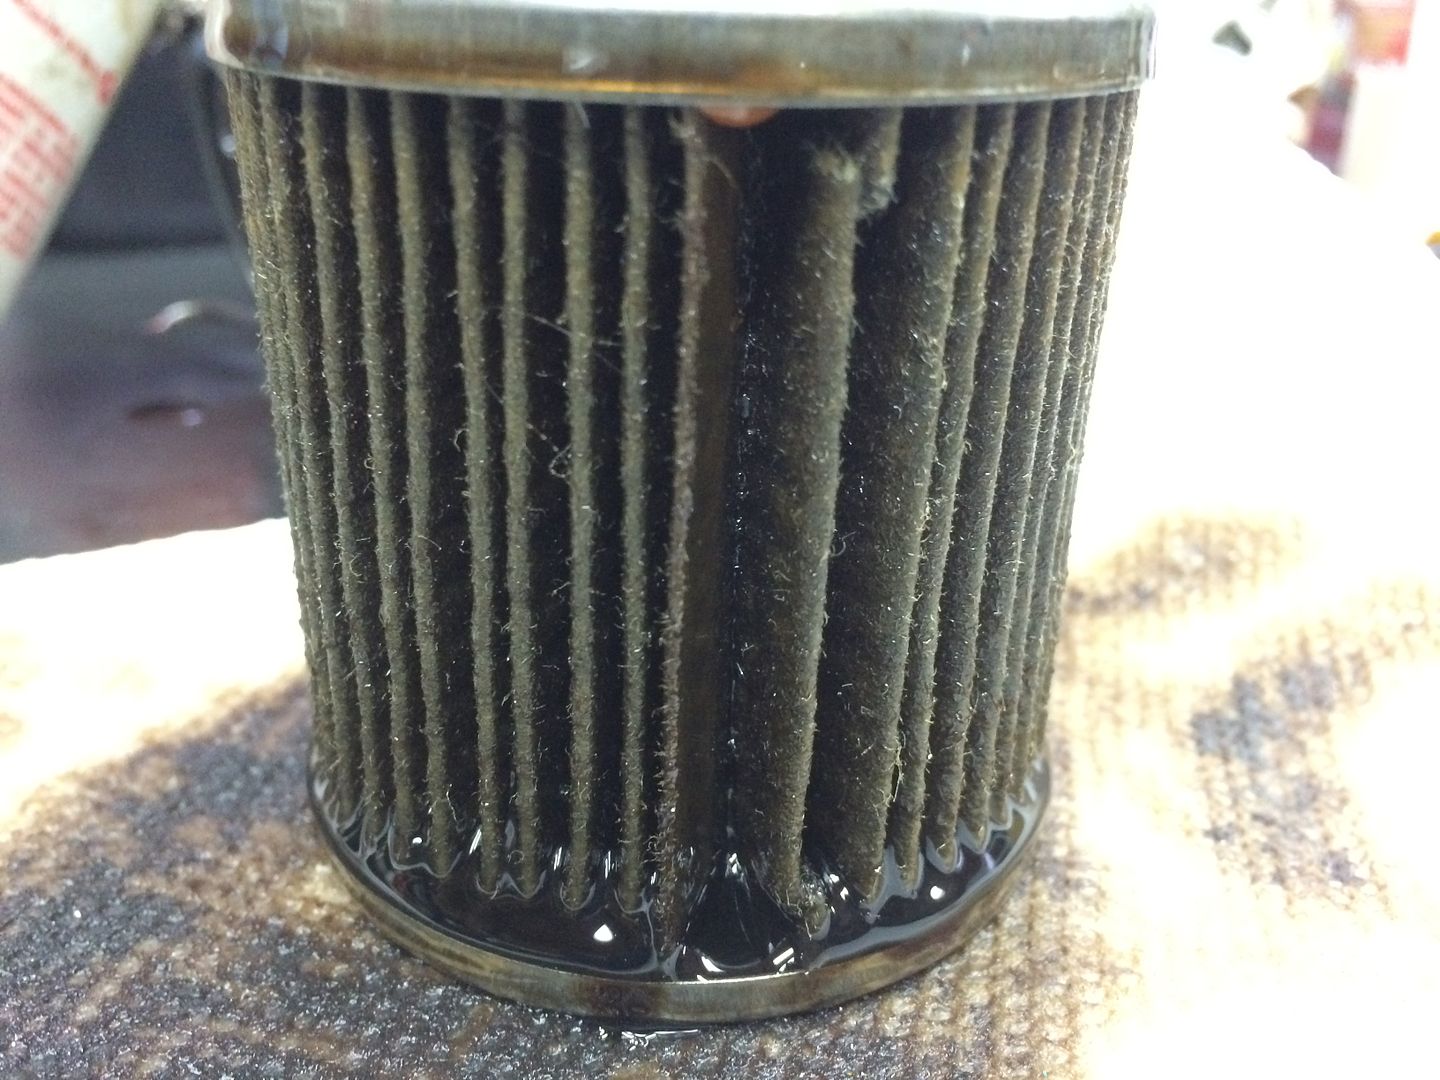
So since the engine portion of the car is going well, and my power expectations exceed that of the factory transmission - I decided to pull that as well and do some upgrades 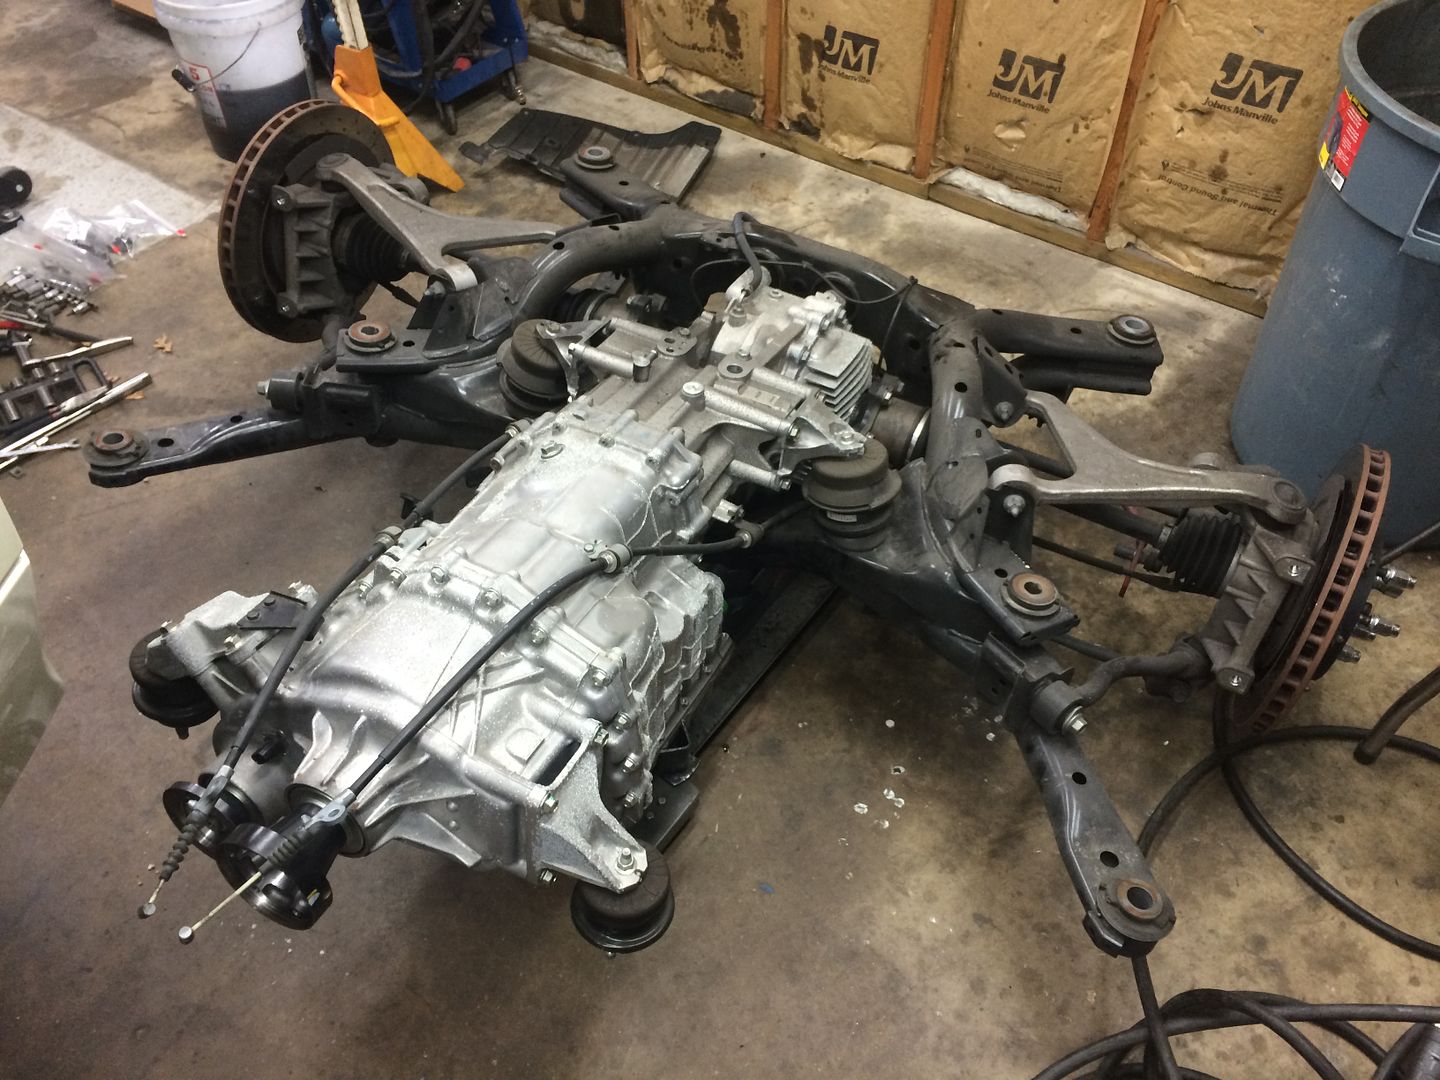
Pulled the trans pan 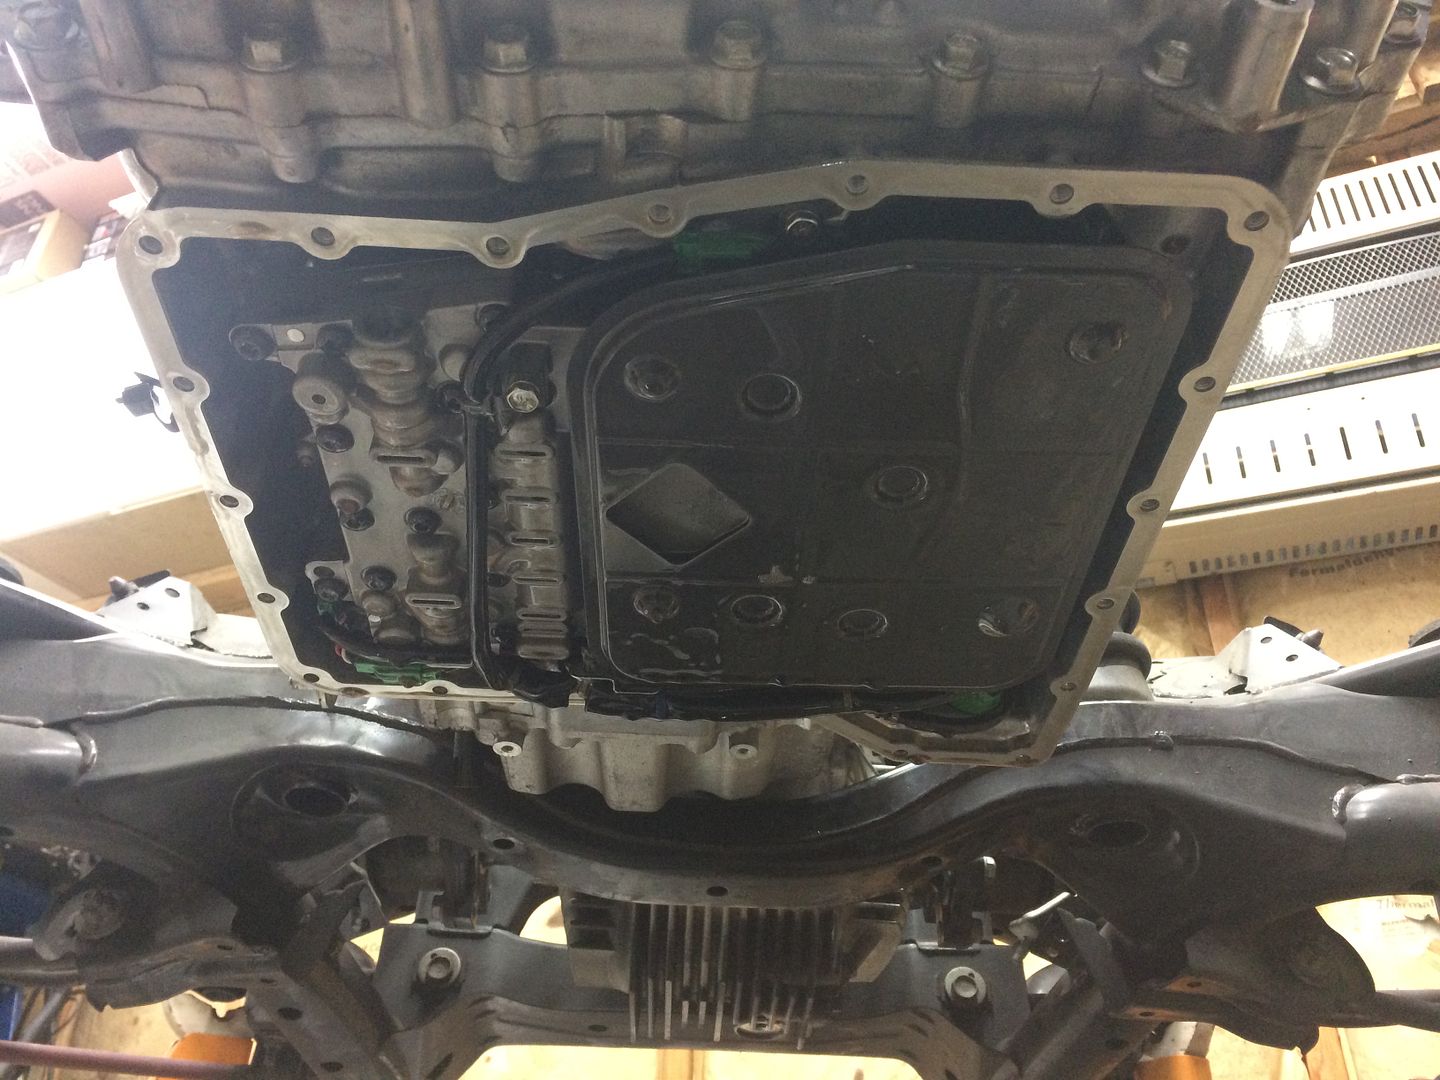
Now I need to pull the front case 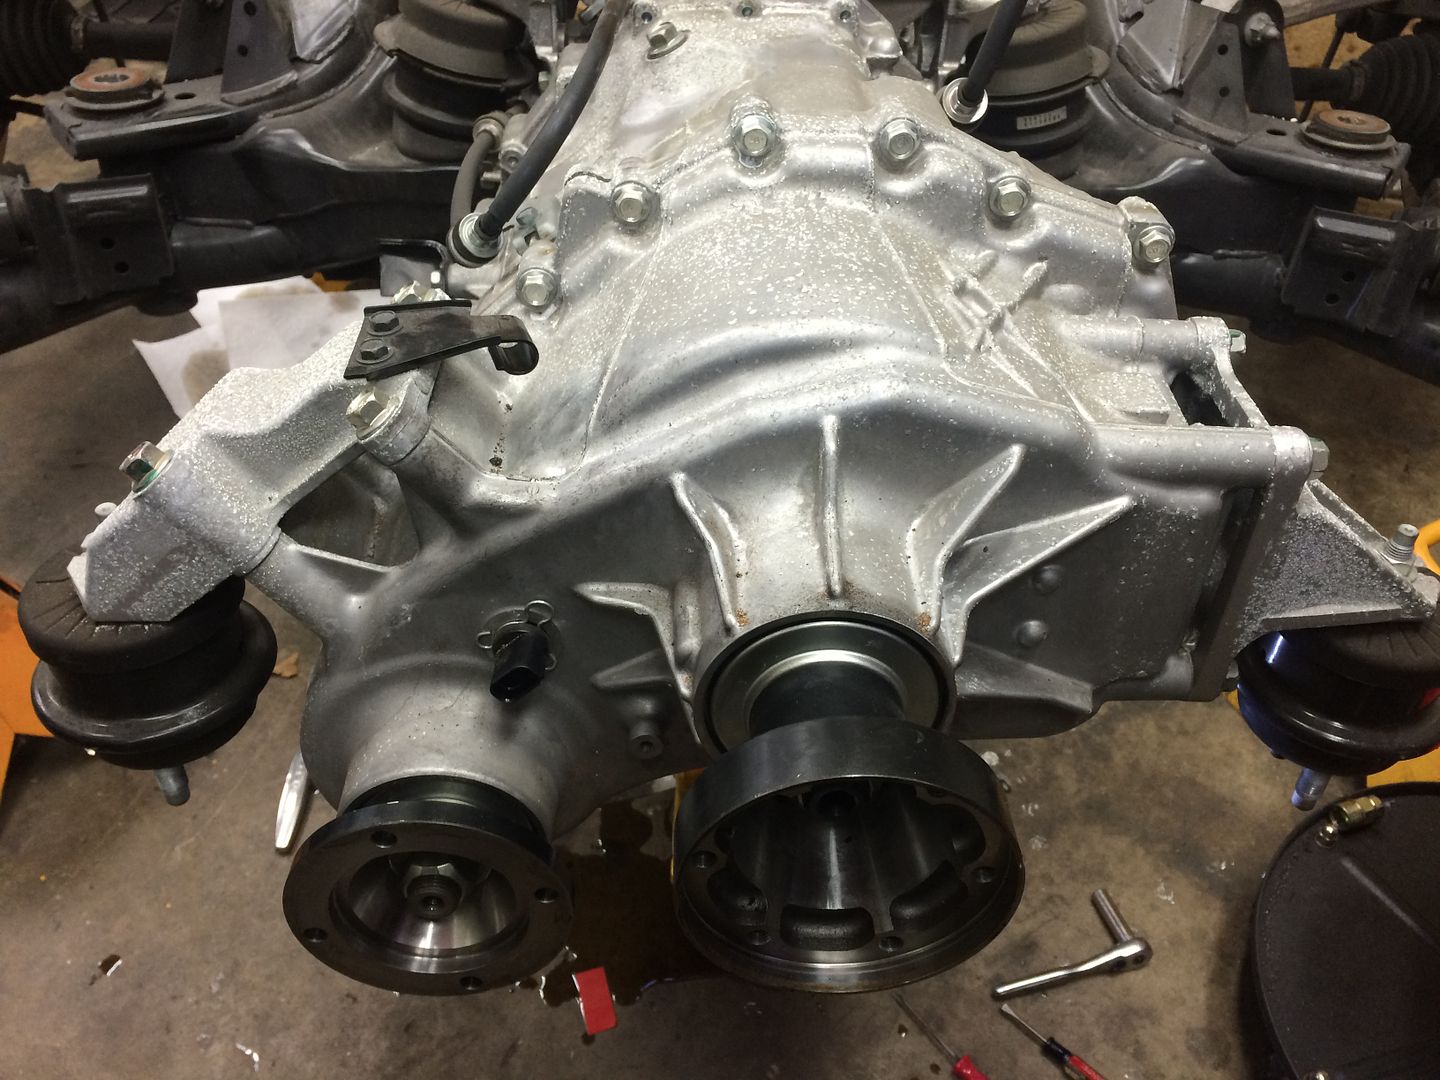
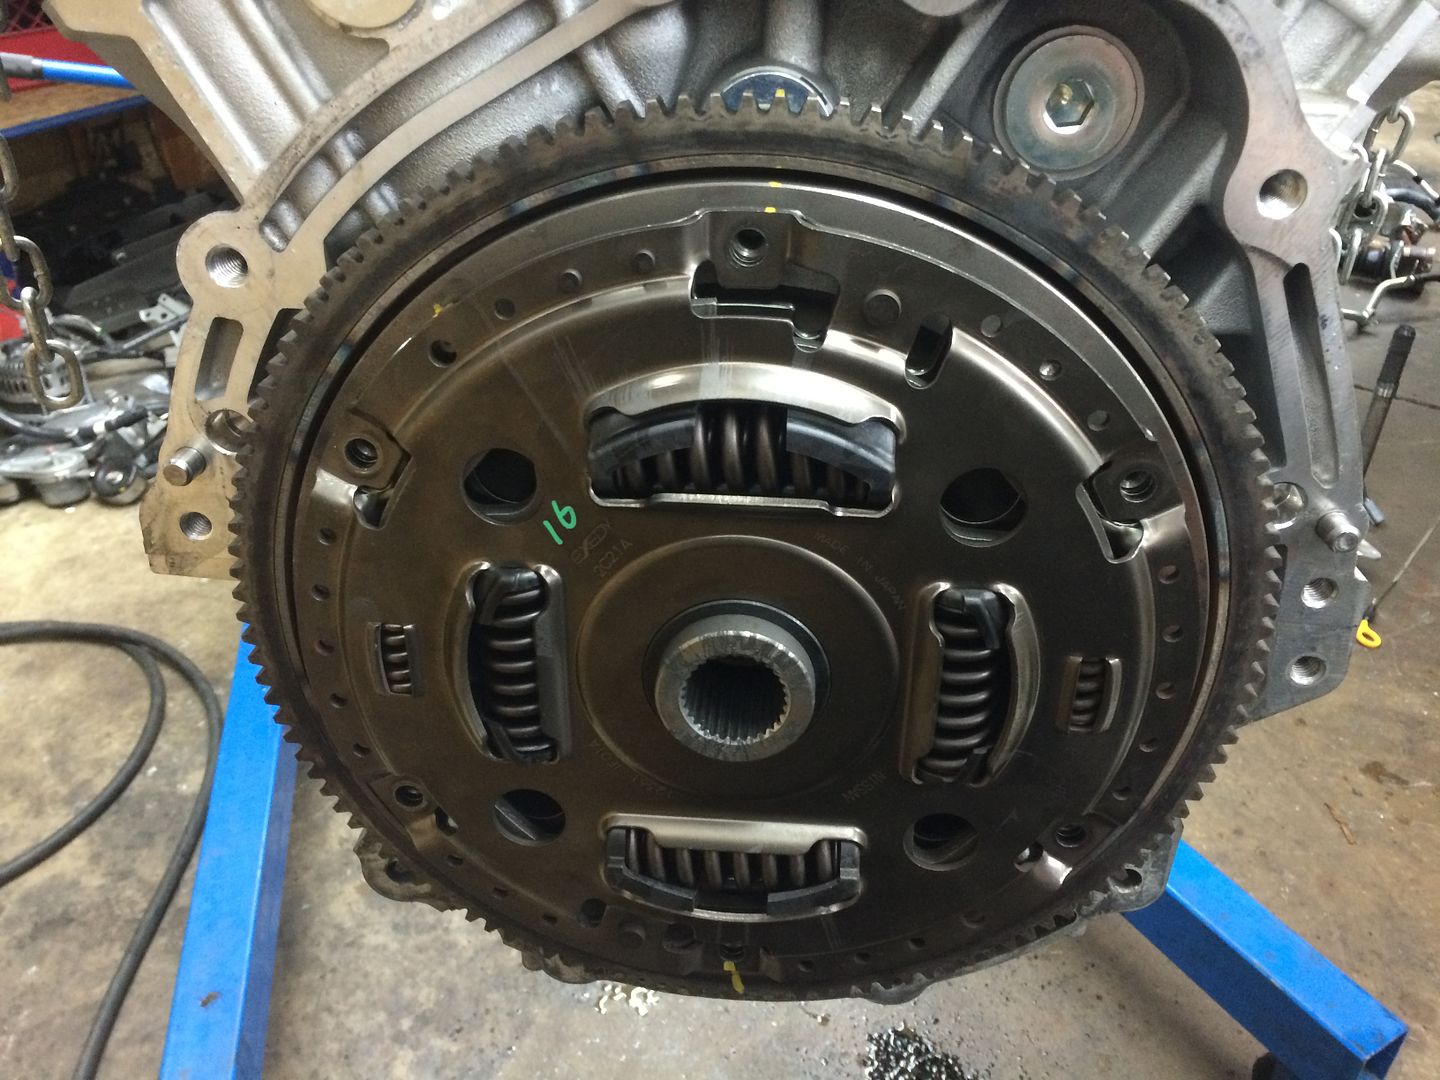
The case contains the factory clutch packs and valve bodies 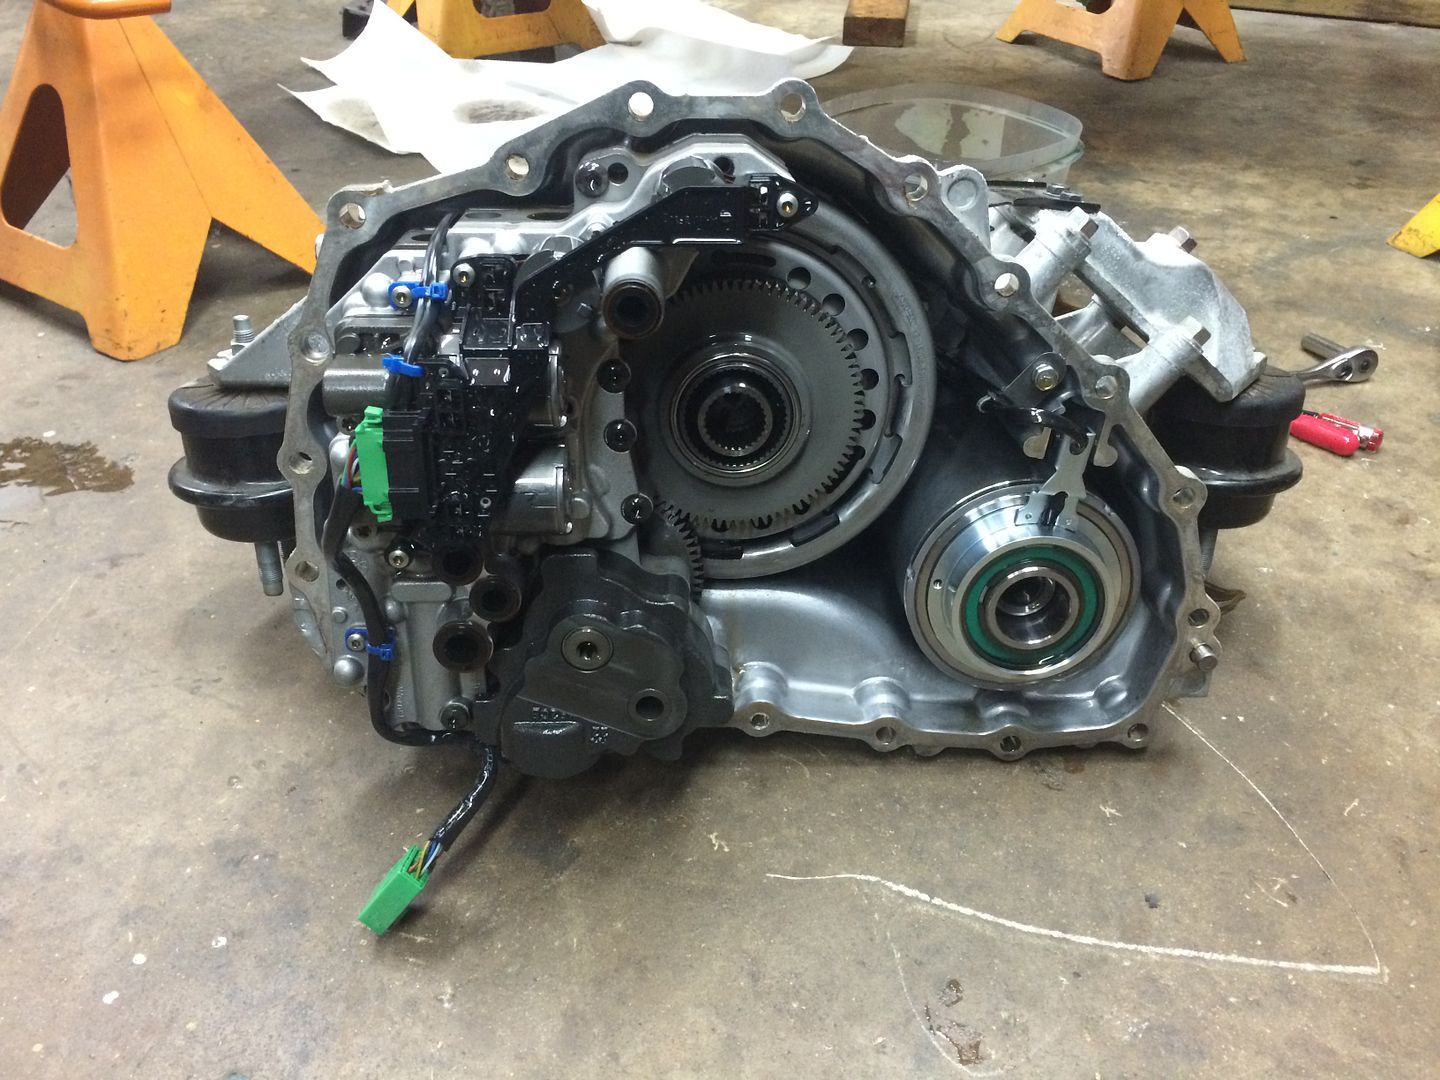
I removed the valve body to get the clutches out. These are what will begin to slip, much like a worn 5spd trans/clutch setup would 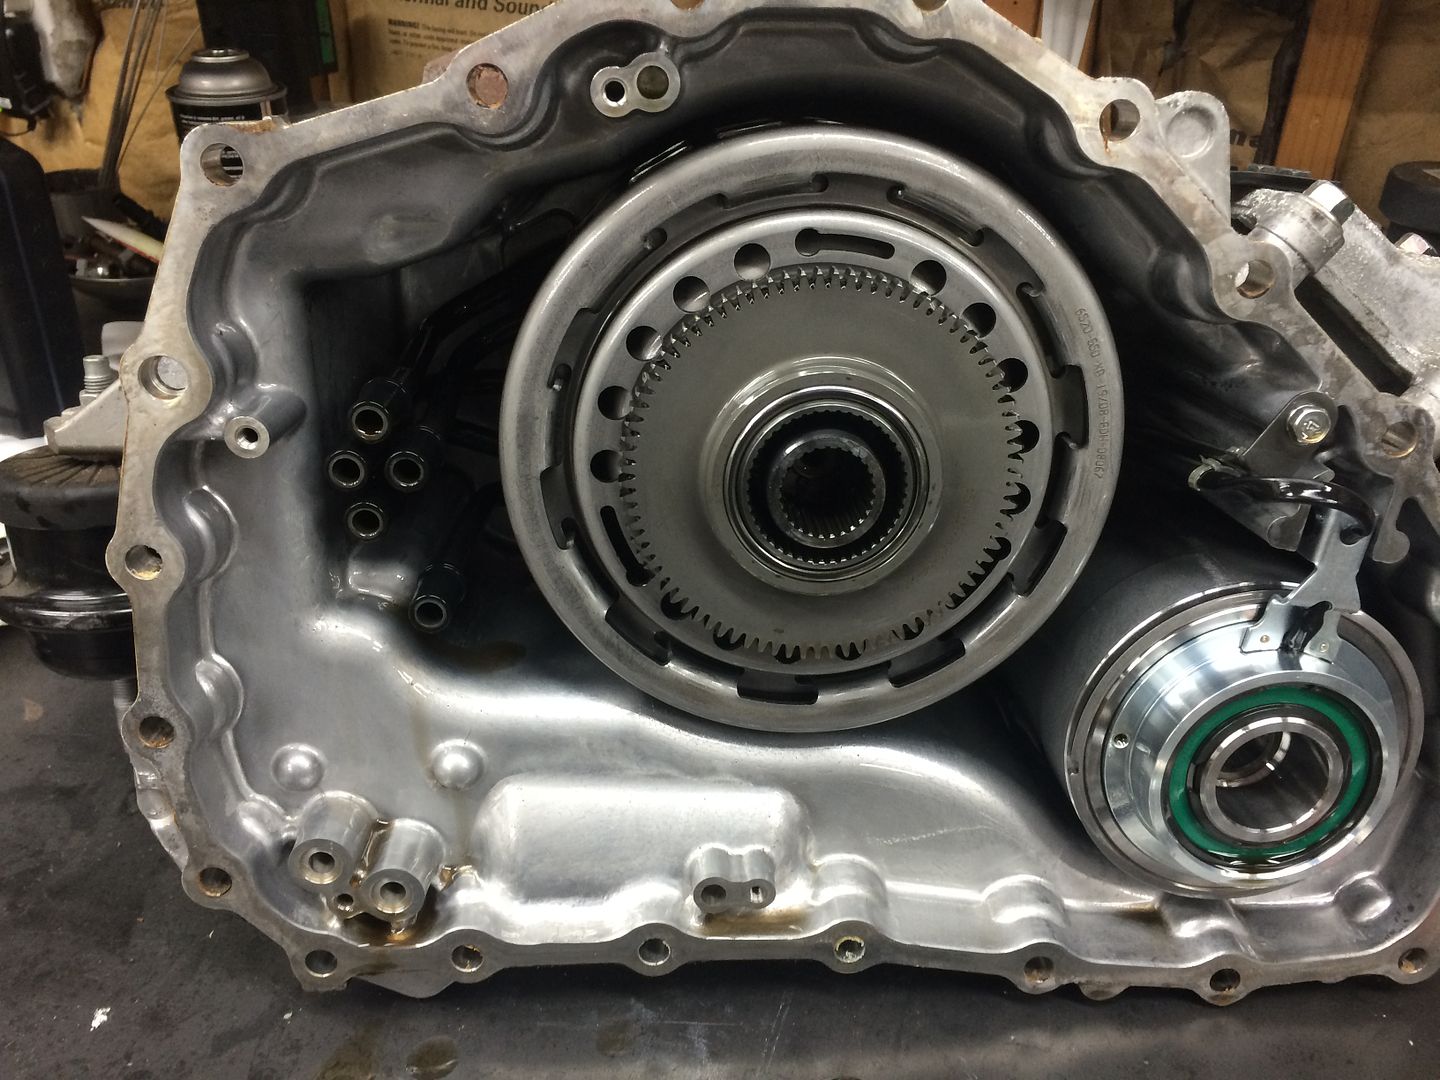
Clutch packs out 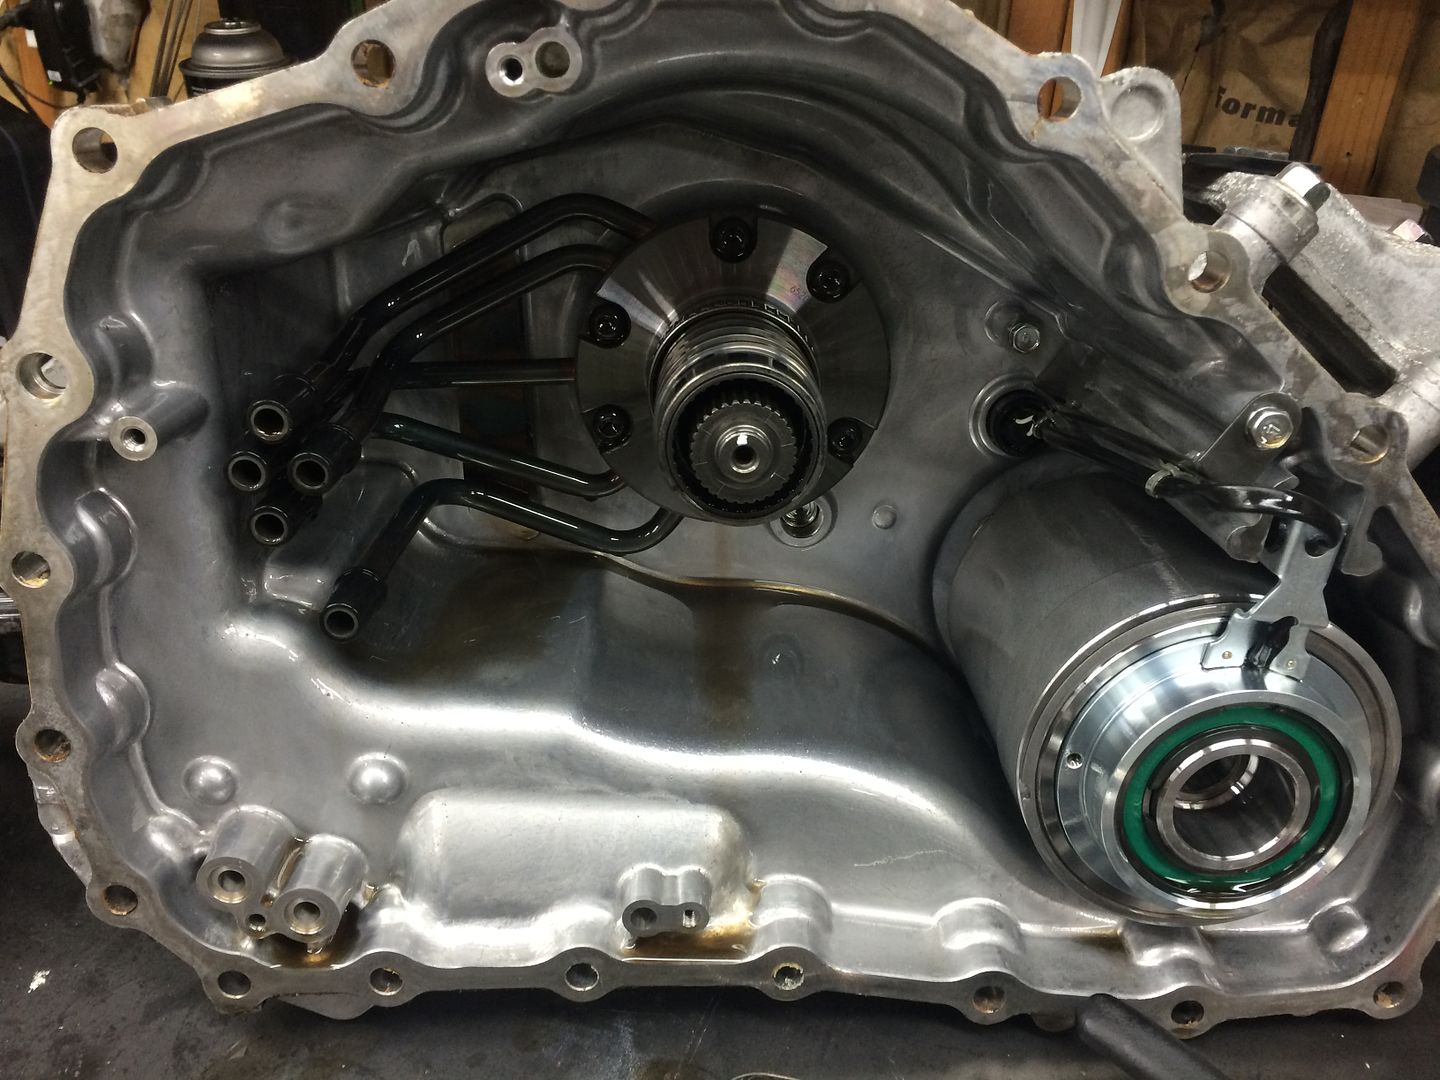
New clutch pack setup rated for 800ft/lbs 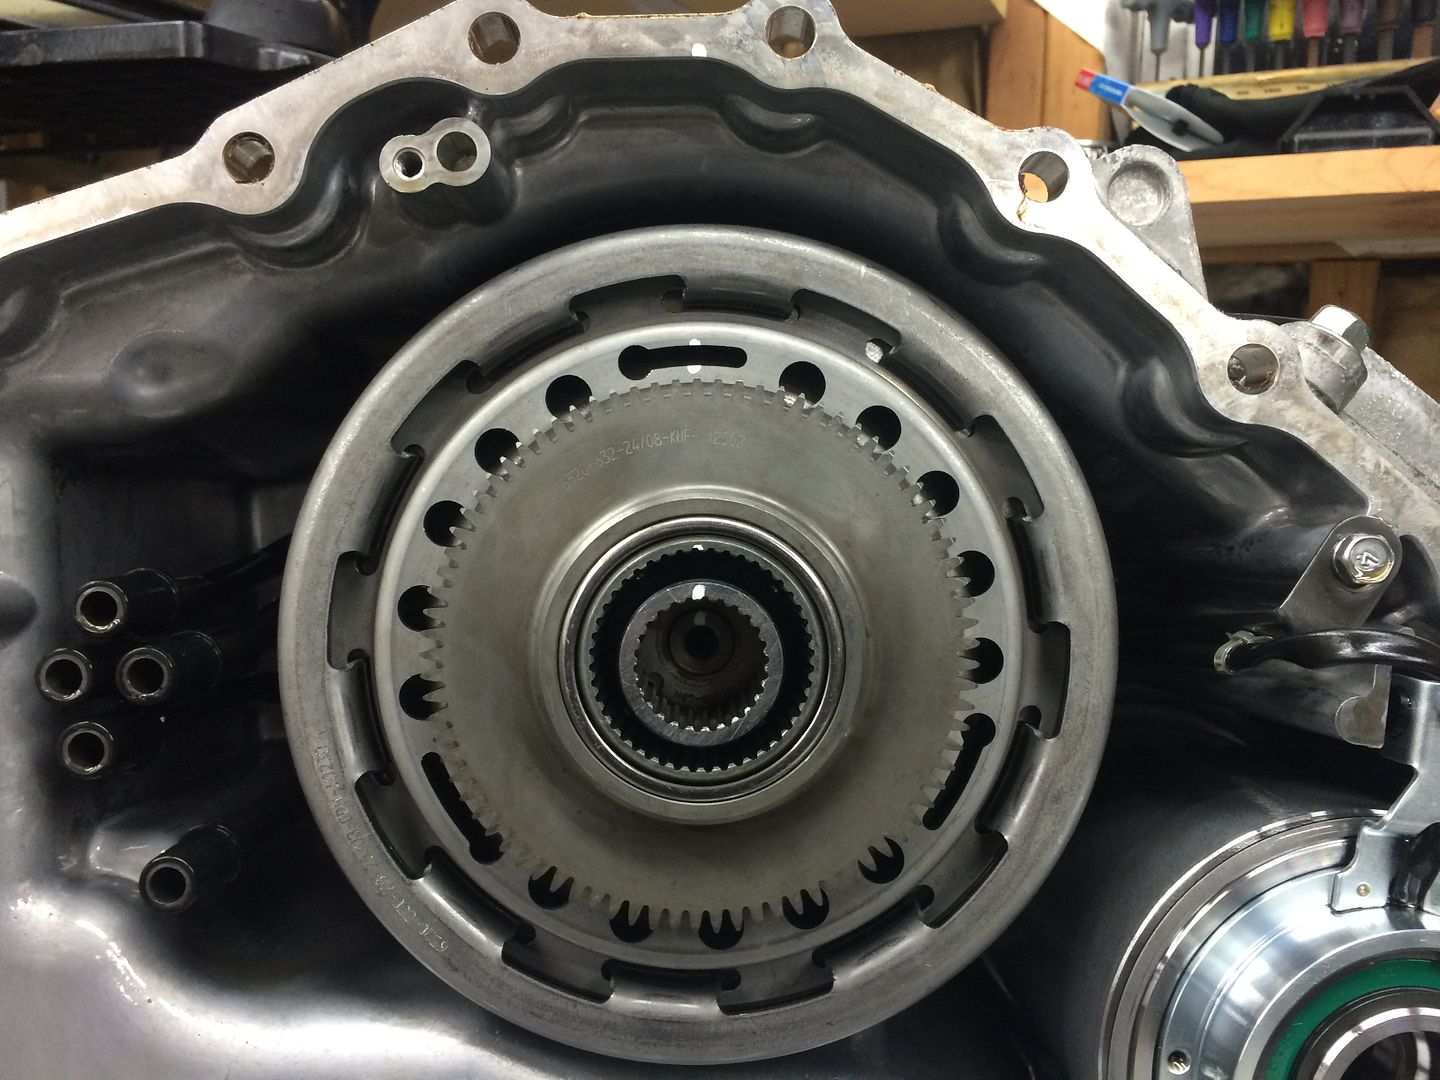
Going back together 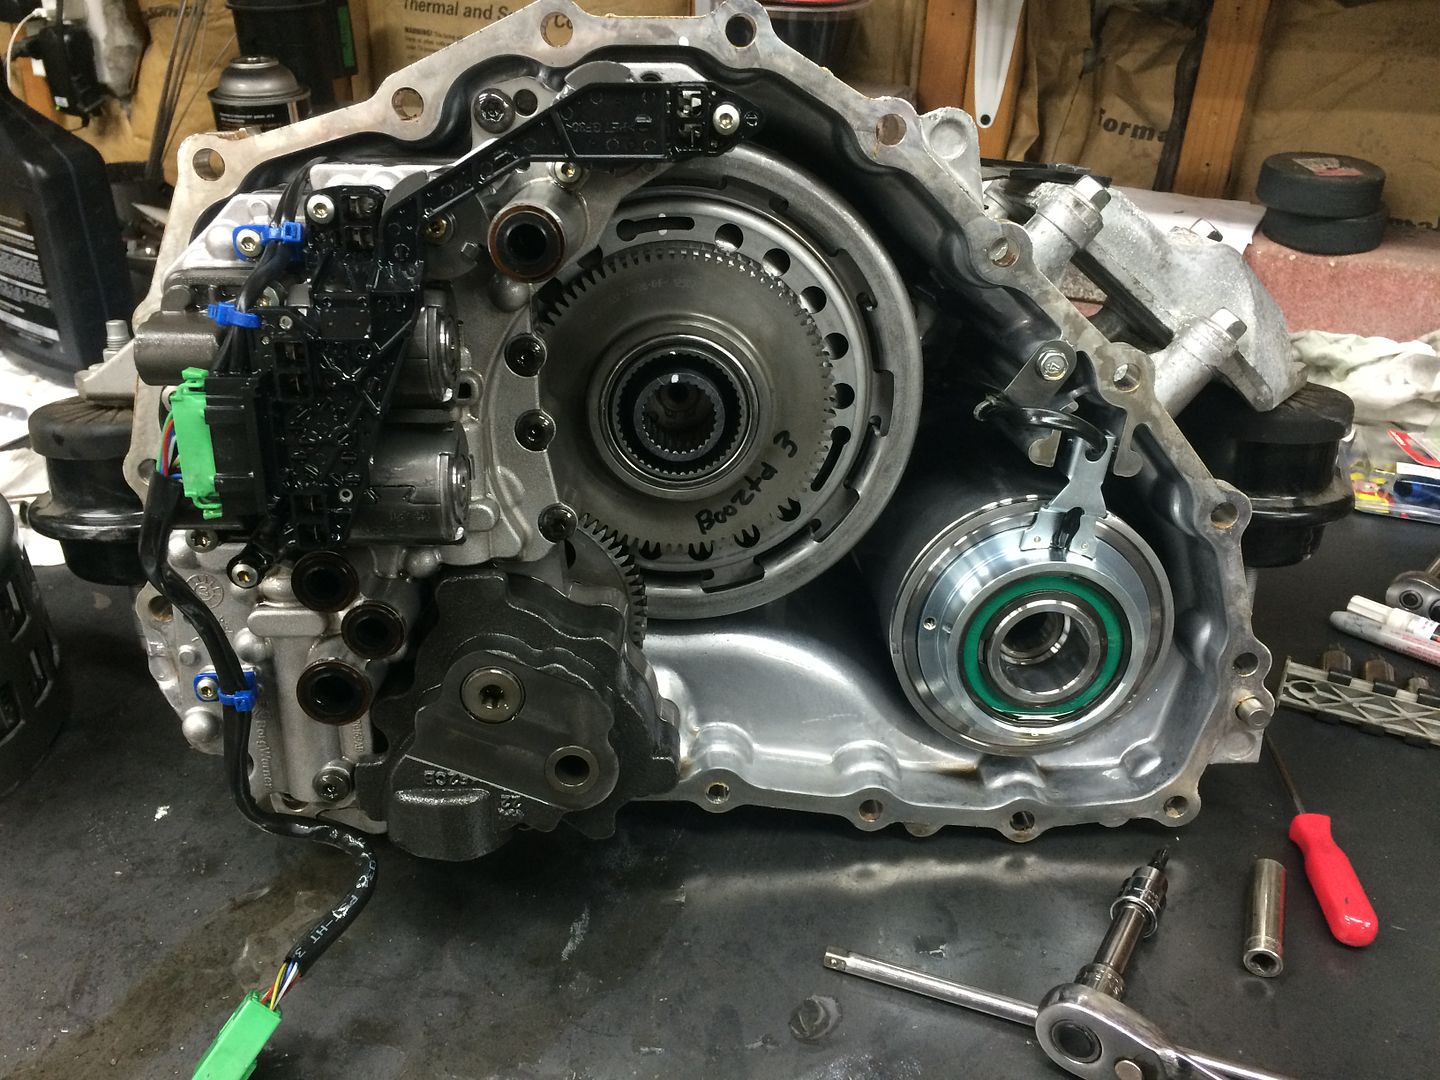
Then I pulled the trans valve body to do some updates the factory recalled 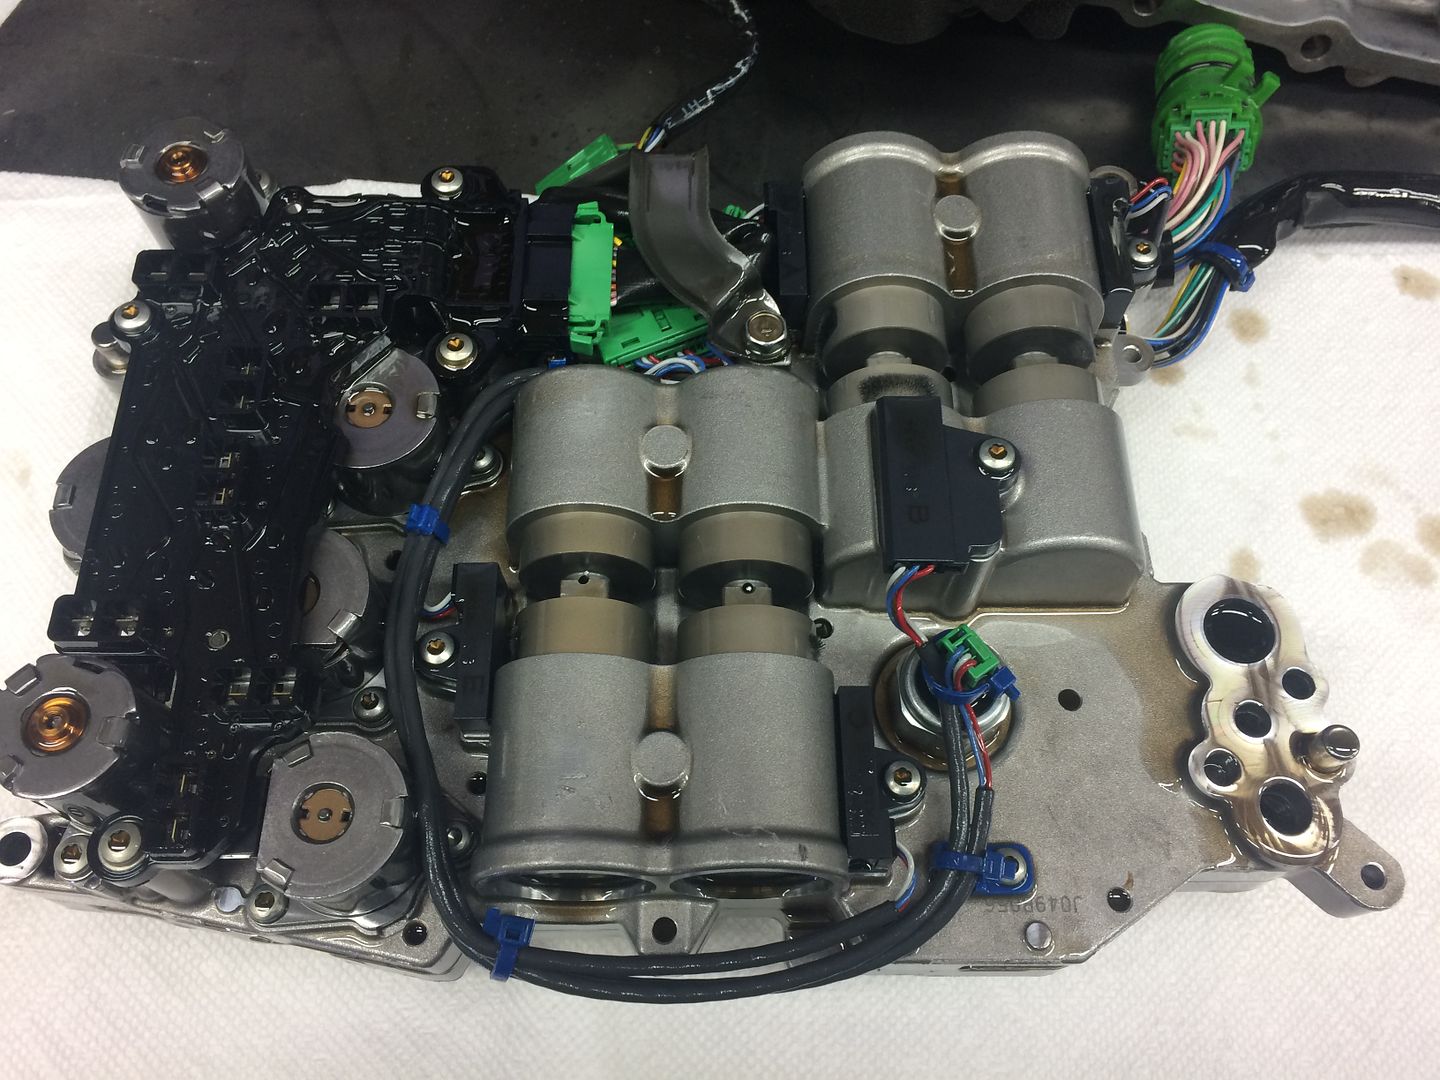
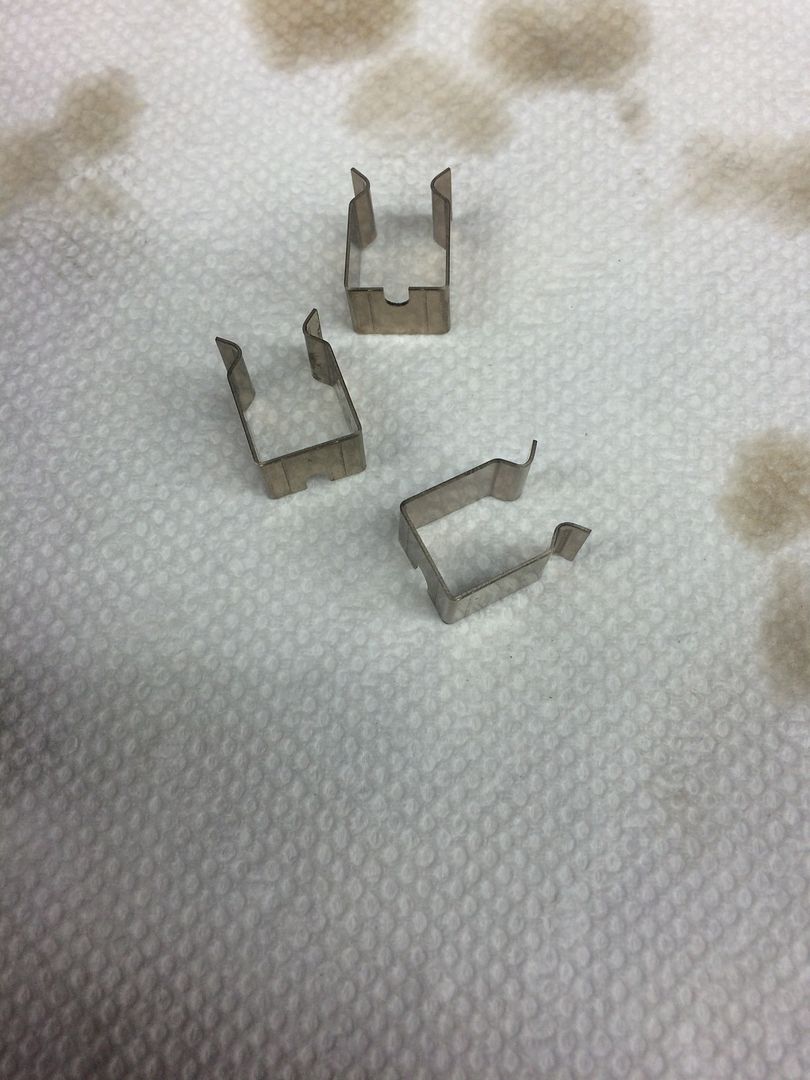
Clips installed 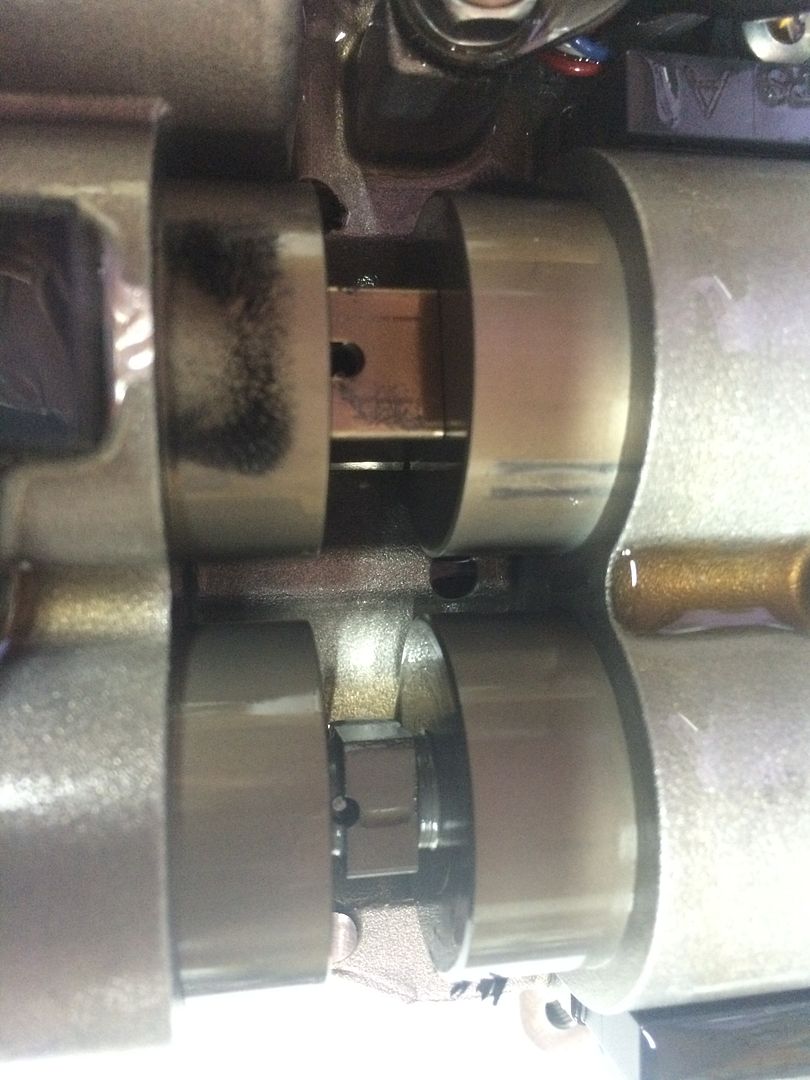
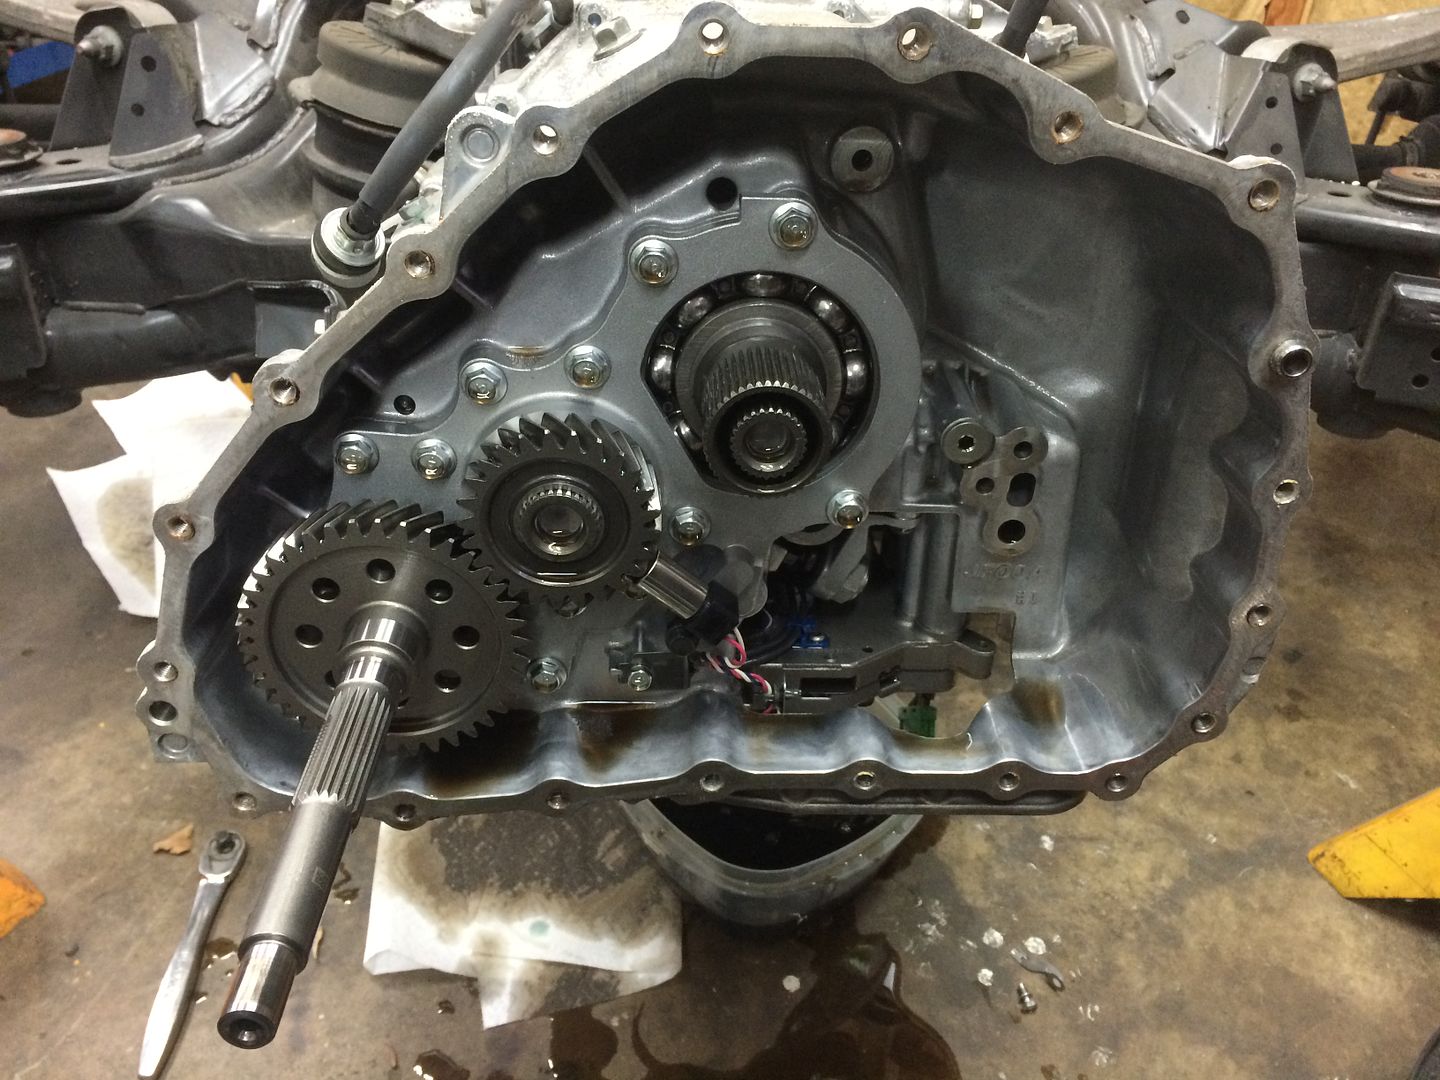
Here's the trans minus the valve body. You can see the gearset 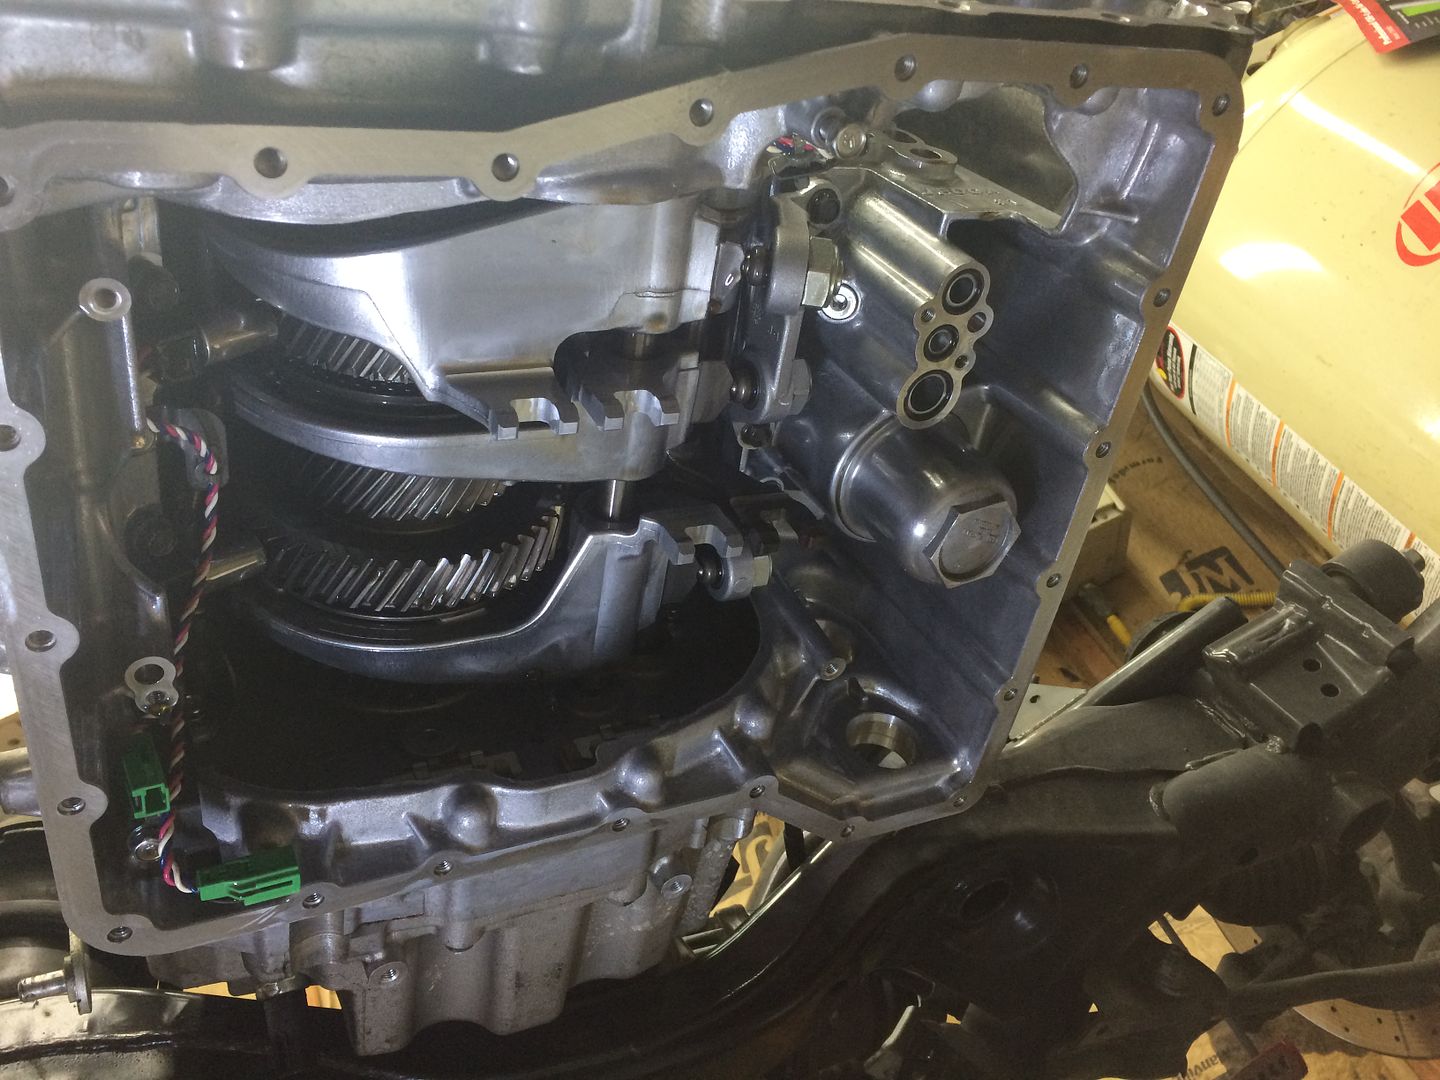
Front case re-installed 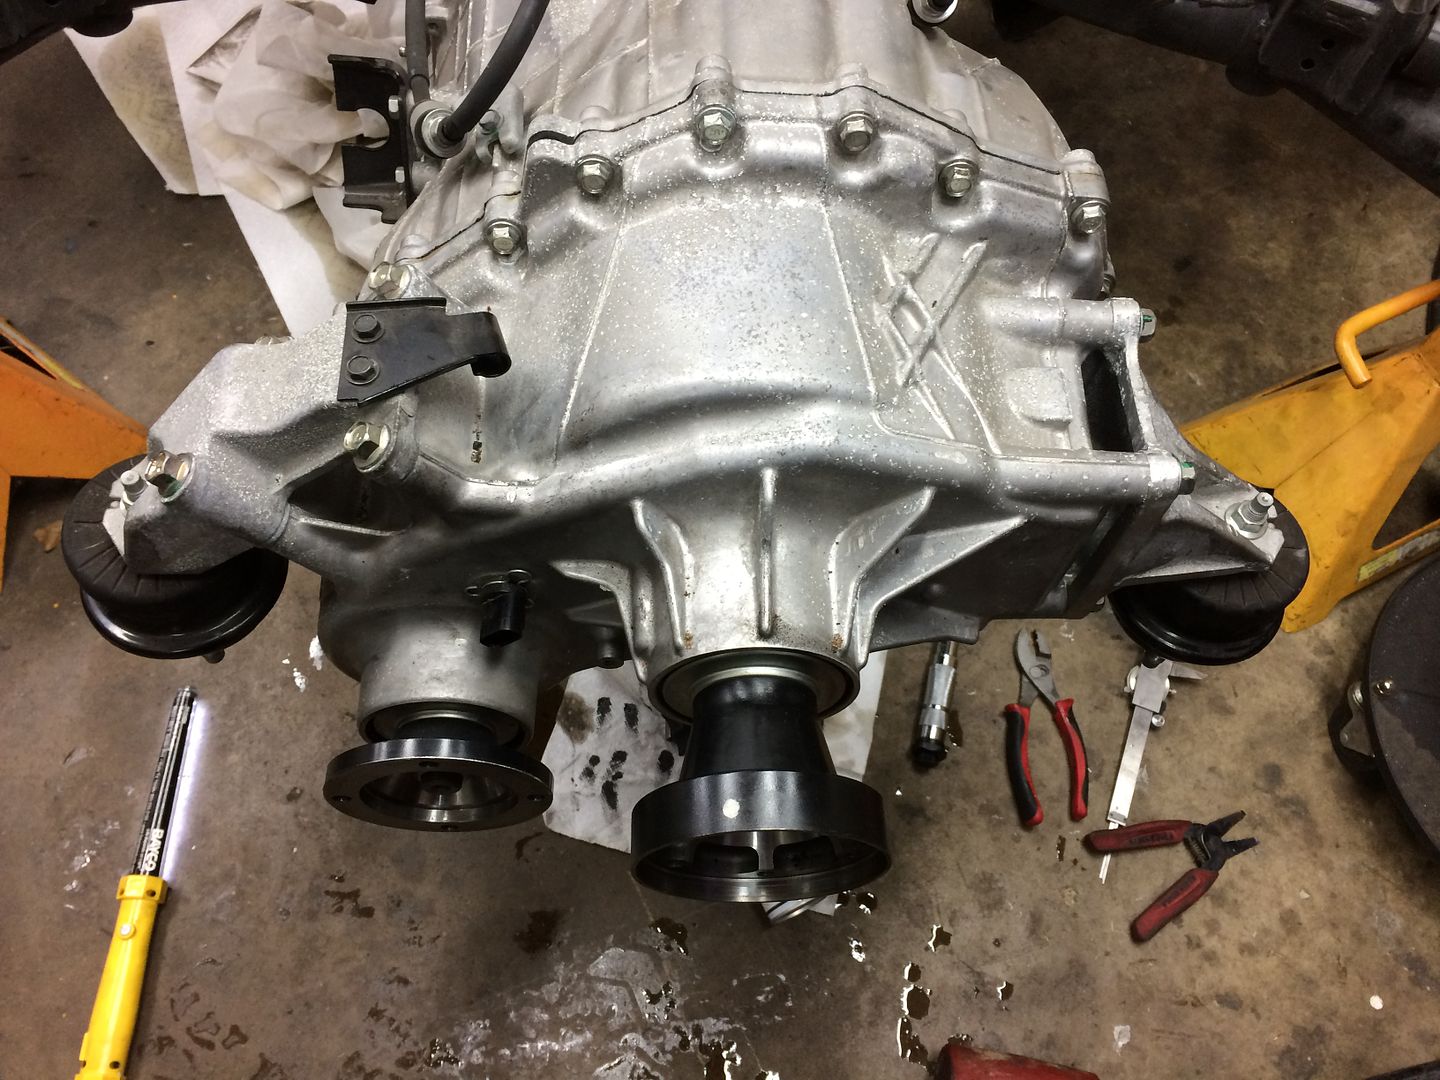
Trans going back in - its a girthy bastard 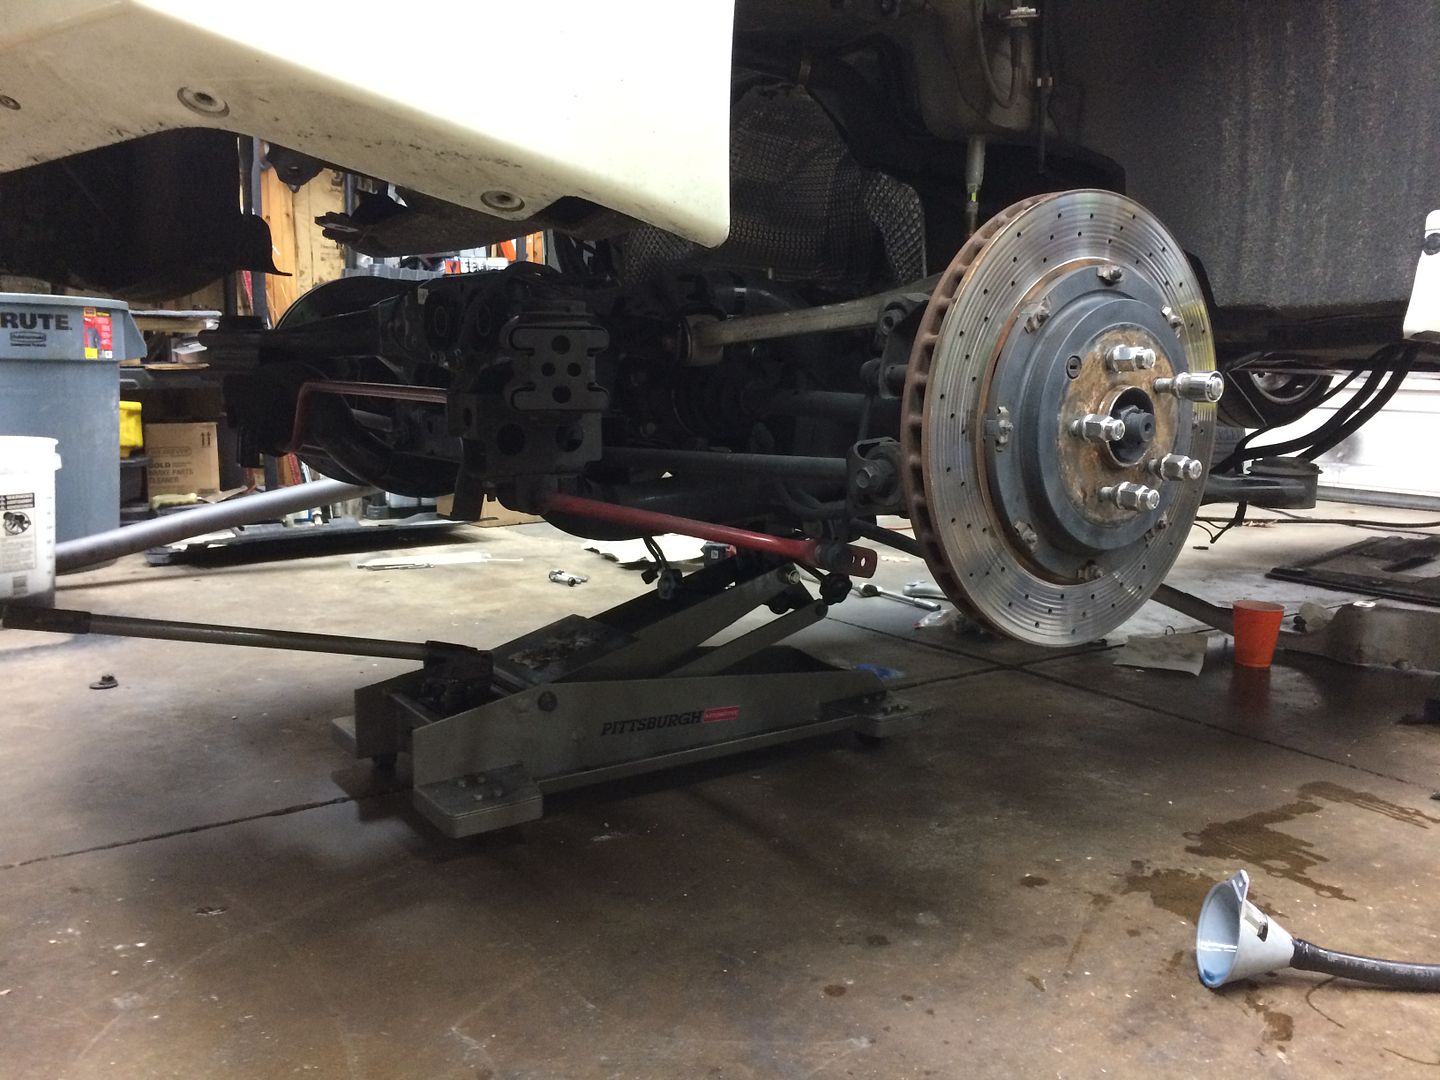
After that I got the car back out on the road and did some tuning and tweaking. This is on a very MILD setup on 93 octane. 
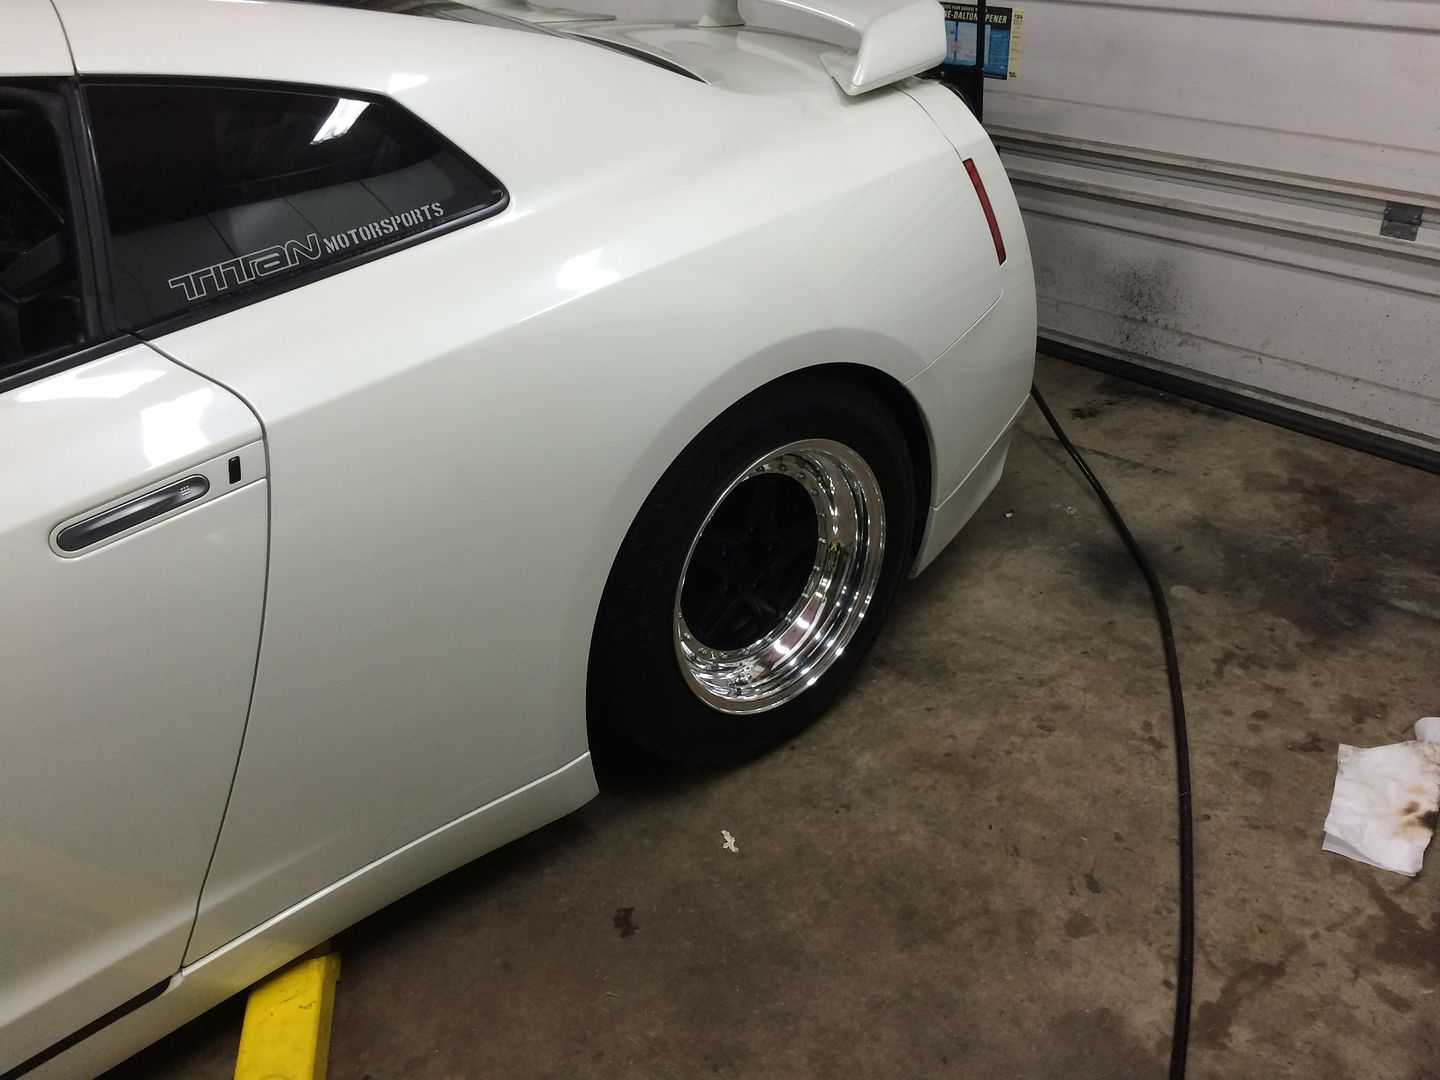
After that I decided this thing is going to boil the tires off if I take it to the track so I added some rear wheels/tires that will shave a good 30lbs of unsprung weight off the car 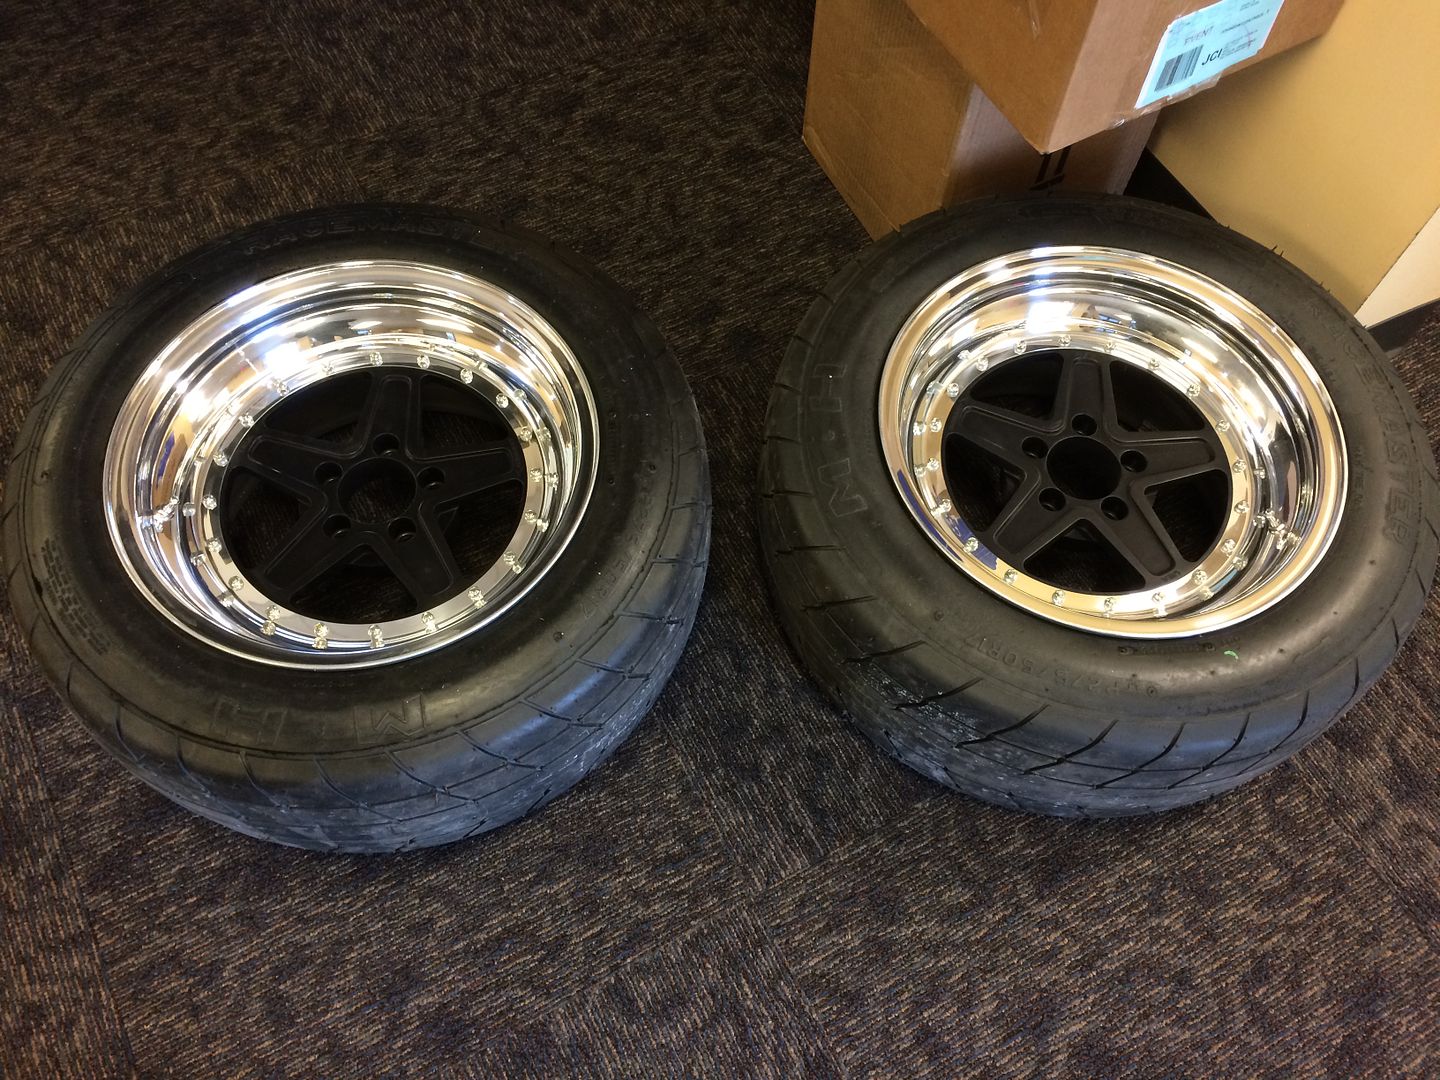
With this kind of power I'm going to be knocking the MAF system out of the park with readings so I've converted it over to speed density. Simultaneously, I converted the car over with a flex fuel kit that will automatically read ethanol content and pipe it into the ECU. The ECU will make adjustments on the fly so no matter what fuel I have in the car, I will have maximum HP on tap 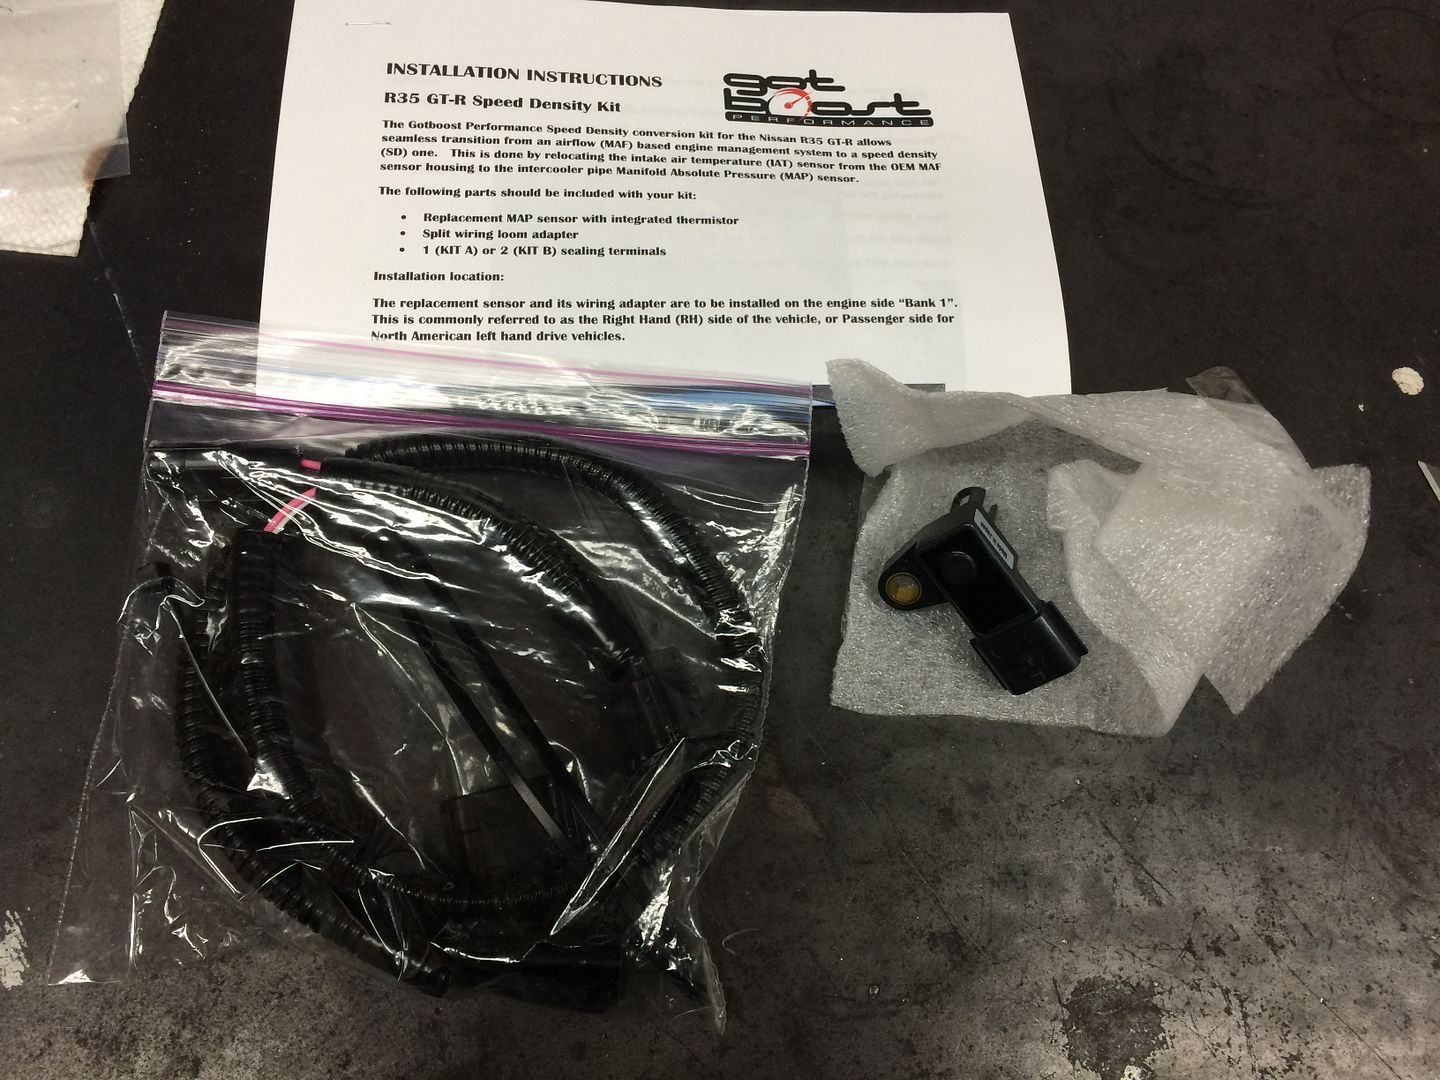
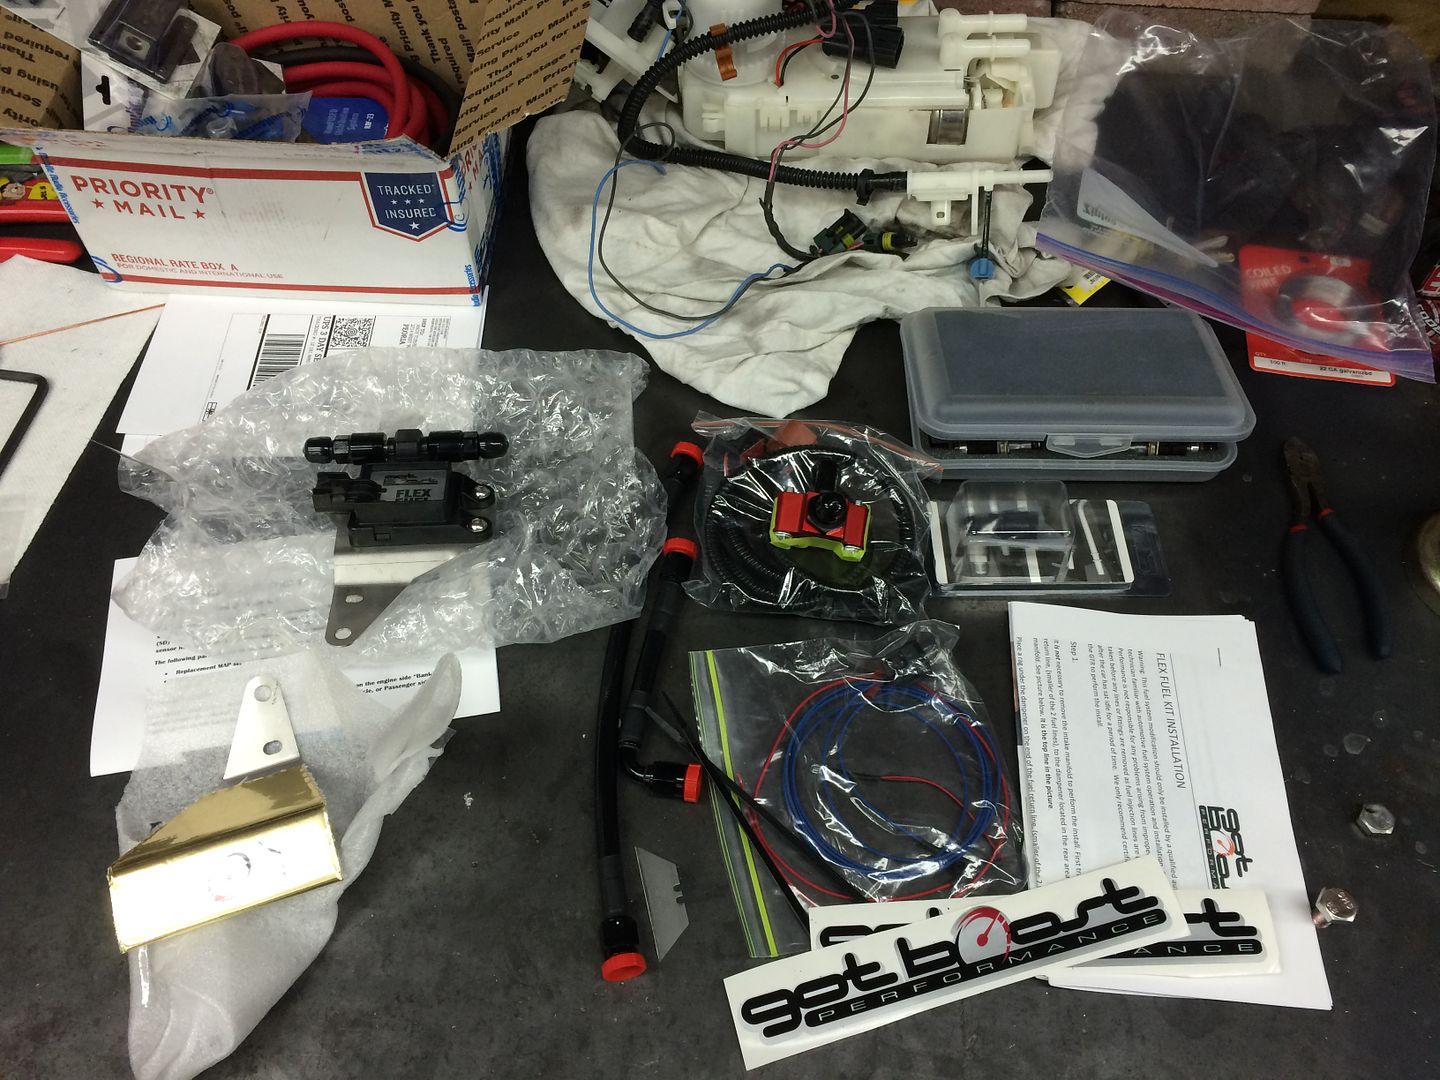
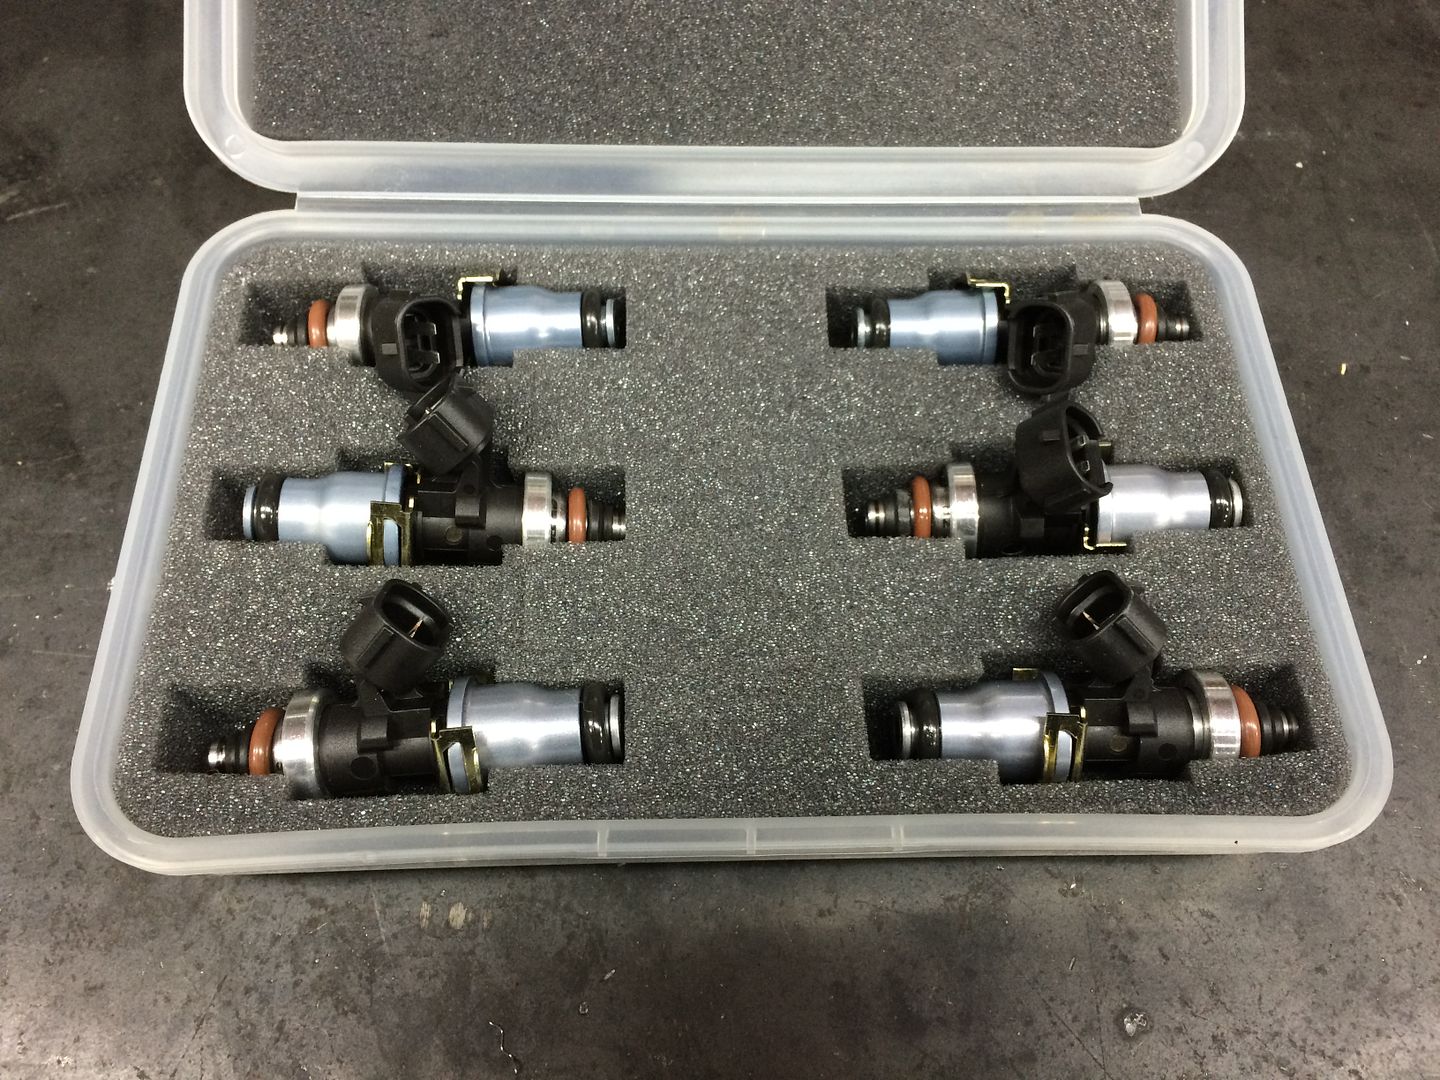
I also needed to do some fuel system upgrades so after verifying the car ran great on the previous setup, I installed some ID2000's 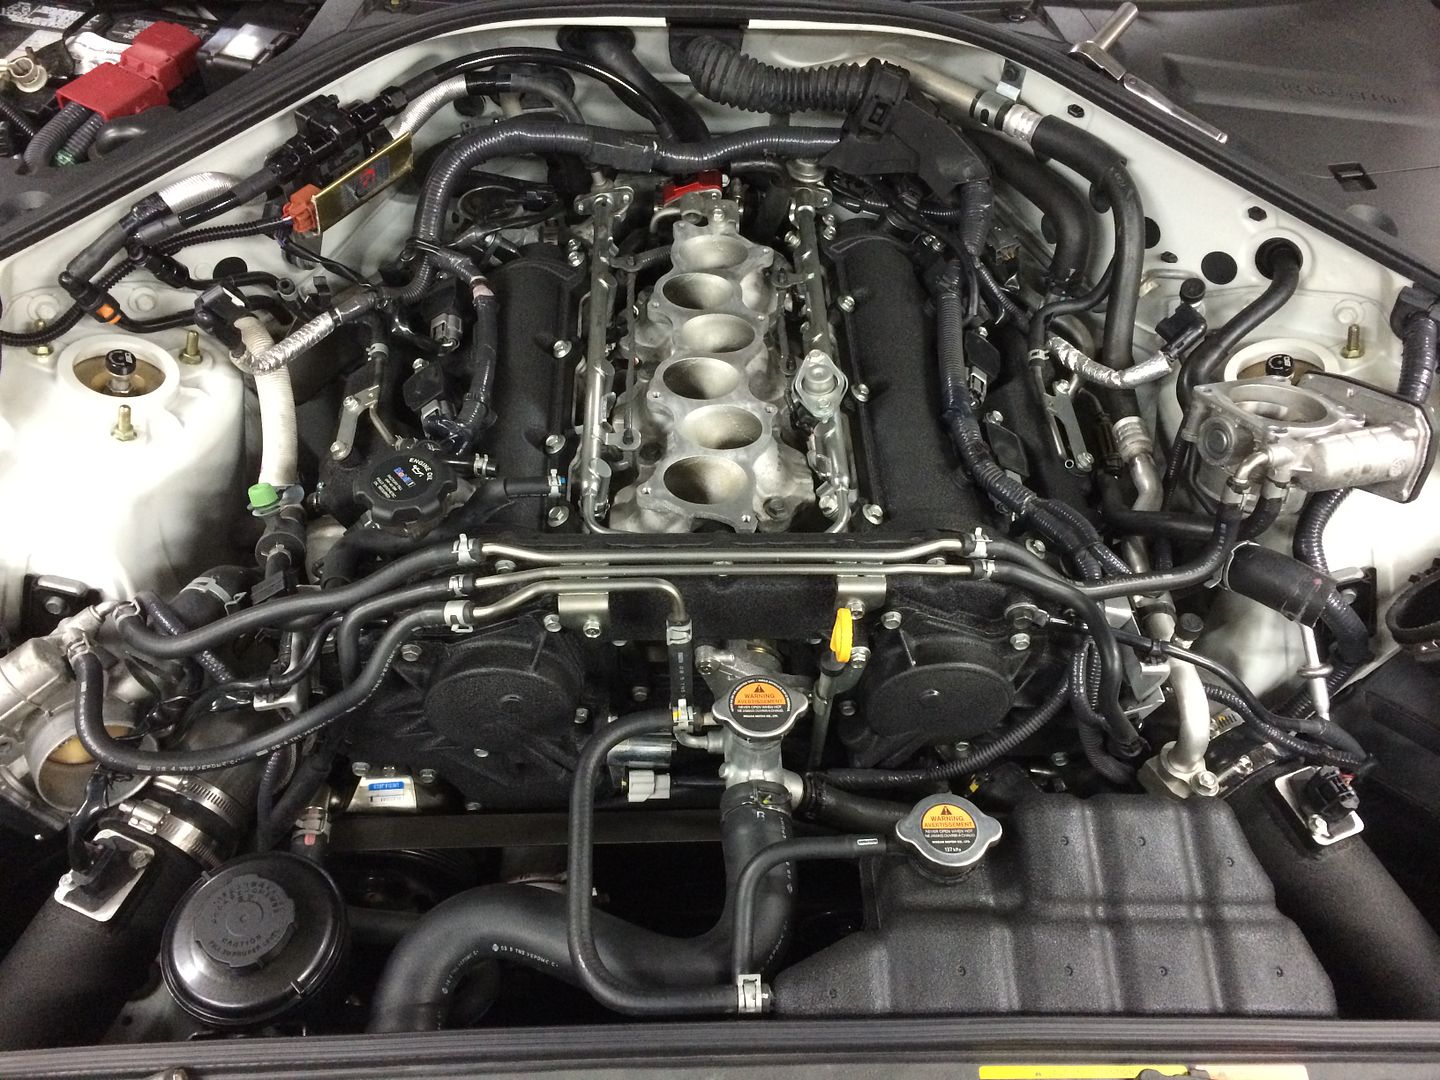
The pumps also need to be addressed, and I have a good setup on order but I wanted to go ahead and supply them with GOOD power so I put together this hardwire kit 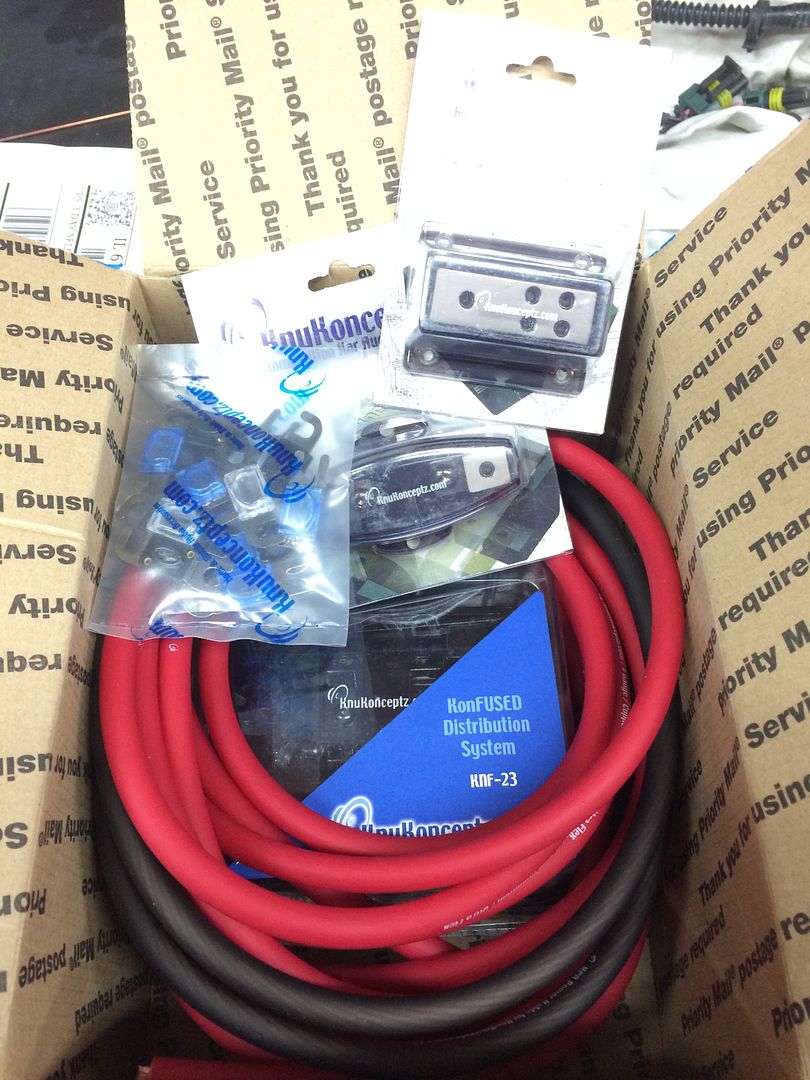
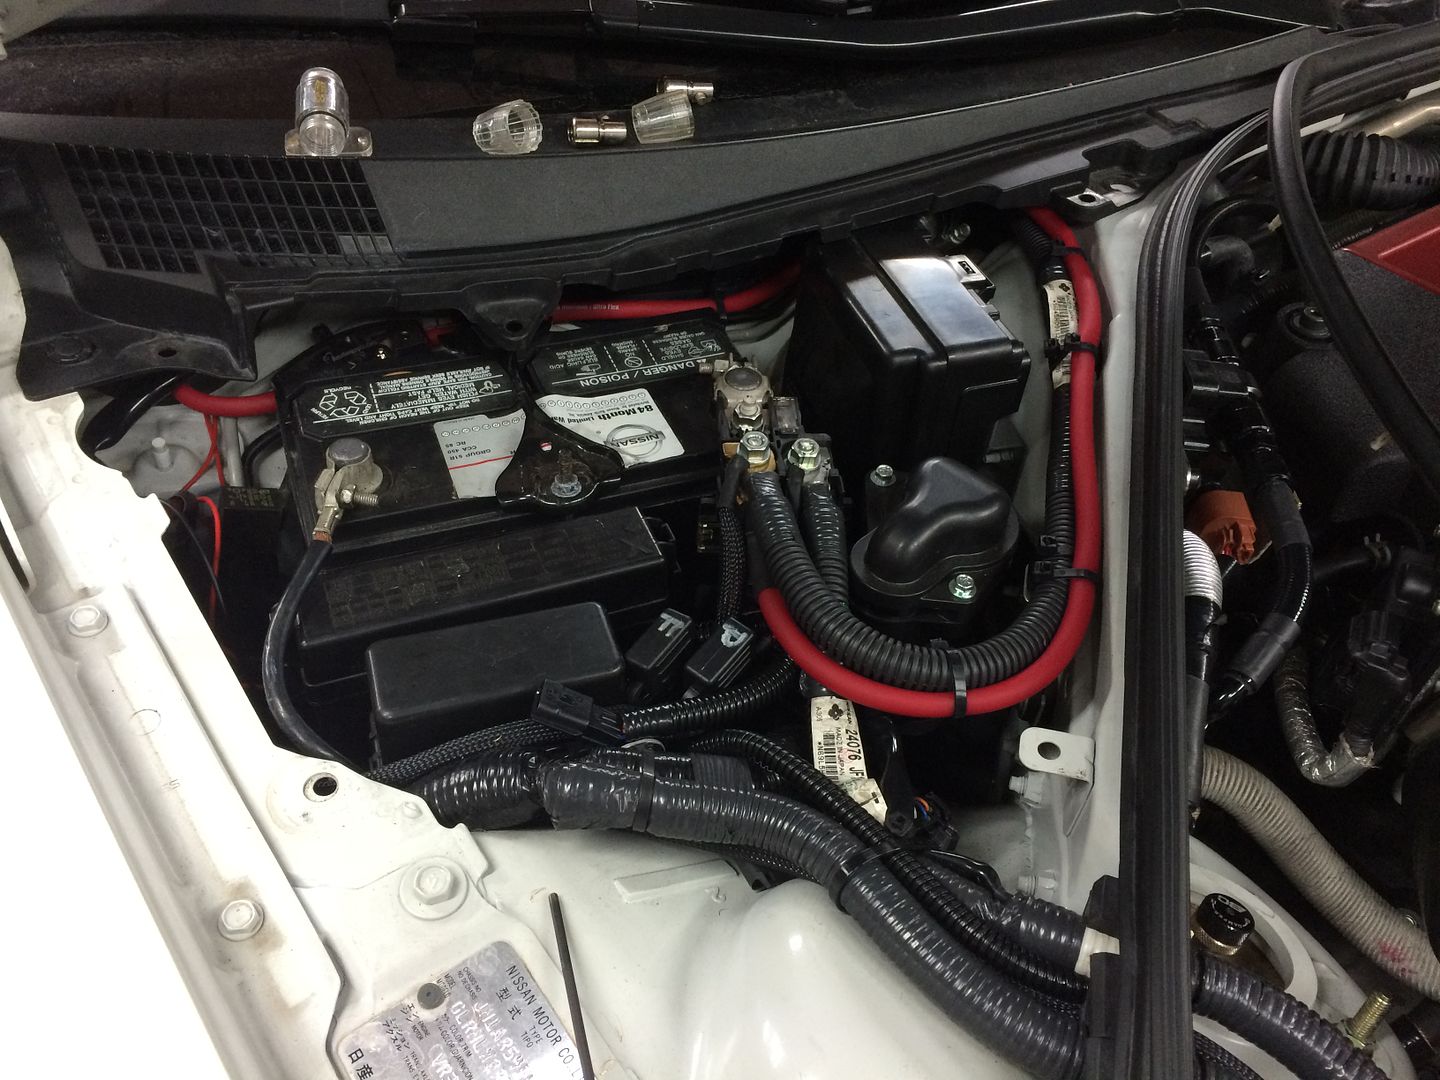
Each pump now has its own dedicated relay and a good power supply. Factory functionality (the GTR has two pumps from the factor) is maintained 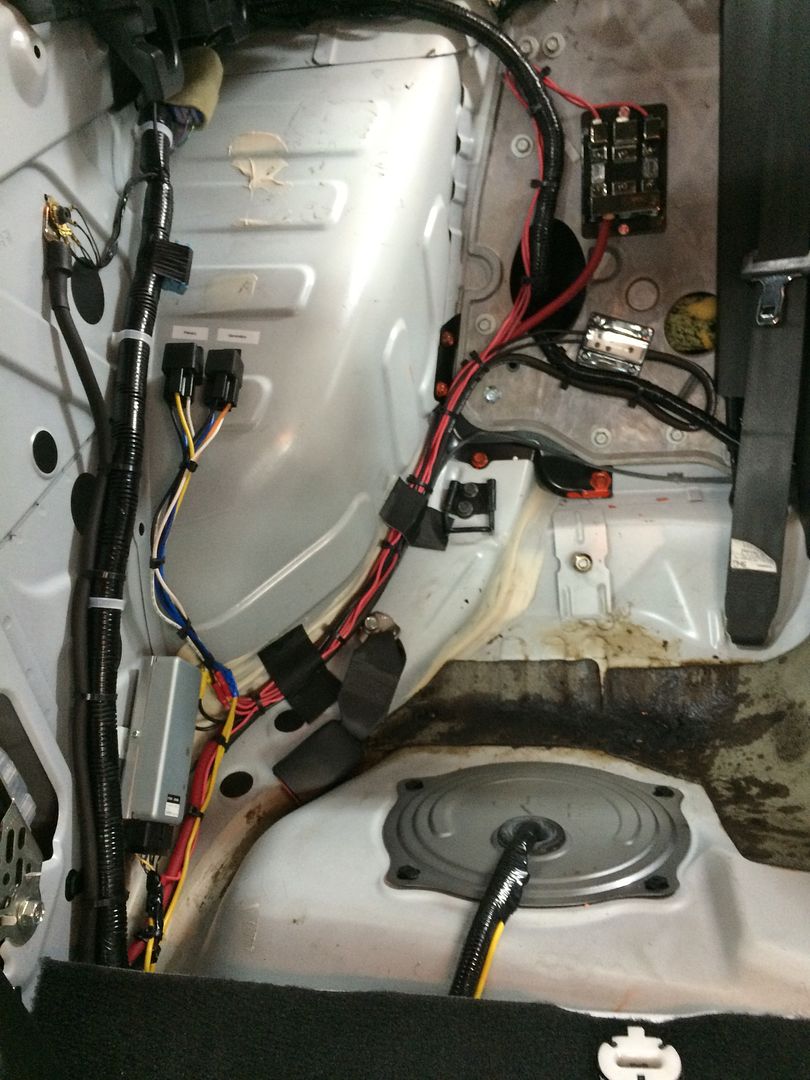
Wow, what a read so far right? Well there's more........Back when I first got my Z I did not like the red interior so I slowly converted it over to black interior. I'm biting the bullet and doing it all now on the GTR. Mine came with ivory interior which I can't stand and it shows dirt really easily. I began converting it over to black interior This process starts with pulling the seats 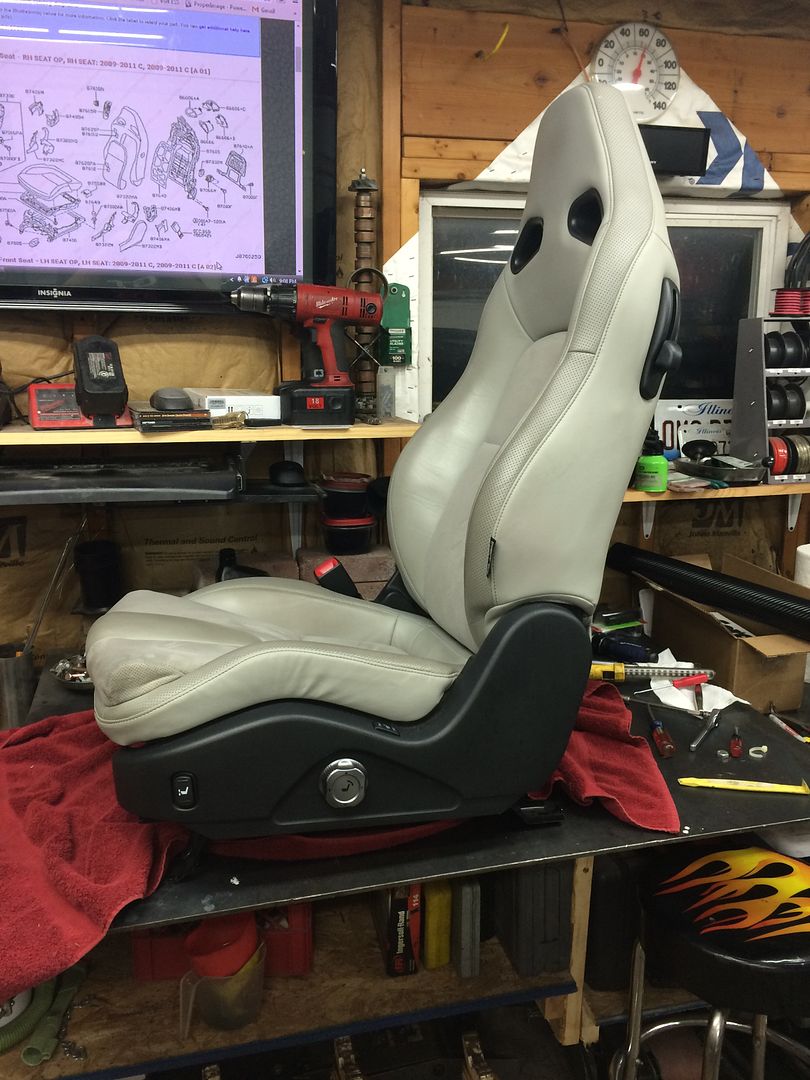
Completely stripped them down 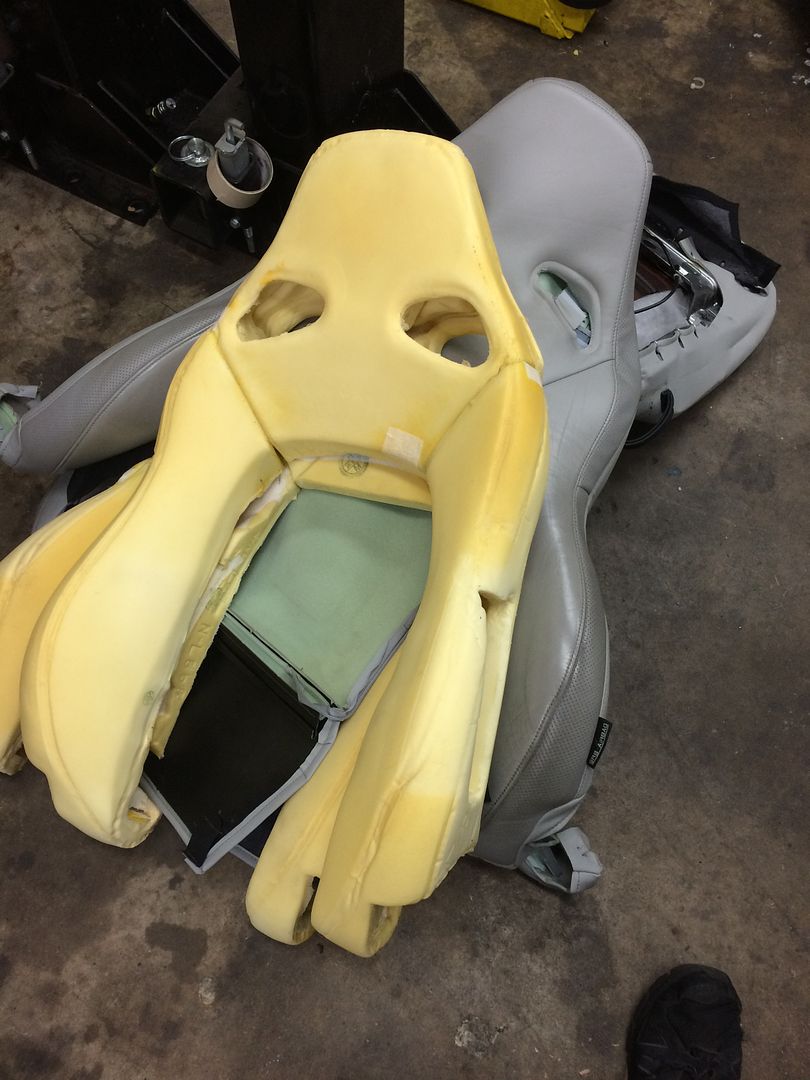
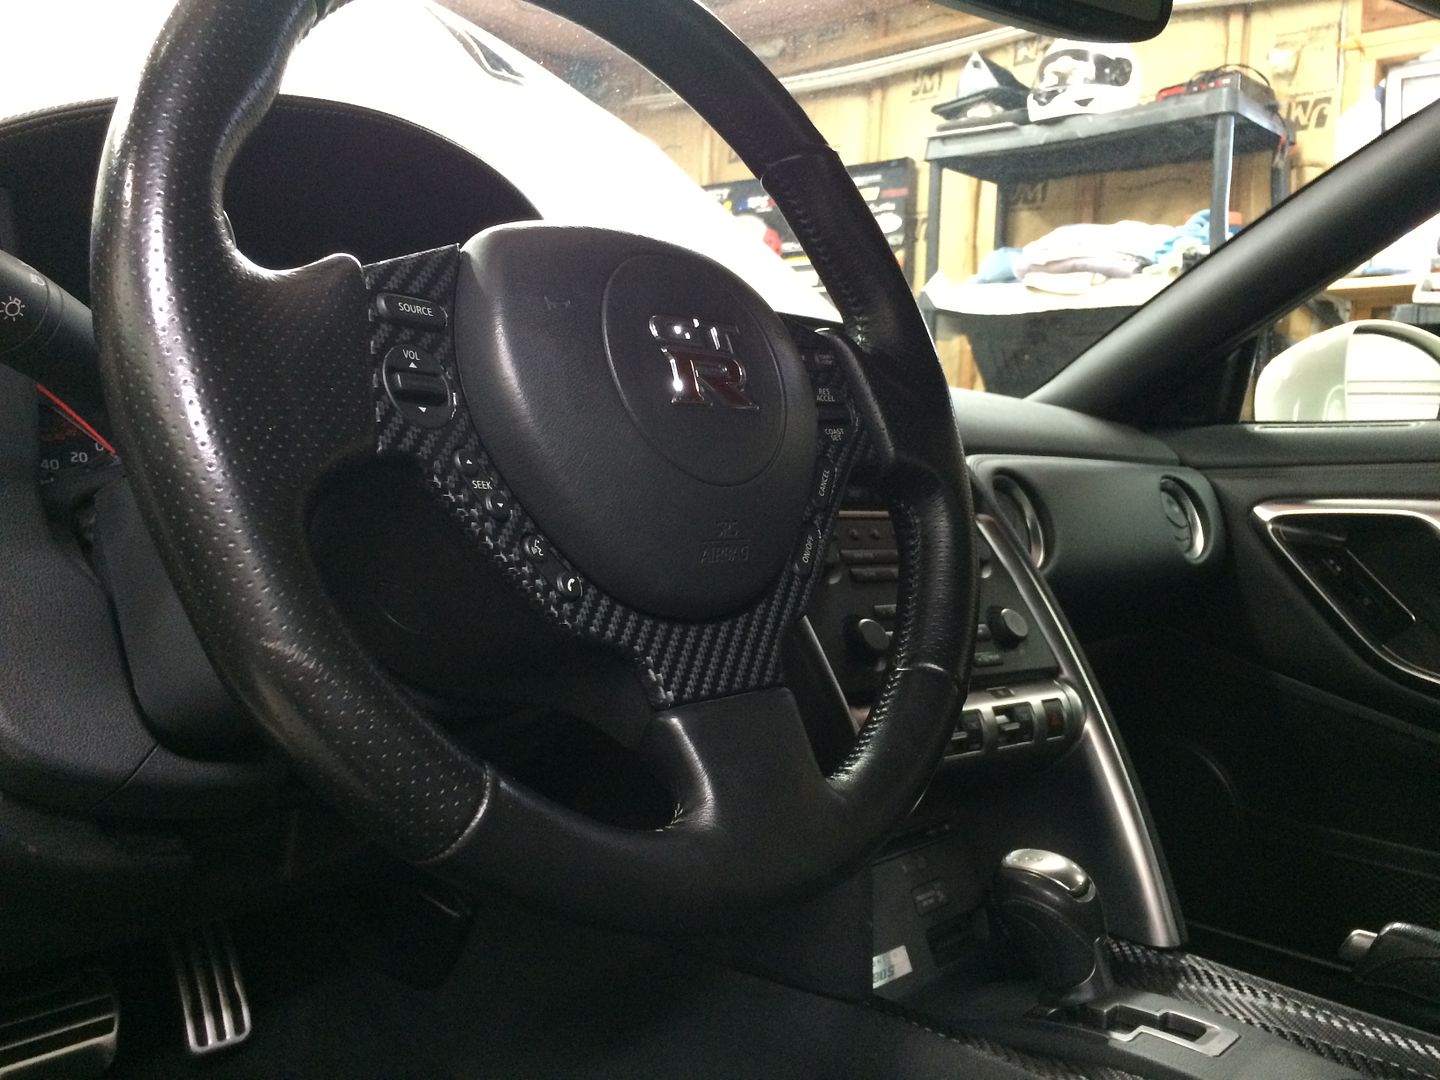
Next I wrapped my center console and steering wheel trim in Di-Noc because the factory finish scratches very easily 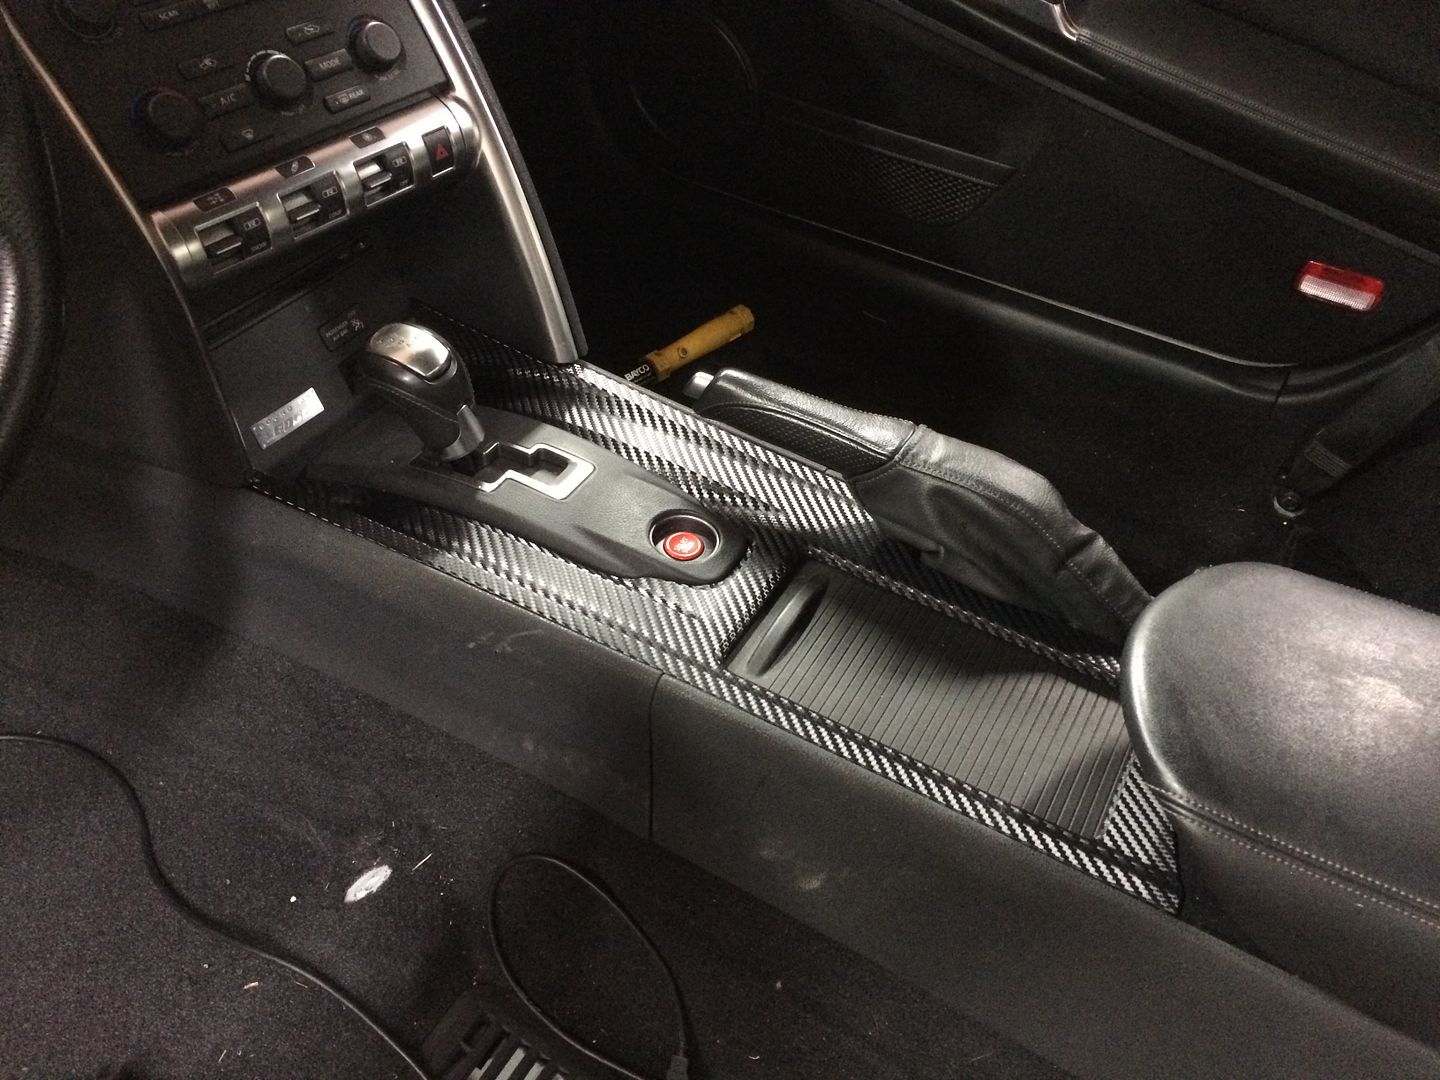
For the front seats, I am having interior-innovations do a custom seat skin which will be a very classic nova-suede and napa leather design in all black. They are supposed to be done next week and I can't wait to get them back I'm going to address the rear seats on my own. I have dye'd seats previously with really good success so I had my local paint shop make a custom matte black color with additional flattener 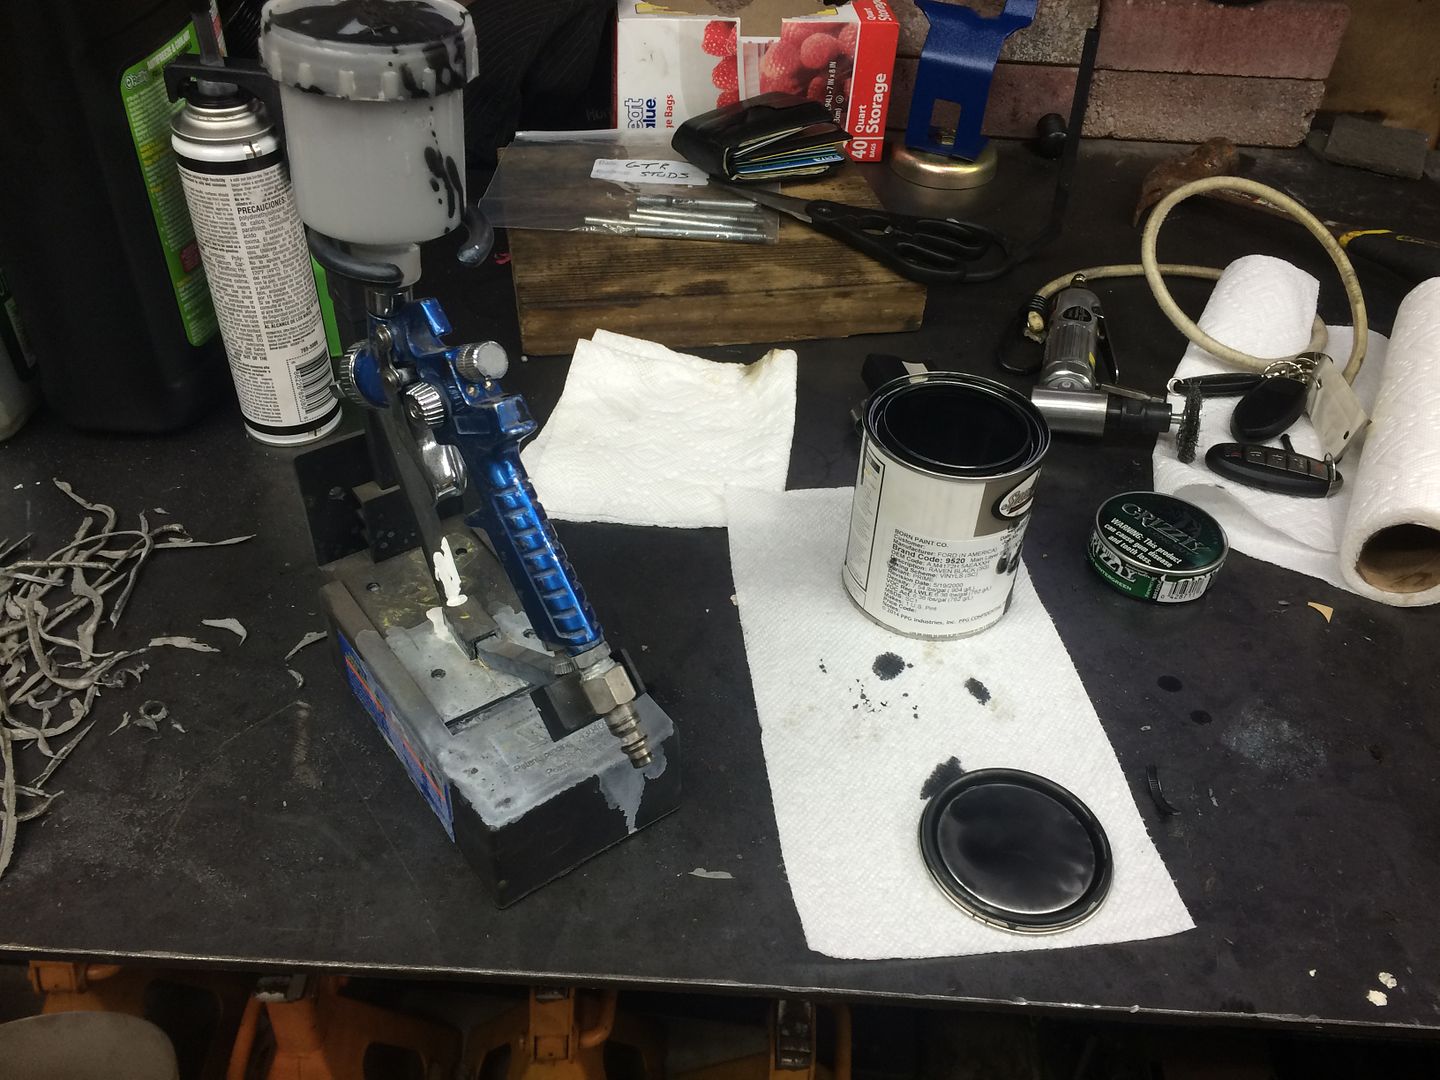
I made my own spray booth 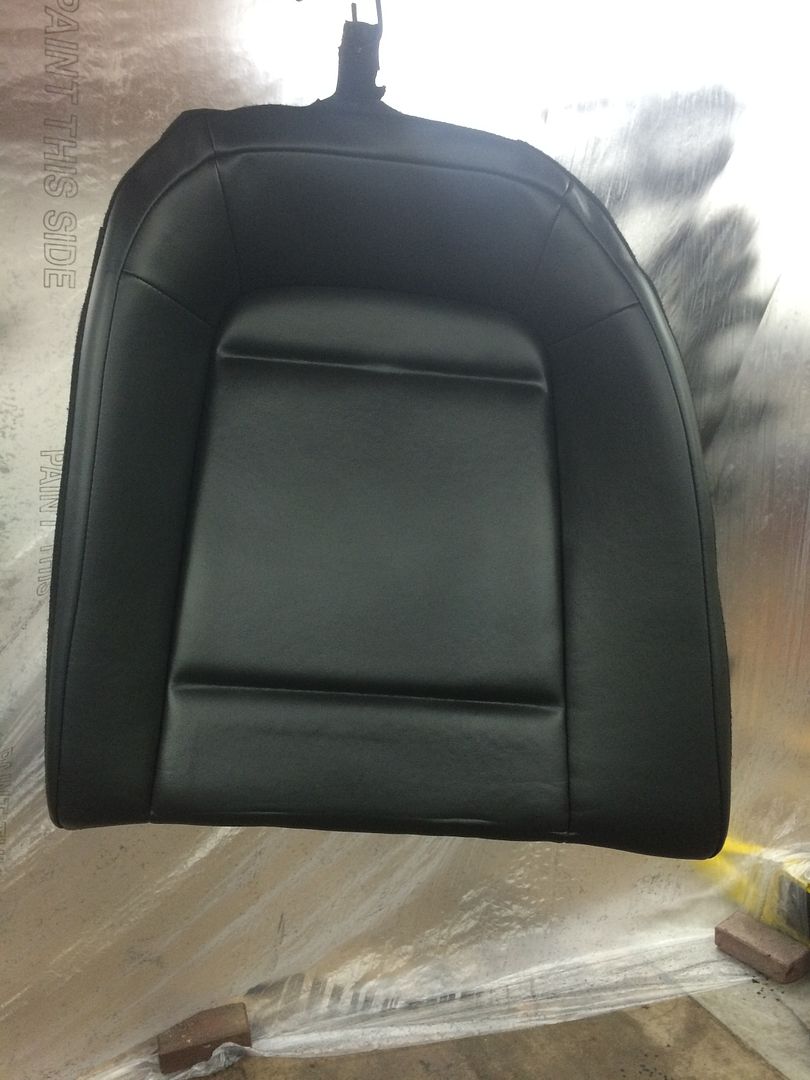
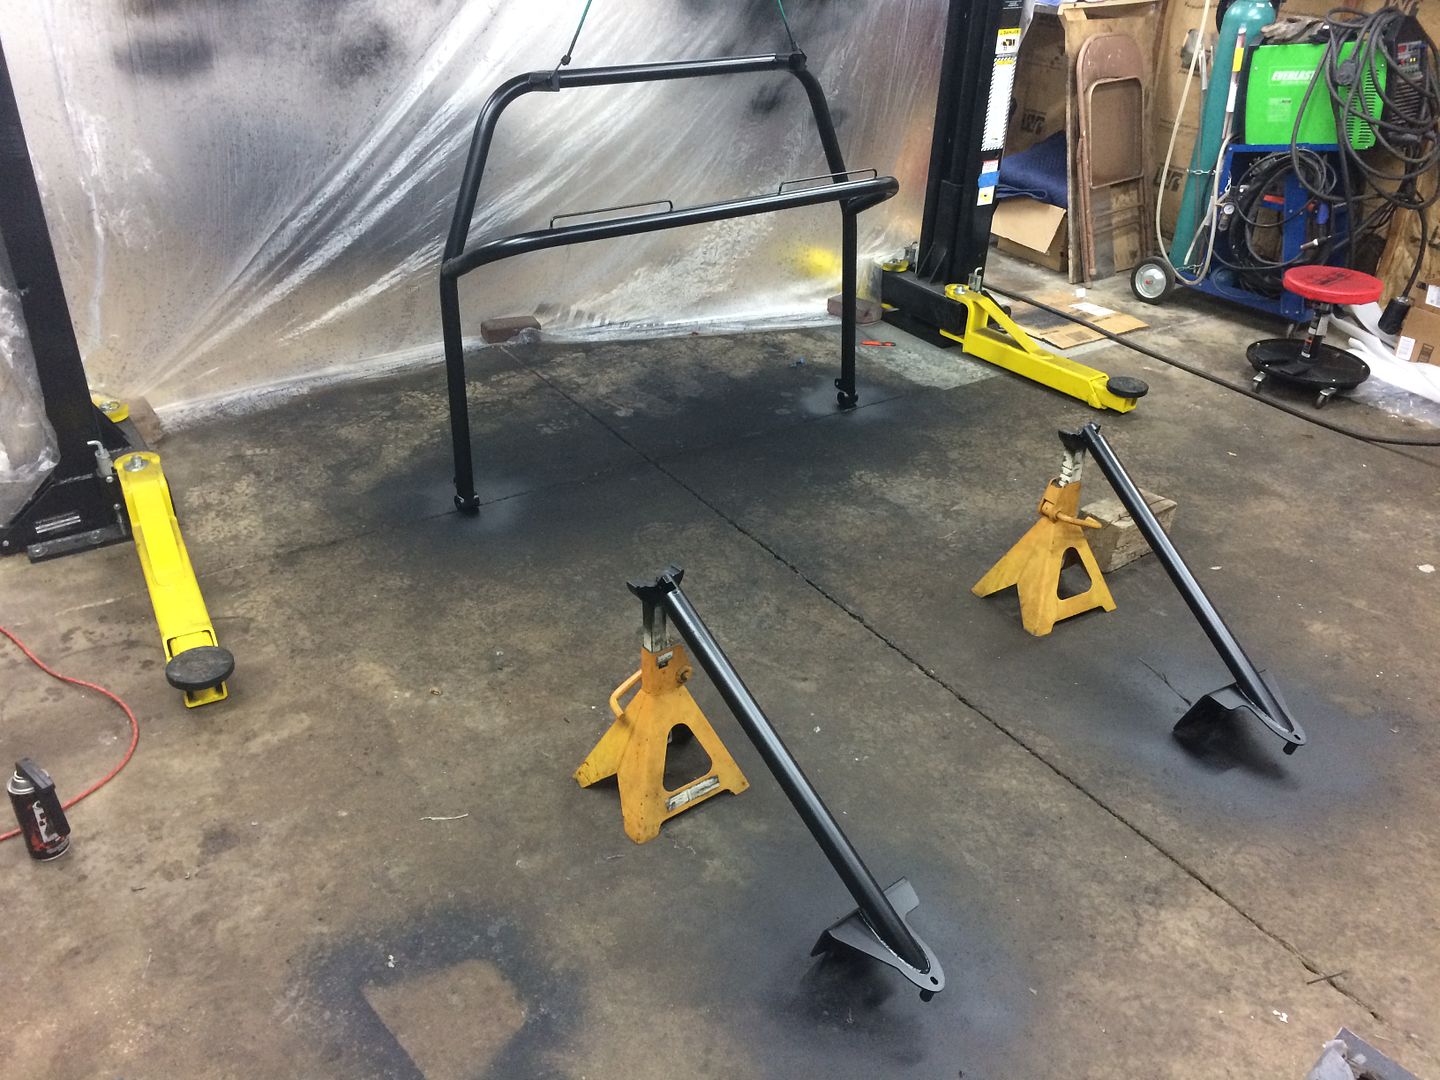
Simultaneously, I wanted to safen the car up a bit so I bit the bullet on a bolt-in roll bar. The only problem was this blocks access to the rear seat. I take my daughter every chance I get so she needs to be able to get in and out of her car seat. This meant I needed to modify the roll bar I cut the roll bar harness section out and added these bar clamps 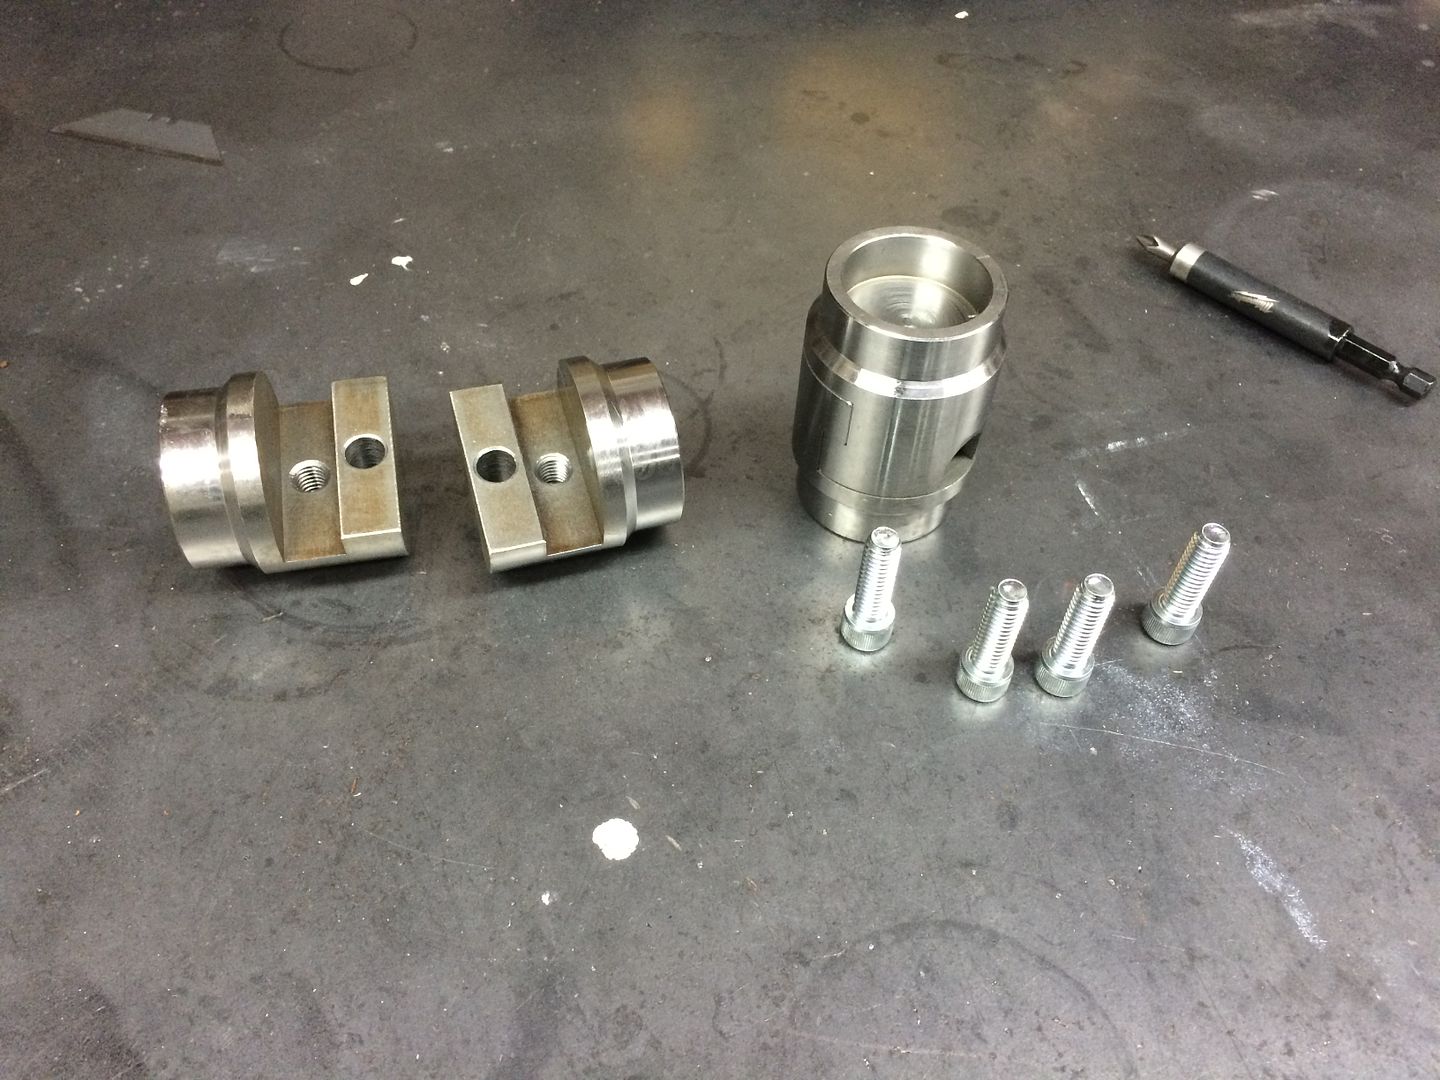
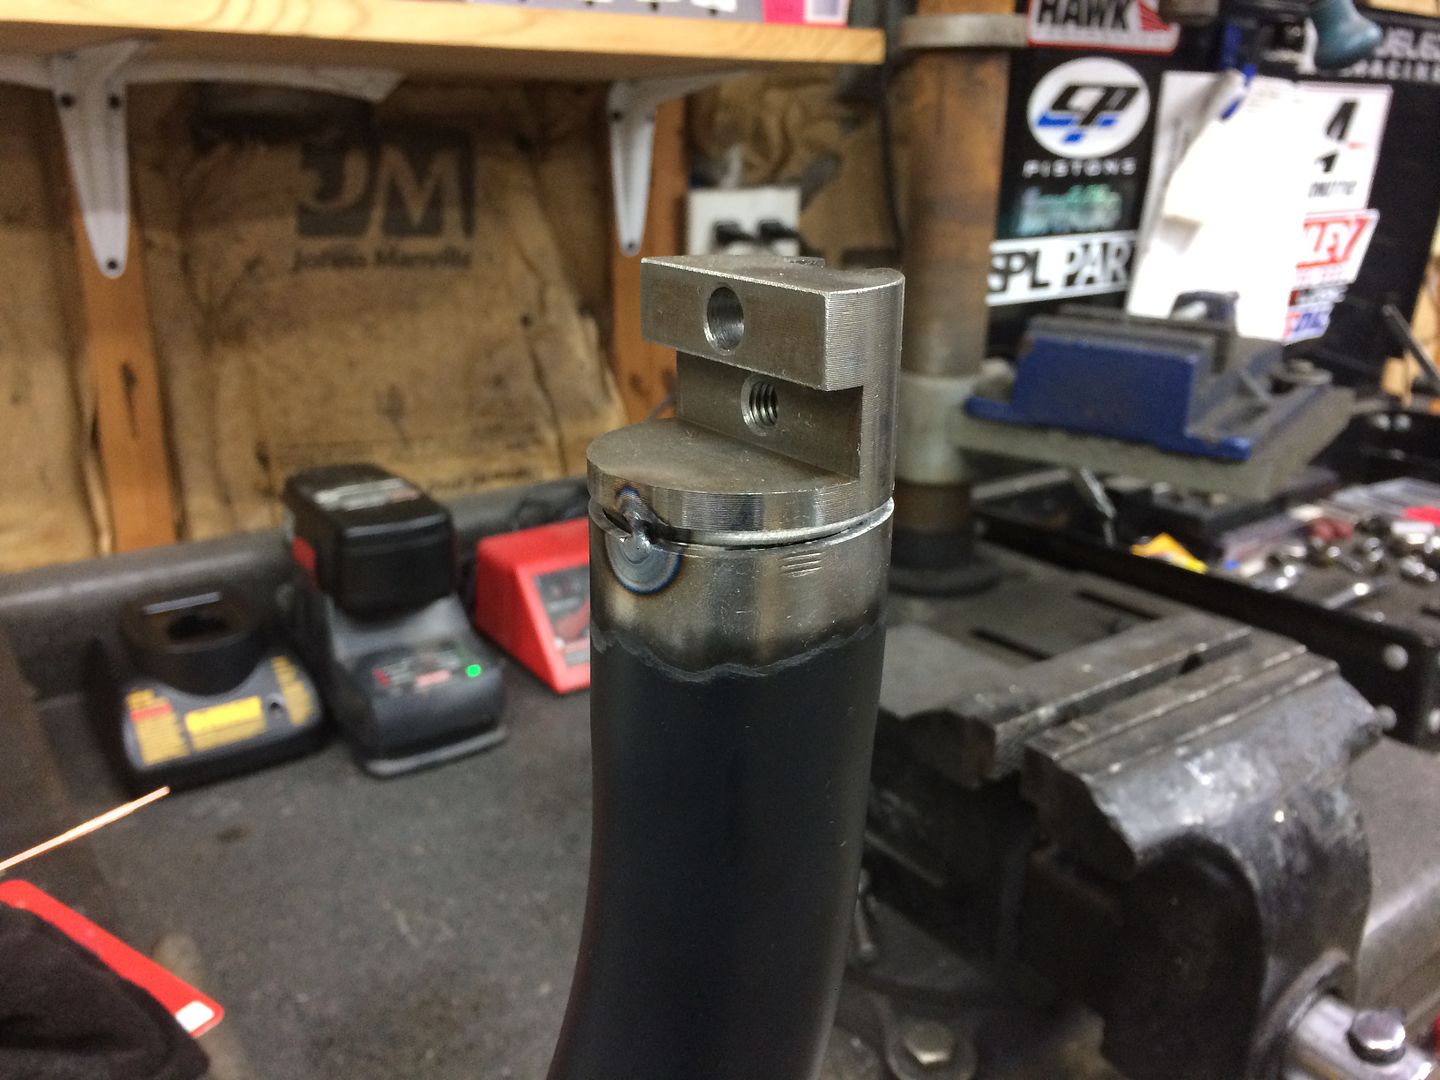
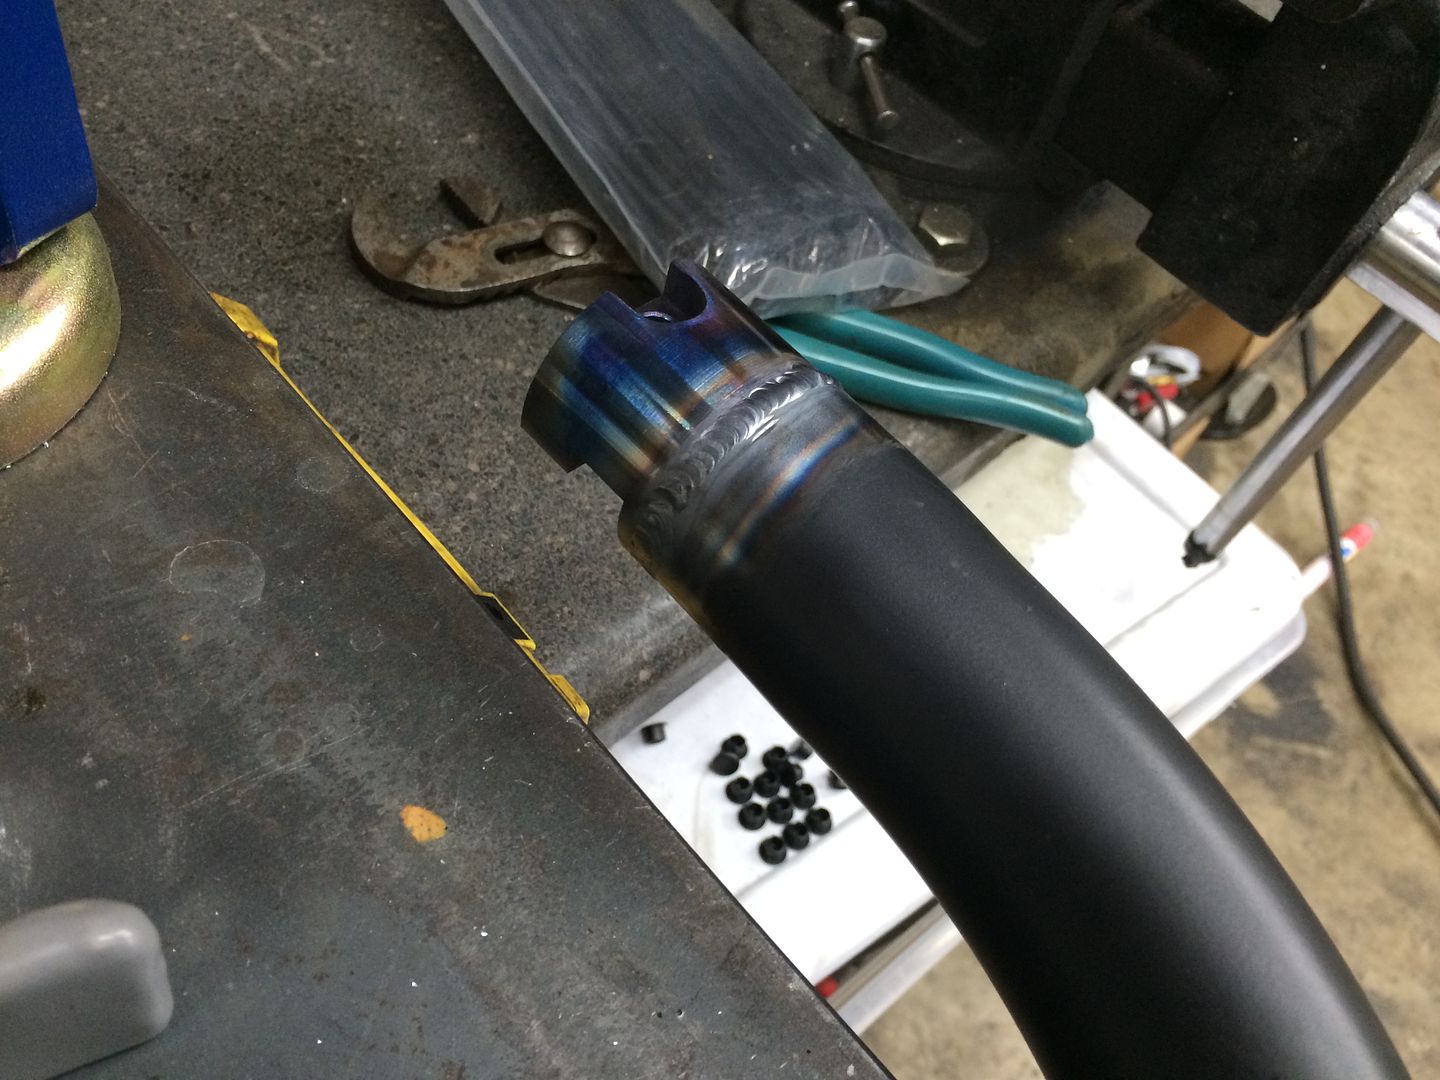
Now the bar is removable at the harness section, making access much easier 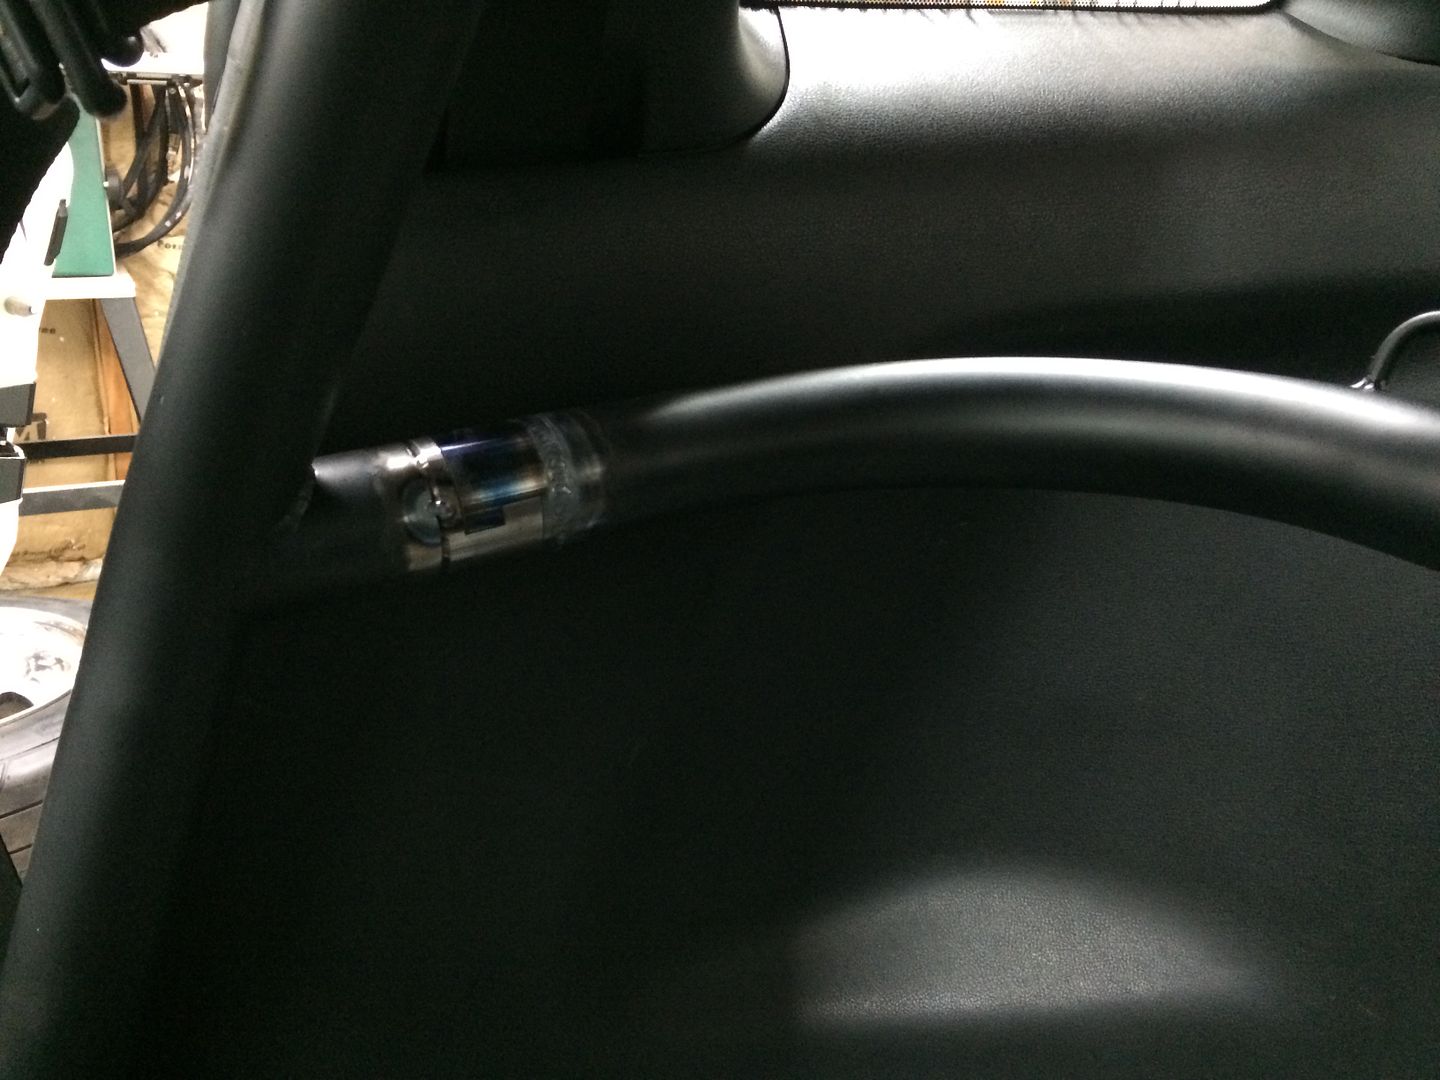
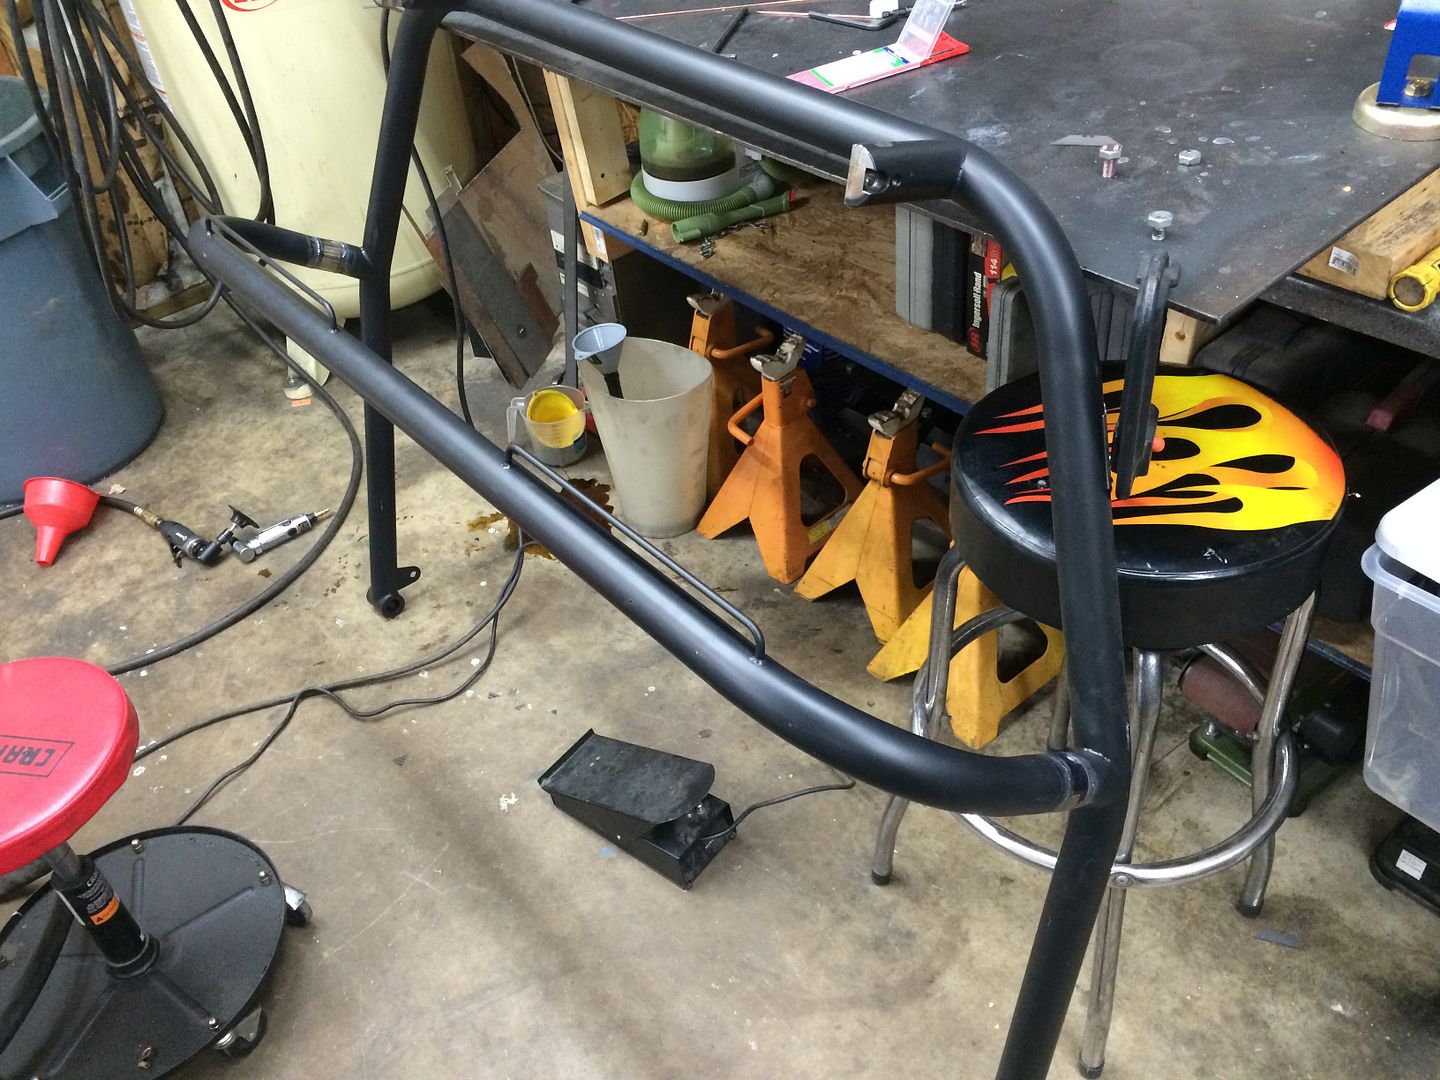
So after dying the seats I re-painted the roll bar after modification 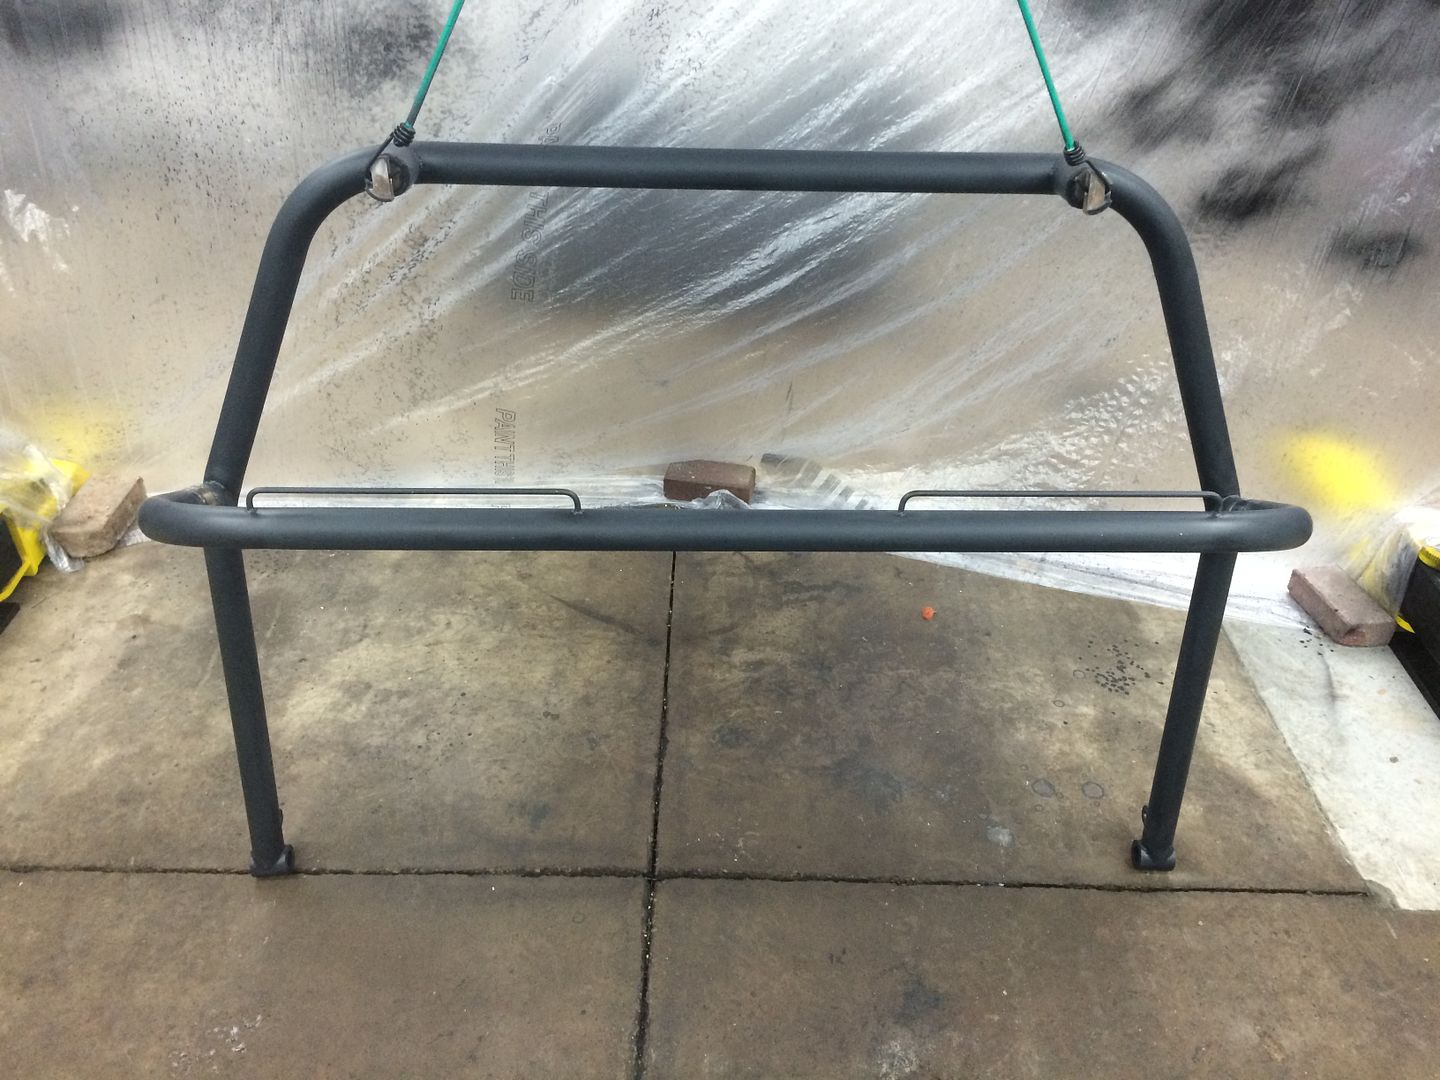
Seats are done 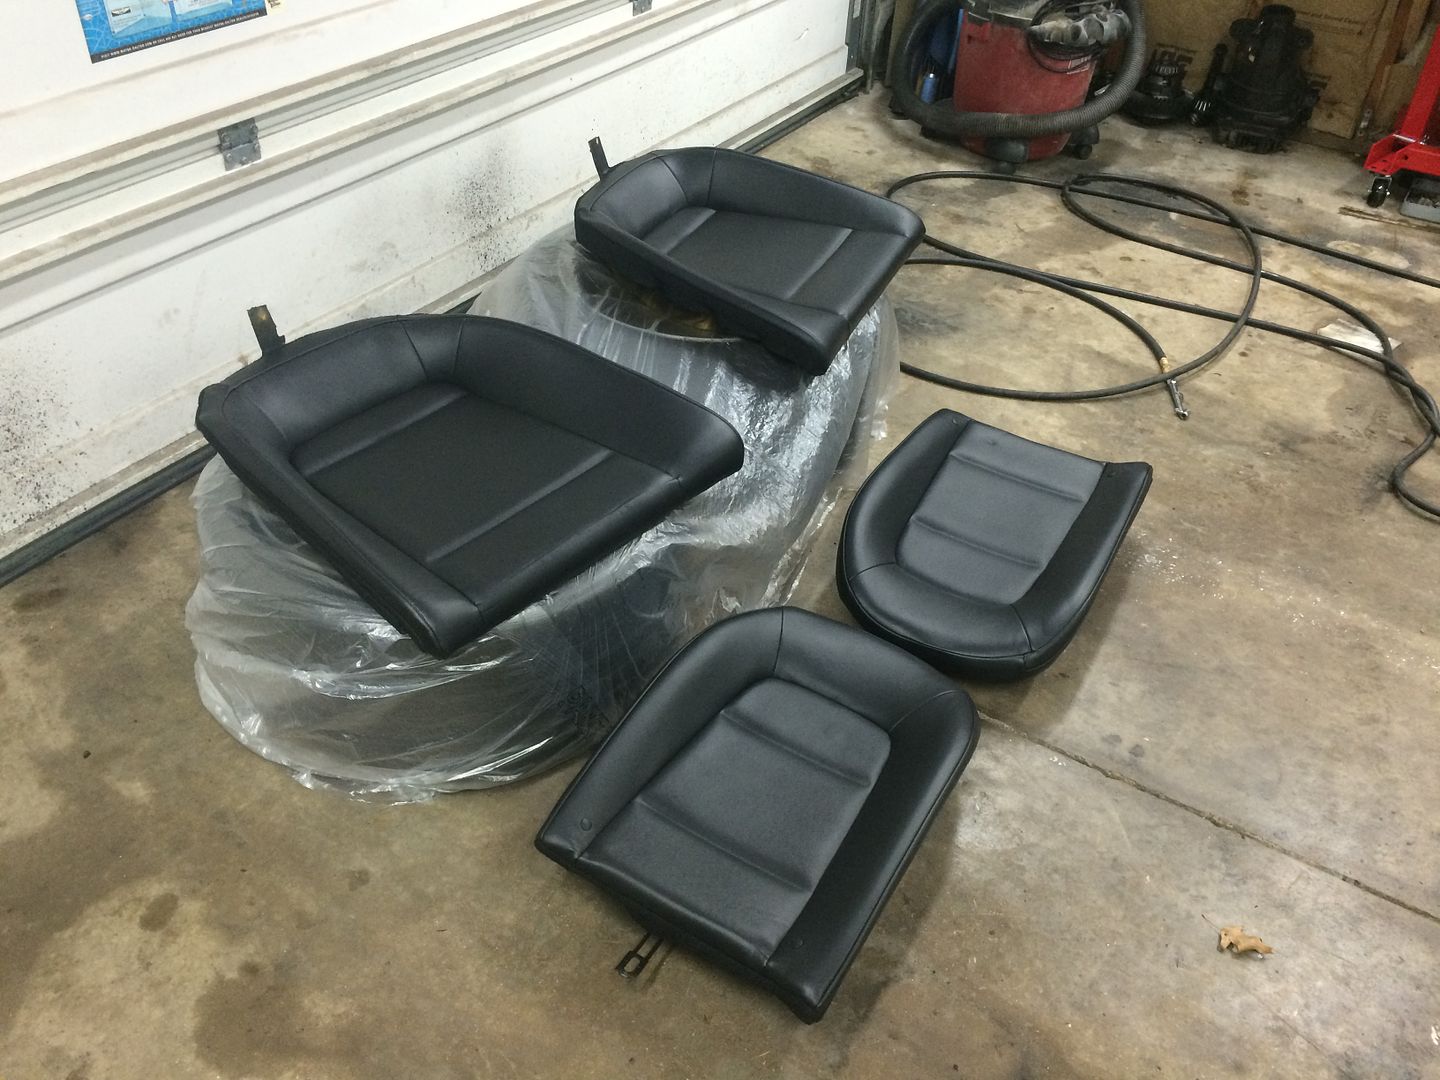
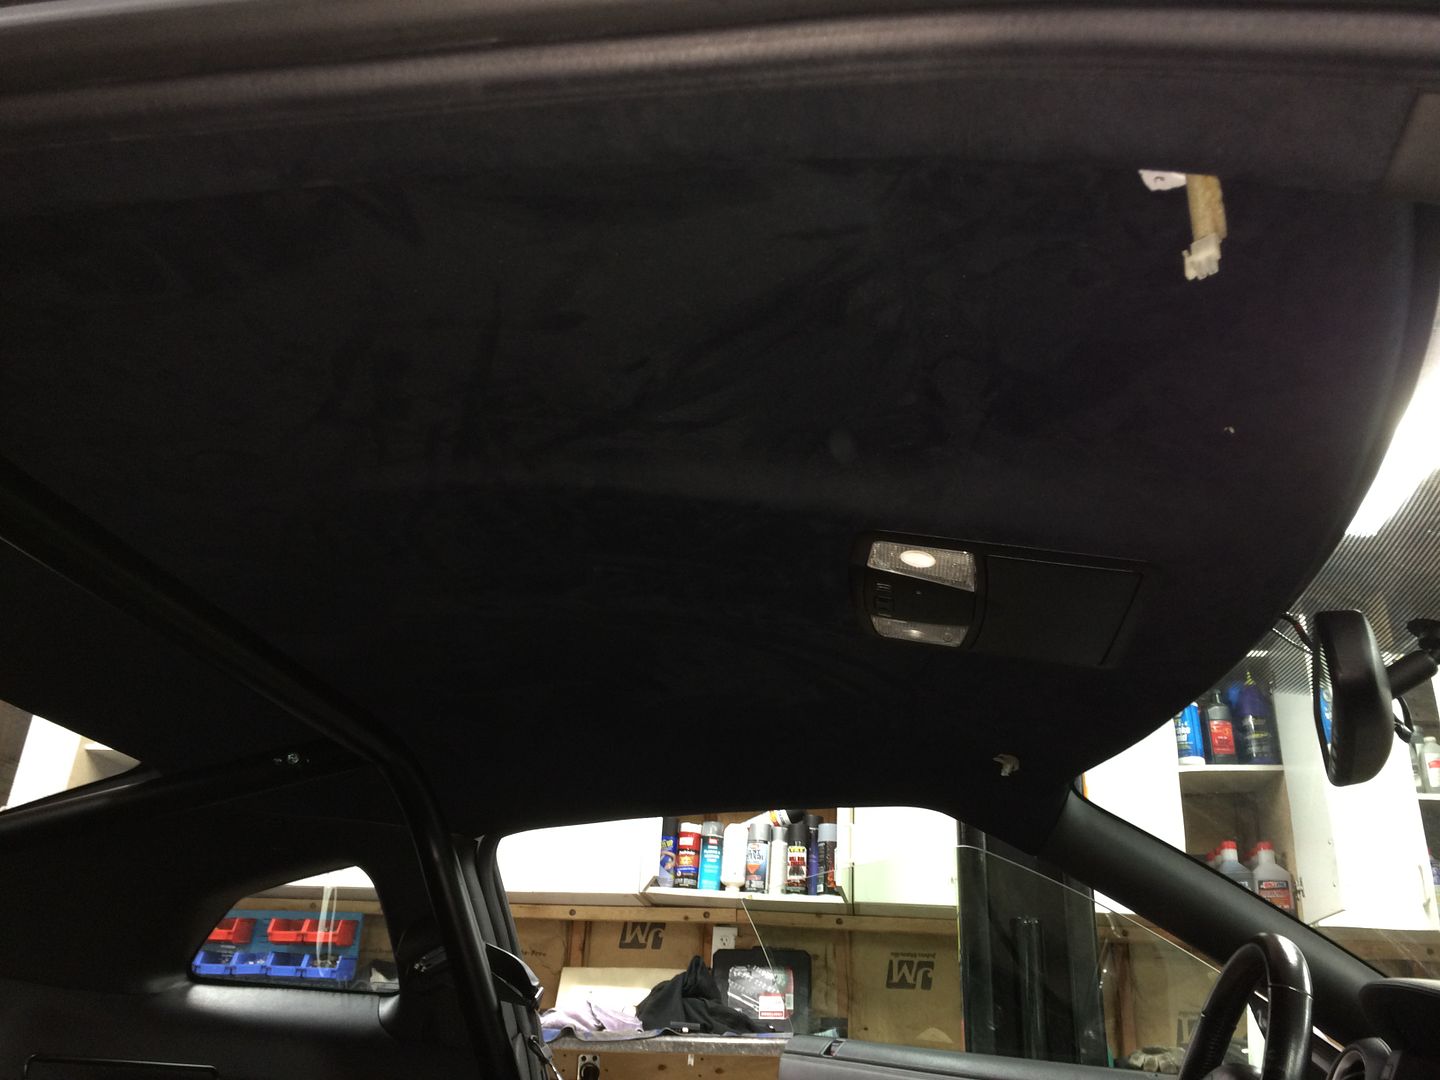
While all of the interior was out, I wanted to really give it a nice touch so Khalid hooked me up with some more novasued and I removed the headliner 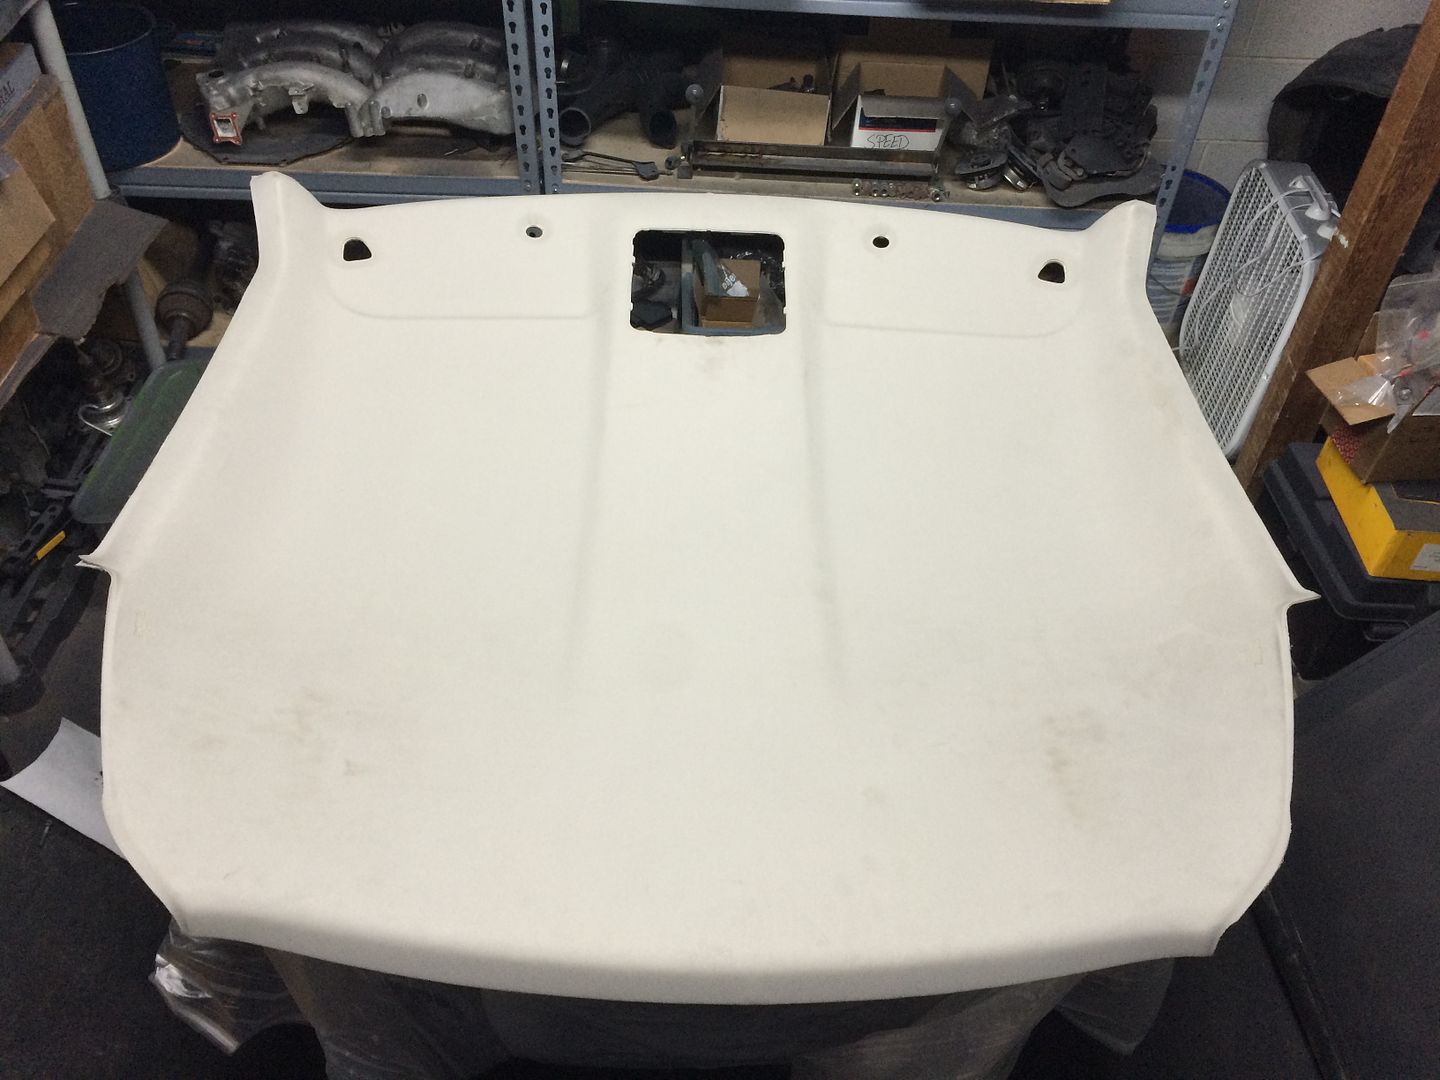
Now its suede! 
The rear setup is finally all installed 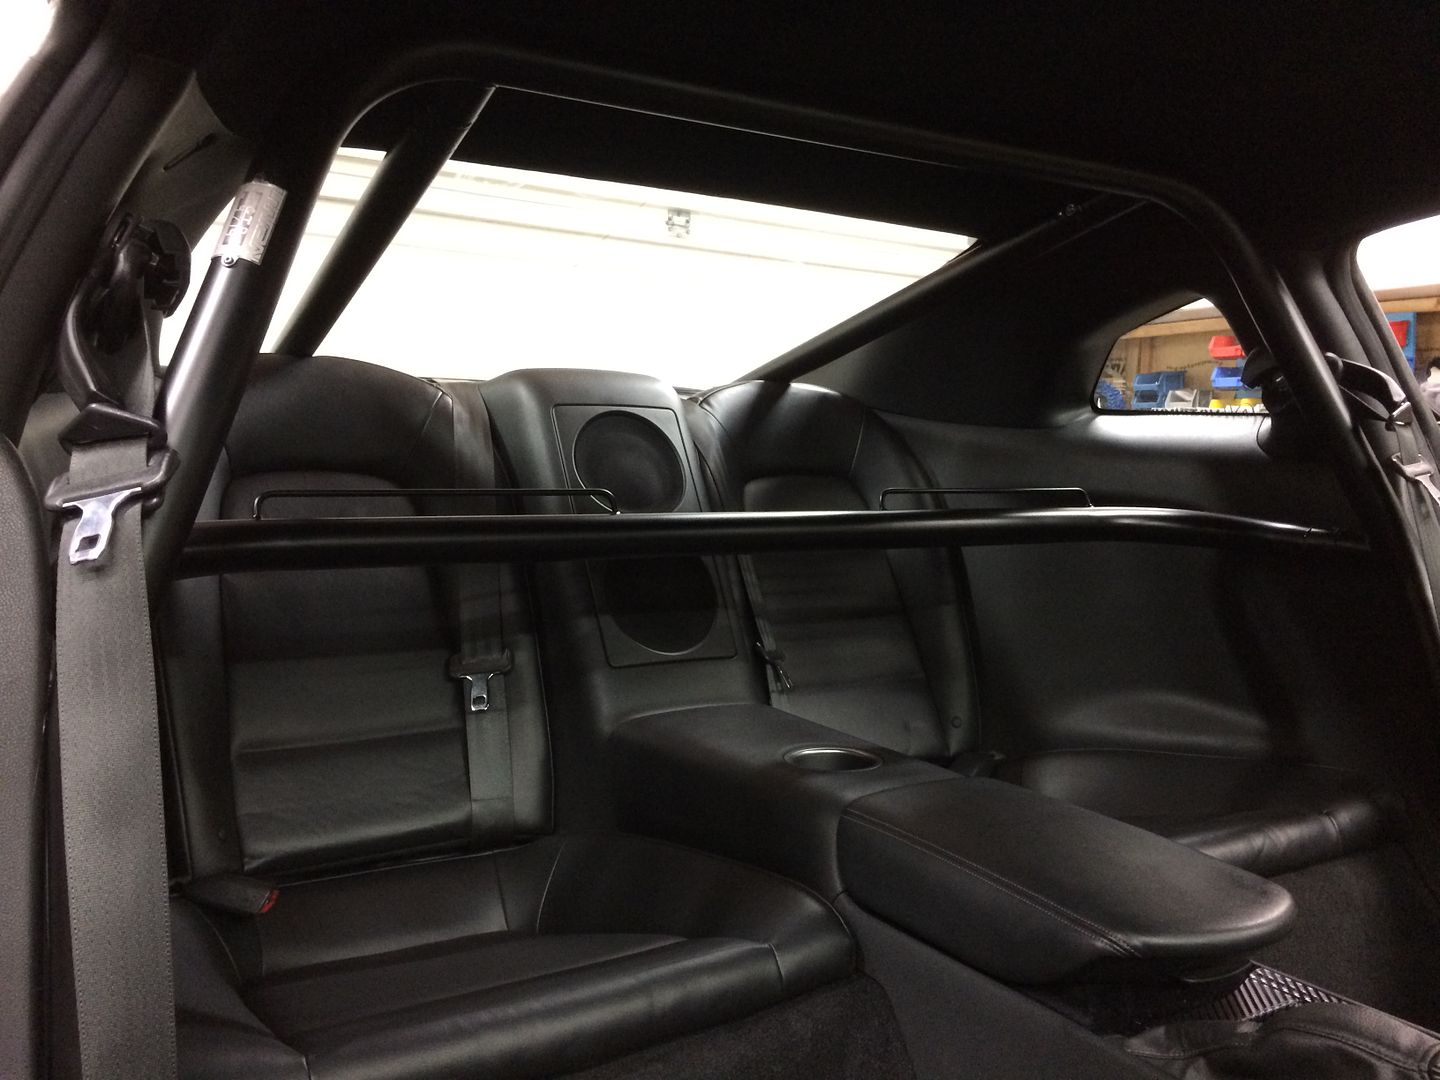
This brings me to this week.....I decided to do a little audio mods 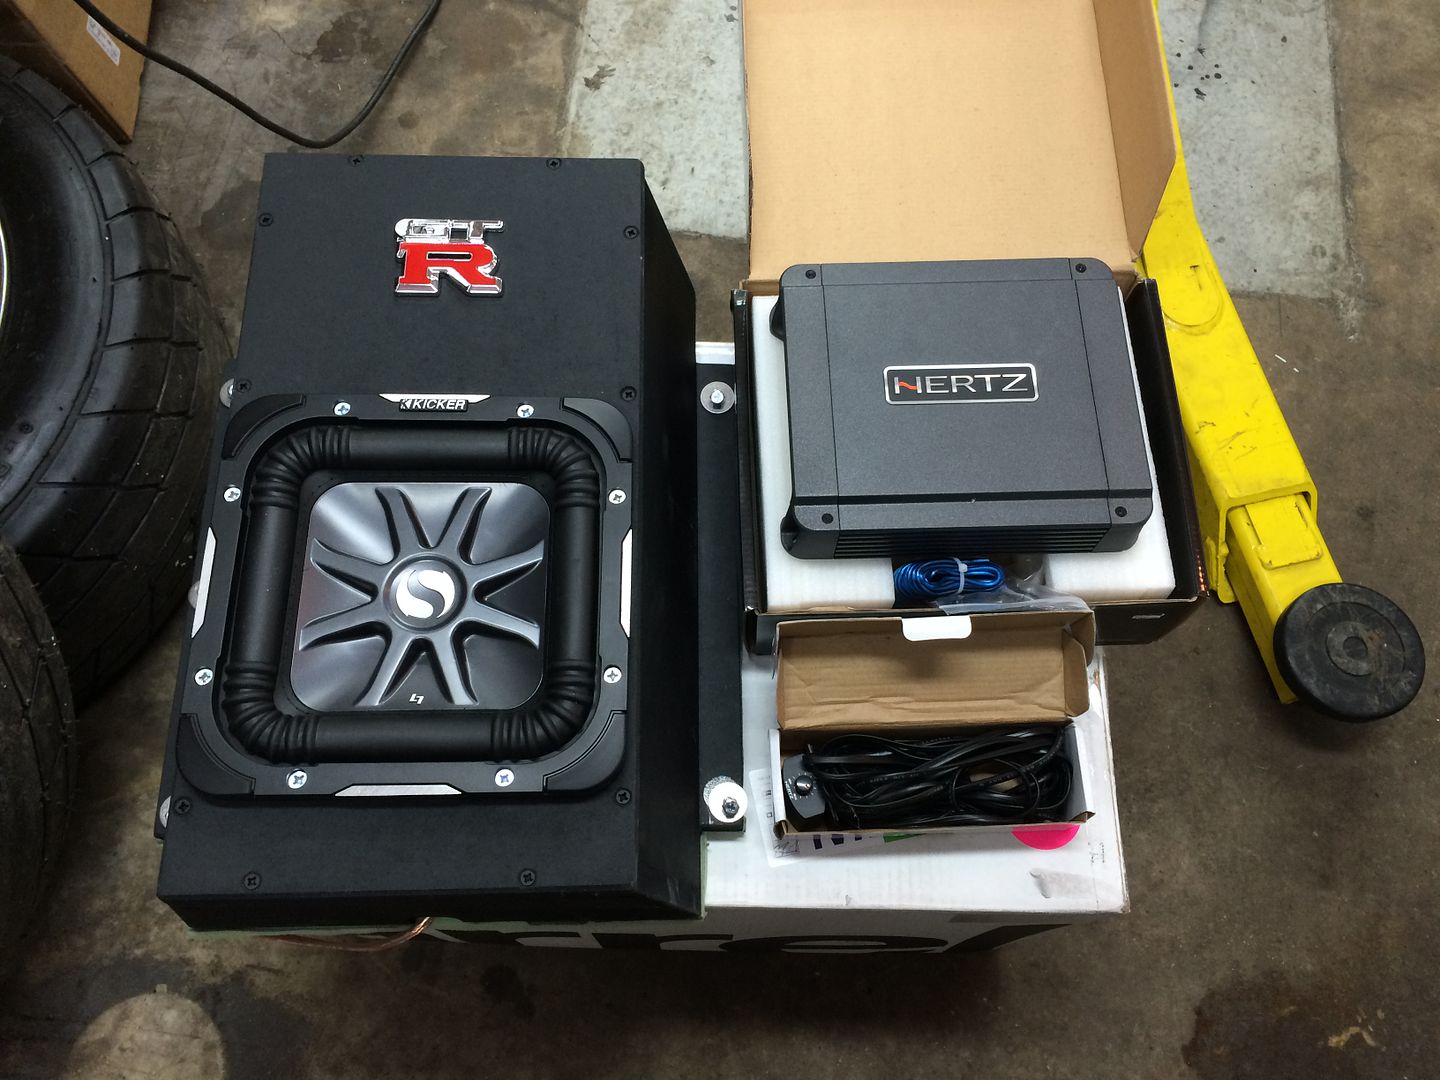
Pulling out the factory subs 
New L7 installed 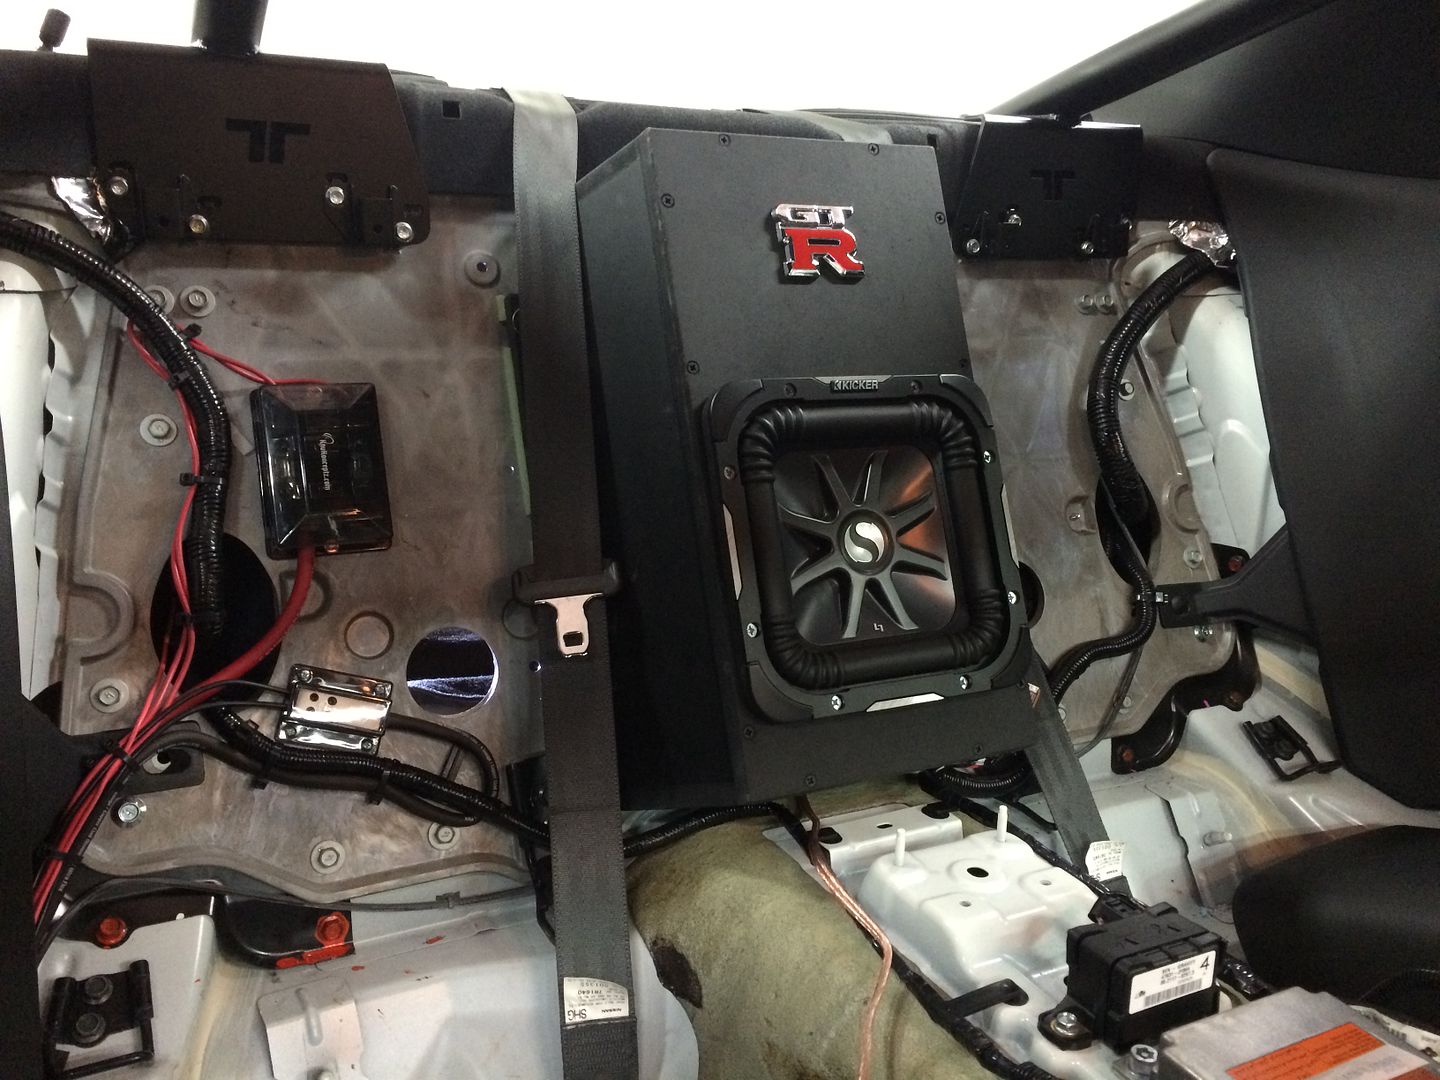
The only thing I'm waiting on now is the seat covers and the car will be ready to rock and roll! I hope you guys have enjoyed this journey as much as I have!
 TR%202/GTR_Signature_zpsbfc89d27.jpg> TR%202/GTR_Signature_zpsbfc89d27.jpg>
|


 And while we're building things...NZR, but still cool -