-
Clean the TPS (Throttle Position Sensor)
-
Clean the air filter
-
Clean the injectors
-
Change the spark plugs
-
Change the fuel filter
-
Clean the Crank Angle Sensor (CAS) connector
-
Clean the Throttle Bodies
-
Clean the detonation sensor connector
-
Clean the Mass Airflow Sensor (MAS) connector
-
Induce turbulence in the air intake
-
Clean the coolant temperature connector
-
Change/add coolant
-
Clean intake valves
-
Do you have an updated Power Transistor?
-
Is it a 1990 model?
-
Clean the TPS (Throttle Position Sensor)
The TPS is located on the driver's side of the engine. Look at the
throttle body, it's the big box with the huge rubber intake hose going
into it. The TPS is the small black plastic box on the side of the throttle
body with wires coming out of it. The important connector is not the one on the black box, it's the one on the cable coming out of the bottom of the black box. It's a grey 3 pin connector.
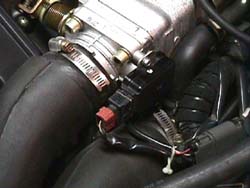
When disconnected, it might have green corrosion on the electrical connectors.
Go to Radio Shack and buy connector/contact cleaner, or just use some ultrafine
grit sandpaper, just get rid of that corrosion! Make those connectors shine
and then reconnect the TPS. Corroded TPS connections are some of the most
common causes of hesitation.
Time required: approximately 15-20 minutes.
-
Clean the air filter
This procedure is illustrated on www.ttzd.com.
Time required: 10 minutes for stock airbox; 1 or 2 hours to clean the
K&N and let it dry.
-
Clean the injectors
Many people will come out and say the injectors should only be cleaned
professionally by removing them. Nissan also says this. However, for the
DIY'er, purchase a bottle of Chevron Techroline or some Red Line injector
cleaner and run it through according to directions.
-
Change the spark plugs
This procedure is illustrated on www.ttzd.com.
It may be a good idea to at least PULL your plugs to inspect them, since
as they age they will take on characteristics that vary based on the health
of the engine.
The following is from the NGK
homepage:
Reading spark plugs can be a valuable tuning
aid. By examining the Insulator firing nose color, an experienced engine
tuner can determine much about the engine's overall operating condition.
In general, a light tan/gray color tells you that
the spark plug is at the optimum temperature and that the engine is in
good operating condition.
Dark coloring, such as heavy black wet or dry
deposits usually indicate a fouling problem. Heavy, dry deposits can indicate
an overly rich condition, too cold a heat range spark plug, possible vacuum
leak, low compression, overly retarded timing, or too large a plug gap.
If the deposits are wet, it can be an indication
of a breached head gasket, oil control from rings or valvetrain problems,
or an extremely rich condition, depending on what liquid is present at
the firing tip.
One must also look for signs of detonation, such
as silver specs, black specs, or melting or breakage at the firing tip.
Signs of fouling or excessive heat must be traced
quickly to prevent further deterioration of performance and to prevent
possible engine damage.
Here are some ideas for what you might see:
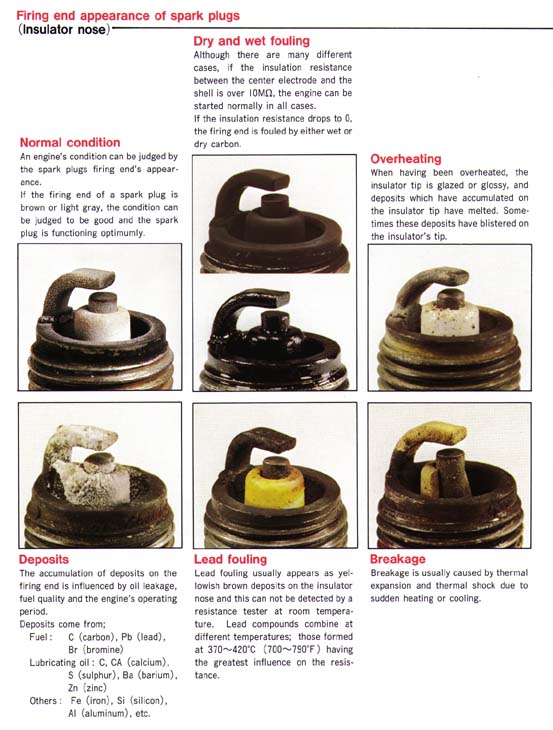
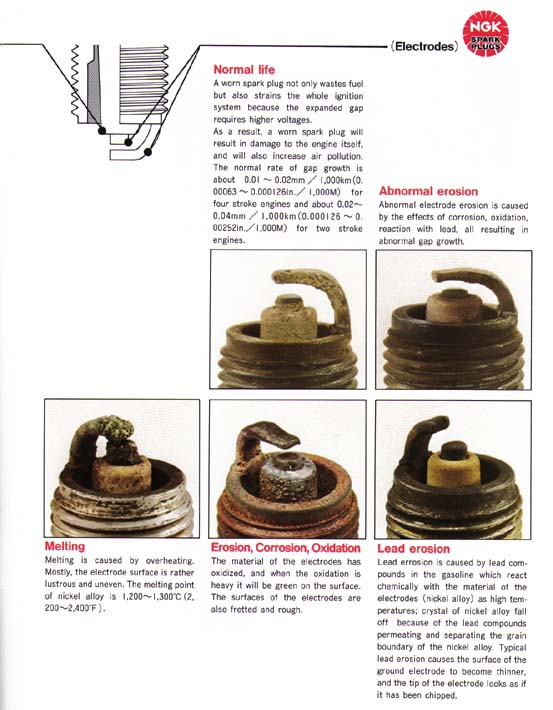
Thanks to CarloZ for the link info.
-
Change the fuel filter
This procedure is illustrated on www.ttzd.com.
If the filter was getting full of debris, it could lead to fuel starvation;
but it would probably manifest itself in the higher RPM ranges where the
engine requires more fuel.
Time required: 10-15 minutes.
-
Clean the Crank Angle Sensor (CAS) connector
This is nearly identical in procedure to cleaning the TPS. Except the
CAS is in a different place. Stand by the nosepiece between the headlights.
Look behind the radiator/fan, there are some hoses going into the middle
of the engine. Those are for the water pump. To the right (driver's side)
of those hoses is a round metal plate 3" to 4" across.
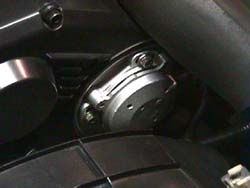
This is the CAS. There is a connector similar to the one on the TPS
going into the CAS. Clean it. The procedure is the same, just a little
more difficult to get to.
Time required: 20-25 minutes.
-
Clean the Throttle Bodies
This procedure is illustrated here
Time required: 20-25 minutes.
-
Clean the detonation sensor connector
This looks like any other electrical connector under the hood. It should
be two or three inches directly behind the stripe on the throttle cable
cover.
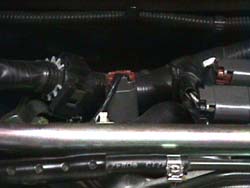
Disconnect and clean. Hopefully this will solve any problems as far
as the connection is concerned, since to actually get to the detonation
sensor, the plenum must be removed.
Time required: 5-10 minutes.
-
Clean the Mass Airflow Sensor (MAS) connector
Remove the nosepiece between the headlights again. The MAS is the little
black box with wires coming out of it connected to the air intake. Be careful,
this connector also has the spring clip like the TPS & CAS. Clean the
connectors and reinstall.
Time required: 10-15 minutes.
-
Clean the coolant temperature sensor connector.
If the temperature gauge drops under acceleration or goes up and down
erratically under acceleration, clean or replace the temp. sending unit.
It is located on the top aluminum pipe in the front of the motor. It is
the sensor to the right with only one wire coming out of it.
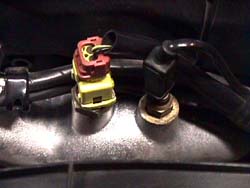
First remove the plug, press in the clip on the right side and pull,
clean out the gunk in the plug. Next remove the sensor itself, 12mm deep
socket or 12mm wrench. Clean the junk off of that too. Replace both the
sensor and the wire. If it still fluctuates, replace the sensor for about
$20.00.
Time required: 10-20 minutes.
Bob:300zx.org
-
Induce turbulence in the air intake
Sometimes airflow around the POP charger will be so smooth the MAS has
trouble registering the correct amount of air, and as a result gives strange
readings to the ECU! Strange but true... To solve this, place two
3" long strips of duct tape along the bottom of the POP charger. This forces
the air to flow into the intake and around the MAS in a different manner;
and should eliminate the problem.
Time required: 5-10 minutes
Jim Bullitt
If there's an aftermarket K&N style filter on the car, make sure the splash guard is covering the front of the filter and run a couple strips of duct tape on the bottom. Running the filter(s) in open air can be problematic. The idea is air coming directly in the front facia while shouldn't be able to hit the filter element directly. The hesitation felt with this problem will mostly be when slightly off throttle while cruising, driving into the wind, or driving alongside or behind other vehicles at speed.
Dallas DamonZ
-
Change/add coolant
Loosen the petcock on the bottom of the radiator & remove the radiator
cap and secondary screw on the top of the radiator. This will drain a lot
of the fluid out. Then run the engine for 15 seconds to flush coolant out
of the heads, etc... Don't run the engine too long without coolant or it'll
overheat! Close the petcock, then add coolant. This can be a bottle of
Red Line Water Wetter and distilled/filtered water (not tap water) if in
a warm climate, OR a mixture of water/antifreeze/Water Wetter (according
to directions on the antifreeze) if in a climate where it gets cold. Even
in the warmer areas, a little antifreeze is probably a good idea. According
to the owner's manual, the cooling system capacity is 9 quarts. Fill the
radiator, and the resovoir up to the "HIGH" mark on the resovoir dipstick.
Then with the radiator cap still off, run the car for 30 seconds. The level
will go down as the heads and tubing are re-filled with coolant. Add more
coolant to the radiator. Make sure the resovoir is still at HIGH. Run the
engine for another minute or two, make sure the radiator is still full
and put on the cap.
The next couple of days, check the level to make sure it's still satisfactory
and there are no leaks.
Time required: 20-30 minutes.
-
Clean intake valves and manifold
This is a slightly controversial procedure. Basically, expose the intake
and run the throttle up to about 2500RPMs. Put something on the gas pedal
to hold the engine there. Next, VERY slowly pour water into the intake.
Like, a tablespoon every ten seconds or so. In fact, use a tablespoon to
keep from pouring TOO much and hydrolocking the engine (water doesn't like
to compress!).
The idea here is a continuous misting of the inside of the intake manifold
will break loose small carbon deposits and free up airflow. While doing
this expect steam out of the exhaust (in small amounts) and perhaps some
smoke if its freeing up a lot of fouling. Keep this up for 10-20 minutes,
then drive the car afterwards to make sure everything's OK.
Chris(Miami)
-
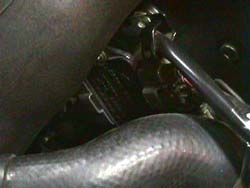
Do you have an updated Power Transistor?
There was a recall on power transistors a few years back. Seems the
old ones can quit working properly after a while. To find out, simply call
or visit the local dealer. Have them look up your VIN and see if the recall
replacement has been performed. If it hasn't, now might be an excellent
time to get it done.
-
Is it a 1990 model?
The driver's side head was machined wrong and the result is a problem
with the crank angle sensor to exhaust cam splined joint. They will wear
themselves out and the car will develop a hesitation that will continue
to get worse. There are some Band-Aid fixes like only replacing the CAS
($350) or the cam and sensor ($2100) but the real fix is to replace the
heads. Check with the dealer about a TSB Nissan has issued on this problem
to see if your car is affected. I believe all 90 models are.
Bruce S
If for some reason all of this doesn't help, try the even MORE extensive Hesitation FAQ by Andy Woo and Steve Chong at www.zhome.com!!


